


Hello and welcome to what we hope will be a useful guide towards the ongoing Log Cabin maintenance. Yes it may come as a surprise to some but just like a lot things in this world. Log cabins need attention every now and then, ensuring they operate as intended.
As much as we would love to provide you with a completely self contained product that requires zero maintenance it simply isn’t possible with this sort of building.
Please expect to have to perform the odd bit of aftercare.
Log Cabin Recap
Firstly lets just have a brief recap on our log cabins so we can all get in the right frame of mind.
By now you may have already installed your log cabin so you have already read our comprehensive online Installation manual. Or perhaps you’re still in the planning phase.. Either way we would suggest viewing the above to gain more clarity and perspective on the whole project.
Before I started working here, when I thought about “log cabins” I would immediately cast my mind to the wooden buildings seen in films made from round tree logs sitting in a snowy forest somewhere nice and peaceful.
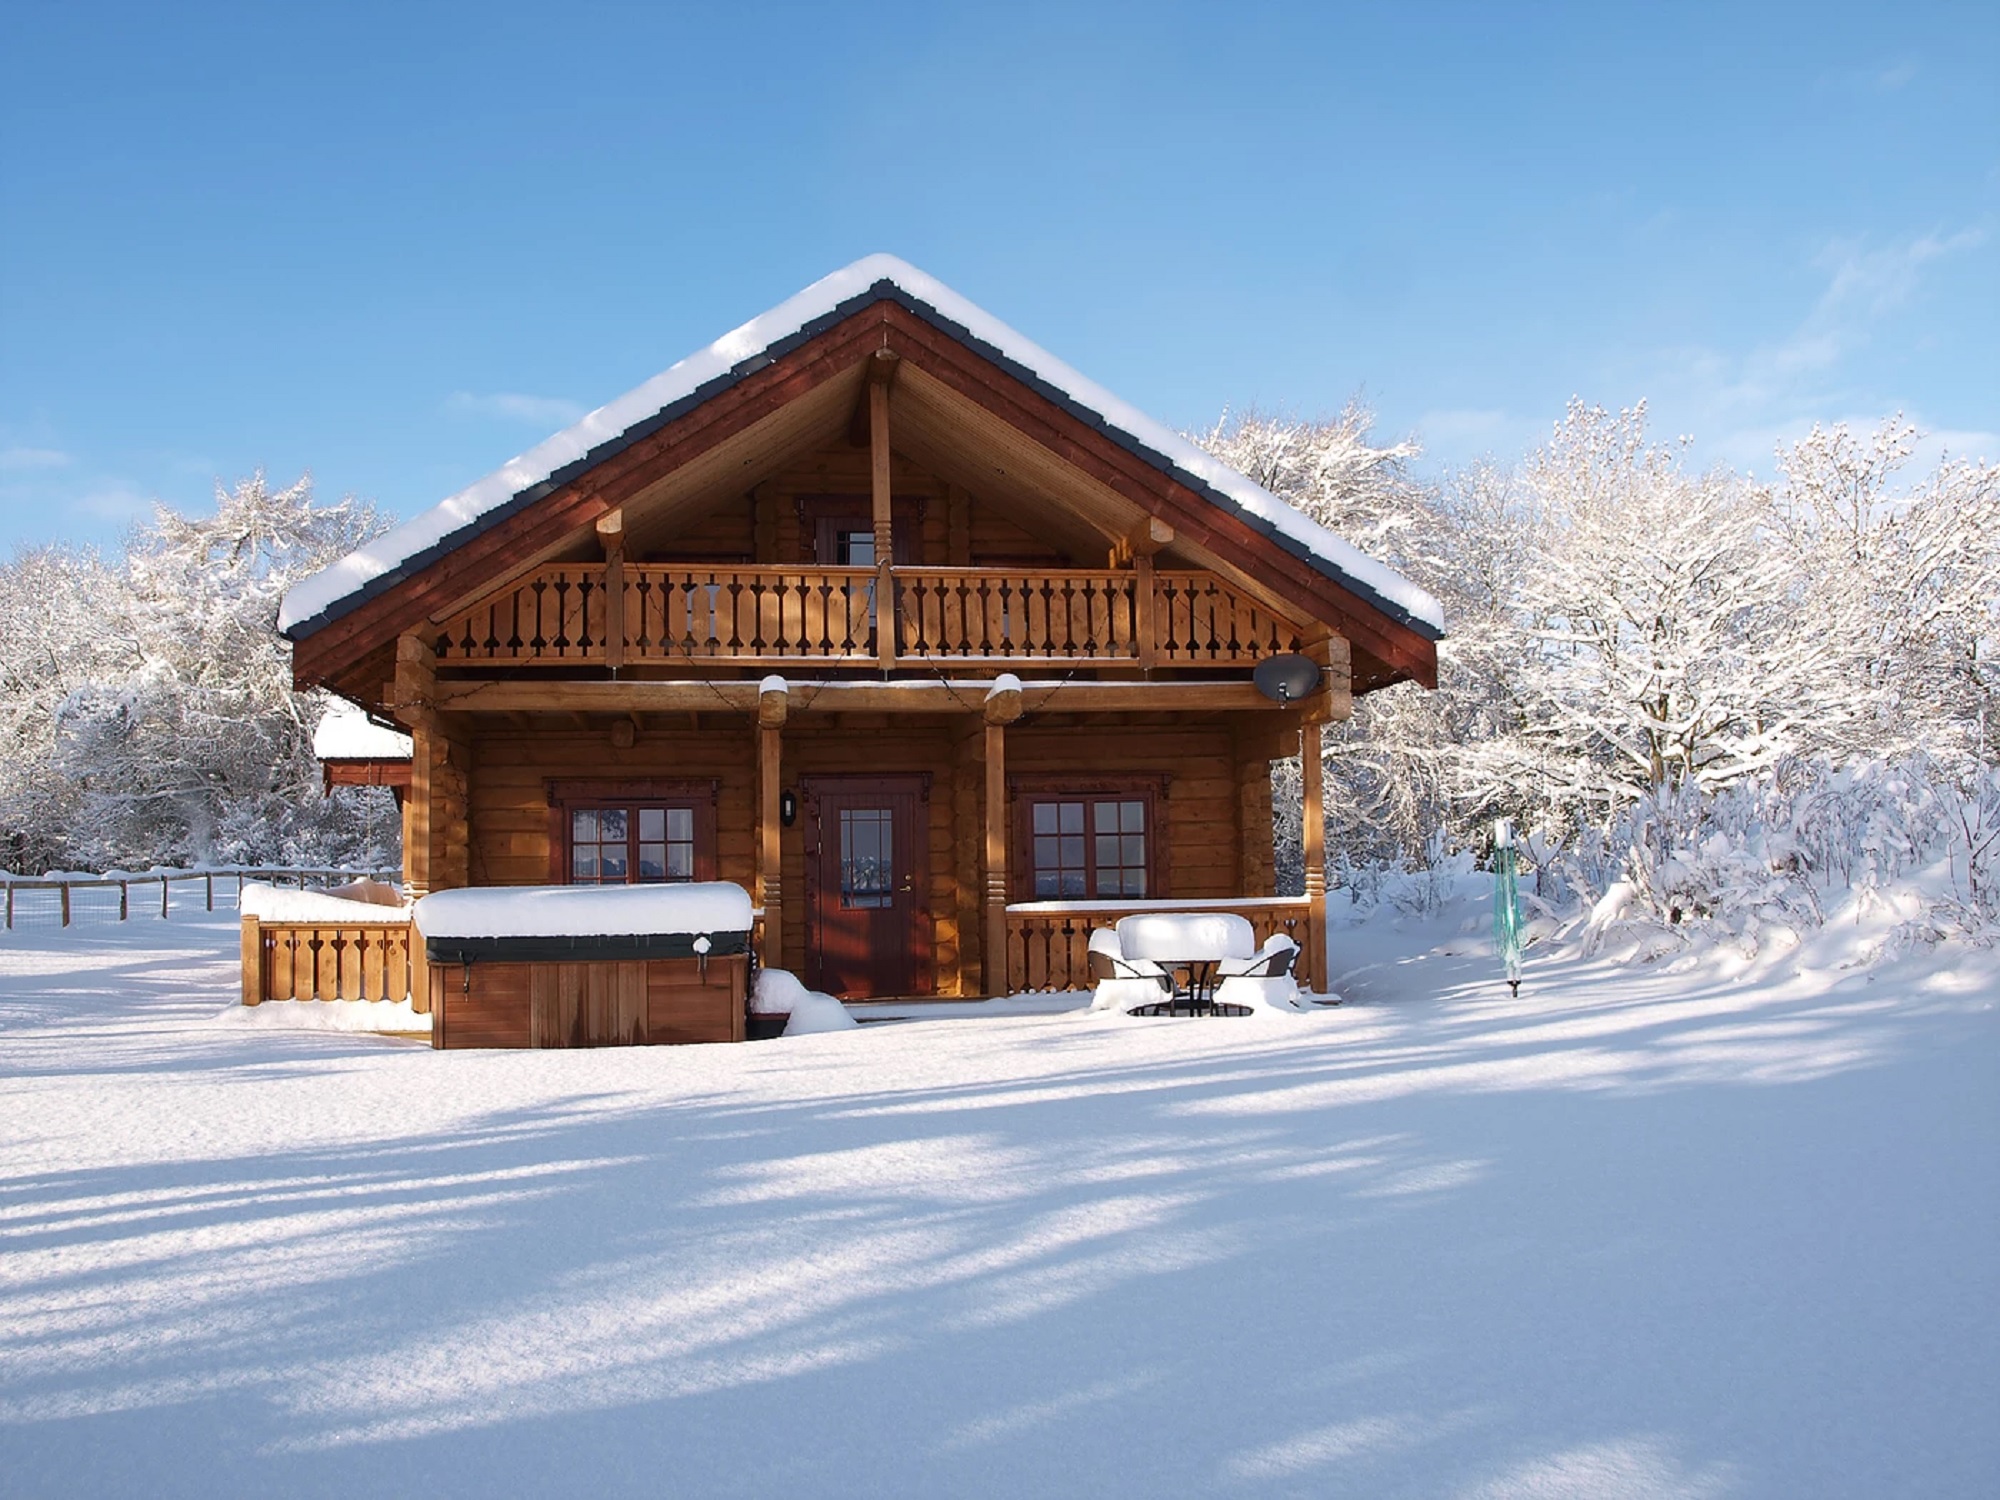
Snowy Log Cabin
Who wouldn’t want to buy one of these right!?
Our Log cabins are made a little differently and we like to think more financially and garden friedly, they consist of flat solid wall logs in a range of different thicknesses, stacked ontop of one another which then interlock in the corners with Wind and Weather Proof Connections.
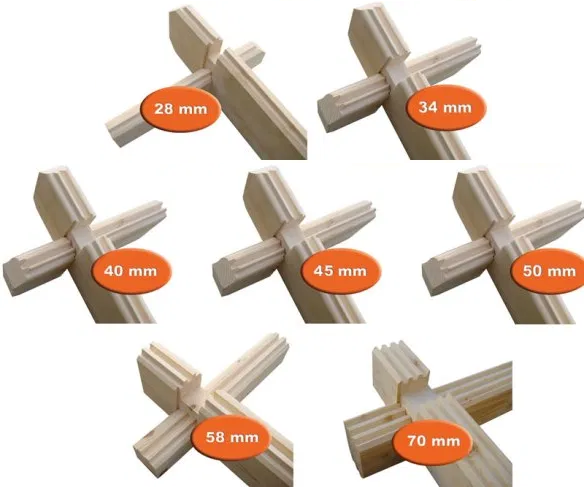
TUIN Log Thicknesses
These wall logs will in most cases rest on what we call Foundation Beams to bring them up and off your base, These foundation beams as a minimum will be pressure treated for longevity.

Basic Foundation Beams
Our basic foundation beams protecting the first layer of wall logs.
After the walls are up you then turn your attention to the roof. These come in different styles and sizes of course but the principle around them is the same. You start with the purlins/rafters then fit the roof boards on top, creating the solid wooden surface for your roof covering.

The roof being assembled on our Lauren 70mm Log cabin

Completed Lauren log cabin
Easy Right… for some more information about fitting out buildings please also visit our Fitting Tips page.
So there we have it. That’s the building up and ready to use. But how do you keep it looking and performing as it should? What other considerations should you be thinking about to keep it a fully functional, problem free living space.
The best way to go through the key points will be to break the cabin down into six areas.
- The Base for the cabin
- The Foundation beams
- The Walls of the cabin
- The Doors and windows
- The Roof
- Additional hardware and extras
Log Cabin Maintenance – Bases
The base is the first thing that gets laid and is critical for both the longevity of your building and its actual construction, i’m not here to talk about what base you should or shouldn’t use as all these details can be found with in our Base Support page already and in reality there’s very little you should ever need to do to maintain it which is lucky as it becomes very inaccessible with a lump of a log cabin sitting on top.
However something to look out for would be subsidence. Let’s say you have a concrete slab, or a compact base with slabs on top. With the weight of the cabin on top has it sunk it some places? Hopefully not but it’s worth keeping that in mind to check if you find yourself with a misbehaving building.
Or perhaps you have built the cabin ontop of a raised Timber Platform and under the weight of the building one or more of the corners have sunk throwing out the top level like this unlucky customers did.

A sinking timber base
Luckily for this customer the timber base was fairly accessible from underneath so he was able to add additional support to bring it back level
Another important aspect of a base is damp proofing. Using a Damp Proof Course. (DPC for short). Or a Damp Proof Membrane (DPM).
Use DPC underneath your foundation beams. It protects the underside of your foundations from rising moisture seeping up through your base as well as providing protection against ingress from the outside.
There are other ways to achieve the same level of protection, My favorite is to use a TAR product, painted on both the underside of the foundation beams and on top of the base that they sit on.. applying this thickly will also service in sealing the perimeter helping prevent ingress.
Use DPM underneath the concrete slab or ontop of it. This will again protect the underside of the cabin/floor from moisture that tries to rise up from and through your base into the building.

Advice on damp proofing
Preventing this moisture from rising up within the building is very important, it can cause unwanted growth with in the building as well as other Unwanted Issues.

Mold with in a cabin
Ventilation does play a big part in preventing this as well which we will cover in a moment but if you notice that a once dry and mold free cabin starts to experience these types of problems then a review of your damp proofing may just be in order.
Log Cabin Maintenance – Foundation Beams
Now these are also very important and often in truth the cause of great confusion at first with our more traditional shed building customers.
So just quickly. Unlike a shed where you would expect to see a row of bearers all running the same direction with a floor built directly on top..

Typical shed base
The Foundation Beams service a different purpose for this type of building. they only span under the perimeter of the cabin (as well as any internal walls that might be featured).. What they DO NOT do is span in the middle where the floor goes later on.
Their purpose is to raise the first logs off and away from the base which in turn protects them and provides added room in the middle for a floating floor
We have different types of foundation beams to offer but they all serve the same purpose and will generally sit on top of your base with a DPC in between. This will generally be enough to keep unwanted ingress from entering your cabin but where two foundations beams butt join together you should think about enhancing these connections with a decent sealant/sealer.
Log Cabin Maintenance – Walls Of the cabin
Treatment
Well here we go, We are starting to get into this now as once the walls are up you can finally start to get a good feel for your log cabin, as we mentioned before the walls are made from individual logs stacked ontop of one another to from a very solid wall, They interlock in the corners with fancy Wind and Weather Proof Connections which go along way to ensure that your cabin remains water tight… But as we also explain this isn’t where the story ends and you cannot just leave the logs as as they are and expect the building to be watertight which leads us swiftly onto a very important part of maintaining your log cabin which is TREATMENT
So let’s start by asking a question.. What is Wood?
Wood is basically a Sponge and this is how you must treat each individual part of your cabin, if you zoom right into the endgrain you will see that it’s made from straws all joined together which was once used to draw water and nutrients to the parts of the poor tree that once needed it.

Wood is a sponge and consists of straws all drawing water for the tree.
You can easily see from these pictures that when we look closely. Wood is full of holes and it’s these little buggers that will be causing a problem as they all fill with water or, drain of water as seeing as we killed the poor thing there is no tension of water to rely on.
For an untreated piece of wood especially this is happening constantly. It’s trying to reach the same moisture content as the surrounding air. We call this Relative Humidity and is a measurement of the amount of moisture in the air.
In the summer the wood expels moisture and shrink. In the winter they will absorb moisture and swell which will loosen and tighten the joints where the logs interlock.
Prevention
A lot of customers will fairly just assume that “treatment” only safeguards the wood and stops it from rotting. In truth, this is just one of its benefits. Treatment is also there to try and limit this natural movement as much as possible , We want to limit the amount those sponges can absorb and expel moisture by clogging up the straws contained with in.. we do this by reaching the recommended depth of microns.
A decent treatment should provide the following benefits
- Protect the surface from weathering (including UV damage)
- Seal wood on wood joints with in the cabins construction
- Reach the required micon depth ( 80-120 microns ) which helps limit natural movement
- Provide the desired finish for appearance
I hope the above all makes sense as it then leads on to the ongoing maintenance of your cabins walls. Treat them and treat them well. Please do not only treat your building once throughout its life time. And Please Please Please use a decent treatment in the first place. Too many times have we had angry customers over the phone shouting, screaming at how dreadful it all is and how disappointed they have become….to only find that they hadn’t applied enough coats, hadn’t kept up with the re-treatments or instead used a lets say “less expensive” brand in the first place.
We recommend our own Tuin Treatments or specific ones found locally such as Sikkens, Sadolins and Kingfisher which we know work well at achieving the desired depth of penetration.
You will not cut the movement out entirely. This is fine because the building is designed to handle a certain amount without any fuss.
So as the logs of the cabin move ( which they will ) you may then need to re-treat certain areas of your walls, Paying particular attention to the end grain and interlocking notches where they join another wall, these are the most vulnerable parts. You will also need to make note and follow the manufacturer’s guidelines in terms of reapplying dates.
Overgrowth around the cabin.
This part is mainly aimed towards landscaping and storage rather than the cabin itself.
I’ll start by repeating one of our bold statements that we confidently make about the properties of timber, .. Wood will never Rot … we promise… Well, we also go onto say that so long as it is always ventilated. So if it gets wet and is then allowed to dry it will be fine.
but what if it can’t dry?, What if air can never reach some parts of your cabin due to overgrowth, shrubbery, stacked rocks, Muck ect…
What if you decide to store things right up against the side of the cabins wall such as logs for a burner and leave them there for a few years while they season..
All of a sudden the wood will not be able to breath, vent and dry, Water could then sit there all winter which will eventually cause you all sorts of grief
Please be mindful of your walls, Make sure they are free from direct contact with anything which could cause a water trap, keep on top of your gardening in those hard to reach areas as if you allow overgrowth to take over it can really ruin your day… you may even decide to call us.. complaining about the timber quality in the first place… “sorry but its wood” we will tell you.. “it only rots if its not allowed to vent” we will try and explain… you won’t like that.

Daisy log cabin
Movement In log cabins
As we know by now the walls of the cabin move as the logs Expand and Contract throughout the seasons, the design allows for that just fine.
But what if you want to fix something to the wall like a mounted TV bracket or some shelving to store those garden tools.. I always tell people they can do whatever they like to these types of buildings so long as they follow the golden rule which is.. “You must always allow for vertical movement with in the logs” further explained with in our Dealing with Expansion and Contraction page
Another consideration for some, if your cabin features vertical posts that supports a canopy or large overhang you will need to periodically check that the adjustable post anchor that we supplied is set at the right height to match the rest of the cabin.
So let’s say you happen to own a building like our Kennet log Cabin
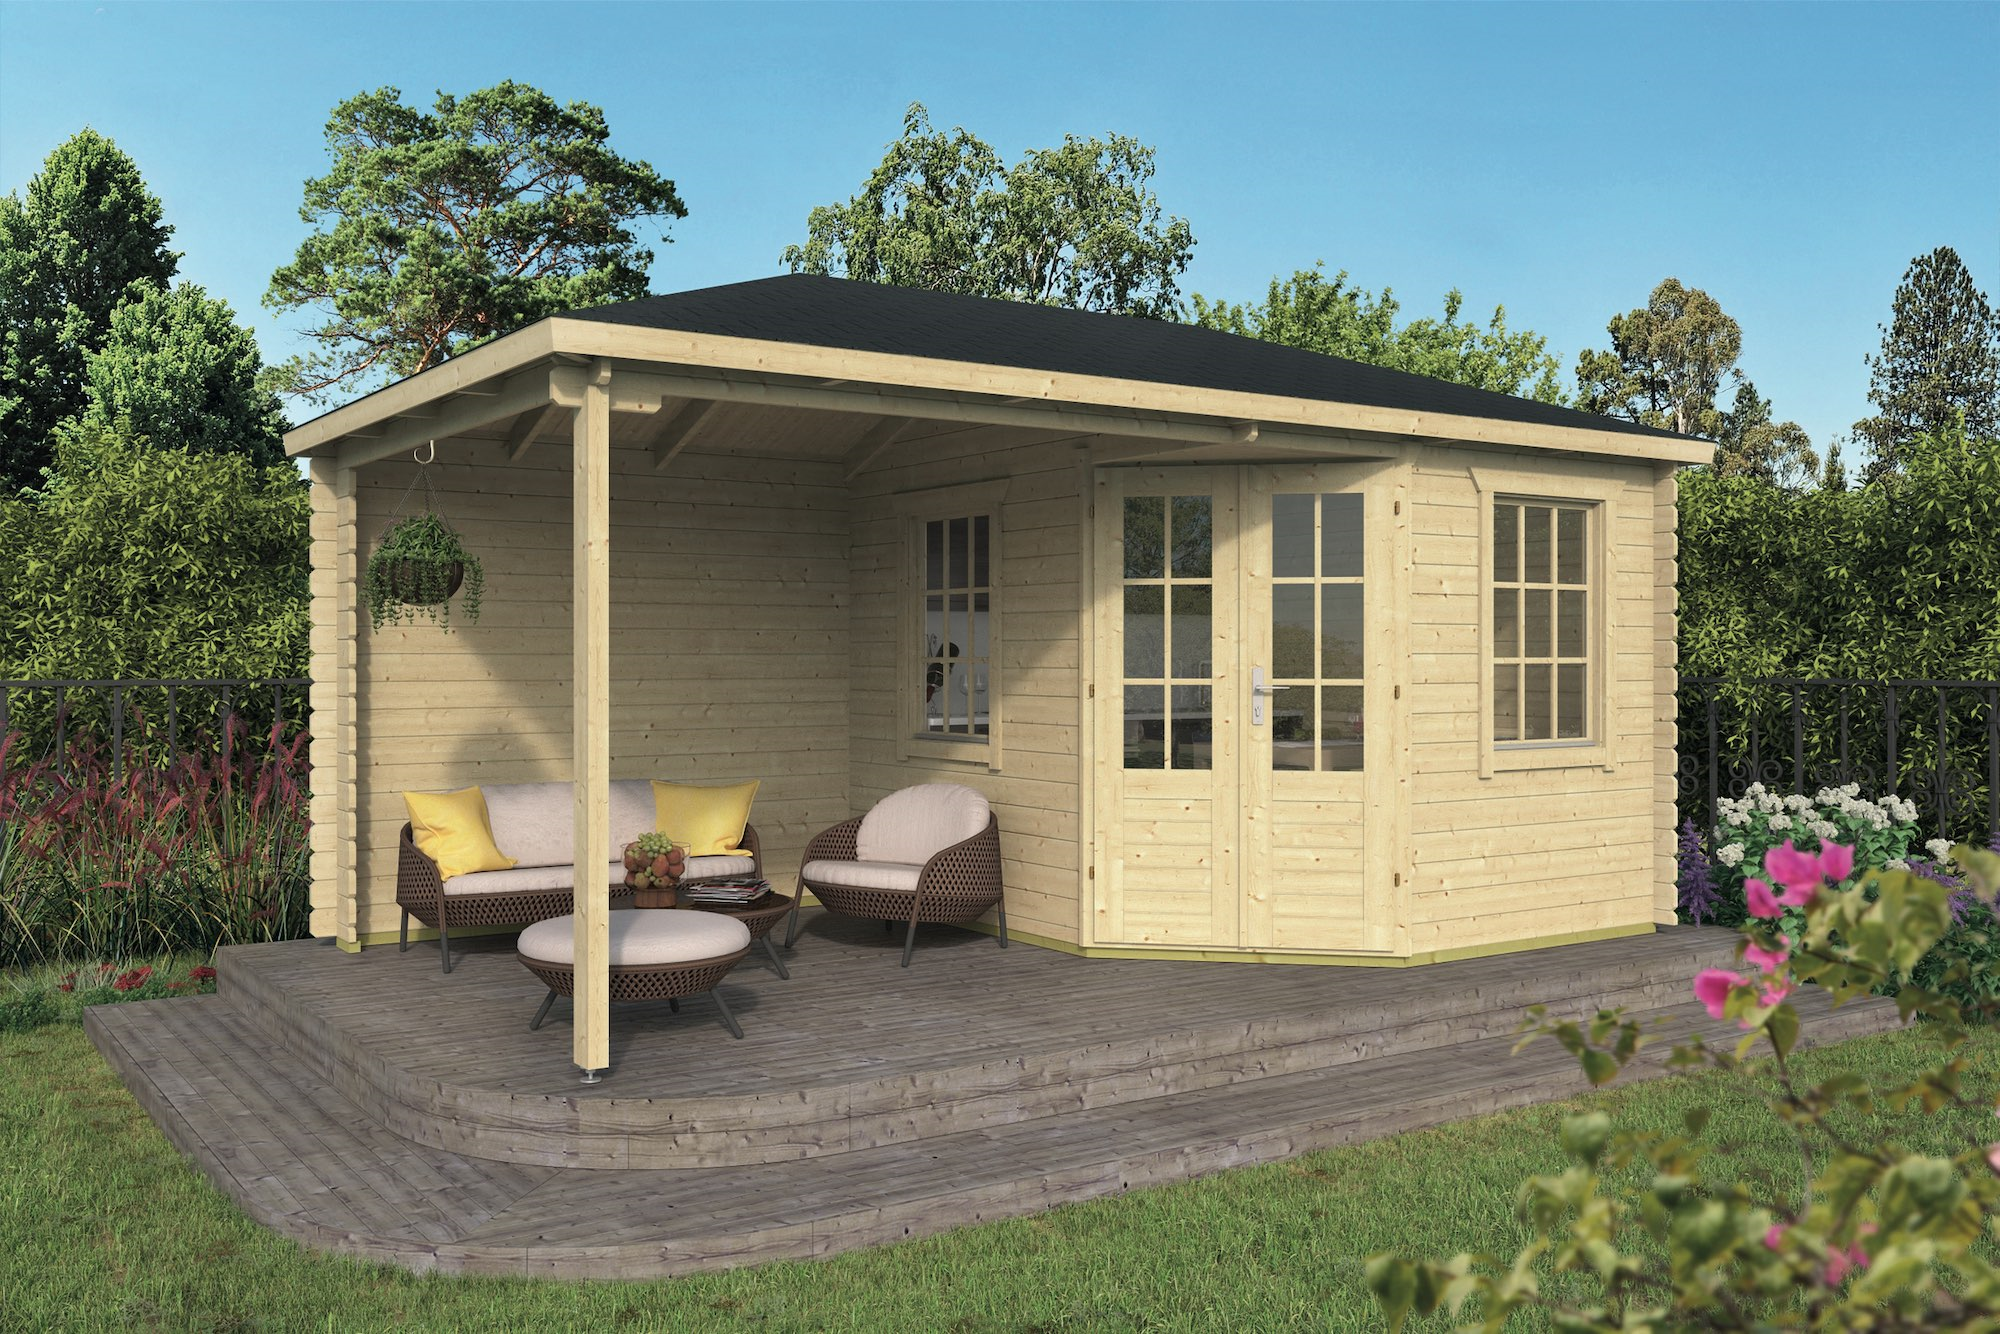
Kennet Log cabin
Remembering that the wall logs expand and contract, that front post will need to be adjusted from time to time as the seasons change because it will not move to the same extent. This happens by simply adjusting the nut that sits beneath the smaller plate on the anchor.

Post anchor being adjusted
Log Cabin Maintenance – Doors and windows
I think the best way to approach this section will be to start by gently reminding you that just like the walls, The doors and windows are predominantly made from wood, you remember all of those straws?.. Sponges.. yup this wood is no different
Sure,..the doors and windows tend to be made from timbers which are laminated together which does improve their strength and reduces the possibility of movement but its still wood and it still has those straws.
Treatment
The correct treatment of the wall logs is very important.. but I would personally say that the correct treatment of the doors and windows is even more so and here’s why
Unlike the logs, The doors and windows do not have the same luxury of being fully and always supported. The wall logs are locked in place and would do well to move in any unexpected sense. However, the same cannot be said for the swinging doors and windows. They are only connected to the cabin via hinges which means if the level of treatment isn’t correct or sufficient you may eventually encounter unwanted warps or twists to occur making them much harder to operate.
When first delivered the doors and windows normally arrive deep with in the pallet. This is on purpose as it provides needed support and compression while in an untreated state to prevent warps and twists… but at the very least the pallets are always banded tightly.

How our doors and windows come packed
You then unpack the doors and windows, Please store them flat and again under compression until ready for installation and treatment. While in situ you need to be very attentive with your treatment and often customers will not give them the attention they sorely require. Treatment should be applied both sides evenly and heavily.. To many times we have had customers upset because their doors have warped and to find out after that they didn’t treat it fully or correctly..

A twisted/bowed door
Log Cabin Maintenance – Hardware
Luckily, even the most twisted door can be corrected with the simple application of a Turn Button or Key,.. you would have already seen these in action in gardens throughout your life time i’m sure as we explain within our other Support Page so don’t panic too much but like most things prevention is better than a cure.
Please keep on top of your door and window treatment.
Let’s move onto those hinges that we mentioned earlier, The doors and windows will come with their own style of hinges so you can operate and use them.. A lot of the time they are cup hinges that look similar to this

Hinges commonly found on our buildings
Now remembering what we discussed before, while treatment will limit the amount those pesky straws can absorb and expel moisture.. it will not cut it out entirely. You will at some point need to adjust the hinges of your doors and windows so please expect to do so, We go into more detail about this with in our other Support Page
A lot of the windows we send are top hung which operate from the inside via a simple Window Stay, we have all seen them and they do the job nicely
Its always easier to pre-treat the windows and doors before they are fitted so you can be sure of full coverage but sometimes this isn’t always possible. or perhaps it’s just time to recoat them following the manufacturer’s guidelines.

Top Hung Window
If you find yourself having to unhang this type of window from the cabin please be aware of an important Safety point before you proceed. The hinges only keep the window in place within the constraints of the supplied window stay. This then means if you lift it up further, the hanging part which contains the glass could slide off. Be ready to take the weight and seek help from another if needed.

Window Stay Limitations
While on the subject of door/window furniture, let’s also talk briefly about the actual locking parts, The cylinder, mechanism, latches ect
These are pretty much self contained but some considerations should be made such as occasionally adding some lubricant with in the metal workings so everything operates as it should.. you don’t want the metal parts seizing up.. also consider oiling the exposed elements to keep rust and corrosion at bay.
Also think about fitting a traditional hook and eye’s for your doors so that during use you can keep them securely open, what we don’t want is the wind catching your new doors and smashing them against the walls… that’s how things break which nobody wants.

Hook and Eyes
Log Cabin Maintenance – Glass
That’s about it for the actual hardware, but what about the glass that lets in that sought after natural lighting.. what do we possibly need to consider in terms of maintenance.
The panes of glass are dry fitted into a rebate contained with in the door or window, this is all done prior to delivery as it’s much safer to transport while in place.
The panes of glass can always be accessed if ever needed, they’re only held in by wooden beading which can be Removed With ease as we show with in our Glass Support Article

Holding the glass in place
A few things that to consider about. One of them, often ignored, is the seal between the glass and that wooden beading.. is it sufficient?
By this point you will have fully treated both sides of your window or door right up to the glass. This alone will typically be enough to prevent water from encroaching between the two surfaces and finding a way into the cabin.
You may also ask yourself, Surely they will come pre-sealed in some way right.. why wouldn’t they be…..?!
Well actually no, they do not. The glass dry fits inside the rebate of frame. That’s not because we couldn’t be bothered or saving a few pennies on some silicone. We dry fit it for good reasons!
Firstly, The packing team do their best to pack the pallets in the safest way possible. We are talking about several tons of a log cabin moving around over huge distances by several hauliers. So things can happen and your glass could arrive damaged. (Rare but possible).
For those who have used silicone before, you will know that it can act like glue at times. So in the unlikely event that you receive your cabin and some of the glass is broken. It’s then an absolute nightmare and down right dangerous to go around and dislodge the broken shards from the inner frame and in the past when units were delivered pre-sealed we received right ear falls from angry customers and rightly so.
Hopefully you agree and can see why we do not send them out pre-sealed. So once you have treated the frames in full and you notice ingress. Either run some sealant along where the glass meets the exterior beading. Or if you want you can remove the beading and silicone where the glass directly fits into the inner rebate instead.

Using the Sealant
Movement in log cabins
Moving on slightly, Let’s think about how the frames actually fit into the walls of the cabin for a moment
Back to Movement again (sorry). The door and window frames comprise of dry, fixing free U-channels which slot over the wall logs which means they will not constrict anything as it moves.
The U-channels consist of what we call fascia boards. Some call them architraves. They consist of planks of wood screwed to the frame, creating the U shape. These cover up the all important expansion and contraction gaps left around the frames. (please do not in-fill these gaps with anything).

Log cabin doors and window installation
So a few things we need to consider in terms of ongoing log cabin maintenance,
Have you treated the inner facias correctly and fully? …They should be as they also play a good part of sealing the outer perimeter of the frames.
Have you accidently sent fixings through these fascias which then also penetrate the moving wall logs underneath? if so please remove them as you will be preventing those logs from moving with the rest. This is to prevent gaps appearing in between the logs.
Or, Perhaps you have noticed gaps around the door frame but are pretty adamant that there are no fouling fixings.. Try loosening the fascias and then re-tightening them. If that doesn’t work then send us some pictures so we can have a look with you.
Maybe you have treated the underside of these fascias but you have noticed some signs of ingress? In this situation we may just need to enhance the seal between the two wooden surfaces.. Removing the fascias and adding silicone or draft excluders will normally cut that right out .. Just let us know and we are happy to send you some FOC.
Log Cabin Maintenance – Log cabin Extras
We can provide an array of Log Cabin Extras to complement your log cabin. Their requirement depends mostly on the circumstance
Air Vents
Before we touched upon the importance of Ventilation. This helps prevent moisture from building up within the sealed cabin. If you are not constantly in and out of your building should consider adding Air Vents. This allows a continuous flow of air in and out of the building.
Also think about what you store within the cabin. White goods especially kick out a lot of moisture so be sure to install vents to combat that.
Storm Kits
We also offer Storm kits as an extra. These spring loaded metal rods ensure that the roof of the cabin remains tied down to the rest underneath. Most useful to those in very exposed areas. Also for cabins with large exposed canopy/overhangs… please consider the application of a Storm kit.
Shingle glue
Shingle Glue is an option to consider. Very handy again for customers in exposed areas. Generally, if you install in the winter we suggest safeguarding the shingles until summer rolls around.
guttering
We highly recommend Guttering for your log cabin. Not only will this help filter roof water to the desired location. It will also serve in protecting the walls and perimeter further down from unwanted ingress and splash around the base.
impregnation fluid
We also sell a product which is very useful for coating the inside of the walls. It’s called Impregnation Fluid on the website. It’s a very powerful Anti-rot, insecticidal treatment which you could consider. Please note that the inside of your doors and windows will need more than just this product alone.
Log Cabin Maintenance – Roof Log Cabin Maintenance
Self-contained roofs should be the case with these cabins. As so long as you install the material correctly there isn’t really that much you need to think about.
Just keep an eye on any unwanted growth on top. Moss sometimes starts building up, remove this as and when you can. Overgrowth can prevent the surface from ever drying out fully. Also moss build up could limit the amount of heat that gets to the shingles. This heat binds all the those bitumen strips together securely.

Build up of moss
It will also be a good idea to periodically check underneath the roofs fascias for any nests. These will cause long term damage.
Before applying the facias, they need pre-treating. Just like the other parts of the cabin you will need to revisit the treatment after a set timeframe. We tend to forget and overlook these parts.
We hope this helps and we are happy to answer any unanswered queries that may come to mind. Please also revisit our installation manual for much much more.
Log Cabin Maintenance – Summary
- Keep half a mind for your Log Cabin Base. Check the levels if you start to notice anything strange happening with the cabin on top
- If you start to experience high levels of condensation within the building. Consider checking your damp proofing and joints between the foundation beams.
- Remember that wood is a sponge. Keep on top of your treatment and please use something decent. Recoat those vulnerable areas and meet the guidelines set out on the tin.
- Treat the doors and windows well and frequently
- Fit hook and eyes to your doors to prevent unwanted wind damage
- Keep your green fingers busy, Stop overgrowth from taking over and allow air to fully circulate around the cabin.
- Do not create water traps around the walls of the cabin
- Be mindful when fixing anything to the walls, Remembering your cabin likes to move
- If you find water ingressing around the glass, they need sealing further
- Cabins should always have guttering installed to protect them.
- Add Air Vents to prevent the build up of moisture
- Consider the need for other log cabin extras
- keep half an eye on your roof, remove overgrowth frequently
Can the window fascias be removed safely in situ for treatment or is there a risk of the window falling towards the opposite side?
I wouldn’t remove them all the same time as it could fall out. It’s best to remove two sets opposing each other, treat, re-apply and then the next set.