


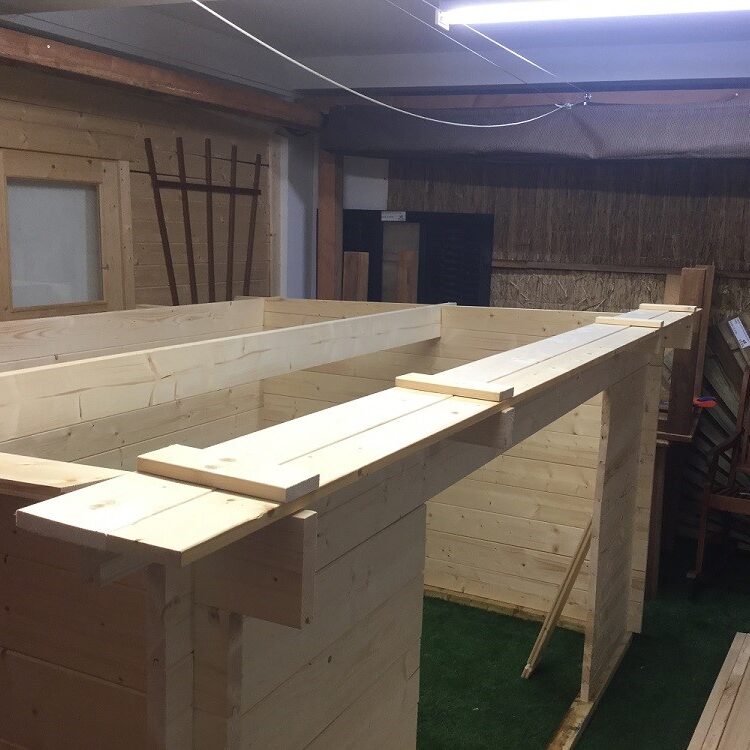
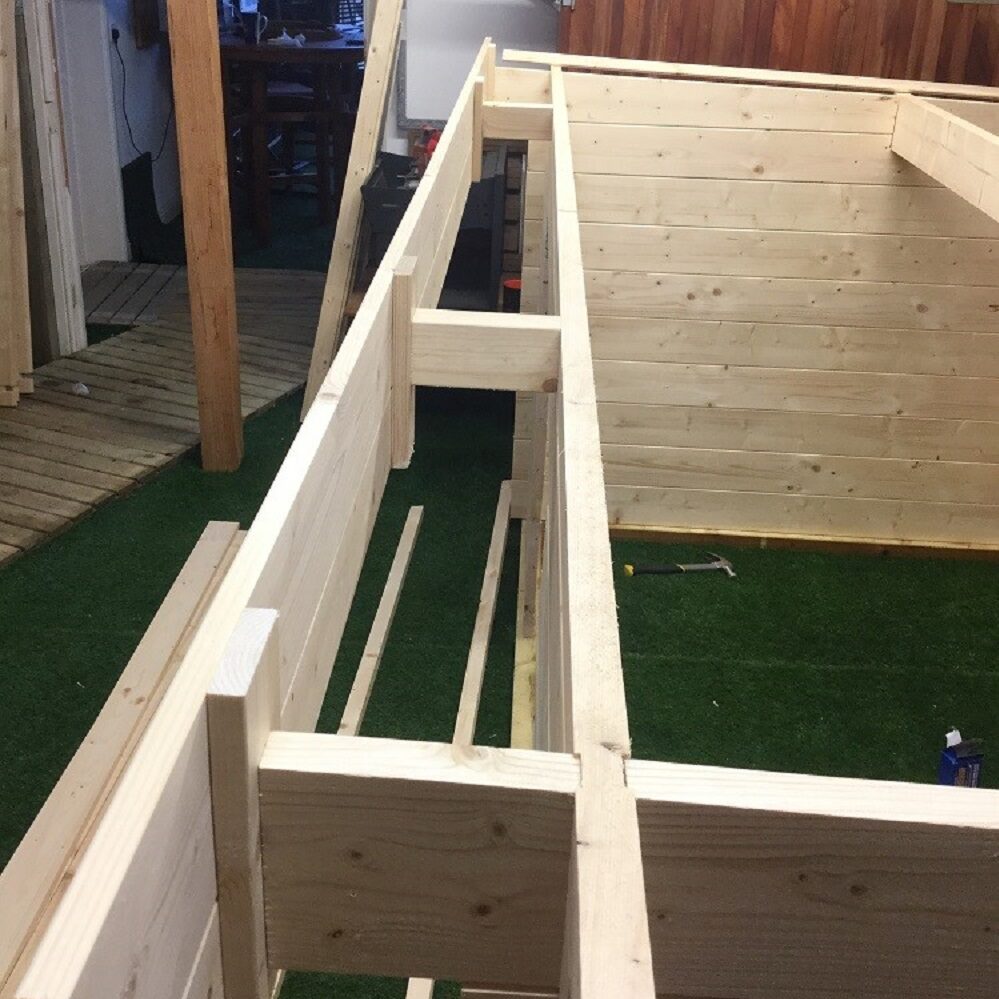
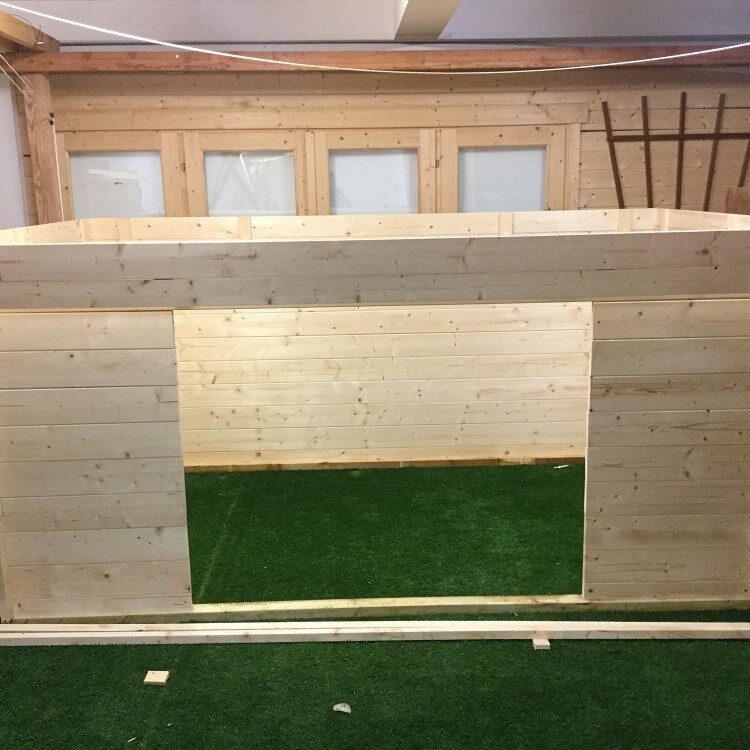
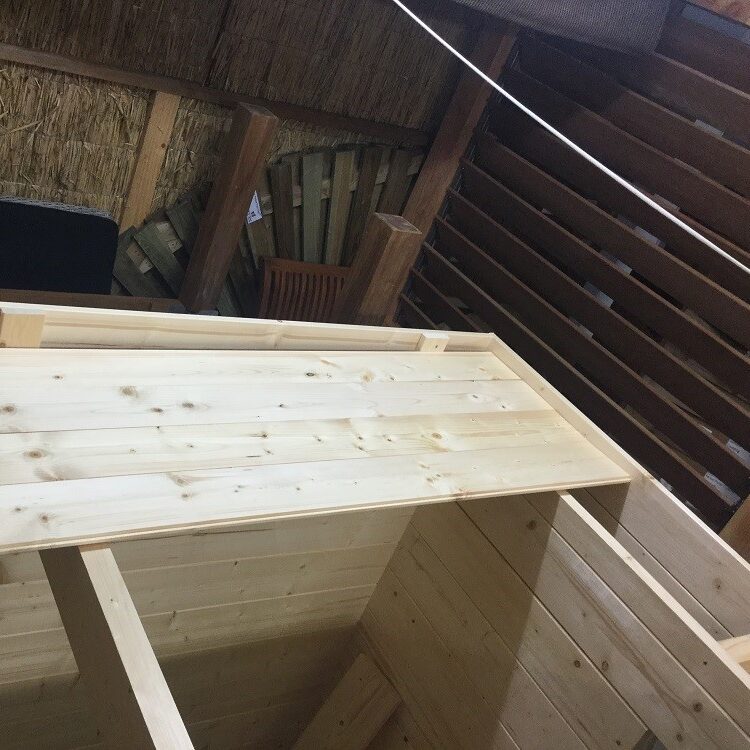
A little insight to how you can format the parts of our Modern log cabins. If you would like to follow along to a video tutorial, see our Installing a Pent Log Cabin video filled with tips on ensuring the longevity of your Log Cabin. So you have built up your new log cabin up to roof height and you will come across a sight like the one below. Now comes the installation of your Pent Roof.
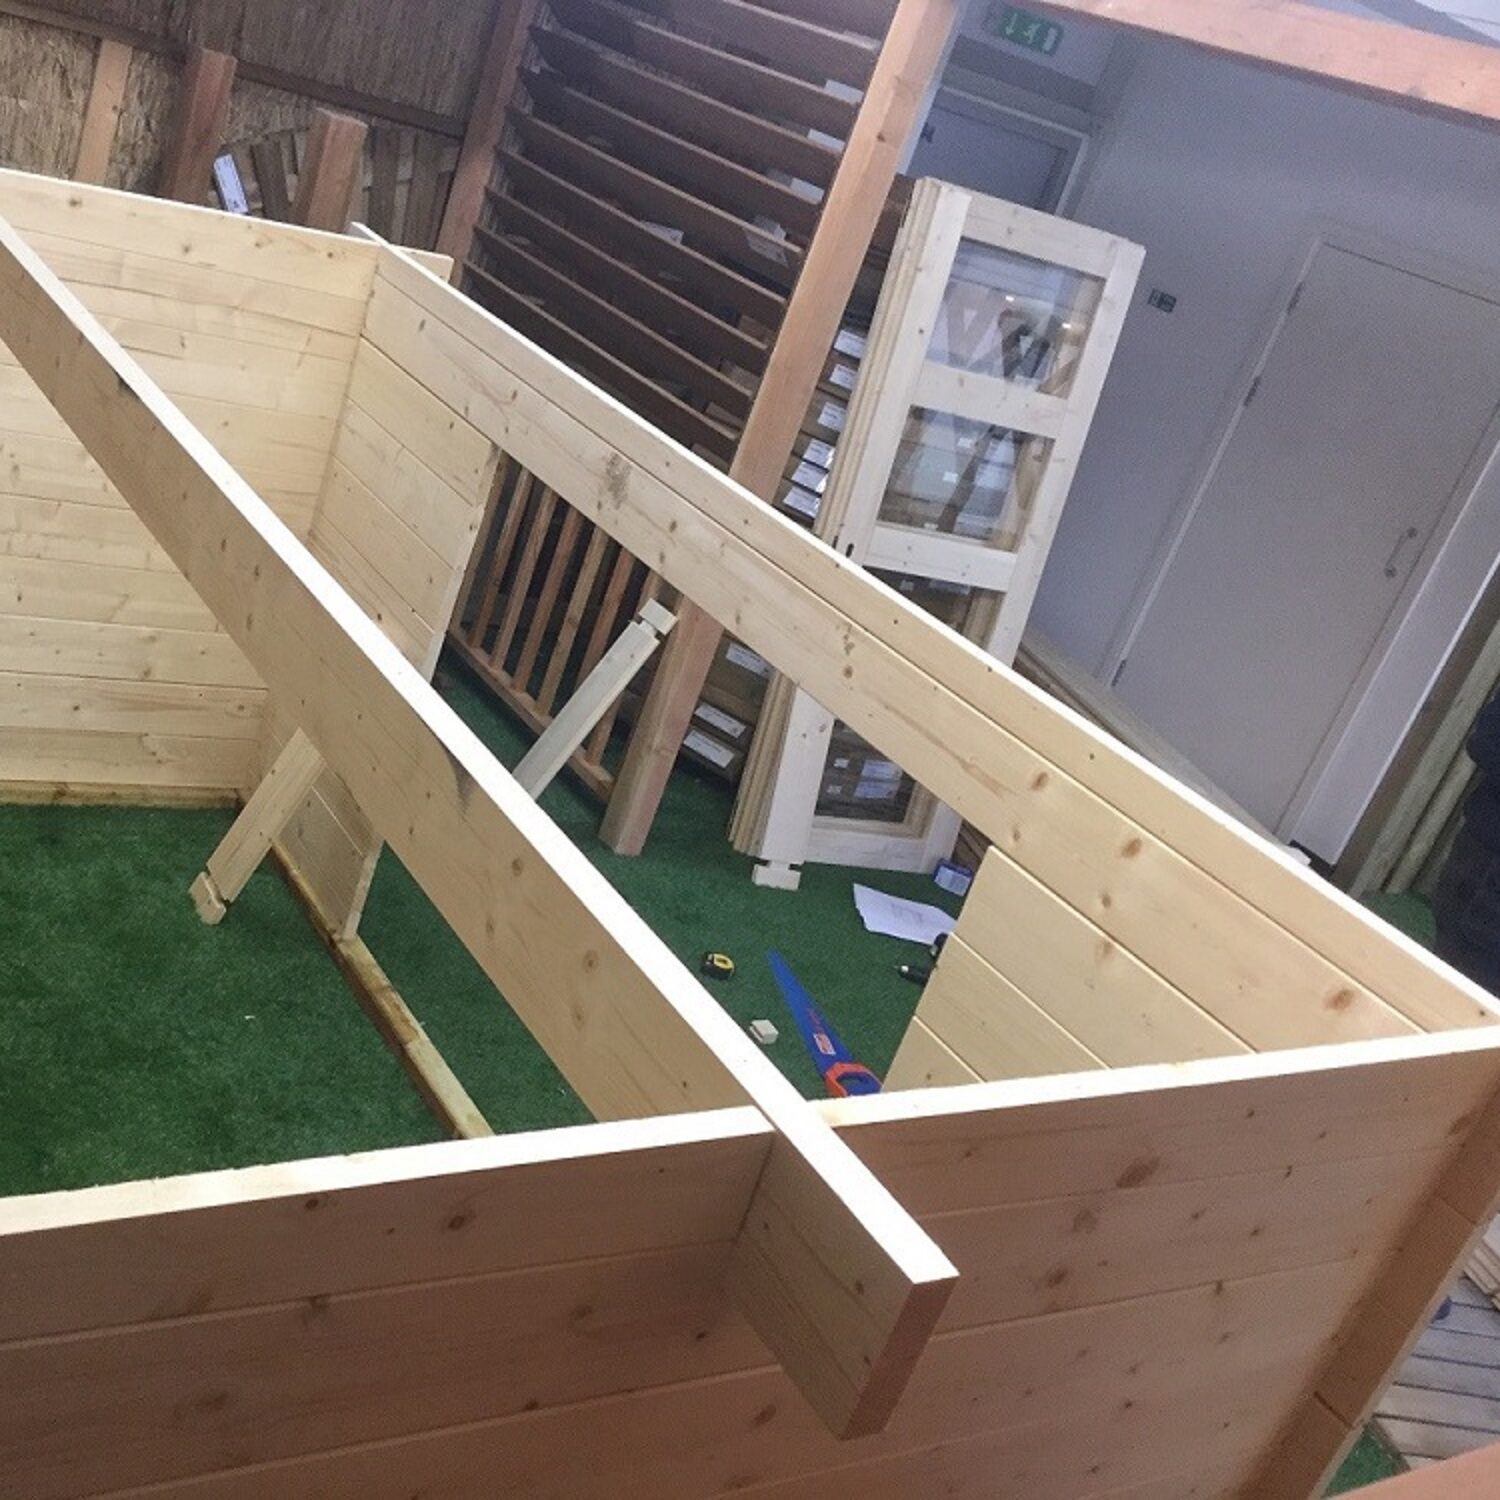
Up to roof height with purlins added
I have made a quick guide which I hope proves useful. This includes different methods in doing this roof style that you may prefer to use.
Preparation
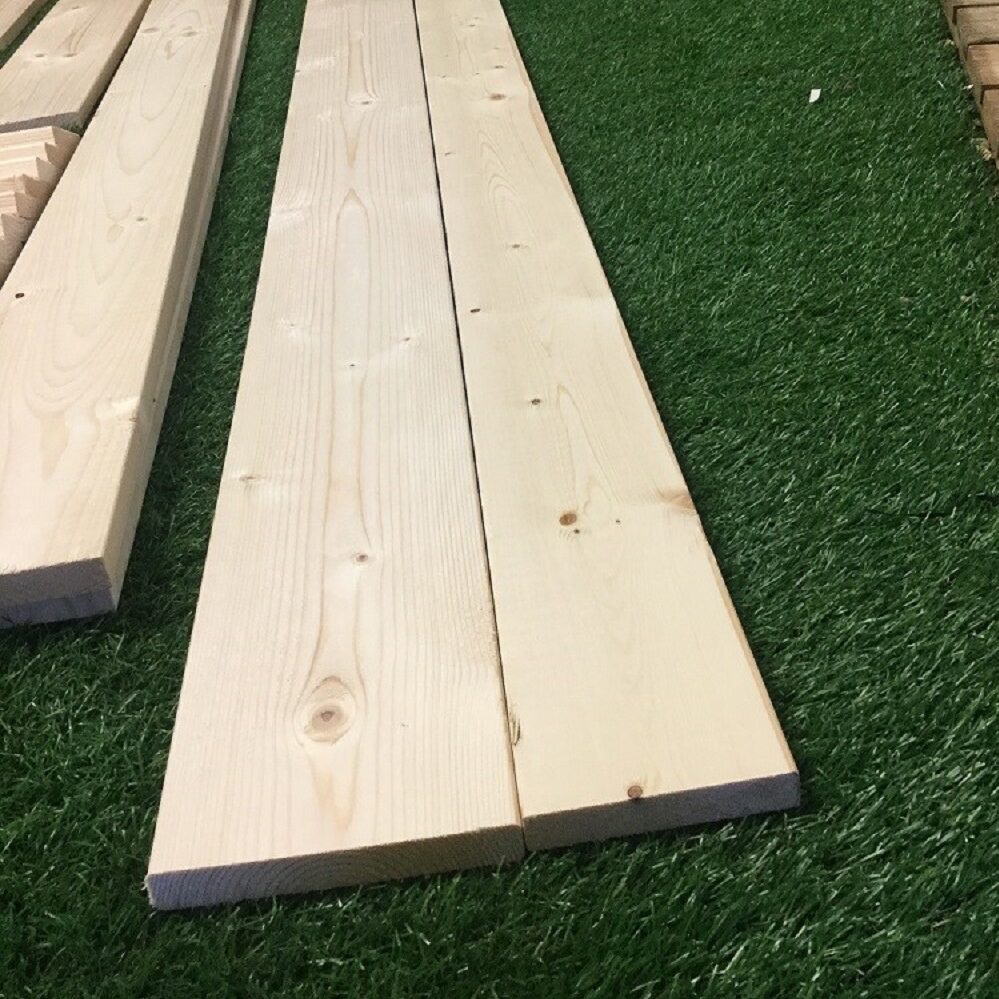
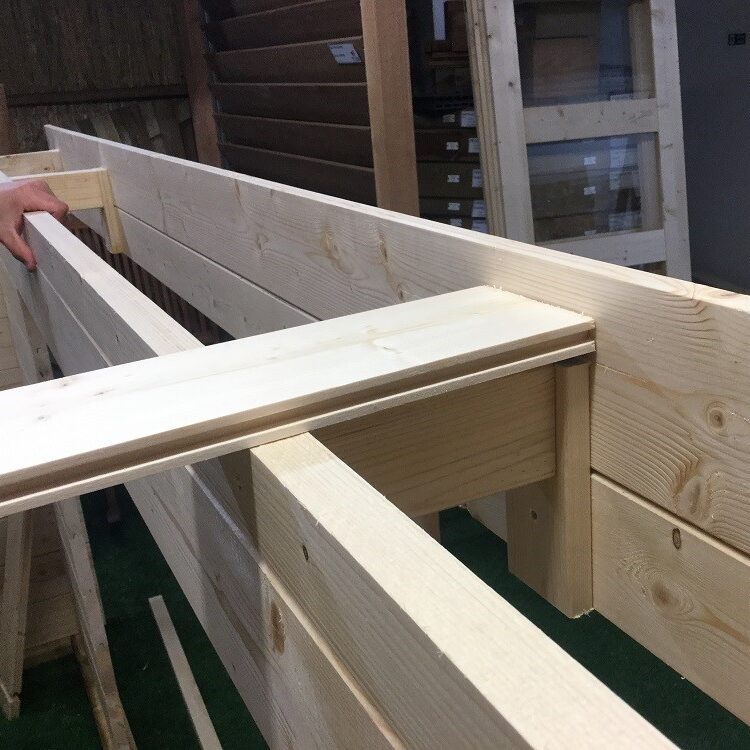
Firstly lets identify all the roof components that we will eventually call upon, in this case we have the two-tiered eaves boards for all four sides, squared battens and a mixture of mounting slats and blocks, sometimes the eaves boards for the longer cabins arrive in half lengths which when offered up to one another span the full required length.
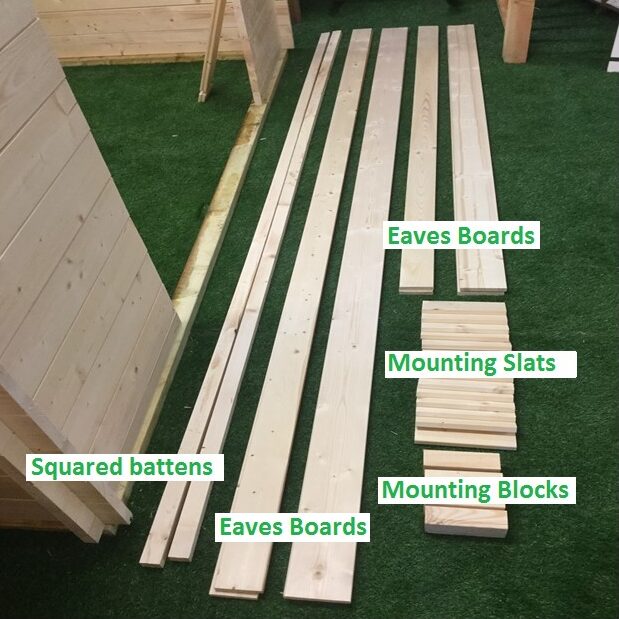
Identifying Roof Components
A good opportunity is often missed at this stage which is treatment and plenty of it as a lot of these parts become very inaccessible once you get further along.
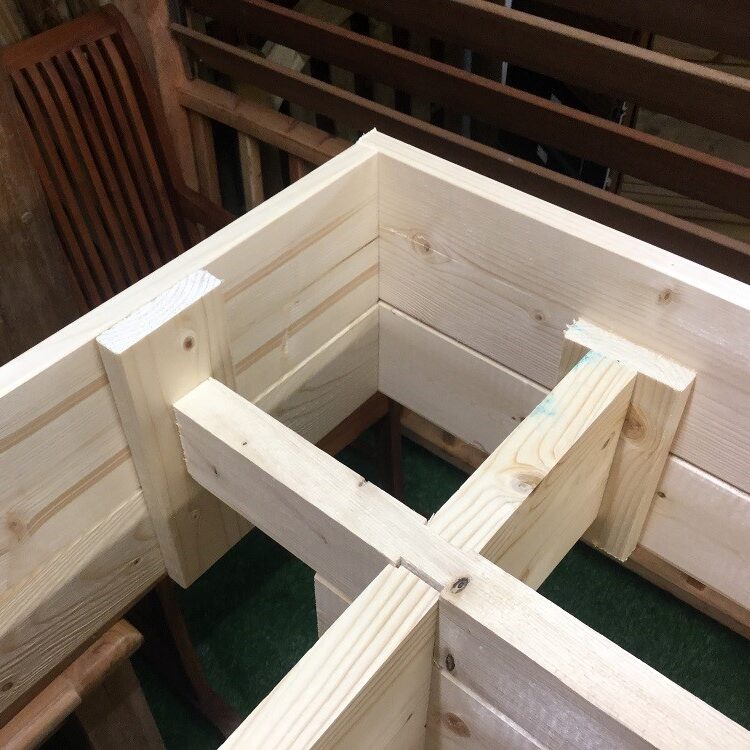
To begin with, let us install the mounting blocks on the front and back of this particular log cabin. These provide more support for the eaves boards when you fit them. Sometimes, these blocks can be fitted to the sides instead, depending on the model. In order to fix these, I shall use a two of the 60mm screws at each point.
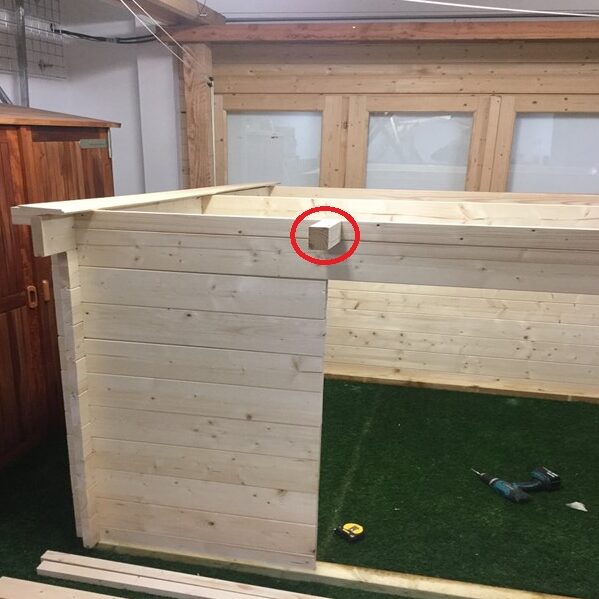
Please do not think too long and hard where the mounting blocks should go. This is because the eaves boards may arrive disassembled, like in the second image above. Instead, place them in a realistic fashion and copy the same for the back.
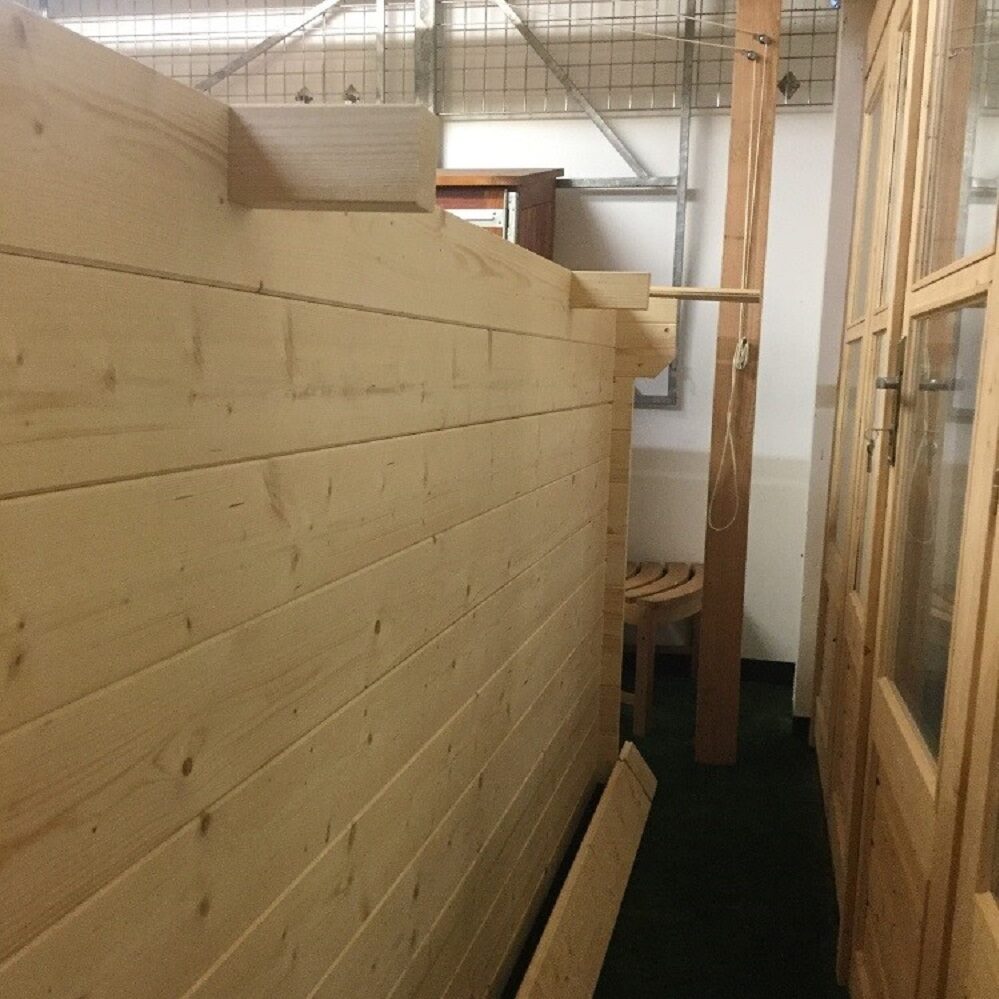
The with mounting blocks fitted, so now it is decision time making up the eaves boards. In this case, we have a narrow and a wider board, these two together make up the full eaves height. You may have seen that the plans are telling me to use the wider boards on the top.
Eaves boards ready for assembly
To join the two boards together we need to use the mounting slats supplied in the kit and identified earlier. You can use anything, including spare pallet timber.
Please pilot drill these before securing them. By doing this with any wood you can be more sure that the wood will not split or crack. Make sure their locations are correct. Use the roof as a guide lining up the slats with the blocks already in place or take measurements.
-
- Offering Eaves boards up to the fitted block locations to aid positioning
-
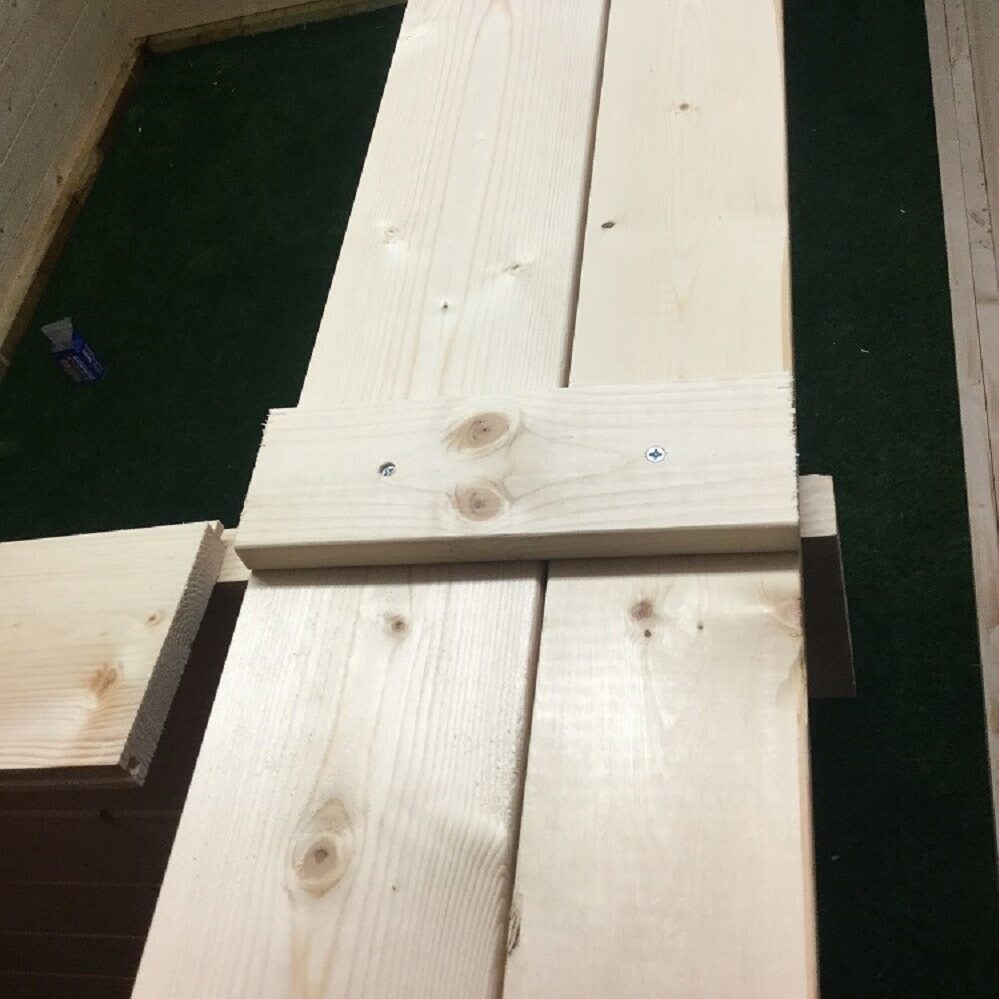
- Screws sent though the mounting slats into the eaves boards
-
- Mounting slats lining up with mounting blocks
Screw the mounting slats all onto one side of the boards, I used 30mm screws which worked nicely.
Now we have all the eaves boards made up as well as all mounting blocks and slats fitted. Then, we need to think about how we want the chosen roof material to be formatted. Roofing Felt, Easy Roofing or EPDM.
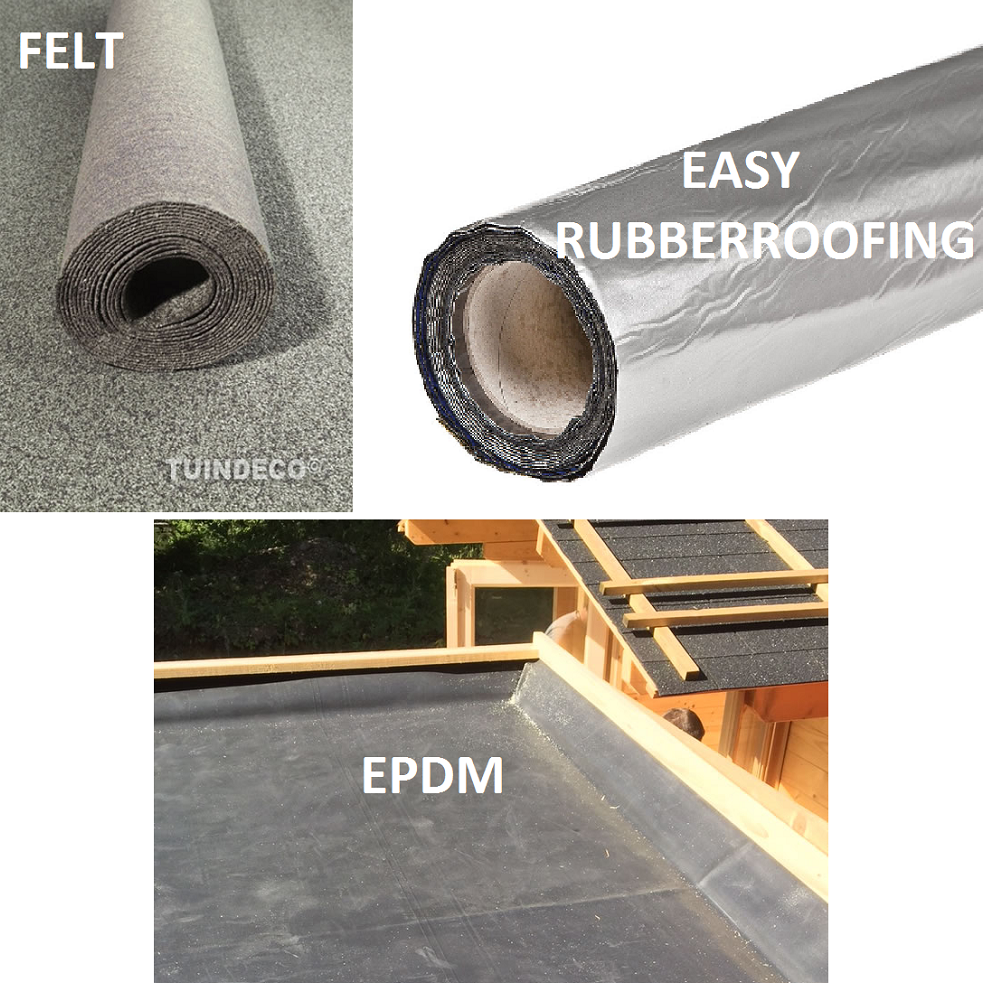
Felt, Easy roofing and EPDM Roofing for our pent roofed log cabins
Roofing felt fitting. Our aim is to fold this under the roof edge on all four sides of the roof. As such, it secures it into place using the supplied battens or sourced trims.
Fitting Easy Roofing ( ERM ). This is an easier solution to roofing felt and requires no nails as its all self adhesive. We recommend a heat gun in the colder months of the year, enhancing the overlaps.
EPDM fitting. Now we save the best until last! The Epdm rubber roof, supplied with a spray adhesive and laid straight onto a “clean dust free roof”. Similar to the easy roof you would dish this up on the inside faces of the eaves boards on all four sides or just the front three.
Felt Roofing Goes First
We do have a video showing how felt in general is laid which for the basic principle is important as well as our very detailed online installation manual for pretty much everything you would need to know about getting the cabin constructed from the ground up; https://www.tuin.co.uk/blog/tips-installation/tuin-log-cabin-instruction-manual/
but more specifically here for a pent roofs which we hope helps further.
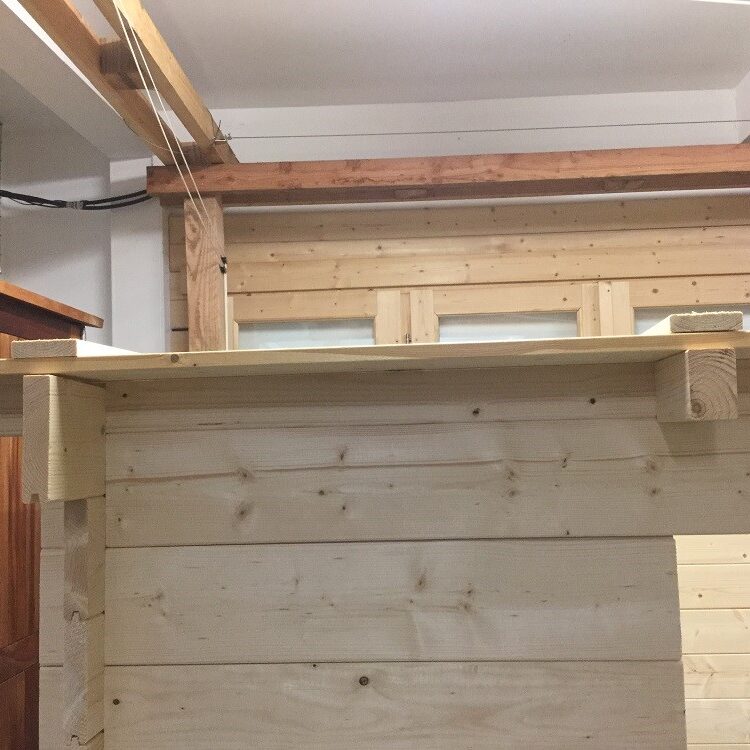
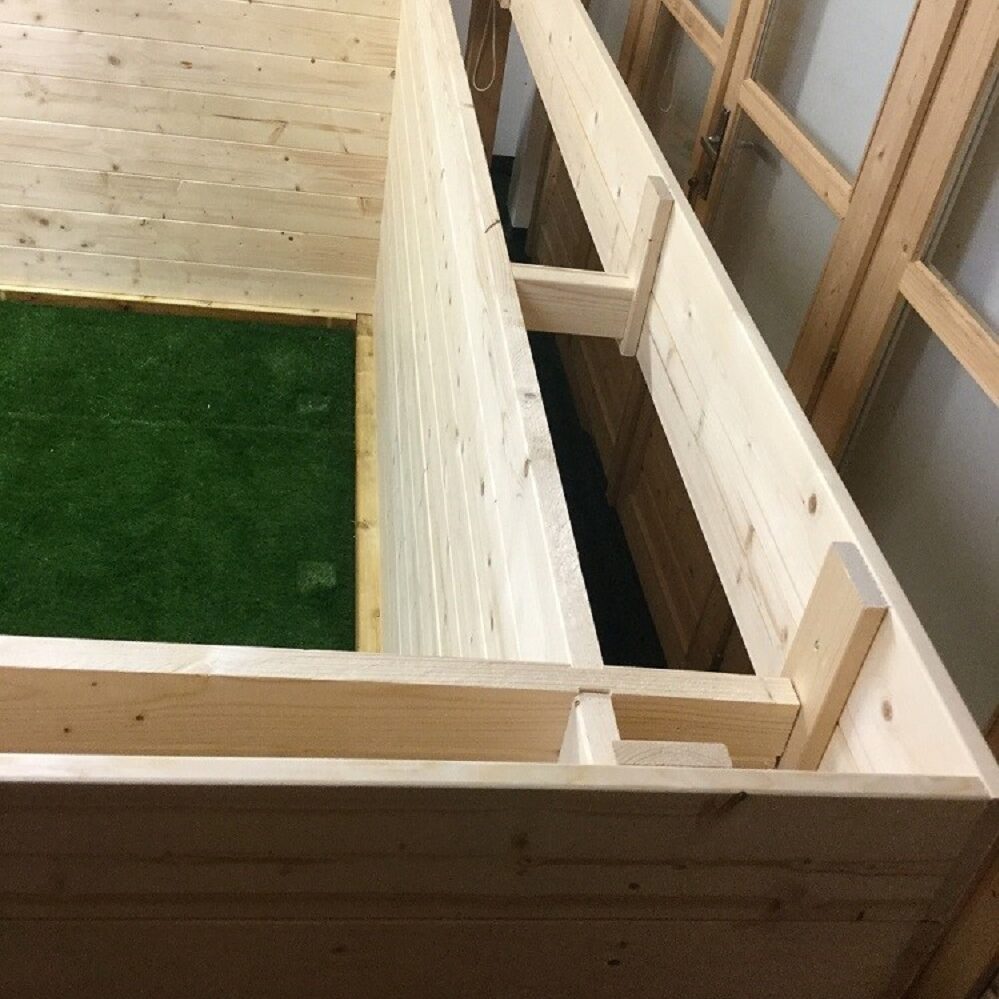
Assuming it is felt that we fit, we need place on the roof boards before anything else. However, what we suggest at this stage is temporarily sticking your front eaves on first. This then gives you a line to offer them all up against knowing they will be correct.
Eaves boards fixed to the blocks ready for the roof boards
You may find that the mounting slats obstruct some of the roof boards from sitting flush so I am trimming them down. Alternatively, I could have trimmed the relevant roof boards instead to slot around them.
-

- Cutting the mounting slats so the roof boards fit flush, The roof boards could be trimmed instead where required
-
- With the slats trimmed the roof boards sit flush against the inside face
When you go to fit the last roof board you nearly always need to rip it down to allow it to sit flush with the ends of the purlin(s)
Remember to use two nails or screws per board at every junction as the roof boards are key to strengthening the whole building. In the Summer, leave a 2mm gap
in-between each board whereas in the Winter close them up as tight as possible.
After that you can then remove the front eaves board as its time to fit the felt.
As mentioned, we really want to wrap the felt round the ends of the roof boards and under. Most cabins come with battens, attaching the felt under the boards. In this instance I was supplied with the two long lengths as shown in a previous picture, I will use these and any other spare pallet timber to secure the felt if needed.
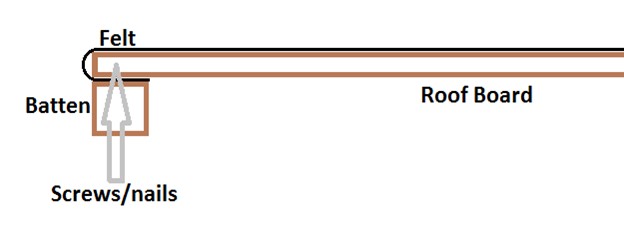
An example of how to finish the roofing felt around the ends of the roof boards
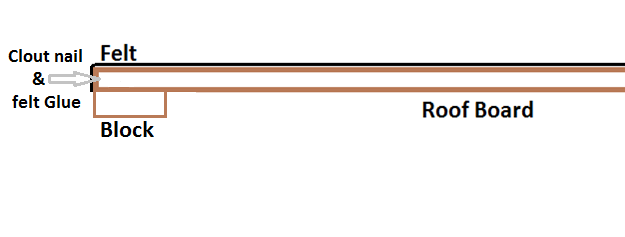
Another example showing how to overcome obstructions
You will at points have to work your way around the mounting blocks, purlins or wall logs, you could remove the blocks temporally while the felt is fitted. you can also leave the felt simply wrapped round the sides of the roof boards to avoid the obstacles but just be sure they are secured down in some way either using Felt Glue or clout nails, Ideally both.
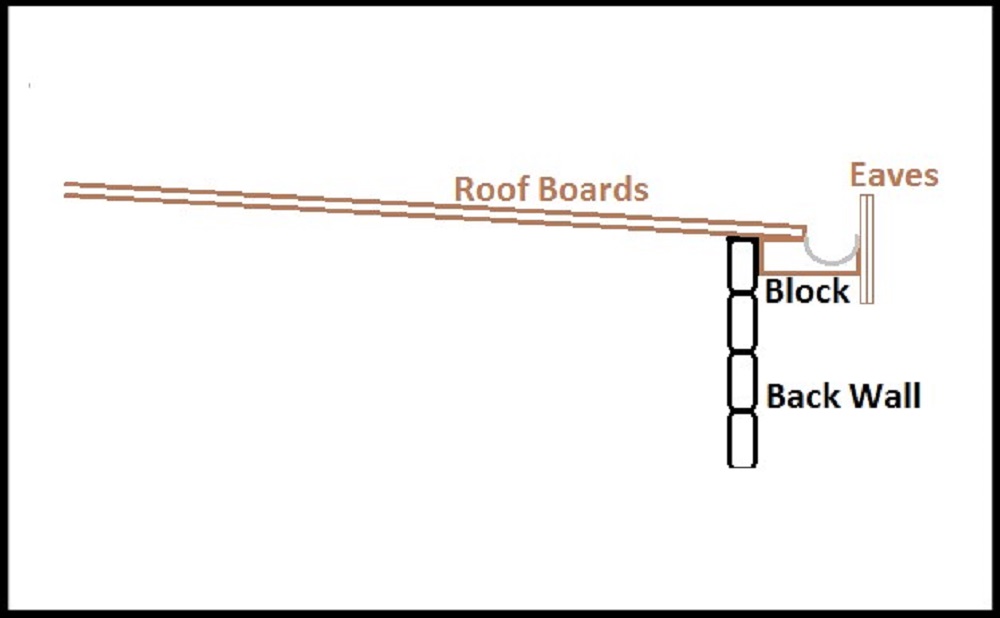
After installing the felt fully, you can then fit all your eaves boards around all sides. The natural gap at the back is there to allow the water to drain off the roof

Expect a gap at the back of the roof, This is for drainage
EPDM or ERM Rubber Roofing
For more specific guidance on the actual installation of the rubber itself, Please visit the following for support and advice
https://www.tuin.co.uk/Easy-Roofing-Membrane.html
For this cabin we opted for the Easy roofing as it is the best with no overlaps, the same fitting aid also applies for the Easy roofing, for these rubber options I am going to dish the roofing up on the front three sides then wrap it around the back to allow the run off.
After the initial stage of fixing all mounting blocks onto the cabin I am going to go ahead and fix all four completed eaves boards onto the sides of the roof.
A close up of a corner, Mounting slats cut and uncut as preferred
An extra pair of hands is useful for this part, but you could use clamps if you have some large enough. I screwed through the outside fascia of the eaves boards through the mounting slat into the mounting block with two 70mm screws at each point.
With them all fitted to the perimeter of the roof I’m ready to fit the roof boards. That follows the same process as we did for the felt part of the guide.
You can format the dishing of the rubber roofing in different ways. As an example, you can direct the rubber upwards against the inside face and apply a hidden trim to cap it off. However it is best actually wrapping the rubber around the top of the eaves board and down the other side as it helps prevent any possible ingress under it You can then cap this off as you wish.
You may like to cut the mounting slats down on the front three sides like we did for the felt approach early as this makes offering the Epdm rubber roof easier to lay on the inside face of the boards.
Roof boards start getting laid, Remember two nails per board at every junction

Examples of how the rubber roofing can be dished up
Then for the back where the natural drainage gap, we wrap it around the side of the roof boards. Some fitters at this point will actually cut into the tops of the blocks so they can wrap the EPDM further around. In spite of this, you can just glue and tac the roofing to the sides
Some fitters will be very clever at this stage and actually cut a channel into the tops of the mounting blocks. Eventually, they fit a guttering length directing the water into a downpipe. You may need to increase the wood size of the block used depending on the gutter size. Then you can glue the EPDM into the inner face of the gutter instead.
With a channel cut on the back overhangs you can fit a guttering length rigged up to a downpipe
Once again, the methods above are not concrete. “Like anything in this world there are always room for enhancements!”. “So fill your boots ladies and gents” and have a go. Any questions please feel free to contact us for advice.
If you would like to see a full installation of a recently purchased Pent Roof Log Cabin, take a look at our our Flow Log Cabin Installers Walkthrough
Hi, not quite as straghtforward on the Mia pent roof. As the eaves boards are assembled from 3 sections and protrude a long way above the roof towards the back it isn’t possible to cut the joining slats back as suggested. I’m thinking of filling in between the slats to provide a clean line for the EPDM. Any reason not to?
I want the roof to look tidy as our garden is terraced into a steep slope and there are fine views of the roof from the top terrace lol.
I can’t see any reason not to, lots of people will adapt and change to suit their own aesthetics, it should give some nice clean lines for your view.
Any advice on fitting felt around all of the many roof beams on the front of a James Summerhousr ?
The roof boards will be flush with the end of the purlins. the felt will then fold over this edge, use a felt nail to hold the felt to the end of the purlin and then cover with the bargeboard to finish and hold in place
When my Garage roof started leaking, I installed EPDM. When my shed roof felt needed replacing for the second time I replaced it with EPDM. I would no more think of a felt roof….!
EPDM is not vastly expensive, and you know when you install it you won’t have to do it again.
You should mention this. I don’t know about Easy rubber. How long does it last?
I agree 100% EPDM lasts for years and never leaks, it also goes of completely flat roofs with no pitch. The Easy Roof is not as good, it certainly lasts a lot longer than felt, is easy to install but nothing beats EPDM. Personally I would never use felt on a flat roof.