


Hi, my name is Ben and I have the gratifying task of visiting our happy customers and their log cabins. In mid October my travels took me to Earl Shilton, Leicester, where I had the pleasure of meeting Karl & his amazing Nieder Log Cabin Garden Room.
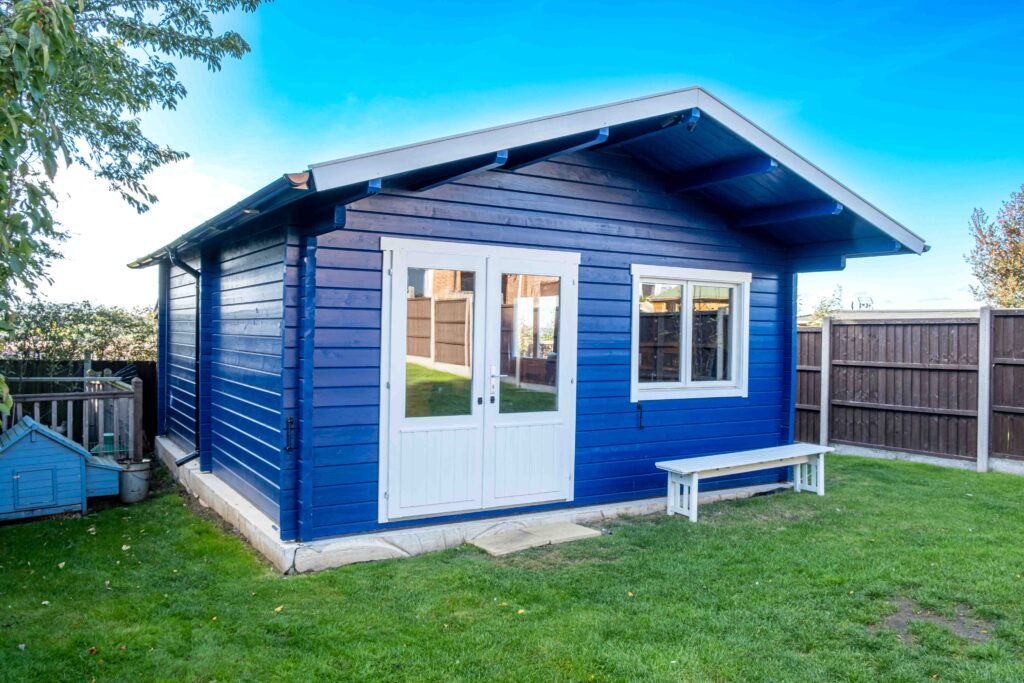
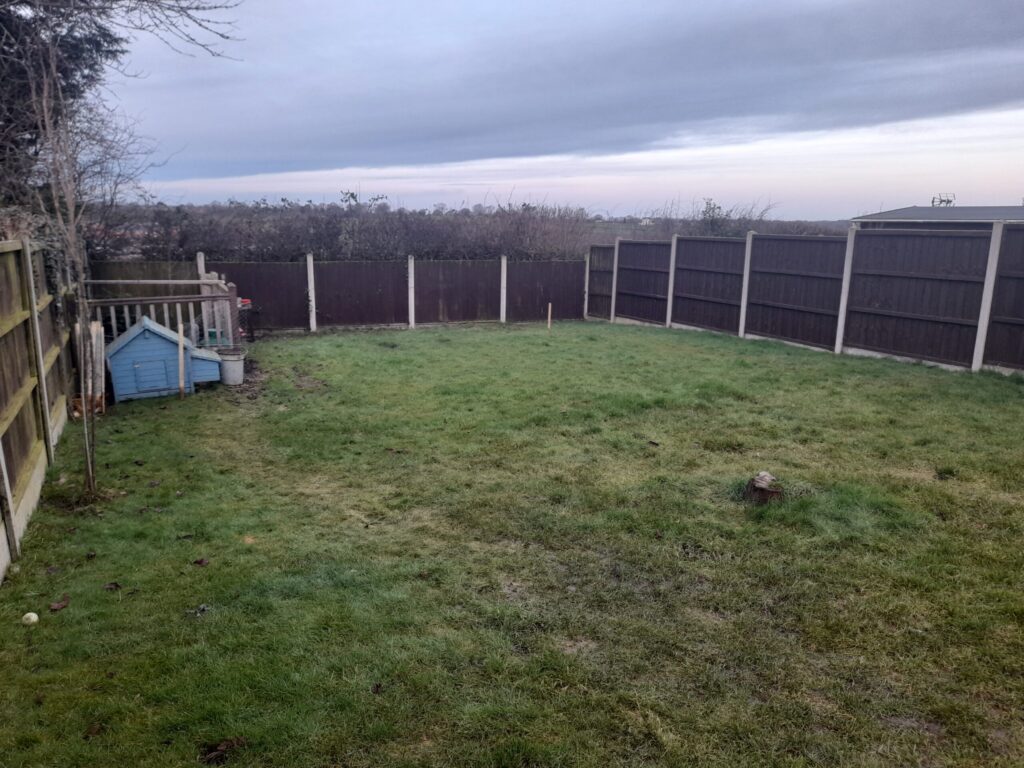
At the bottom of his nice long lawn garden, with a lovely view over the green fields of Leicestershire stands Karl and his family’s proud Nieder Log Cabin.
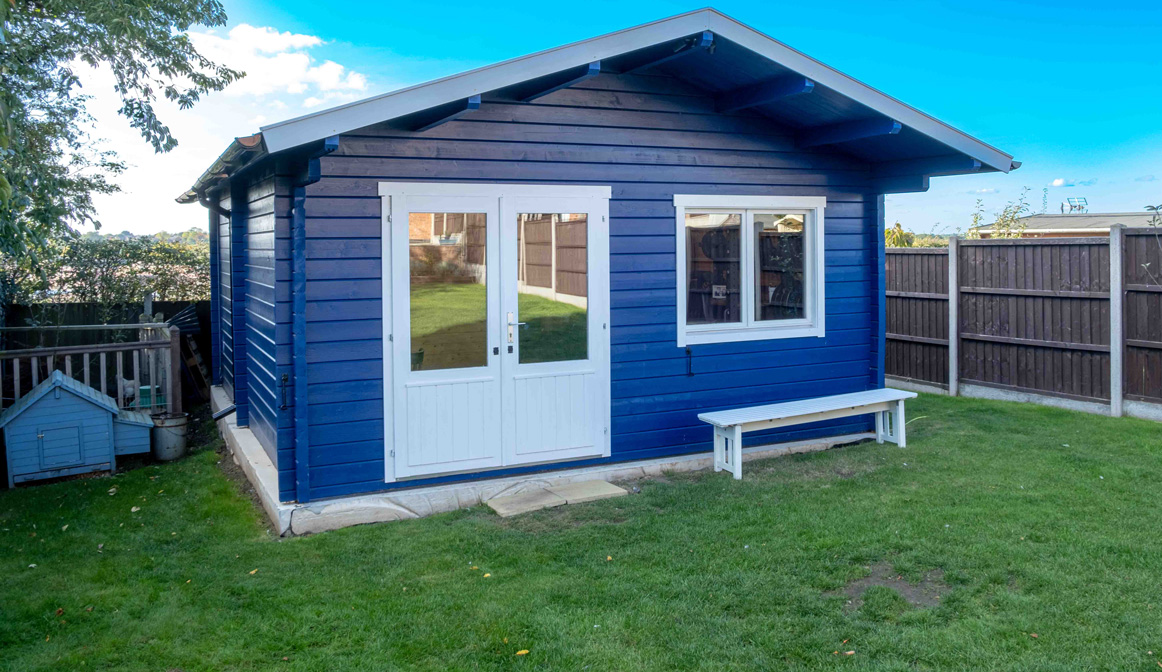
The Nieder doesn’t do anything by halves, it’s thick 70mm logs, Double glazing, and standing at 3 meters tall certainly puts it in the bold, strong-statement category.
Why TUIN & the Nieder Log Cabin?
Karl is a self-confessed over-researcher. He took the time to scour the web in the hunt for a suitable log cabin to become his home office & family room. He spent a lot of time comparing the quality, strength, size and price of different cabins from numerous providers. When he discovered the Nieder, he was pleasantly surprised. For him it ticked all the boxes on quality, style, size and especially cost.
Once Karl had came across TUIN he was very encouraged by our wealth of knowledge and information on our blogs and help pages. He made a point in telling me that if a company has this amount of quality content and help available, they know their log cabins and could be trusted.
Nieder Log Cabin – Garden Room – Feature Video
Ordering & Delivery of the Nieder Log Cabin Garden Room
Settled on the Nieder Karl went ahead and ordered it. He said the process was straightforward and effortless. Karl received communications from our sales team by both email and telephone calls regarding payment and the delivery of his newly purchased cabin, which was encouraging to him when spending a good amount of money on an item.
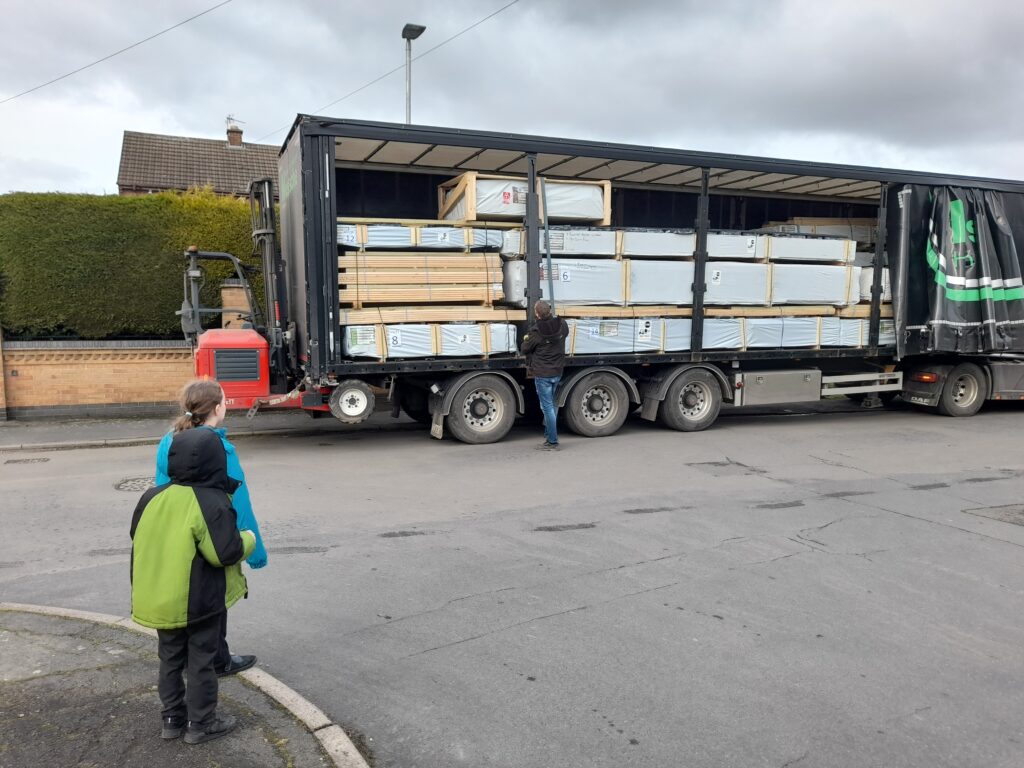
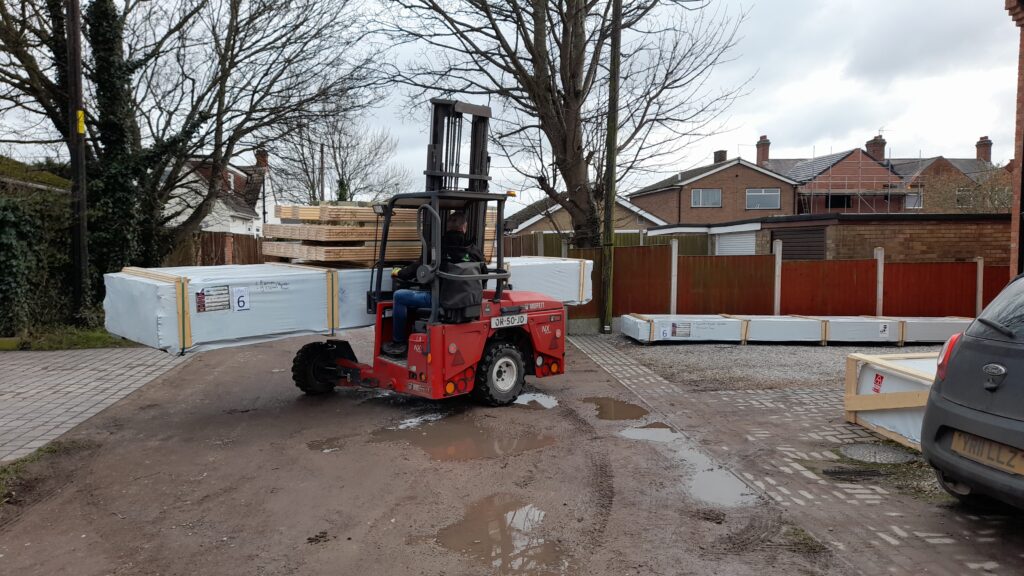
With the cabin ordered and delivery date confirmed by the courier everything was set in motion. Getting regular updates on delivery times was well received. So much so, Karl and his excited children were able to meet the delivery truck at the end of their street and watch as the Moffett forklift effortlessly removed their cabin from his load. Watching the skilled courier go about his work is always an impressive sight. He makes transporting a 6 meter long, heavy load look easy as he makes his way through narrow streets past parked cars without issue.
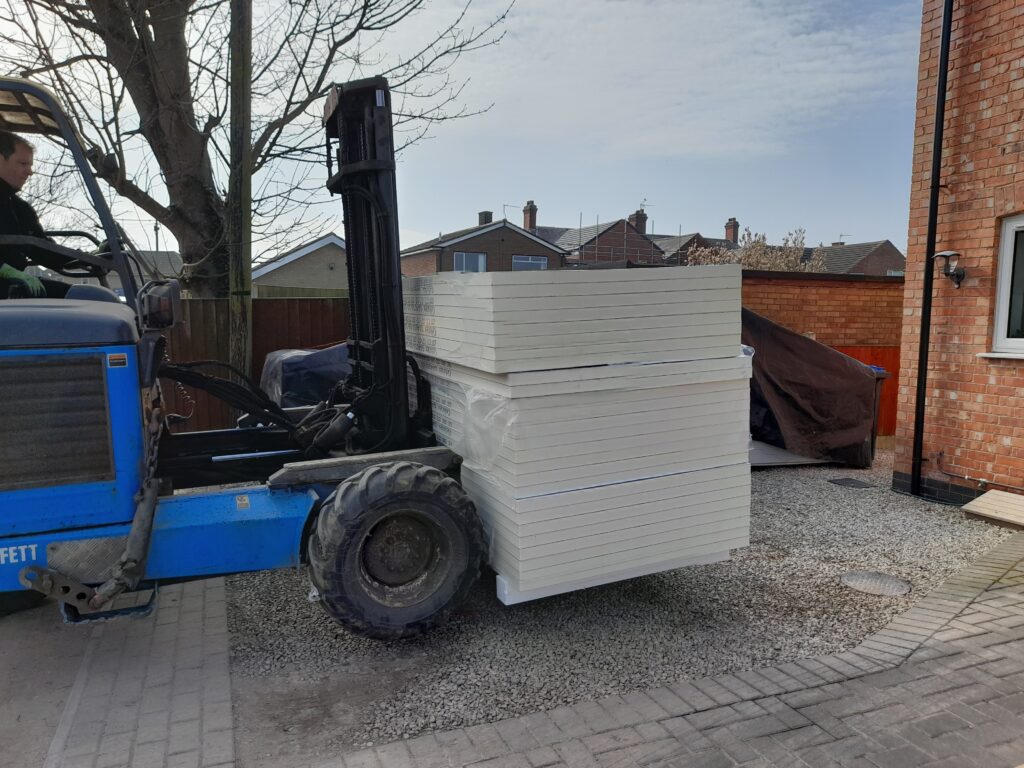
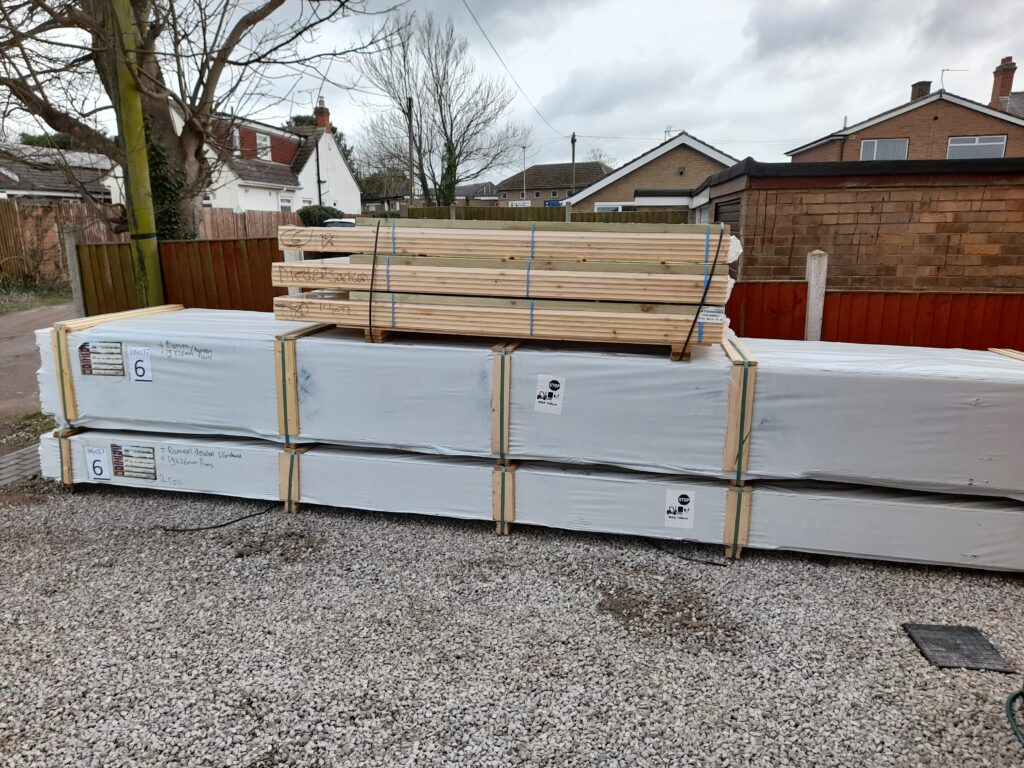
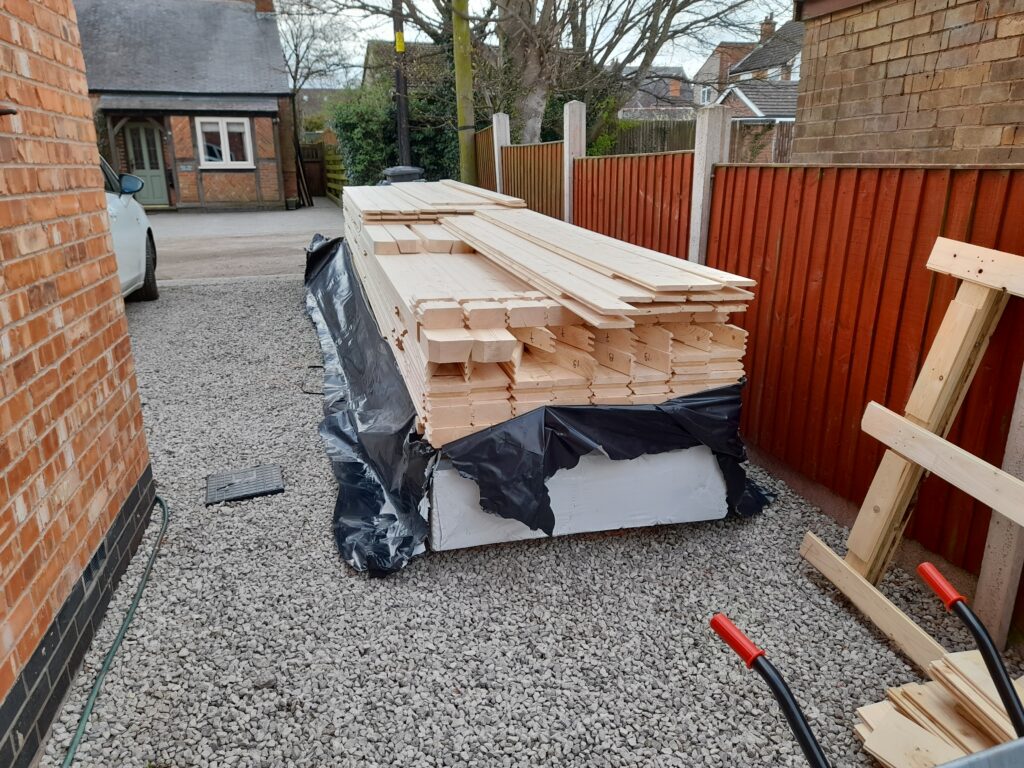
Packages were conveniently placed onto Karls front drive, tightly wrapped to keep the elements out for when the time came to start the build. Notice the top unwrapped package, this is the flooring and was stored inside until needed.
Karl ordered felt shingles, he removed from the top of the packaging as these could melt together due to the bitumen strip within them. He then resealed the package to make it watertight. As highlighted in our blog, these steps are important ensure your logs don’t suffer from warps or damage while being stored.
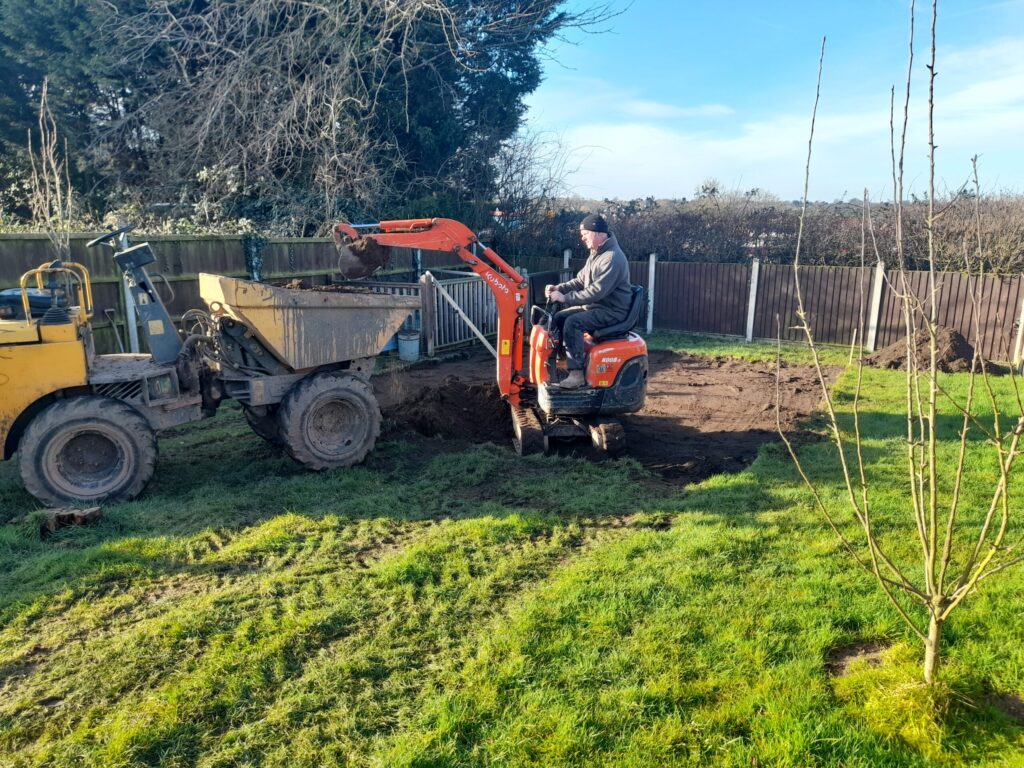
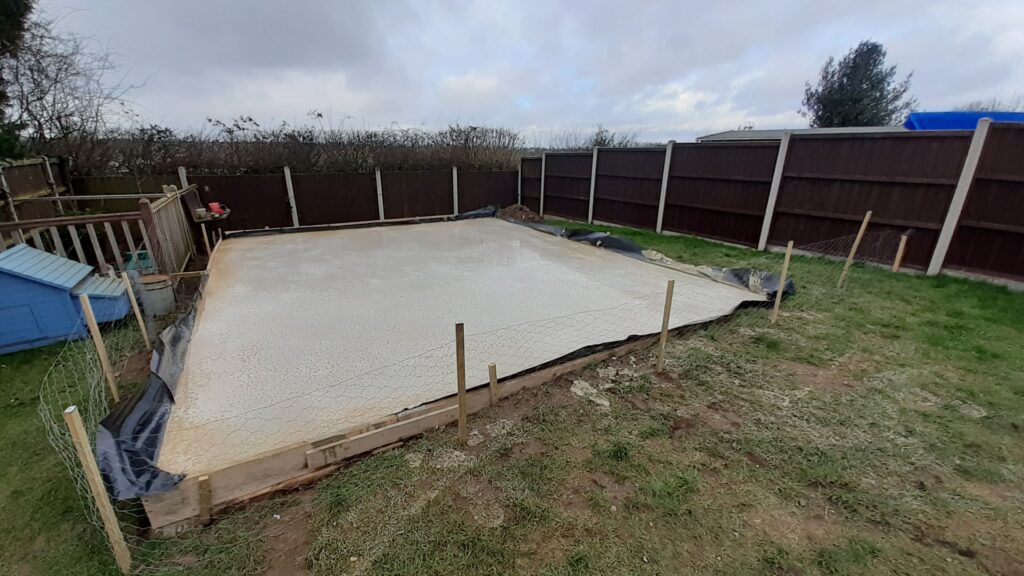
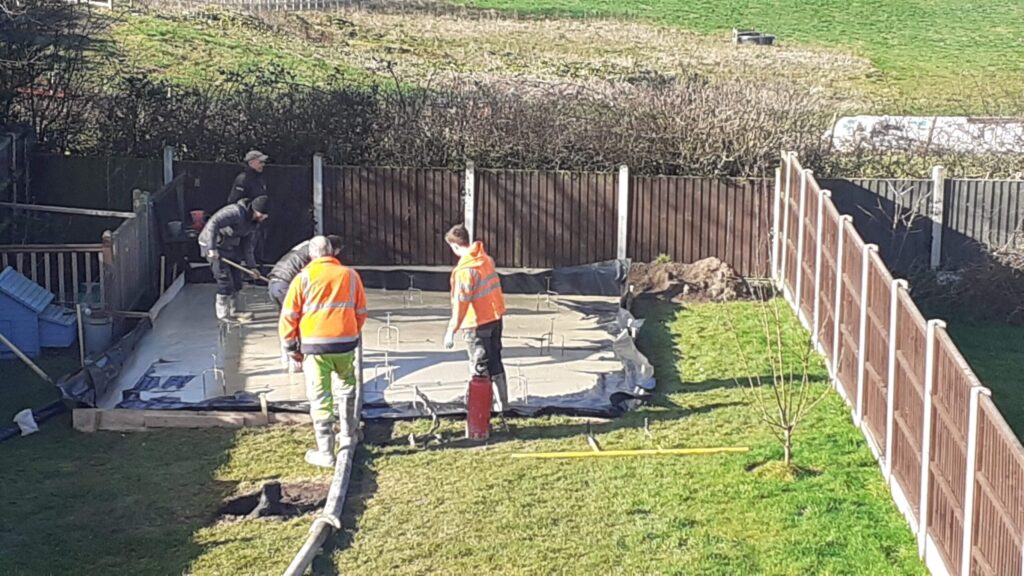
Groundworks for the Nieder Log Cabin Garden Room
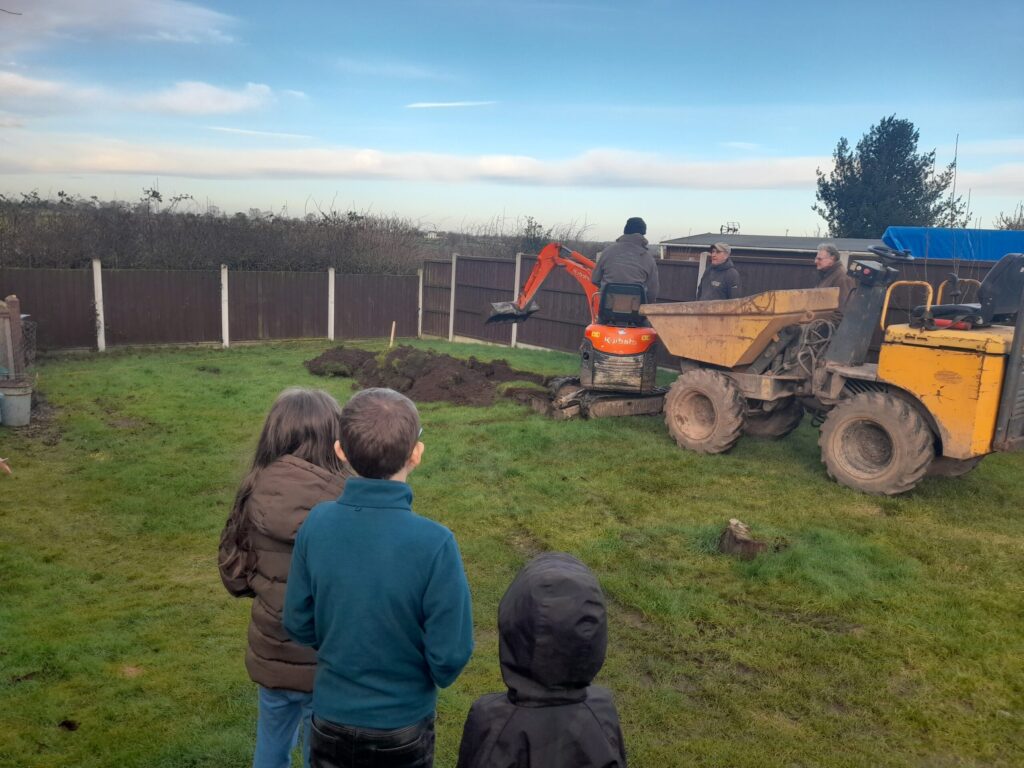
From reading our blogs Karl knew a substantial base for his large, heavy log cabin was paramount. Karl went ahead and hired a local groundworks team to lay the foundations.
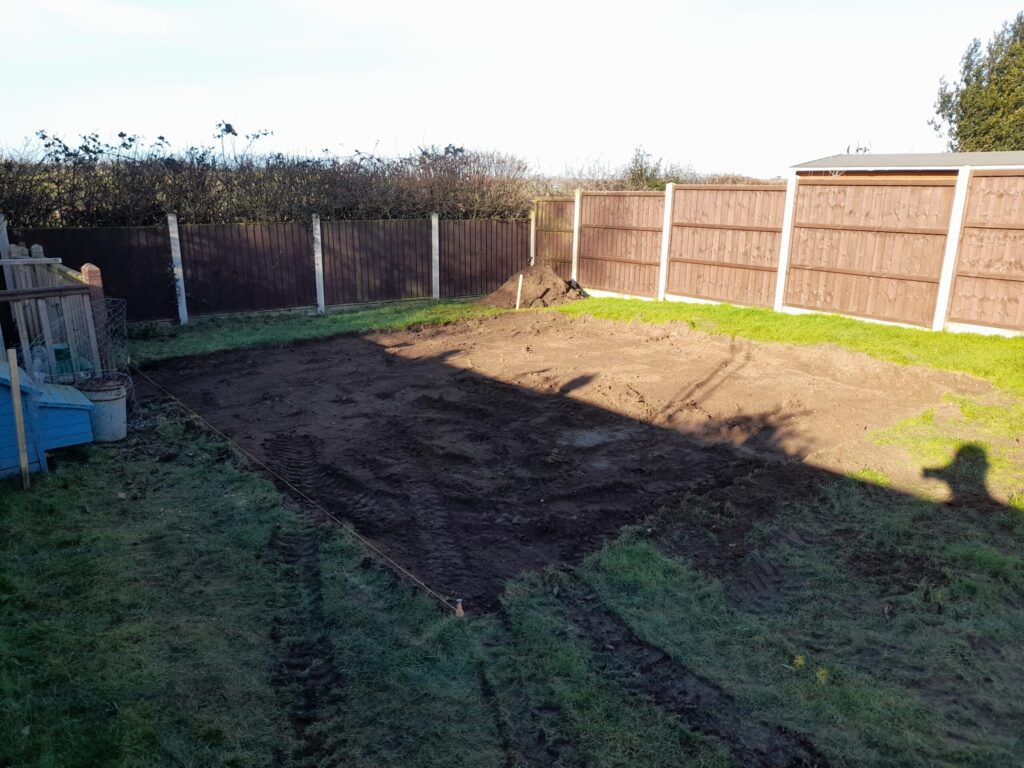
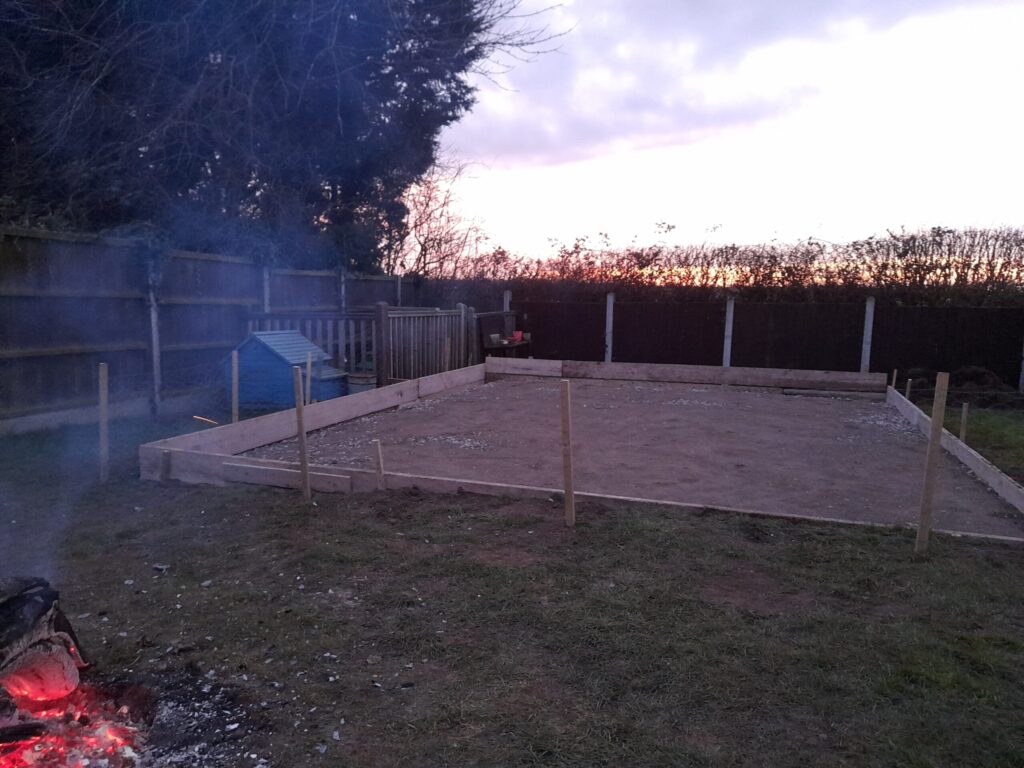
They begun by digging out the lawn and top layer of soil then compressing the ground to form a sub base ensuring it was completely level. Timber shuttering was then installed around the perimeter of the sub base. A vapour barrier was then laid and secured over the base to prevent moisture entering the concrete as it dries. A Steel reinforcement mesh was then laid before concrete was pumped onto the area to form a solid 6 inch base. Once fully dried, the timber shutting was removed, ready for the newly purchased log cabin.
Nieder Log Cabin – The Build
Preparation
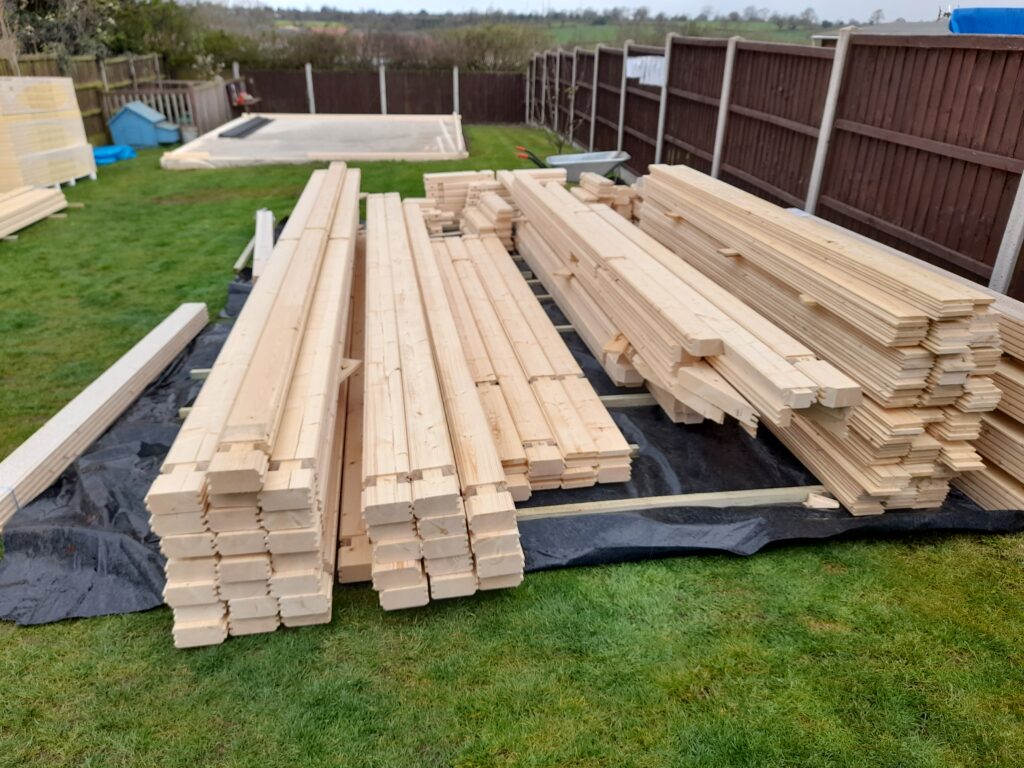
The weather started off fine and dry, the perfect weather for a day of log cabin building!
A sheet of waterproof membrane was placed on the garden lawn. Then wooden battens were spread across in preparation for the logs to be placed off the ground. Karl and his dad then unwrapped the packing and began carrying the logs around the house to the back garden. As they went the logs were sorted into similar length piles as to make the build continue smoothly. Half/starter logs were also set aside as these were to be laid first. As you can see from the images, things look a lot more straightforward when everything is well prepared and organised.
Foundation Beams & Starter Logs
Karl began by laying the foundation beams, he decided to go for the composite profiled foundation beams which allow the water to drain away from the base of the building. They are also made of plastic so they will never rot!
The next step was to lay the half/starter logs as mentioned above, these are then screwed into the foundation beams (the only logs that require screwing).
Windows & Doors Building up
Karl and his dad then proceeded to build up the walls by slotting the logs into place and hammering down with a mallet. Karl mentioned how easy he found the process. Once they laid 6 layers of logs they slotted in the door frames, then continued to build up the logs around it. When 4 or 5 layers higher the windows were installed.
Roofing & Shingles
Once all the wall logs were in place they proceeded to install the gables, rafters and purlins, which all easily slotted together perfectly. (Definitely a 2 person job!)
Then the rain came! Just as the roof boards were being installed. Not wanting to risk the slippery roof, Karl and his father took the opportunity to take a well earned rest. The weather soon cleared and they were able to finish the rest of the roof boards in good time.
Karl took advantage of our Free shingles offer and opted for the Black Half Round style. Karl mentioned this was fairly time consuming as the roof covers a large area. However he was pleased he made the decision to install them as they are much more pleasing to the eye than a EPDM roof.
Flooring
Once the structure was complete Karl and his family were able to continue to lay the flooring. He opted for our thicker 26mm flooring tongue and groove Spruce timber for heavy duty usage. As you can see in the images the kids helped out with treating both sides of the boards before installing. Insulation boards were placed between the floor joists. While installing the boards Karl ensured there was a 5-10mm gap around the perimeter to allow for the boards to expand and contract throughout the year. Once laid they painted on another coat of treatment for extra strength and protection.
Sorting Logs into piles 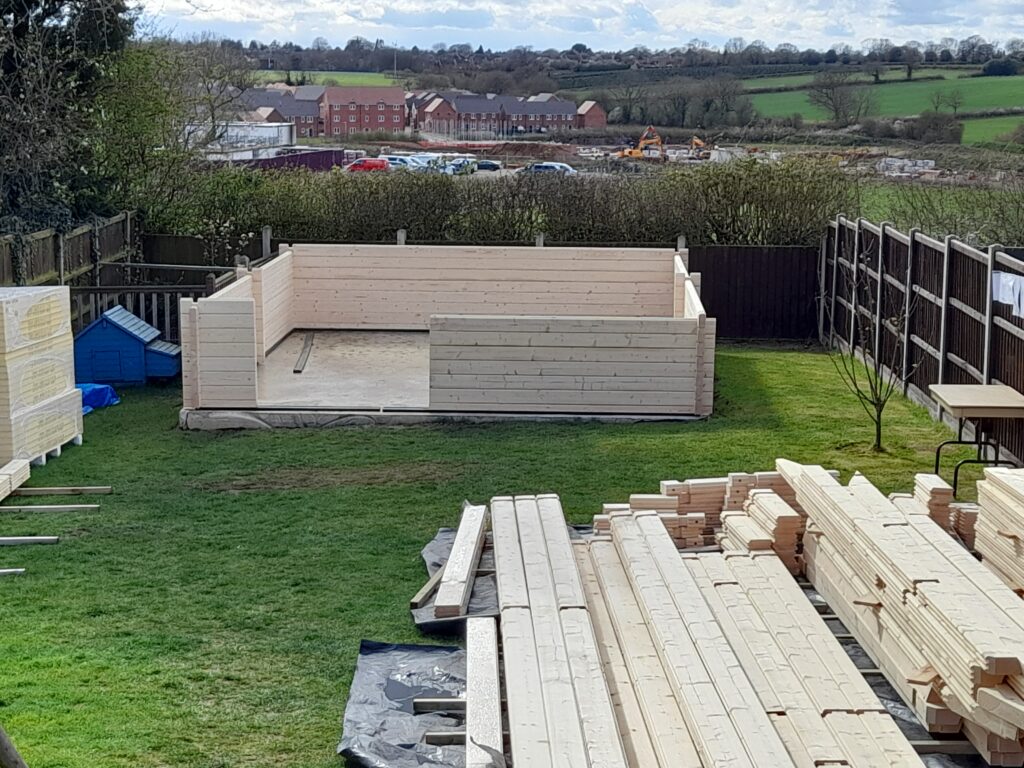
Foundation beams, starter logs and 3 layers of logs laid. 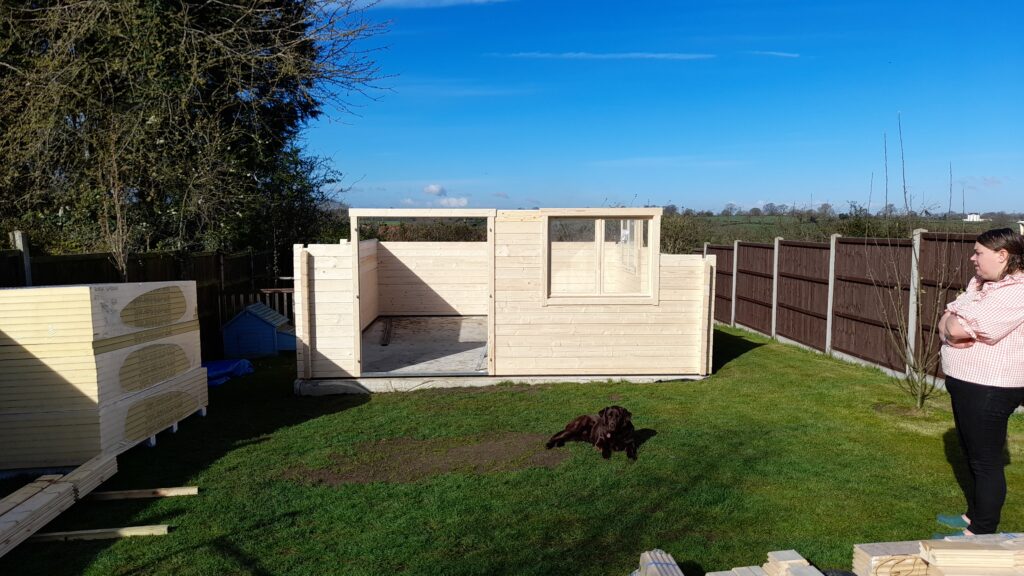
Walls progressing and windows and Doors in 
Roof purlins going in 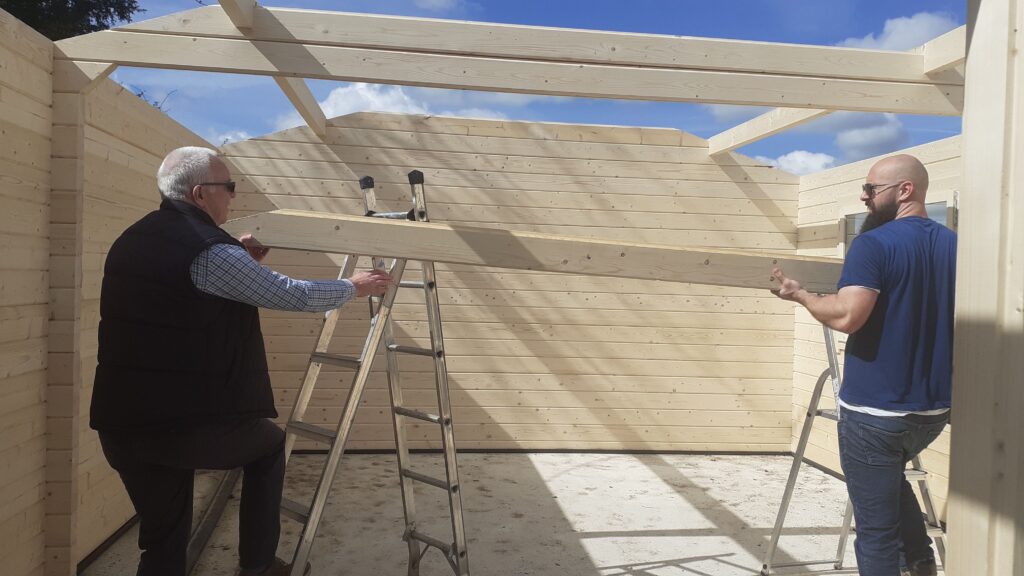
Roof joists going in 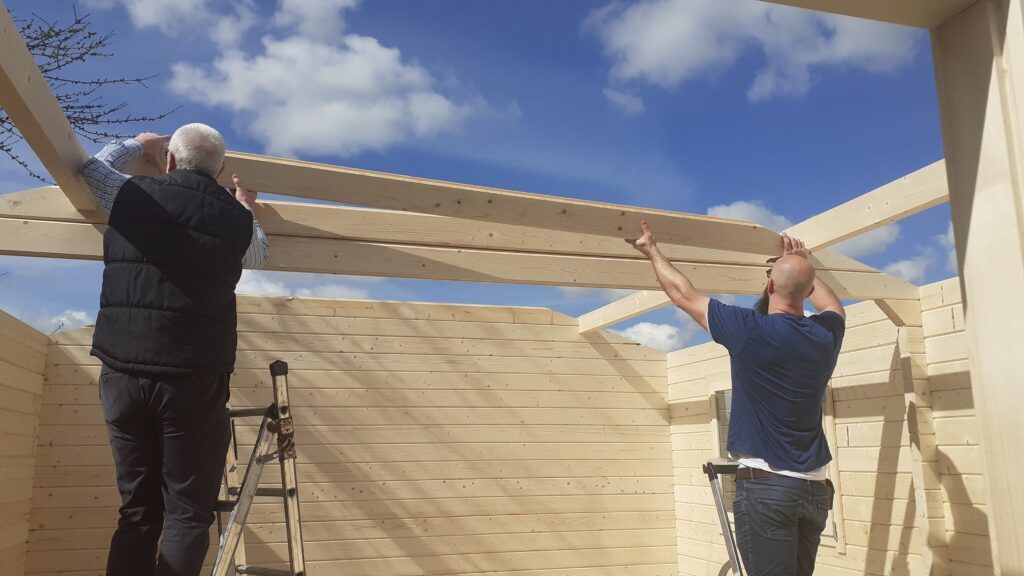
Roof joists going in 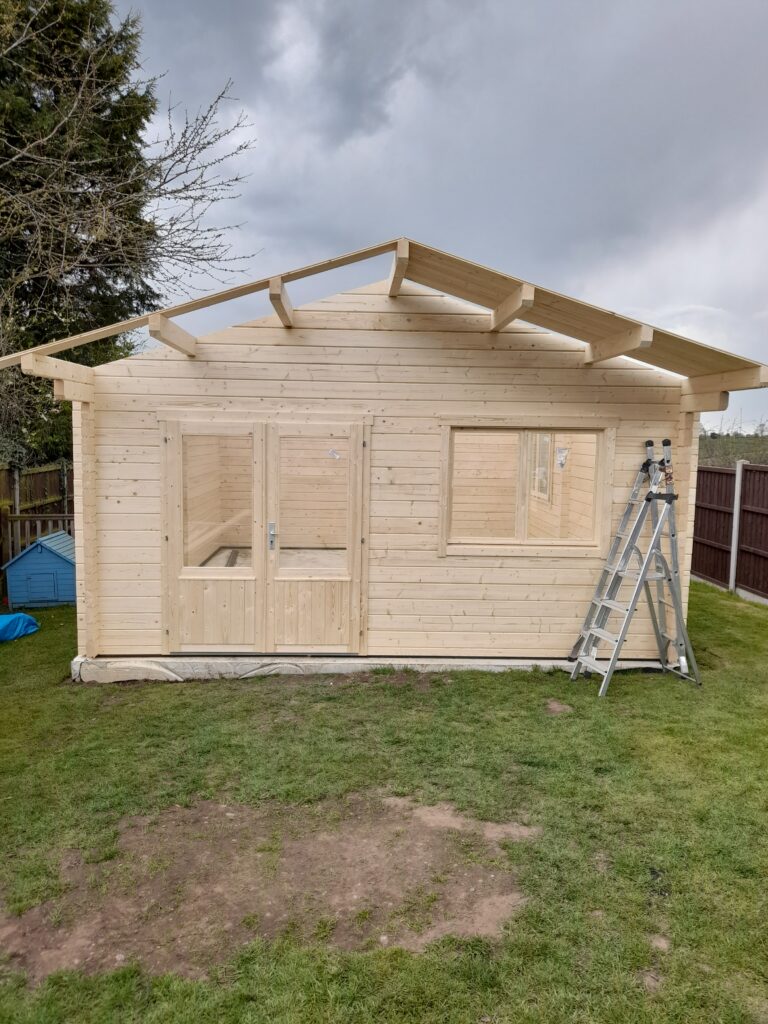
Roof boards going on. 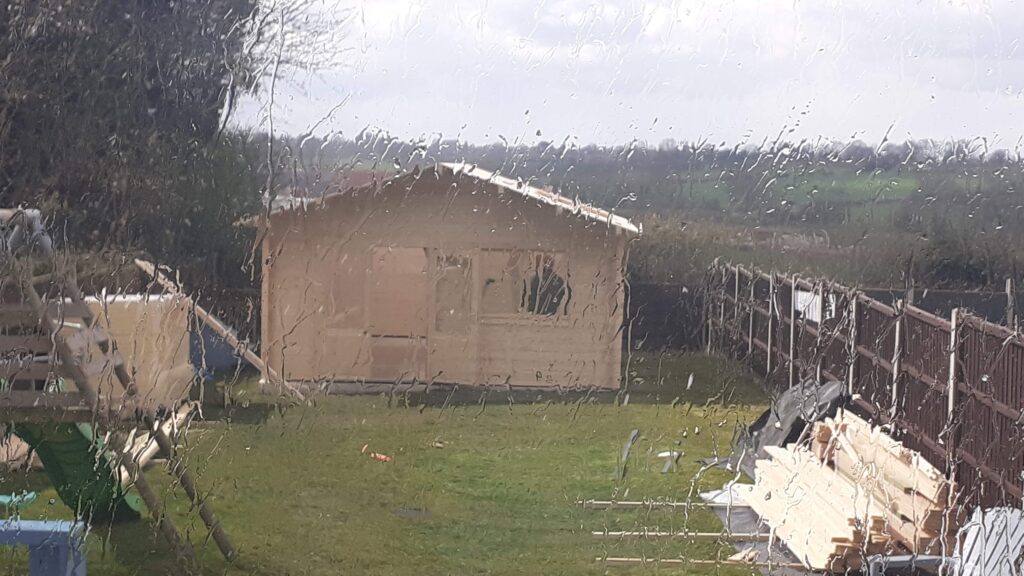
Rain halted progress 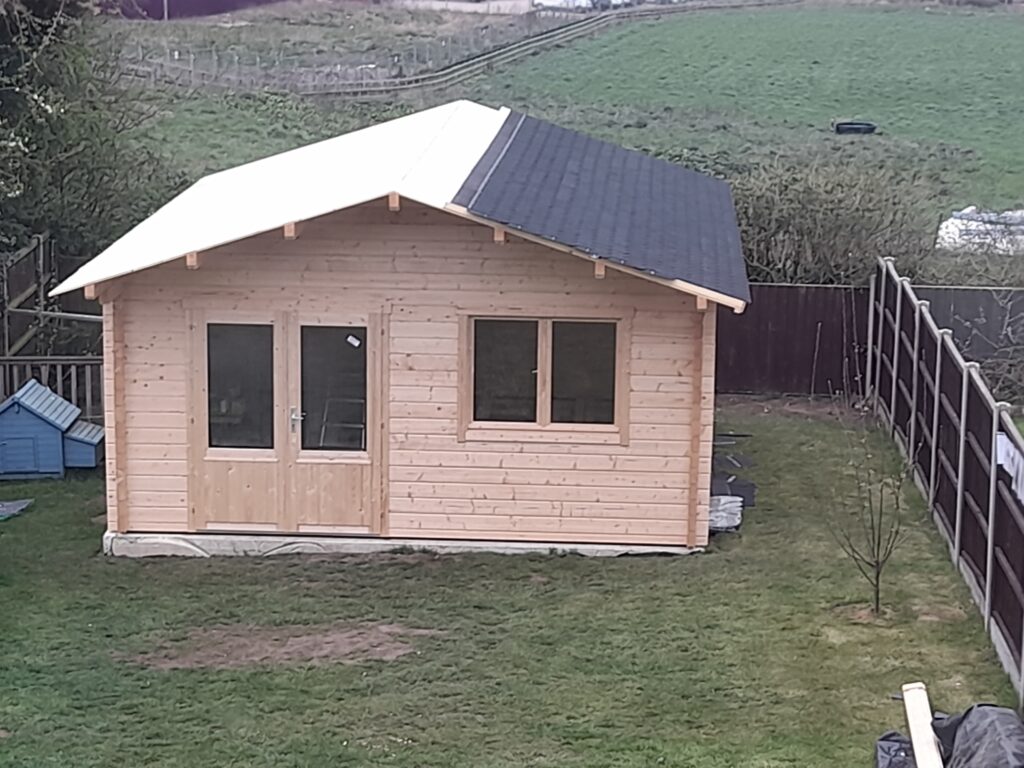
Half of shingles laid. 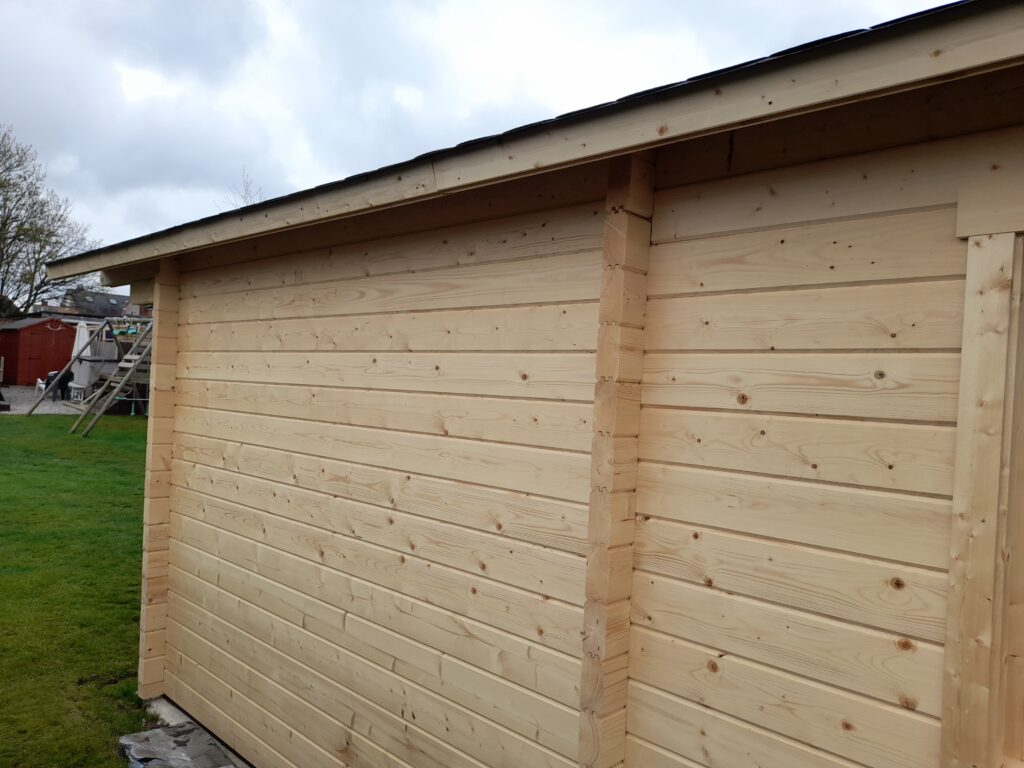

Almost finished laying shingles 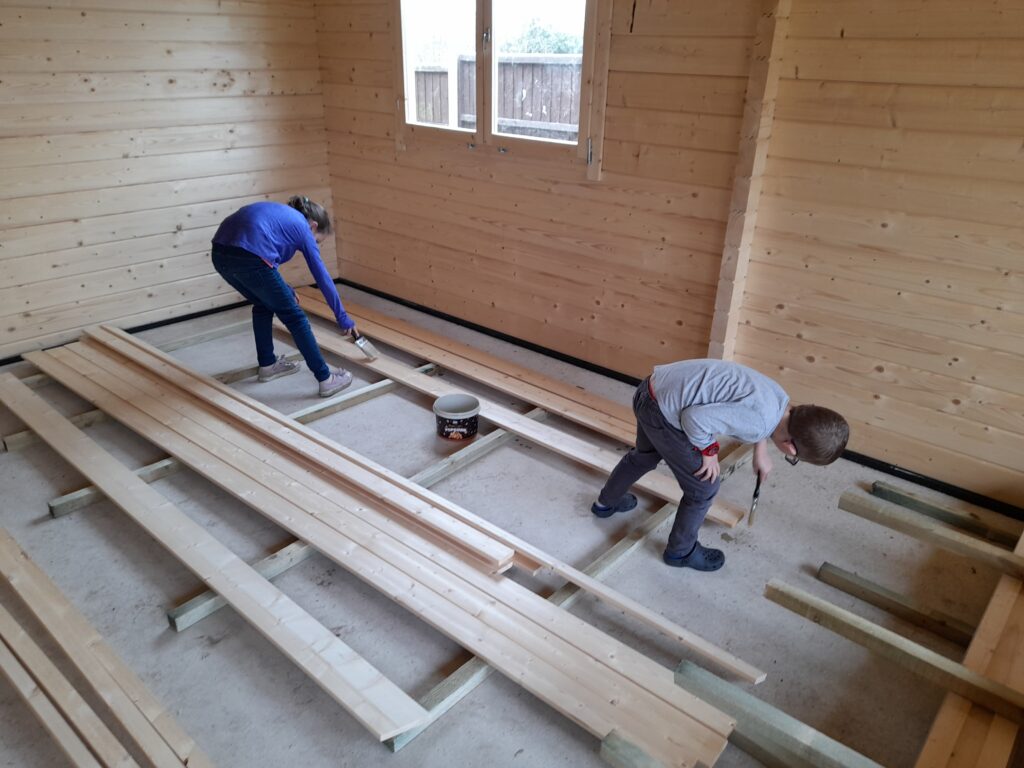
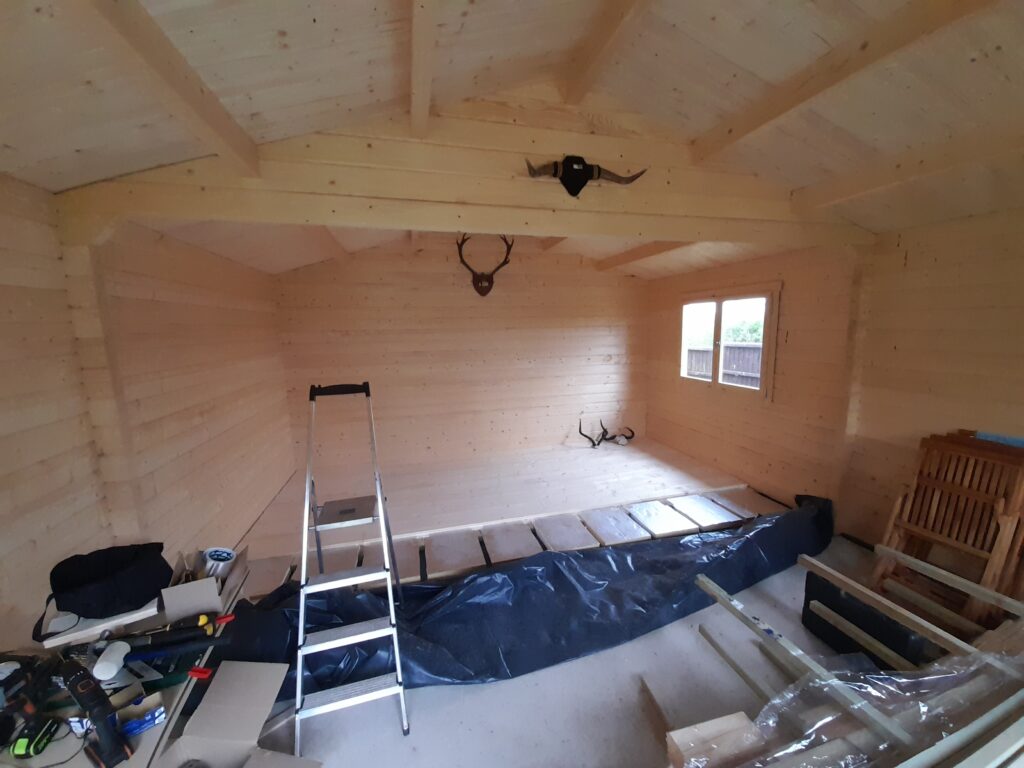
Decor being hung inside the cabin 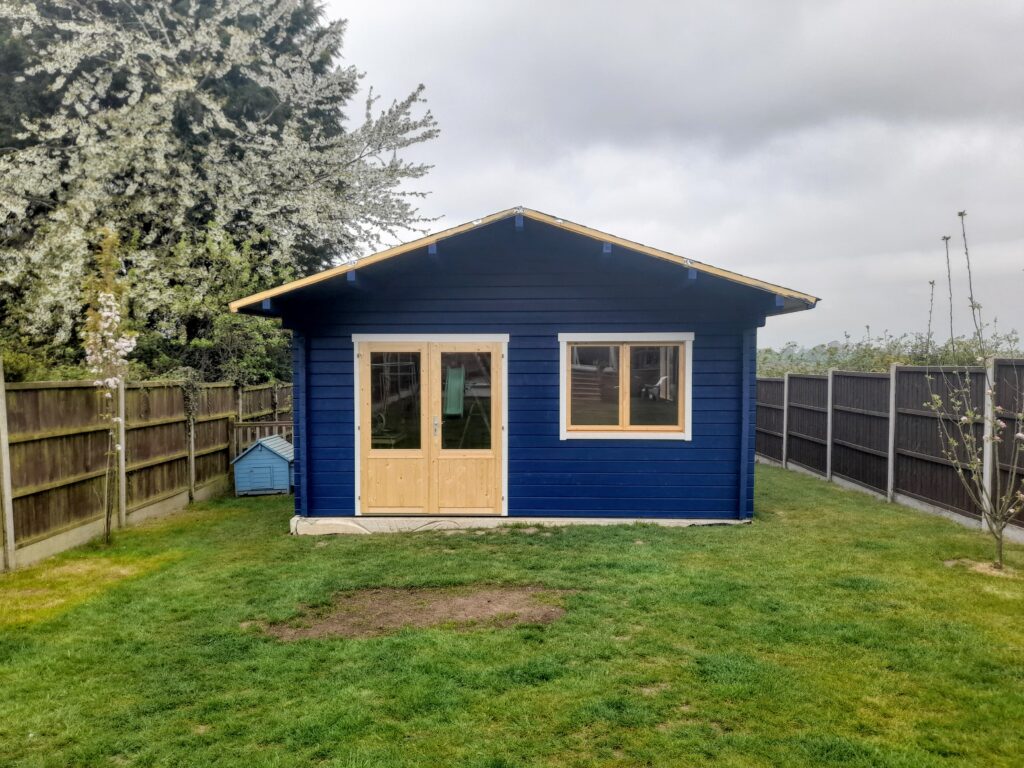
Painted complete excluding windows and door frames. 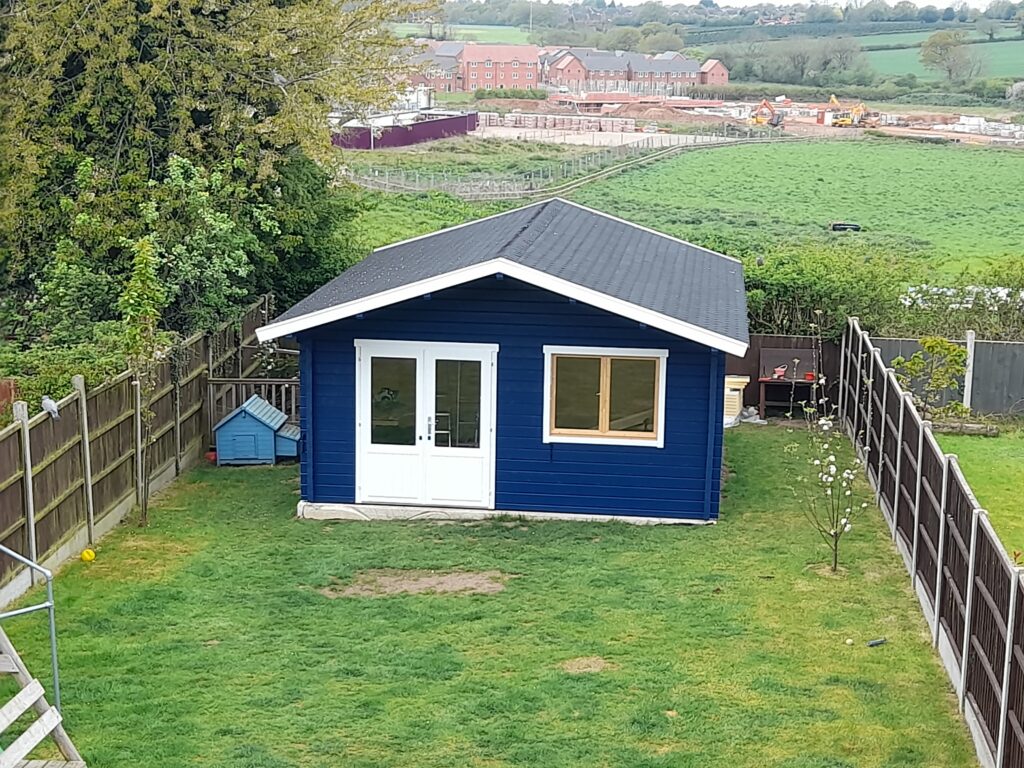
Cabin fully painted
Treatments
As for treatments, Karl went for our highly recommended “Sadolin Superdec Opaque Wood Protection – Satin”. This treatment comes at a higher cost to other brands but it performs much better and will keep your timber cabin well protected from the elements and looking fresh.
Sadolin Superdec Opaque Wood Protection Satin (Tinted) 12.5L – Insatiable was used for the main body of the Nieder. And for contrast, Sadolin Superdec Opaque Wood Protection Satin Super White 5L was used for the door & window frames as well as the bargeboards.


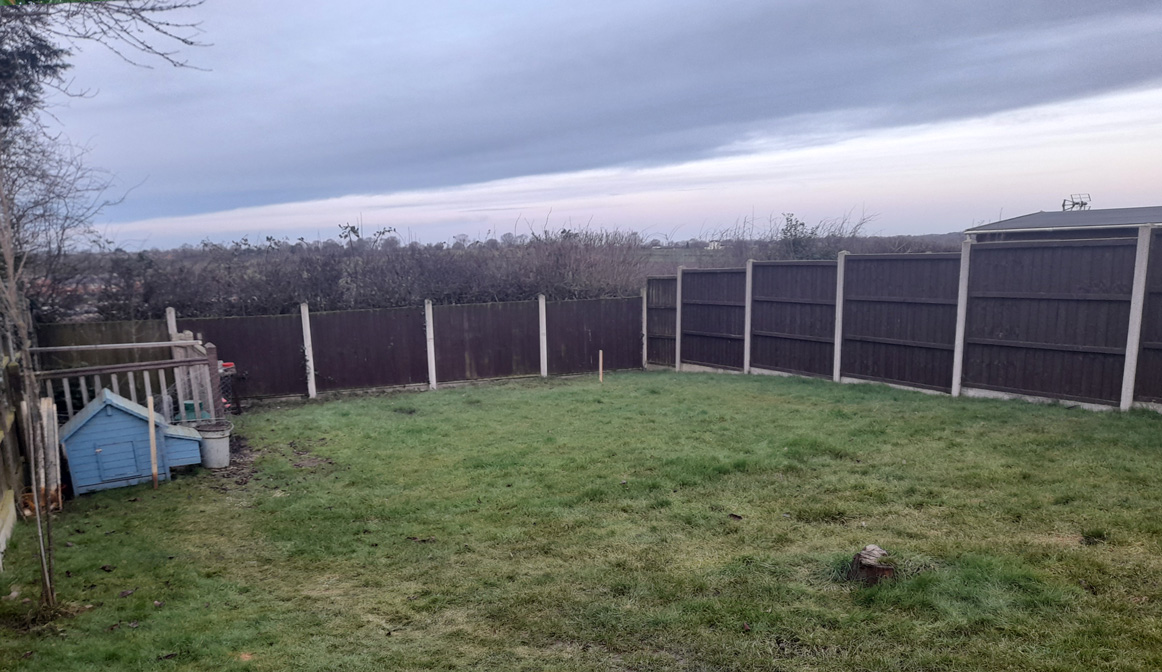
Nieder Log Cabin – Garden Room – Before & After
A look at the customers garden before and after the Nieder was erected.
Nieder Log Cabin – Garden Room – Finishing touches
Karl put a lot of effort into putting some character to the inside of his cabin. Throughout the cabin there are some great touches, adding to the outback theme decor. From wall mounted Deer antlers to license plates and rope lights you can see these great little touches all the way through.
One idea I had never seen before was the type of electrical cable for the ceiling lights. Karl didn’t want to use (sometime unsightly) electrical ducting for his light fittings, so he sourced some fabric lighting cables and secured them with cable clips, allowing the cables to move with the contraction and expansion of the timber. In my opinion a much more aesthetically pleasing alternative to electrical conduit. He also wired them into hidden away Wifi controlled light switches as to not have to run any cables up the walls.
The Many uses of the Nieder Log Cabin!
The main use for the cabin is an office, a place where Karl can get away from the house and work without distractions in a quiet, peaceful environment. Also, you may have noticed the gym equipment at his desk. Enabling Karl to work out whilst working at his desk, a fantastic convenient, space saving idea.
A family room. A superb place for the family to spent time together, playing games, having discos, and sleepovers. Karl and his family have a no-screens policy in their cabin, allowing them to spend some quality time together without distraction.
A lounge. With a large leather sofa and matching reclining chairs, Kirk and his family has a wonderful environment in which to put their feet up after a hard day at work or school.
With the internal dimensions of 4.66m x 5.64m, and a height of 3m, the Nieder Log cabin is plenty big enough for almost any use you can think of!
Nieder Log Cabin – Garden Room – Image Gallery
A selection of images I captured during my visit.


Conclusion
Wow! what a fantastic space Karl and his family have created! I love the idea of the no-screen policy in the cabin allowing the large family to spend quality time together. The “outback” theme throughout the cabin is an excellent touch, including the inventive cabling ideas. The large expanse of this cabin makes it incredibly versatile. Karl has taken advantage of this and created a fantastic multi-purpose him and his family can enjoy all year around.
It was a real pleasure meeting Karl and his family, I’m sure they’ll continue to enjoy their tranquil garden room for many more years to come.