


I have today received a really in depth and useful review from Mr Rob Withers. He has been very kind in spending time writing and illustrating this. There are good points, some not so good ones but it is a well written and an honest appraisal of Mr Withers thought process, findings and journey from the conception to the installation and finished building of the Petit Log Cabin
Mr Withers also made some small modifications to enhance the log cabin. He also opted for different foundations to those we supply. It all makes sense and there are some good points in here for prospective log cabin purchasers.
Initial thoughts.
I wanted to find a suitable attractive timber building for my wife who creates flower arrangements as a hobby. She wanted to have somewhere to store all her equipment and flowers as it can be a messy job. Also a cosy but useful working place on the patio with easy access from the house.
I had a very large leylandii tree against the boundary at the edge of the patio that needed removing. I decided to give some thought to removal of this tree and utilise the otherwise open space by providing her with a small log cabin. After further consideration and investigation into the type, design, specification and size of log cabins, I decided to go ahead with the plan. This would prompt me to have the tree removed and at the same time keep my wife very happy. A win-win situation.
But which Cabin?
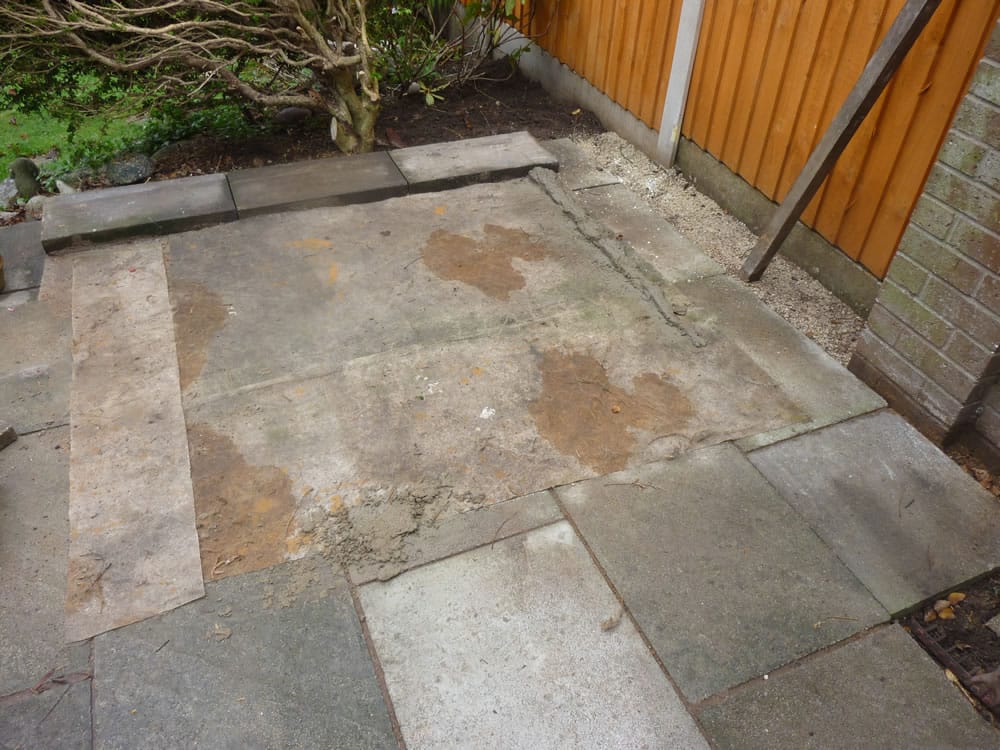
Having had the tree removed and made the paving made good, I was left with an available area on the patio of about 2.0m x 2.0m. I didn’t want to encroach on the space previously enjoyed but just use the available space gained by removing the tree.
I wanted a corner cabin, as in my opinion they look very attractive. Having a pitched roof, canted corner doorway and windows. The door, sheltered from the rain and with its half glazing, allows plenty of natural light into the cabin as do the two side opening windows.
Most cabins that I looked at were larger than the size I wanted. However after searching numerous sites, I found the perfect cabin on Tuin’s website. The Petite cabin although only 1.8m x 1.8m max is surprisingly roomy inside. Has good eaves and ridge height, with a wide door opening. A perfect size for the space available.
Pre-Planning
Before purchase, I contacted Tuin for detailed plans. They e-mailed me back with a floor plan and elevation details complete with all dimensions. This was extremely useful. When you have these details to hand before making the purchase it is important to do the following:-
1) Set out the cabin footprint on the ground to see exactly what size the cabin will be and the most suitable position to site it.
2) Placing your cabin on a suitable, stable and level surface is paramount.
3) Check the finished height at ridge and eaves level against boundary walls/fencing or other buildings.
4) Check the overhang of the roof and any other clearance needed between the protruding/interlocking edges of the cabin and any boundary. Remember to allow room for painting upon completion.
Having carried out these preliminary tasks, I talked this through with my wife and we decided to go ahead and order the Petit Log Cabin from Tuin.
Making the Purchase
The decision was made on a Sunday afternoon and after exchange of e-mails with Richard the order was placed and confirmation received, which was all very reassuring. Some days after I was able to arrange a convenient delivery date. I can also confirm that at this stage no payment had been taken as Tuin had agreed a date with me to debit my account, which was also very helpful.
Delivery
A delivery date was agreed. Again Tuin were helpful as I had to re-arrange delivery at a later date than first agreed.
Information from Tuin’s delivery department was forwarded before the delivery date and during the day of the delivery. The cabin arrived within the allotted timescale and the driver took his time in unloading the well protected cabin. It was sitting on a substantial pallet placed exactly where I wanted it on the driveway. It was surprising how well packaged it came. Complete with glazed door and windows perfectly protected and wrapped in a polythene cover to protect it from the elements.
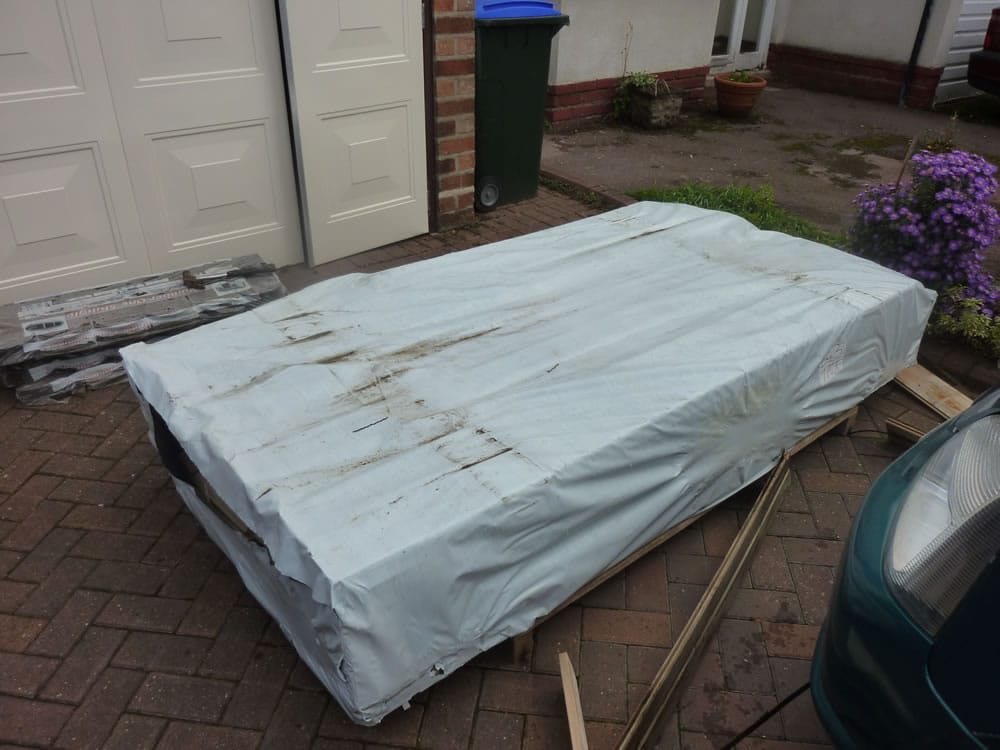
The package the Petit log cabin arrives in.
Constructing the cabin
The following tools are required:-
Builders level, hammer, handsaw, carpenters combination square, power drill/screwdriver with torx bit, 13mm spanner, line or string, timber levelling board. tape measure, screwdriver and plastic sheeting for temporary cover.

Tools used during construction of the log cabin
(My Note: Please also see the video below for suggested tools)
Sitting the cabin – the timber foundation ring beam
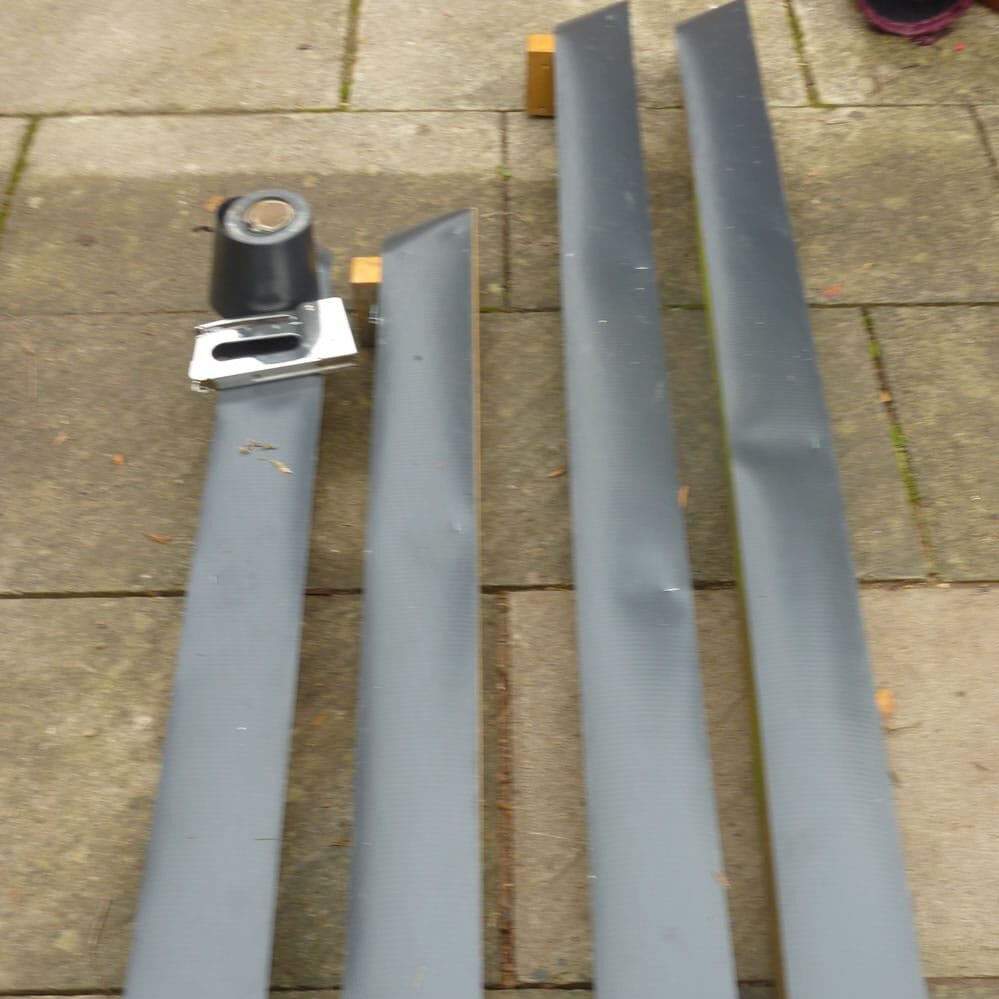
It is vital that the cabin sits on a sound and level base preferably on a timber ring beam. This is recommended to be approximately 16mm smaller than the external wall dimensions of the cabin. This allows the cabin walls to overhang the ring beam allowing water to run off the sidewalls clear of the base. Three long pieces of treated 75mm x 50mm were delivered with the cabin to use as a ring beam. However I wanted to keep the cabin logs at least 100mm from ground level.
I purchased four 100mm x 100mm timber fence posts to use instead. This size of timber meant that the weight of the cabin would be easily supported and uniformly distributed on the ring beam. Even in places where the beam was not in contact with the patio paving. It is absolutely essential to ensure that the ring beam is level in both directions.
Leveling
Our patio sloped away from the house and by placing the timber levelling board across the paving where the cabin was going to sit; the difference in level was 75mm from front to back and 25mm from side to side. It was therefore necessary to make up this difference in level before the ring beam was put in place. This was achieved by bedding and levelling three 600mm x 300mm x 50mm paving slabs. They were placed on top of the existing paving slabs at the lower end.
Having cleaned off the paved area and marked out the cabin position with chalk. I placed a weed control fabric over the whole area.
Weed control matting, an excellent idea to stop anything coming through.
I cut the two longer timber posts to size and mitred at the corners. Followed by the two shorter posts, which were cut slightly longer than required. When I saw the exact size of the canted door opening, I cut and mitered them.
Damp Proof membrane
I stapled a damp course membrane to the underside of the posts to protect them from surface water from the patio. Then I placed them in position on the paving and when satisfied they were level all round, screwed them together and checked for square. Use either a builders square or measure across corner to corner dimensions.
This is also a very good idea and can be stapled on or use the felt roof tack nails. Using DPC also helps to create a seal between the base and the timber being used as a foundation.
It is well worth taking the time making the effort to set out and install the timber ring beam as it provides a solid and level base upon which to construct the cabin, ensuring that it will be horizontal and upright and stay that way in the future. It is also reduces assembly time and ensures the future longevity of cabin.
-
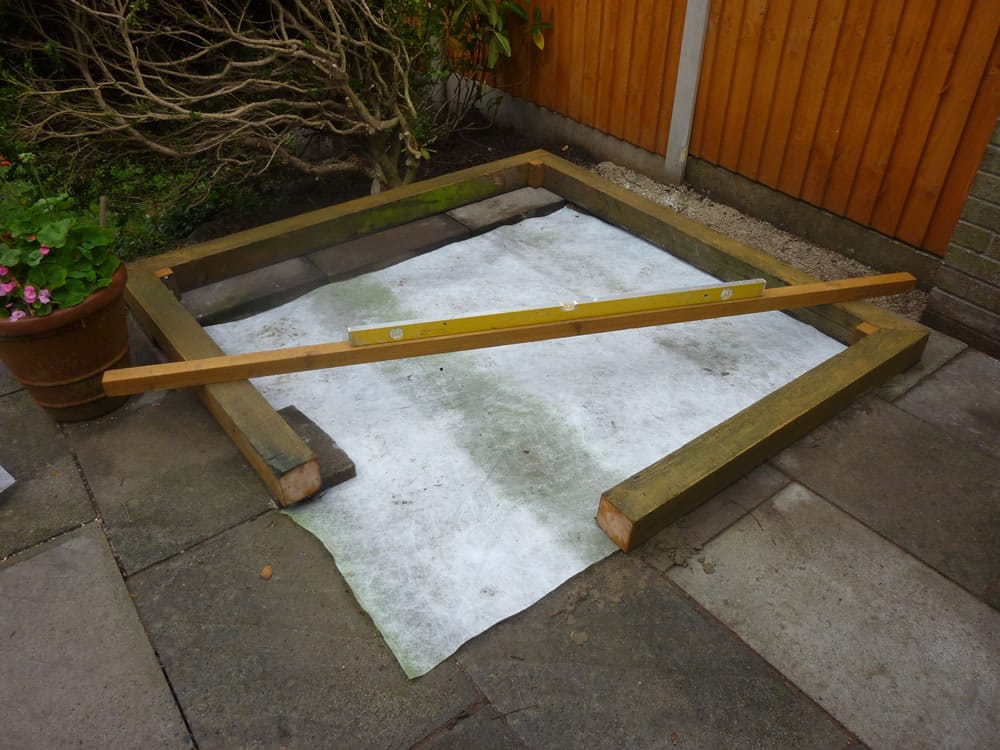
- Setting out the base for the Petit Log Cabin
-
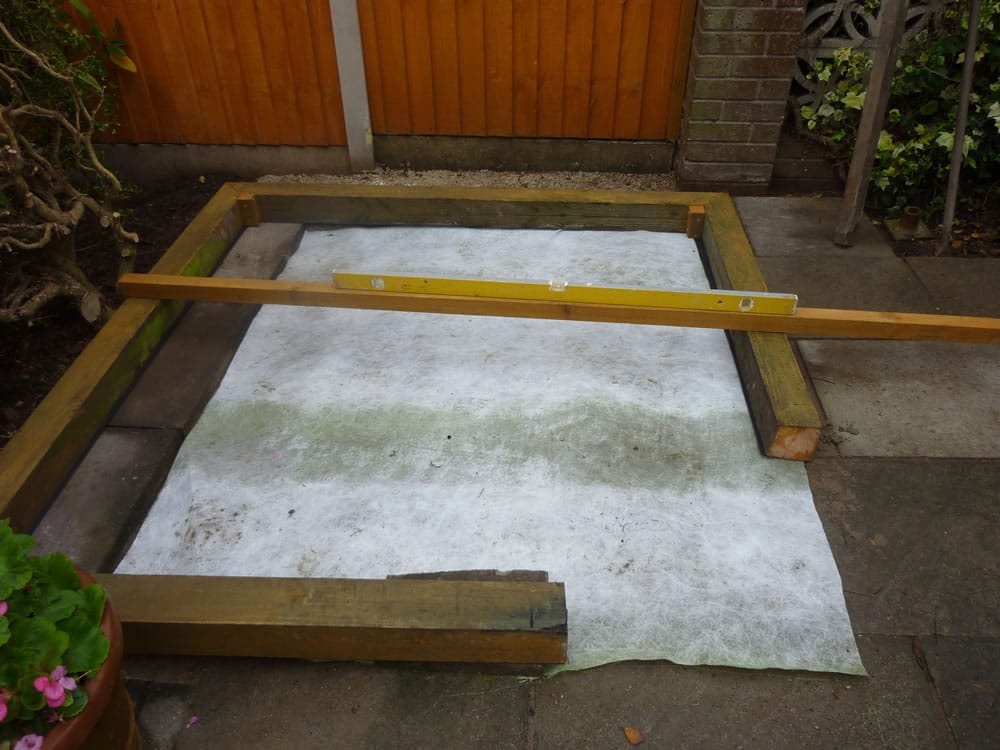
- Mr Withers checking the opposite plans to make sure everything is entirely level
However, if the area where the cabin is to be placed is already level and able to support the load, it would be acceptable to sit the cabin on the 75mm x 50mm timbers supplied. I note that Tuin supply various pressure treated, hardwood and plastic profiled drainage beams as an optional extra, and it may be worthwhile to invest in these if the cabin base is in close proximity to the ground.
Placing the logs – building the cabin
Tuin supply an instruction sheet and drawings that identify the numerous components and the order in which they are to be placed on the foundation and these parts are easily identifiable.
The placing of the 28mm logs commenced and continued up to window cill height, a relatively straightforward and pleasant operation. Logs lock together reasonably easily but by using a hammer or mallet and the short installation block supplied to gently tamp down each log ensuring the tongue and groove is a good fit along each length and corner joints are engaged correctly.
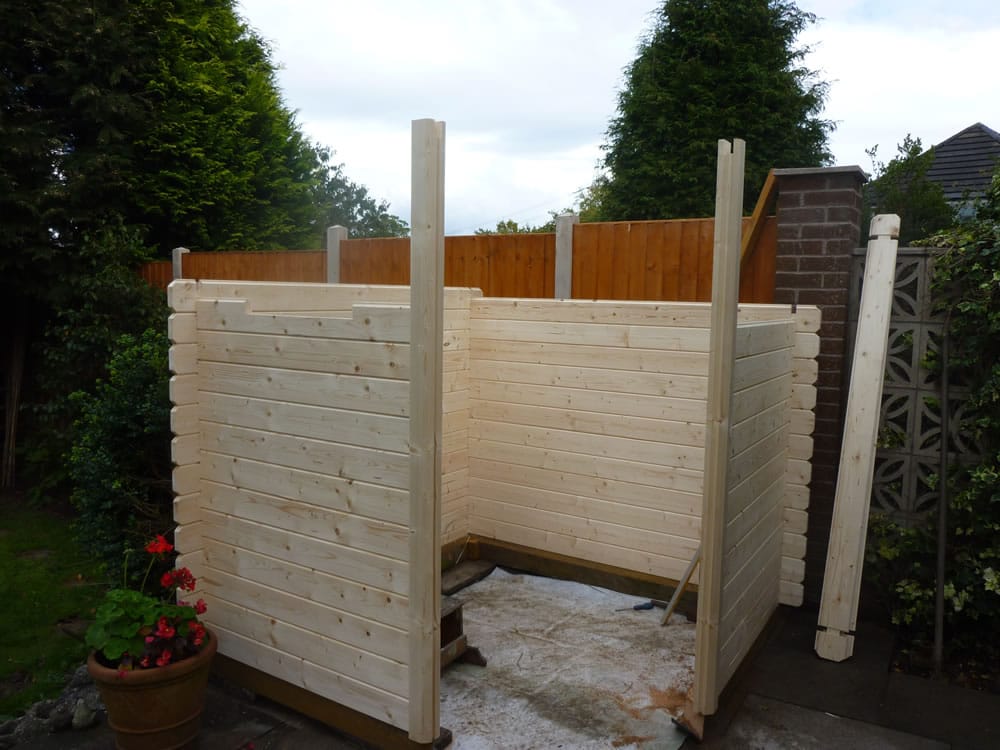
As Mr Withers writes, it will be necessary to use a mallet to tamp down the logs as the joints can be quite tight.
The window height to the right hand side of the doorway we cannot alter. However we recommend lowering the left hand window if required. I fitted both windows at the same height as per the drawing, which is in line with the head of the door frame.
Fitting the Windows
The windows should be placed into position at this stage together with the two door pole uprights at the door frame opening but do not fix these as they have to be positioned against the door frame before it is screwed into position. Assemble the door frame by gluing and screwing the head and cill to the jambs with the screws provide. Place on one side for fitting later. The cabin does not have a projected cill section so I purchased a piece of 125mm x 40mm timber and made my own, screwing it to the bottom edge of the door frame. In my opinion, this looks aesthetically better but displaces the water away from the door.
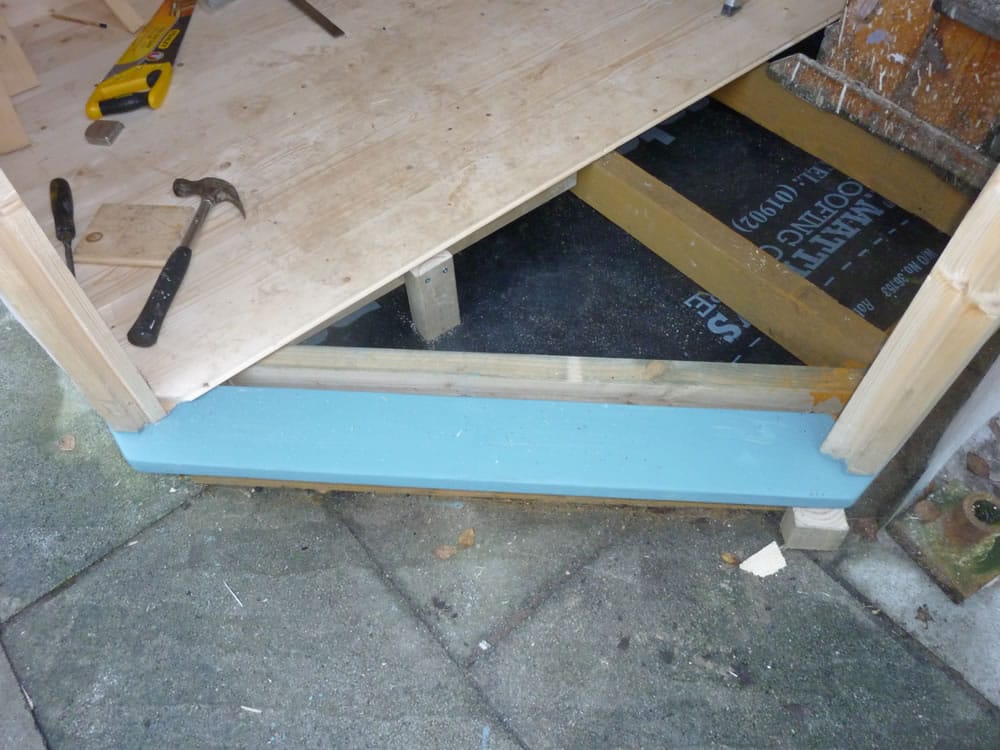
Mr Withers enhancement modification with a cill.
At this stage check that the logs are level and both uprights at the door opening are vertical in both directions. Complete the assembly to eaves level. Place the door frame in position adjusting the height of the frame if necessary by a packing underneath it. Position the door poles tight up against the door frame, leaving an equal margin either side between the door poles and frame on the outside face and screw the uprights to the inside of the door poles and door frame. This fixes the door frame into position.
Fitting the Door
Offer up the door to ensure that the opening is square and that the door will fit correctly. The door is best left until the structure is completed to save any damage to the glazing whilst constructing the roof. Complete the foundation ring by adding the fifth short timber section beneath the door opening. I used 50mm thick timber for this section.
Mr Withers completing the main ring section. As he mention in his review, where possible keep to door until last as this gives you room to move and saves and inadvertent damage if hit with tools or ladders/
It is now possible to fit the triangular section (soffit) above the doorway, but check it is square before fitting. I positioned this 20mm above the bottom edge of the log. It can be fitted after completing the roof but access is easier at this stage.
Constructing the roof
Take time to familiarise yourself with the component parts of the roof. Each rafter is cut to exact length and individually mitred to fit together at the apex. Fit the four rafters that are located midway along each side first. Each of the top logs has a pre-drilled hole to take the coach screws that hold these rafters in position. At this point it was necessary to seek assistance of a friend to hold each rafter in place whilst drilling a 3mm pilot hole and driving the coach screws into the rafter using a 13mm spanner. The final four rafters can then be placed into position at each corner and fastened at the eaves and apex.
The roof boarding was packaged in four bundles each length mitred at both ends. Commence by installing the first (longest length) to each side of the cabin, these boards overhang the cabin to form a soffit. With hindsight I should have removed the groove from the first board as it proved difficult to fit the fascia board (noted as the eaves board in the materials list) later on. It was also necessary to cut some of the roof boards to length prior to fixing them as they were too long. To finish off the roof the fascia boards were fitted to the soffit boarding.
I purchased four additional lengths of 20mm x 30mm timber to attach to the top of the fascia board to form an extension and provide increased overhang for the roof covering.
Finally, the whole roof area was covered permanently with an approved sarking felt. This protects the timber, prior to fitting the shingles which were laid on top of the felt.
Fitting the Shingles
To ensure correct information about the installation it was necessary to contact the manufacturers IKO Technical Services. (My Note: This should not be necessary as all information can be found here: https://www.tuin.co.uk/IKO-Felt-Shingles.html including instructional videos) They were most helpful and mailed me a technical guide for the installation, which I read in conjunction with the information from Tuin. The first course of shingles, the starting course, is fitted slightly overhanging the eaves with the cut-outs facing upwards. This provides a length of straight material along the entire edge of the roof. The second course is laid over the starting course, cut-outs facing down, to provide a double thickness at the eaves. It is important to stagger the shingles so that the straight joint between each length of shingle is overlapped by the shingle above it.
This proved to be a straightforward process. The only addition made was to fit an undercloak material at the eaves (obtainable from most builders merchants/timber suppliers) to support the overhanging edge of the shingles. This consists of a cementatious weatherproof board cut to 100mm in width and laid onto the eaves/ fascia boarding along each edge of the roof.
Finally, I fitted a timber finial at the ridge, purchased from the decking section of a DIY store
The floor construction
An optional timber floor is available from Tuin but I decided to fit a suspended timber floor. This consisted of 100mm x 50mm joists, purchased from the local timber merchants; these were housed over and fastened to the ring beam at 450mm centres and sixteen lengths of 1.8m tongue and groove floor boarding sufficient to complete the floor.
-
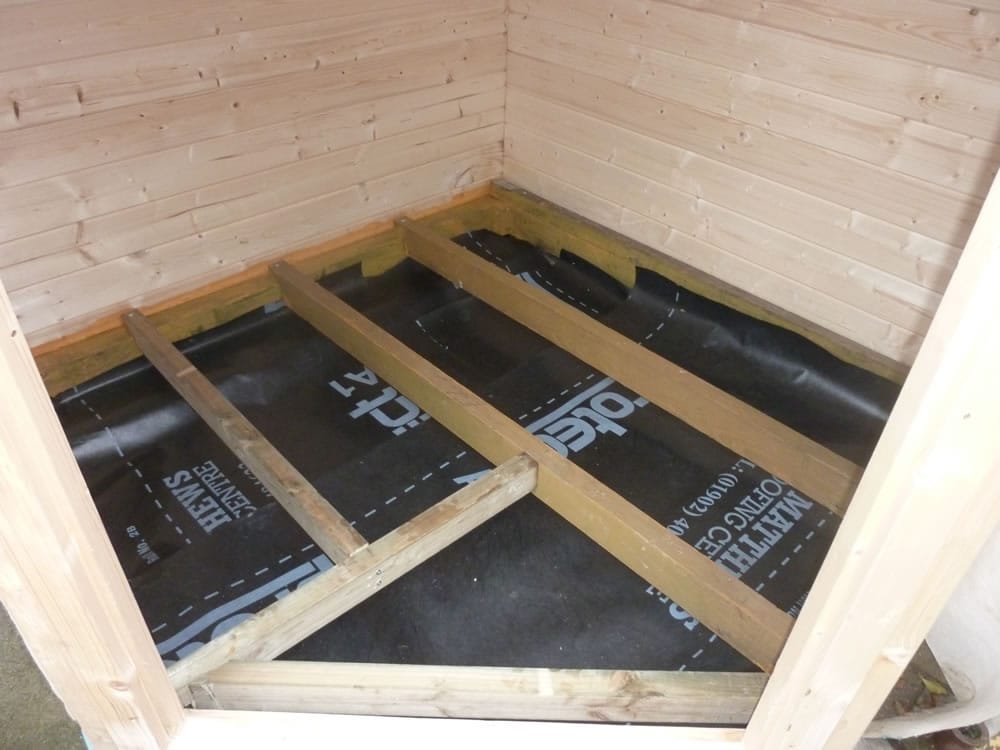
- Mr Withers floor construction.
-
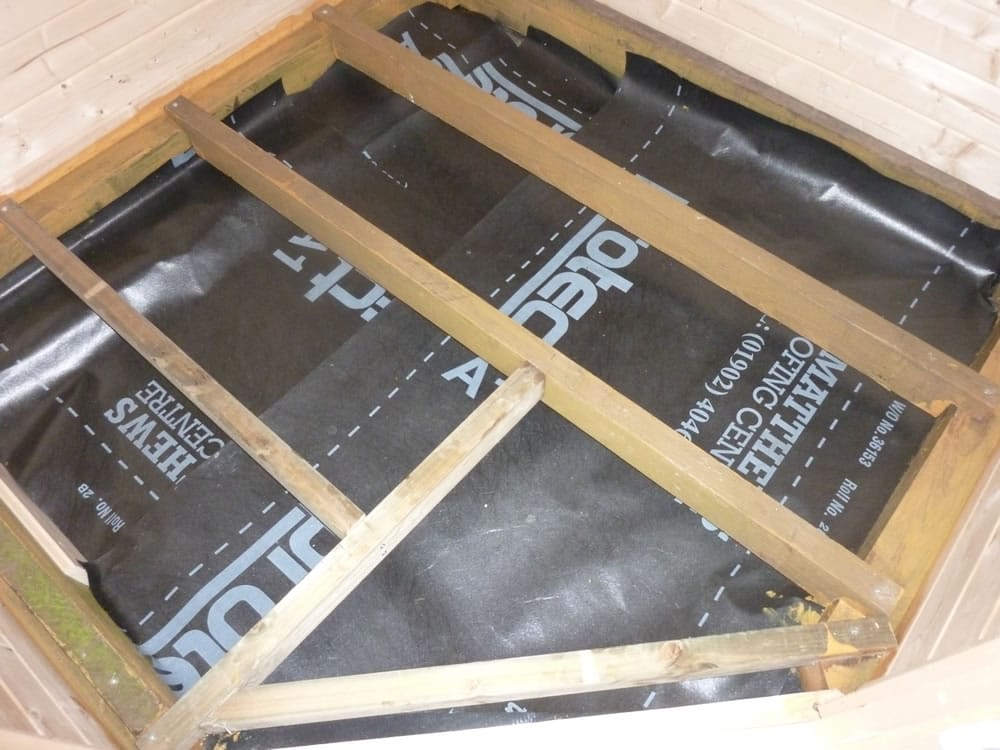
- This is a very good structure for the floor and an excellent use of a damp proof membrane curled up and the edges.
Completion
The final job consisted of fitting the door hinges into the pre-drilled holes in the door and frame. The position of the pre-drilled hole in the door frame for the lower hinge was incorrect and it was necessary to drill a new 7mm hole to locate the hinge into its correct location. The door came with a fitted mortice sashlock and all we required was fitting the euro cylinder and lever handles. Similarly, the catches for the windows only required the handles to be fitted. The ironmongery was of good quality.
The external and internal door frame trim as supplied was fitted and along with some purchased 75mm bull nose skirting, completed the job.
Conclusion
Tuin has put a lot of thought and effort into designing and manufacturing this log cabin. It sets a standard that must be difficult to beat at a most competitive price. The kit contains everything required and only basic skills and tools are needed to build it. The Tuin team were very supportive from the pre-order stage to delivery. They are available to answer questions should they arise.
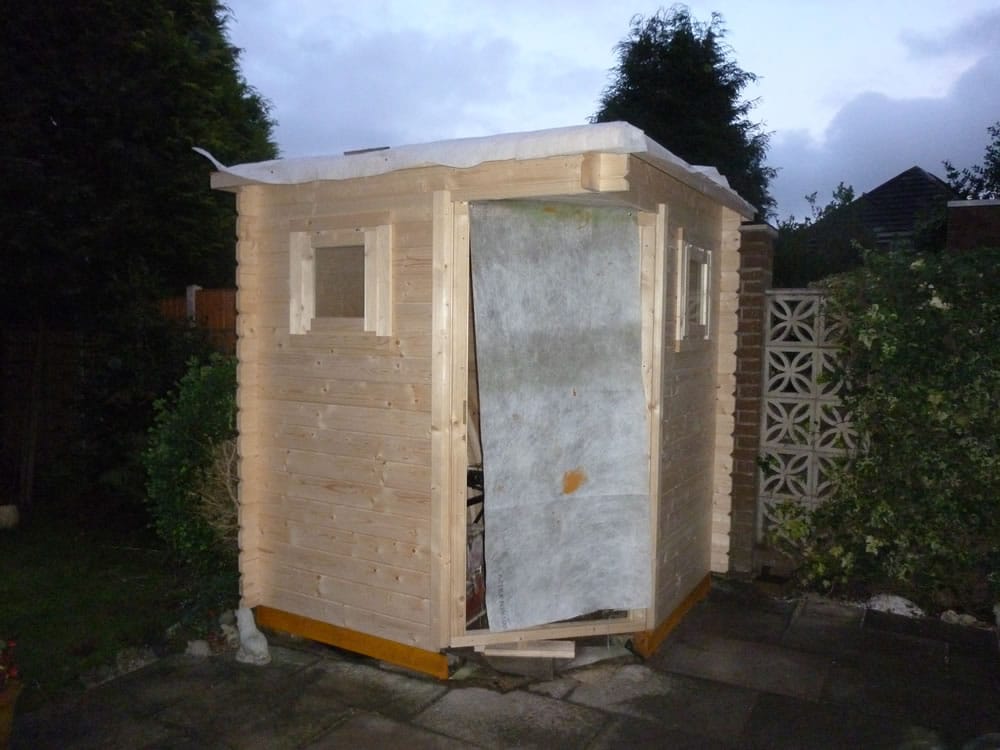
Overall, I am delighted I chose the Petite version of this design as it is amply big enough. This little cabin fulfils all of our needs and I wish I had a spare corner, to construct an additional alternative style from their delightful product range. As a result, we highly recommended this product.
Thank you Tuin Team.
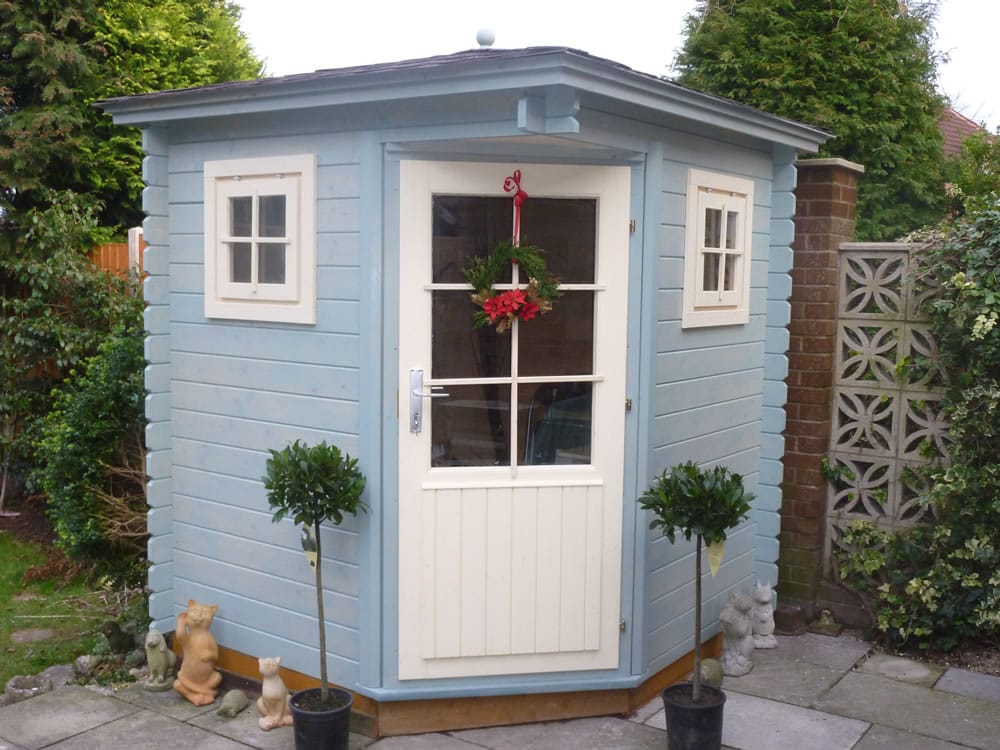
Mr Withers final completed log cabin.
I very much thank Mr Withers for his time in writing this. Not all was plain sailing. Yes with the pyramid roofs there is some alterations on occasions with trimming the roof boards, please expect this. It was interesting how Mr Withers chose to do the base and foundation and his own floor. This is why we try to give you the options. See this post why our floors in log cabins are an option Why pay extra if you don’t need to?
I encourage all customers to contribute to this blog with their findings and experiences of Tuin and Tuindeco. If you feel able to we would love to hear from you.
Other Posts and thoughts
- Inside a log cabin – selection of pictures inside customers log cabins
- Petit log cabin review
- Onyx Log Cabin Review from Mrs G
- Wolfgang log cabin review and how long it took
- Lukas log cabin review – Mr W
- Mr B’s twisted log complaint – Heino log cabin
- Shepherd Hut review by ME
- Asmund log cabin review – Mr F
- Log Cabin delivery – Mr S
- Mr T log cabin in the woods – Edelweis – A great timber framed base