


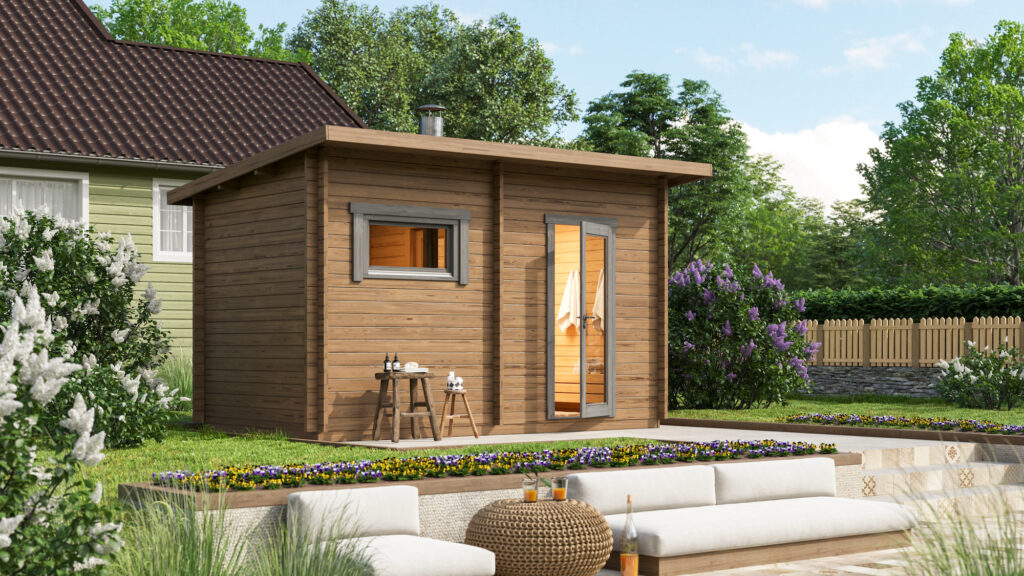
New to 2023 we have launched a new range of garden sauna houses. They range in styles and sizes but their method of construction is all relatively similar. We’re going to dive into the processes here involved in as much detail as possible.
Very similar in design to our log cabins in terms of their construction method it will also be beneficial to read our extensive fitting advice on log cabins
Please be sure to read this in conjunction with the paper documentation delivered with the product. This will be specific to your order – Example instructions
Home Garden Saunas – Fitting Services:
Before we get into it, you may not even want to install the product yourself? no problem as we do have fitting services available for these Home Saunas
Tuins Own Fitting Service:
If you would like the building installed we do offer our own installation service as a company. We have a specialist and skilled team whom can schedule in you conduct the fit on your behalf. Sounds great right? Though we have to be honest and warn you there are much more affordable options. This brings us onto our next option.
Self-Employed Installations:
As well as our own Tuin fitting service we also work with self-employed installers whom we recommend. Working for themselves our recommended self-employed fitters are cheaper and come highly recommended.
We pass the details to you on request if you wish to ask the installers for a quote.
External Tradesmen:
Please make sure any Tradesman are given these instructions before working on your building to avoid mistakes in installation.
Home garden saunas – Fitting Guide
So let’s start from the ground up, following the build sequence in as much detail as possible. Throughout the guide, it’s worth noting that not everything is possible to cover in full. You should remain vigilant while conducting the build yourself. I’ll be using extracts from a single building for this but they’re all very similar. It will still make sense with any model chosen.
I will be using the Jakobsad 3.72 x 2.08m sauna house
Hard Standing / Bases and Foundations
The Hardstanding / Base is what the whole building will sit on top of. It should be made to at least the min size as stated on the product page. The Foundations are what separates the building from your base, thus protecting the first logs of the sauna house from absorbing any damp.
Hard Standing / Base
A good base for your sauna cabin is essential for the stability and durability of your building. Only a completely 100% level and supporting base can guarantee a perfect assembly of the wall logs, doors, window frame and roof parts. The minimum base size required is to the advised ‘Footprint’ of the sauna house. All our sauna product pages show this.
A base can be made from many different things, Concrete, Slabs or a Timber frame. No matter whats its made from, they should all meet the same criteria.
- The base should be 100% flat and level throughout the entire footprint service of the chosen home sauna house
- The base should be strong enough to house both the sauna itself and its contents
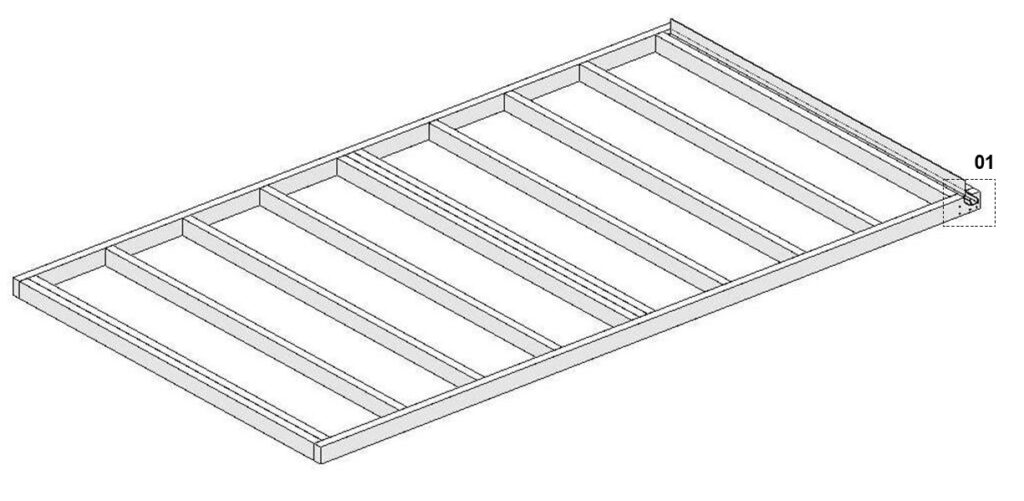
Timber Foundations
The range of Home garden saunas are all supplied with a timber foundation sub-frame. This lifts your sauna off from the surface of your base protecting it from absorbing any damp that might build near its perimeter. The foundation timbers will be pressure treated for longevity
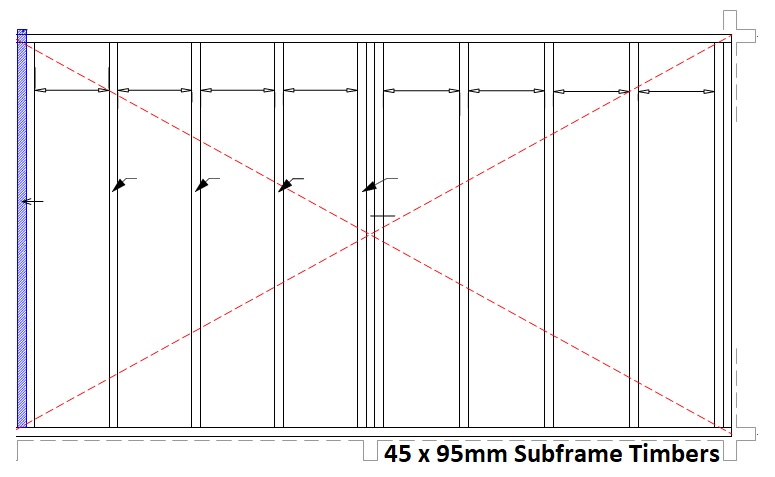
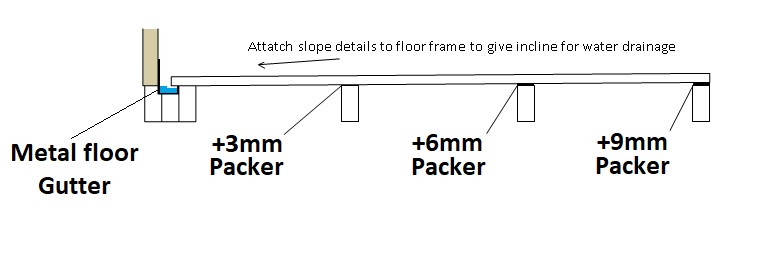
You will notice as building the subframe that the instructions will tell you to add some packing strips of different thicknesses ontop of some of the middle subframe joists, This will make more sense later but the idea is to create a very shallow tilt to the floor inside the sauna section of your building, thus allowing water to drain away towards the metal floor gutter system.
Installation Tips for the subframe:
- When laying the subframe onto your base, it is recommended that you think about damp proofing. A Damp Proof Course laid underneath every section of wood will protect them from rising damp from the base underneath.
- Consider applying more treatment to these framing timbers, you can never be to careful
- Spend time on this part of the installation to make sure it’s been constructed perfectly square in each corner. Also that it’s left and flat throughout
- If you have made the base larger than the subframe, check that you’re happy with the positioning as it will be very heavy to move later on.
- Be sure to remember to fit the metal drainage profile at this stage
Home garden saunas – Wall Construction
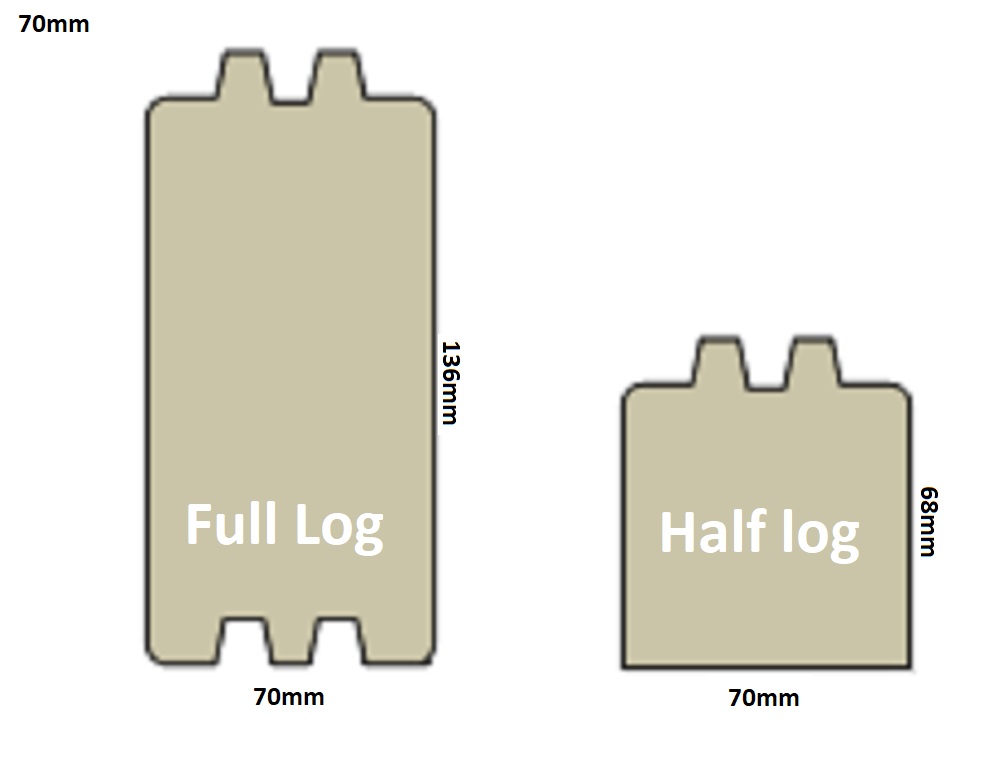
Now it’s time to start adding wall logs on top of your completed subframe. The logs are 70mm thick so can be on the heavy side, handle them with care and take your time. The first thing you will notice is some logs are half the height of most of the other. These, you may not be surprised to read, have been appropriately named “half logs”. When added they will allow the half and half interlocking log construction method to begin.
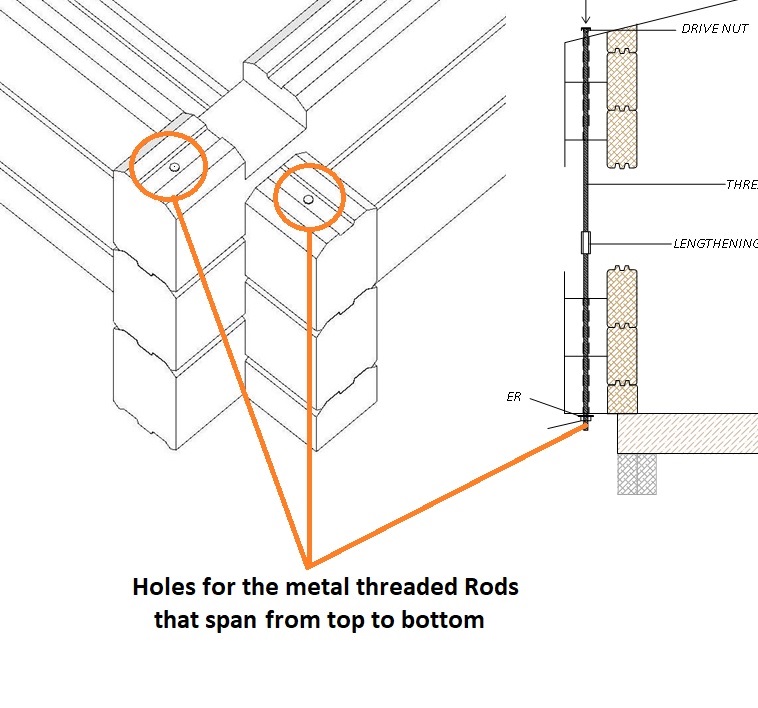
You will also notices that there are some pre-drilled holes with in the ends of each of the logs beyond the notch, these holes are there to house threaded metal rods which span the full height.
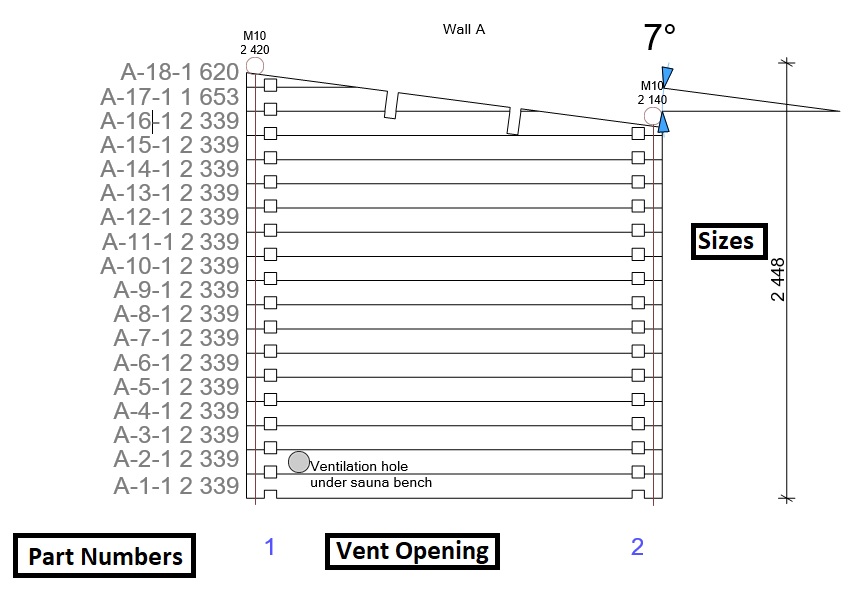
So you may be asking yourself “how do i know which log goes where moving upwards for my Home garden saunas?”, thats where we need to look at the elevation drawings supplied within the package, the elevation diagrams will show a fair bit of detail including heights and part numbers.
They will also show the locations and sizing of any door and window openings featured within the chosen building and any ventilation holes that need to be drilled out in preparation for later.
Be sure to keep checking for level and square as you work up the layers of the building. It’s much easier to correct any problem areas early, as when logs get stacked ontop things become much heavier and difficult to adjust.
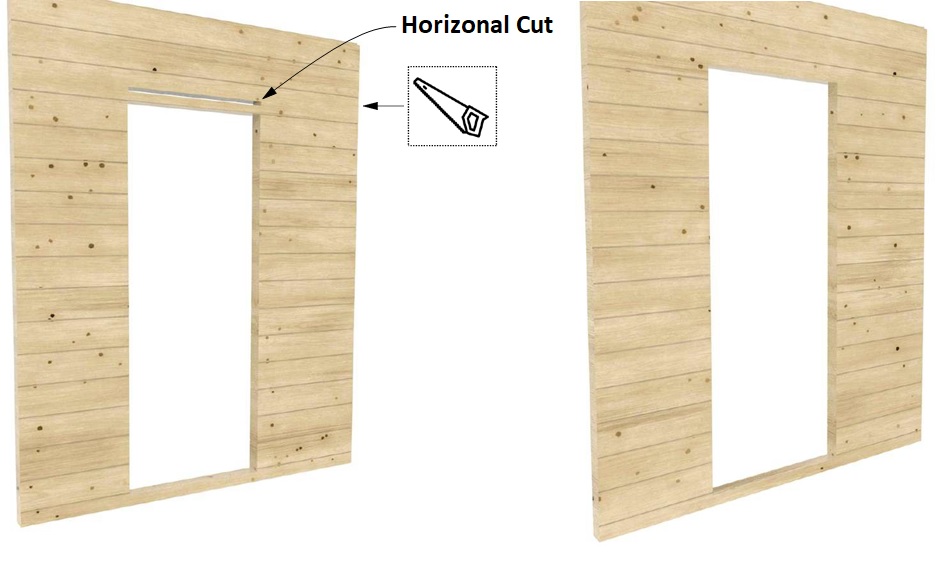
When it comes to the door and window openings in the walls, in some models they need to be extended slightly on site by cutting into the log at the top, There are illustrations included showing how this can be done. A handsaw will be fine for this but a circular, electric saw will make this much easier.
Home garden saunas – Roof Construction
Once all of the walls are constructed, take this time to perform another check for level and square, as when the roof parts start to get installed it will be extremely difficult to change anything afterwards.
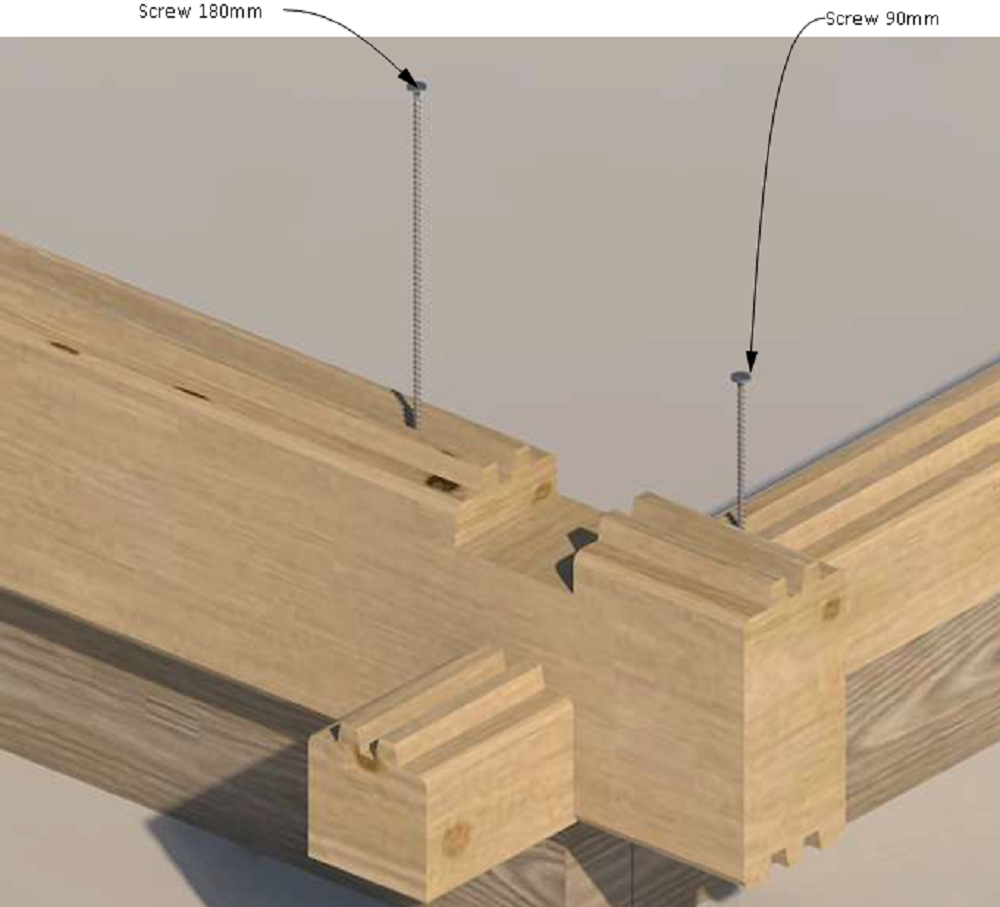
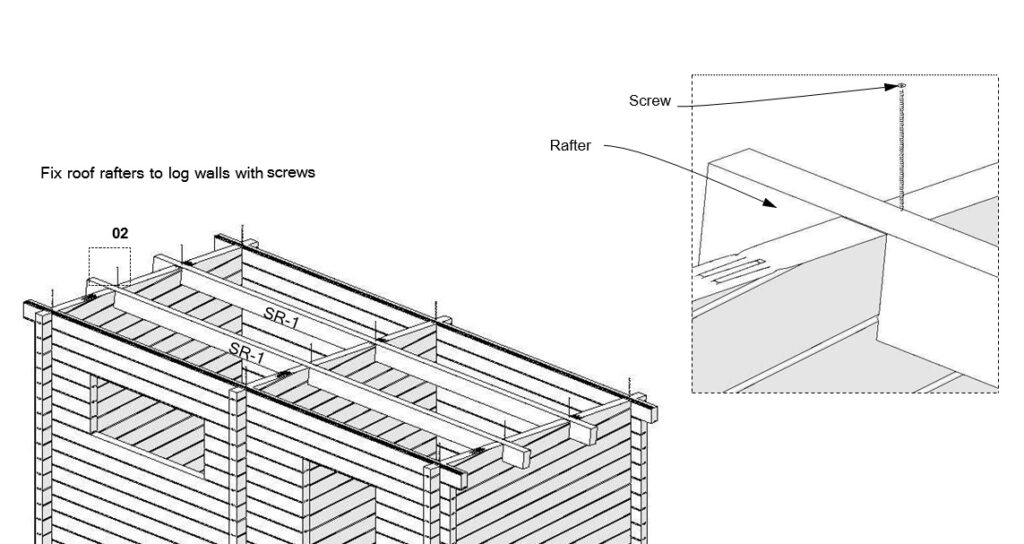
The first part of the roof to lay are the roof beams/purlins. They will span from one end of home sauna house to the other. Slots will be pre-cut ready for them to slot into. Once they’re firmly in place use the screws provided to secure them.
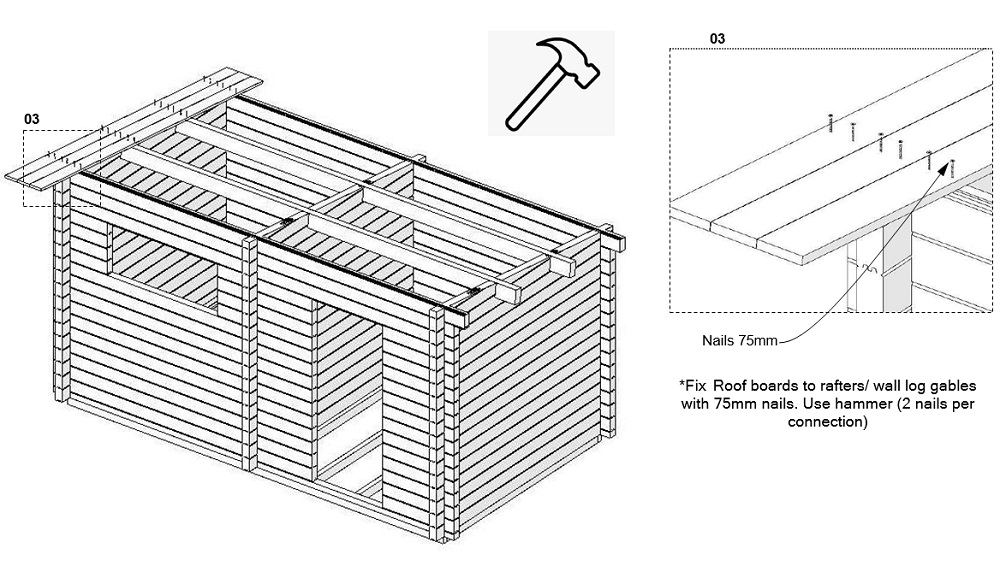
Once all of the rafters are fitted and secured, it’s time to move onto the next stage which are the T&G roof boards that form the solid roof surface, You can start laying the roof boards from either end, tongue facing inwards or outwards. The most important thing to remember when laying these boards is
- When laying the roof boards, please ensure that you use two nails / screws per board per Junction. you should aim to drive the fixing through with in 10 – 15mm from either end at each point.
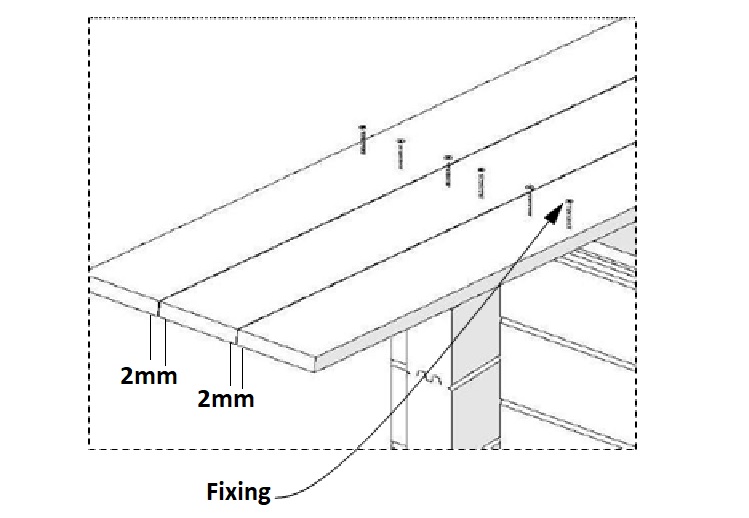
- When laying roof boards you should ensure a 2mm expansion gap is left in-between each board in sequence, this allows space for growth if the boards swell slightly in the wetter months of the year
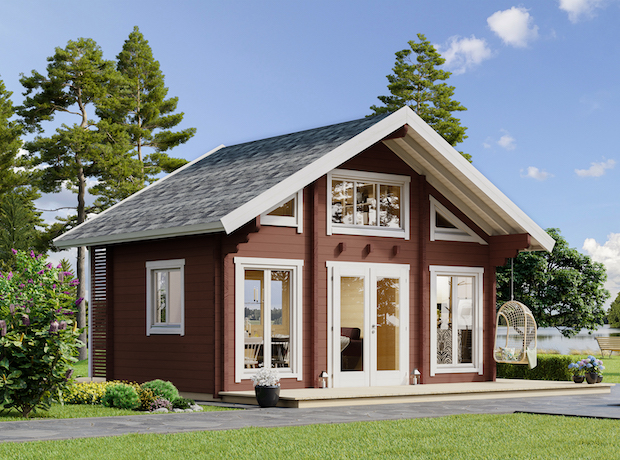
Once the roof boards are all laid, the next step will depend on which type of roof your sauna house has, and also what roofing material has been selected for that roof. Some of the garden saunas have a pent/flat roof which require a different roofing material when compared to others which have a pitched / apex roof shape.
Home garden saunas – Different Roof Types
Below i have linked two of our marvelous sauna houses, both have a different roof style to help show you the different options available.. If you have a pent roof, Please proceed to “Pent Roofed Installation” heading, If Its an Apex roof, Proceed to “Apex Roof Construction”
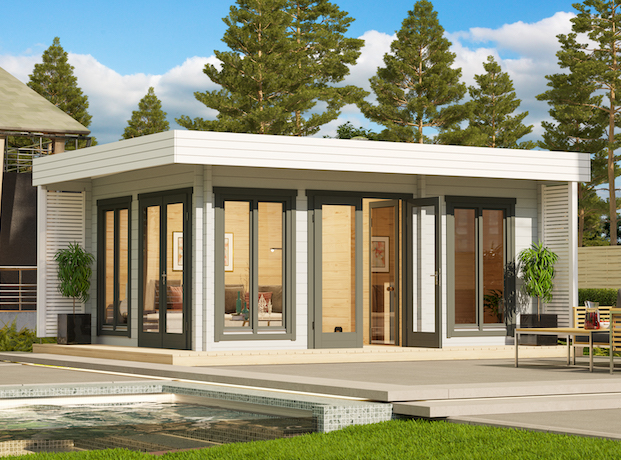
Pent Roofed Installation
For pent roofed garden saunas’ we offer EPDM rubber roofing as standard, this is the very best option we offer for this style. It will be one large sheet of thick rubber that covers the whole area of the roof with no overlaps ( weak spots ). EPDM can be finished in a couple of different ways. We explain this in more detail on our EPDM dedicated page.
So we need to first ask ourselves, how do we want to finish off the rubber roof around each side of this building. The preferred method is to create either a Three or Four sided “bowl” ontop of your roof.
Three Sided Bowl
By this i mean i will dish up the front of my roof and the side, I’ll raise up my boards and run the rubber up the inner face and then wrap it around the top, and outside. I will finish this off by adding external roof trims over the top. Or make use of the fancy metal roofing trims available here instead.
Four Sided Bowl
Or as as the name suggests, ill raise up all four of my para-boards to create a four sided “bowl”, then run the EPDM up, across and down the topo on all sides. In this instance I will also need to cut and fit a hole for a drainage outlet somewhere.


Apex Roof Roof Construction
The Apex style roofs are all applied with our IKO felt shingles as standard, these create a tiled effect once in place and come in a range of different colours. The building will come with all the required eaves and bargeboards to complete the roof nicely, For more information of shingle installation please visit our roofing page.


Home Garden Saunas – Full Range
We offer a very large range of saunas, they come in all shapes and sizes. from cabin style buildings with interlocking logs, to unique sauna cubes and barrels. You can really be sure to find something you like. Feel free to contact us to help you find what you’re looking for


