


It’s that magical time of year again! It’s the time when a lot of us get creative with craft ideas and projects to suit the holiday season.
What better way to do this than to repurpose the pallets and spare logs that come with your log cabin? It seems a little wild to throw away perfectly good timber which can be used for something decorative or useful.
It’s finally time to use the pallets and timber that have been cluttering up your garden garage, waiting for a time such as now.There are many uses for your spare pallets. Pallets tables, chairs, bookcase, wine rack, planter, or a coat rack to name just a few. However, as it is Christmas, why not create your very own reusable pallet Christmas Tree.
Using a single pallet, a spare log which may come with your log cabin, and some basic tools you can make this tree of your very own.There are many styles and designs you can follow to create your tree. I like the design of the one in this tutorial as it has optional diagonal lengths for a nice tinsel effect.
Tools required
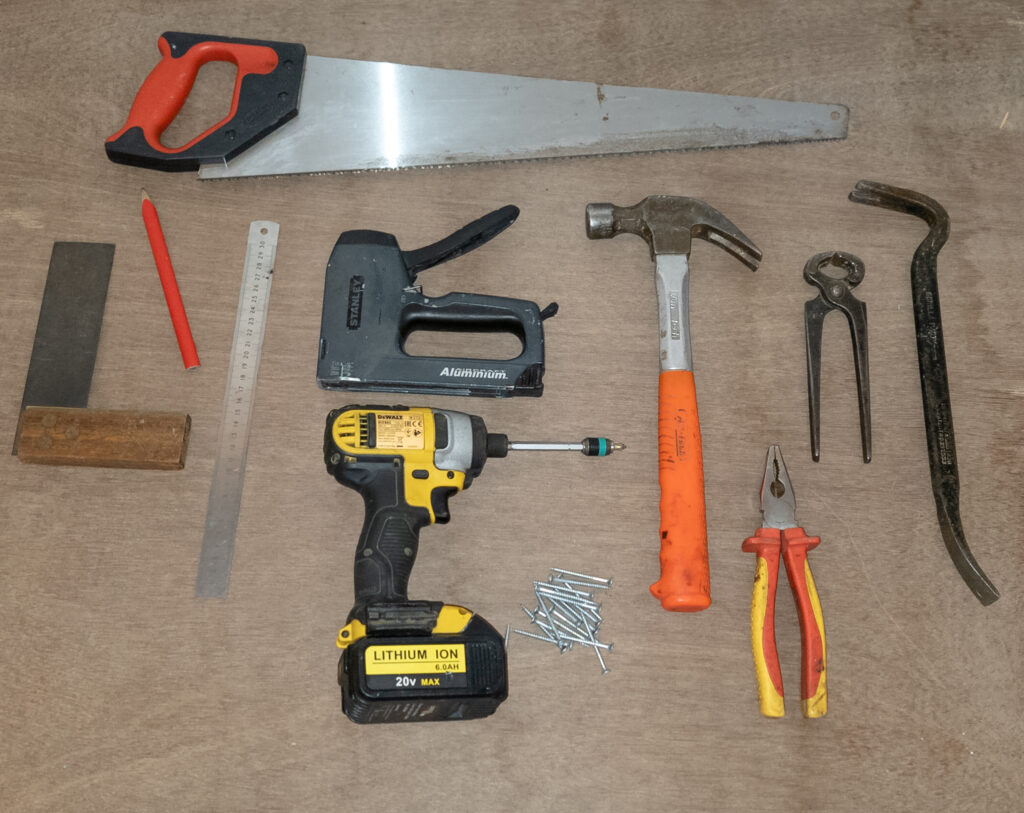
- Saw
- Hammer
- Screwdriver
- Crowbar
- Pliers
- Pencil
- Tape Measure
- Ruler
- Claw Pincers
- Screws
- Staple gun or Wood Glue
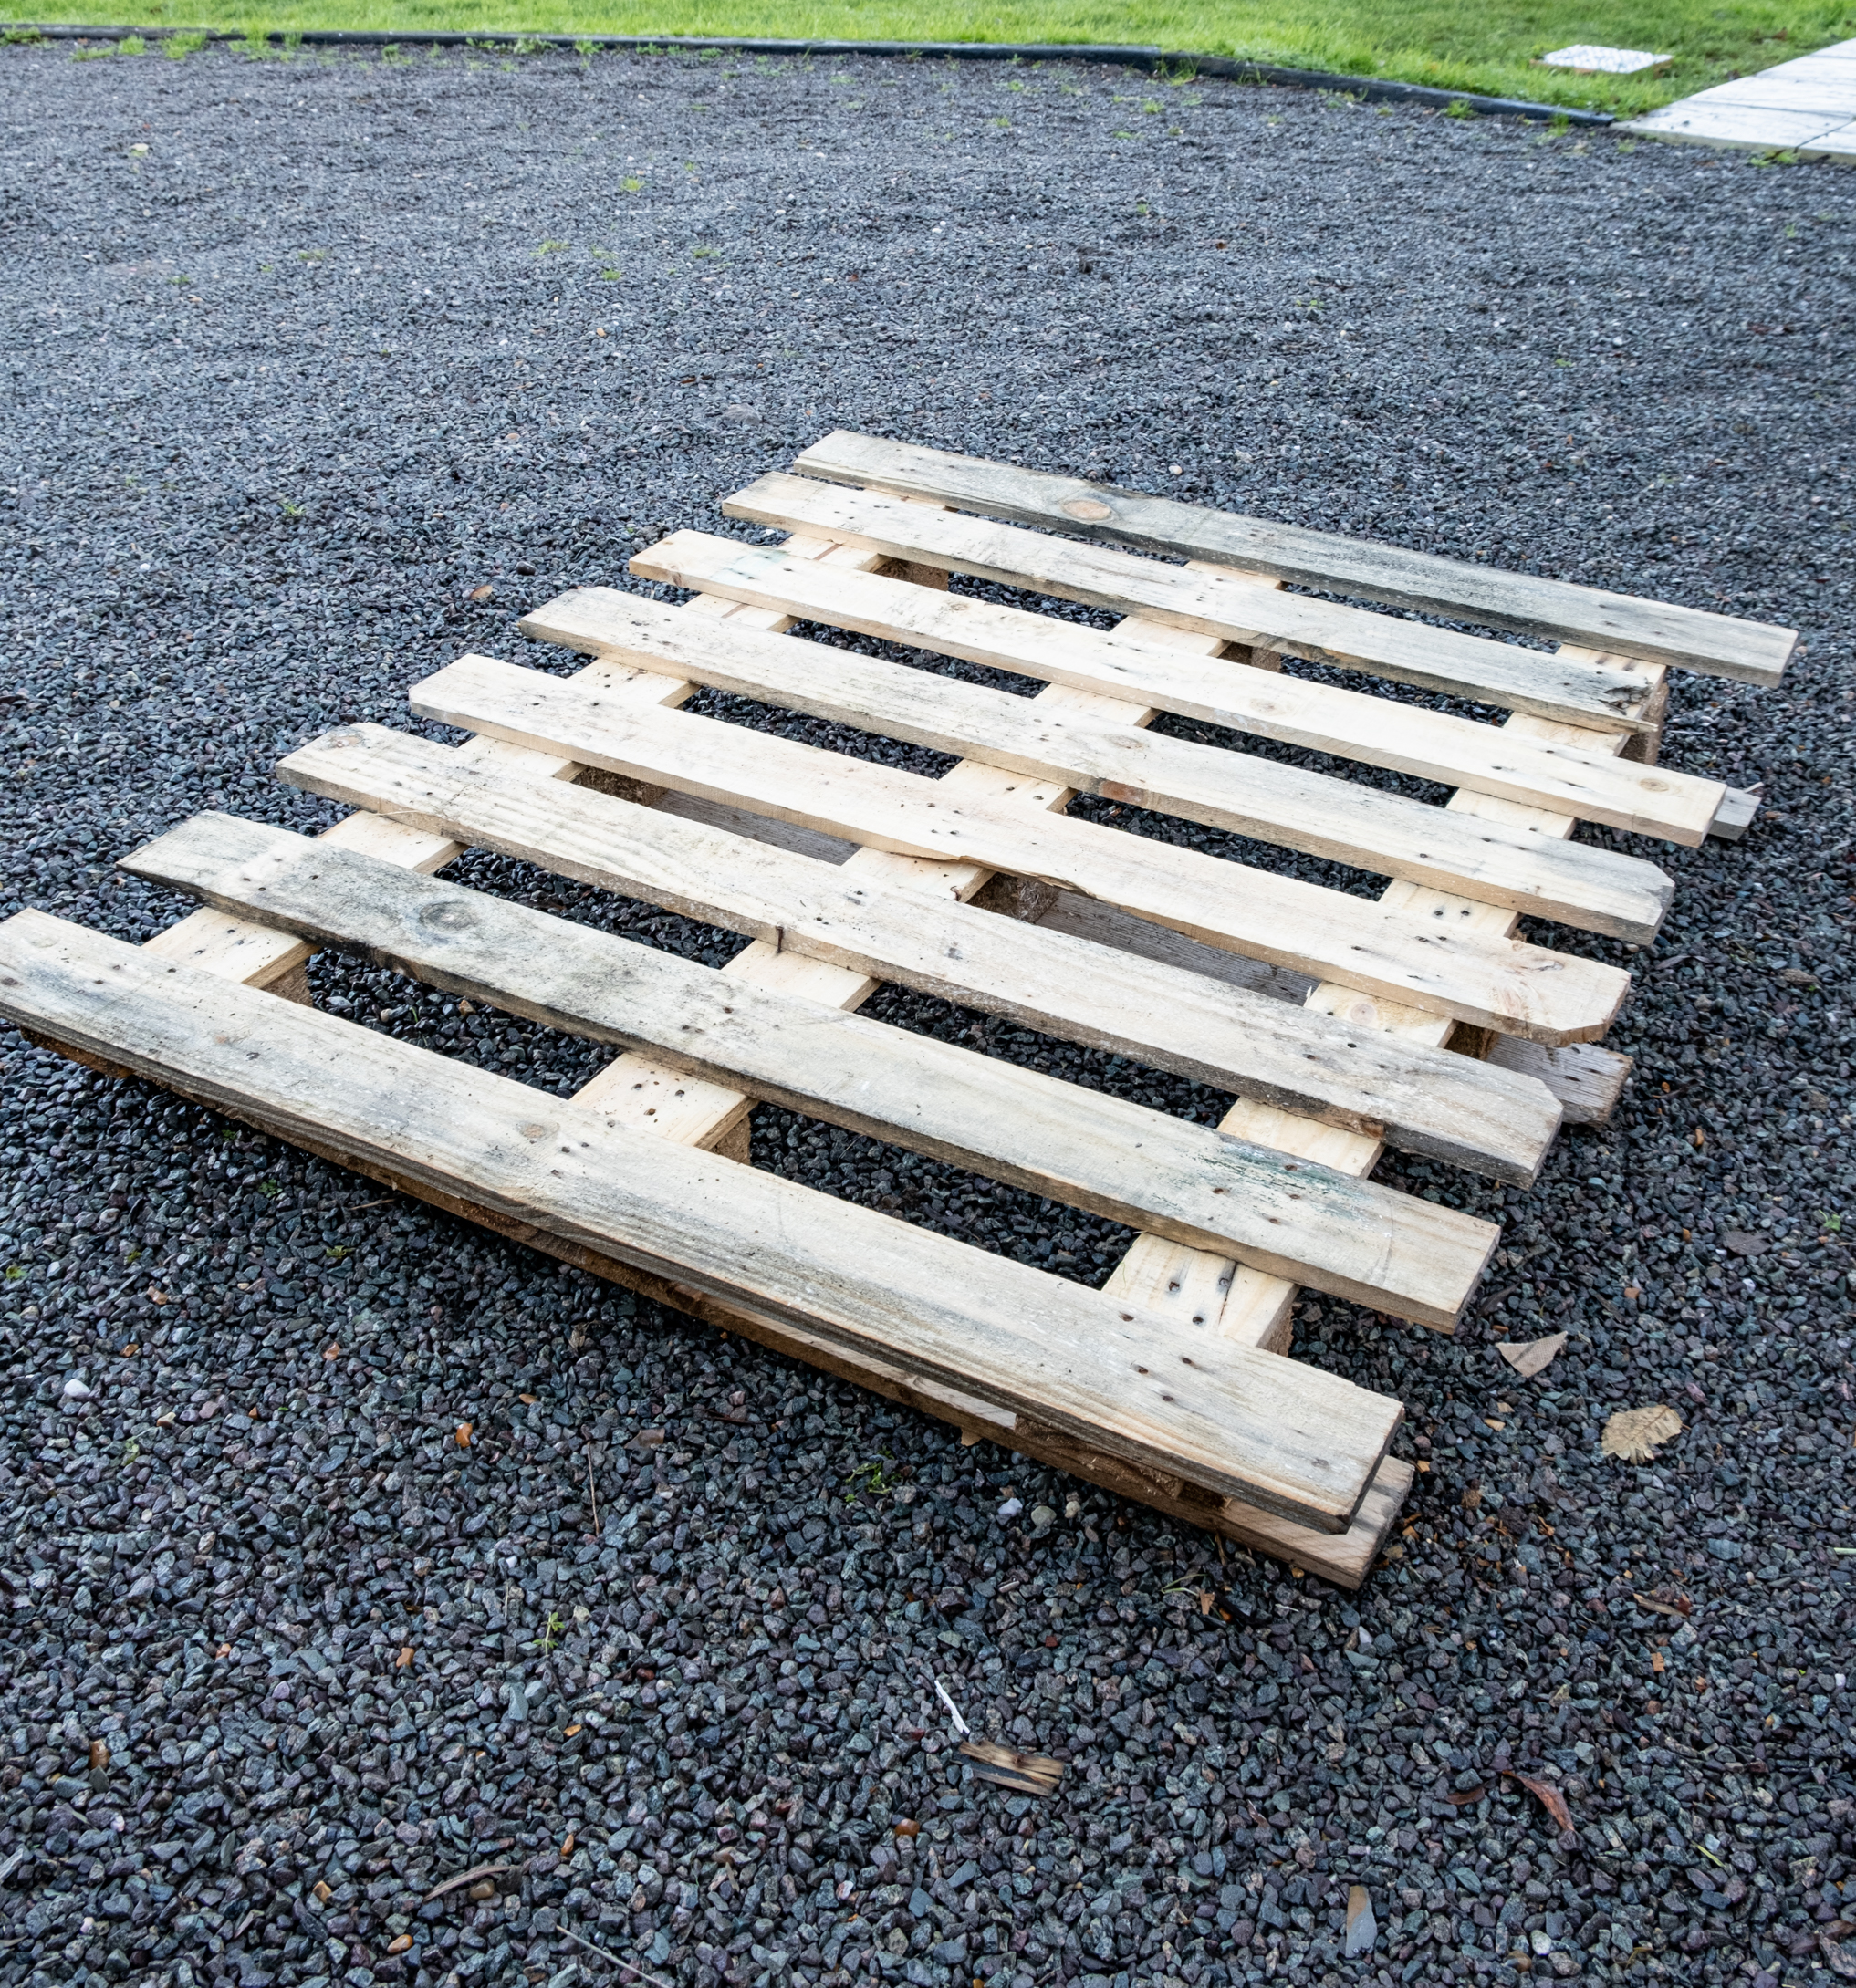
1 – Breaking up the Pallets – Christmas Tree Pallet
Begin by placing the pallets onto the ground and use a crowbar and/or claw hammer to lever the boards off from the stringers. Be careful not to use too much force or the the boards may split.
2 – Remove Nails – Christmas Tree Pallet
Once boards are safely removed, it is time to remove the nails from them. Do this by hammering the ends of the nails then using claw pincers, lever out the nails. If any nails are bent, use a pair of pliers to straighten them out and hammer them through.
3 – Measure Log & Mark – Christmas Tree Pallet
Now find a length of spare log you have left over from your cabin. This will be the “trunk” of the tree. Cut it down to a size you prefer and measure it. Use this measurement and divide it by the number of horizontal boards you will be using. For this example I have 6 horizontal boards so I will do the following (Trunk length ÷ 6). Then mark out the positions of the boards using this measurement onto the trunk. I then measured the width of a board and halved it (5cm). I then marked out 5cm below each mark I previously made. This is where I will place the bottom edge of the horizontal boards later.
4 – Measure & Cut Horizontal Boards – Christmas Tree Pallet
Find a board that is the length you want for your lowest (longest) horizontal board. Measure its length.
Then measure the width of the “trunk”. This will be the length of your smallest horizontal board. Subtract this measurement from the length of your lowest/longest horizontal board. Divide this number by 5 (number of total horizontal lengths minus 1) this is the amount you will remove from each length.
Example
My longest board was 130cm and my shortest was 12cm, so 130cm – 12cm = 118.
118cm ÷ 5cm (total number of boards – 1) = 23.6cm
I will subtract 23.6cm from 130cm for the second board = 106.4cm length of second board.
106cm – 23.6cm = 82.8cm length of third board.
82.8cm – 23.6cm = 59.2cm for the fourth.
59.2cm – 23.6cm = 35.6cm for the fifth.
and 12cm is the length of the sixth board.
Measure and mark the lengths of your horizontal boards. Use a square to mark a straight line and cut with a handsaw.
5 – Mark the centre of the Trunk and Boards – Christmas Tree Pallet
Measure and mark the centre of each board. Then mark the centre of the trunk at each point the horizontal boards will be placed. This is to ensure the boards are placed centrally.
6 – Secure Horizontal Boards
Now all your horizontal boards are cut to size, you can go ahead with securing them into the “trunk”. Using a square, ensure the boards are at a right angle to the trunk and line up the center marks you made earlier.
Fix into place with screws.
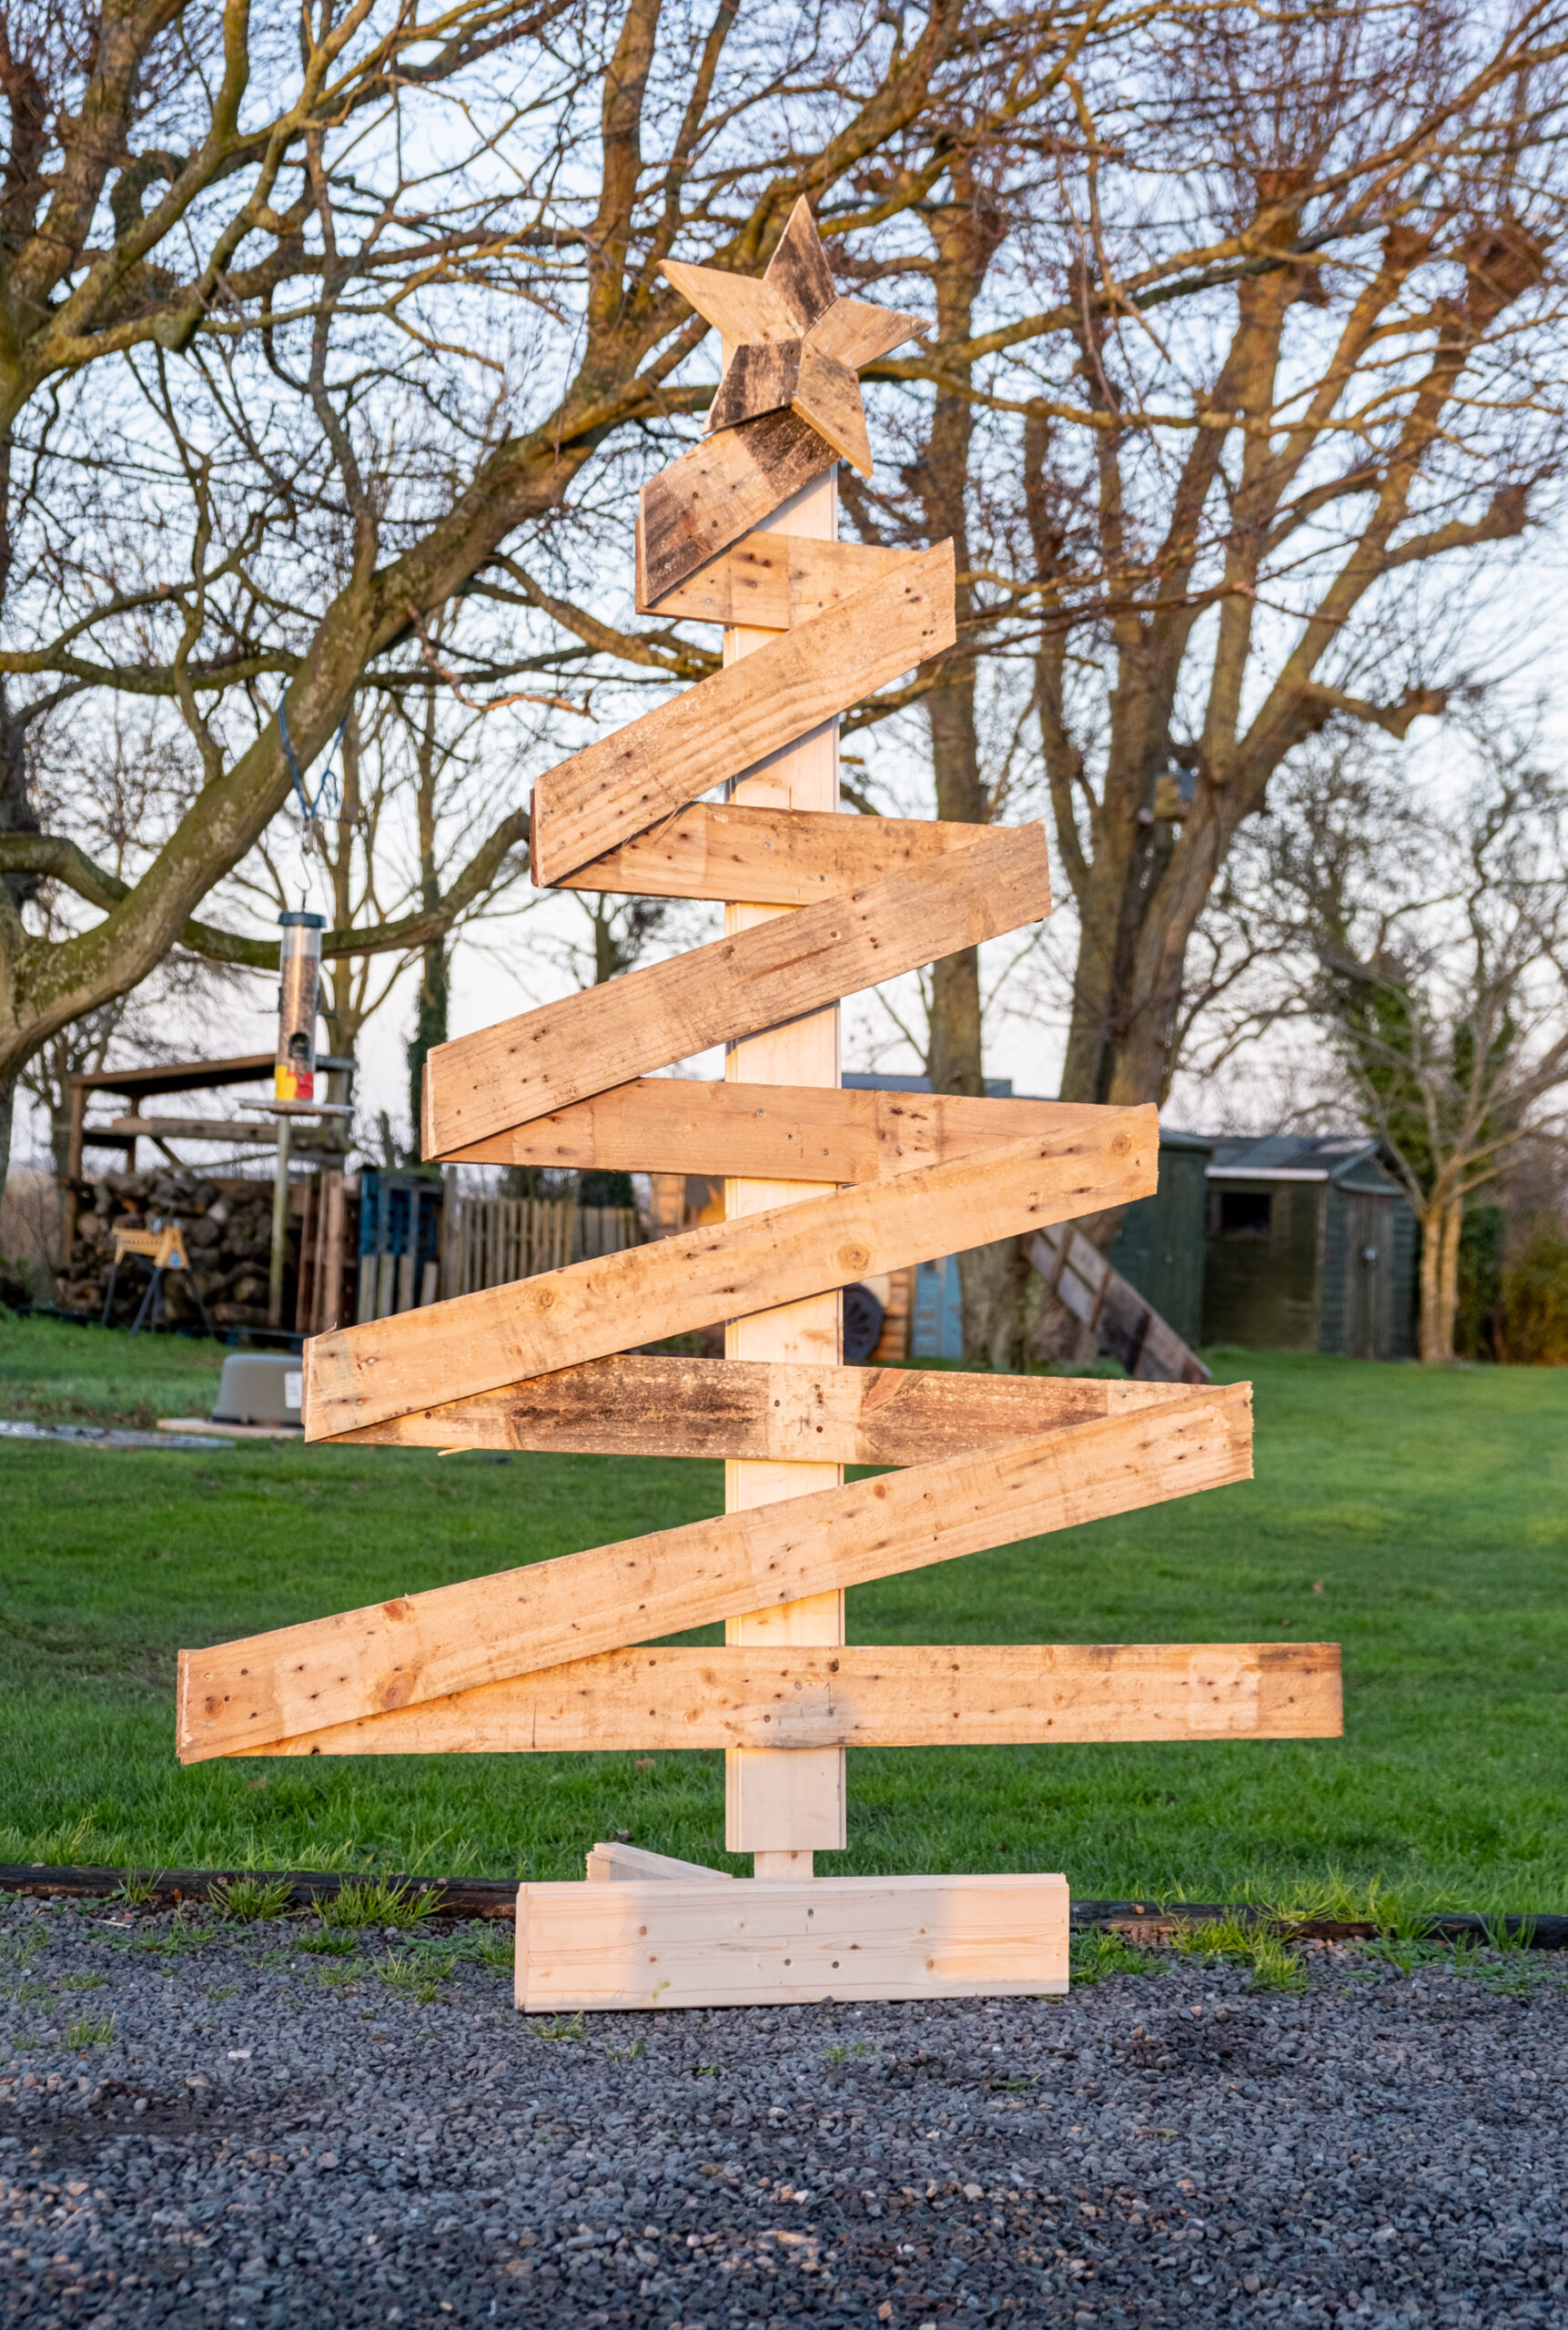
7 – Diagonal Boards – Christmas Tree Pallet
With your horizontal boards secured you can either add diagonal “tinsel” boards. or skip to the next step.
Place a board from the bottom corner of the first board to the opposite corner of the second board, mark underneath with a pencil and cut to size. Secure the diagonal boards with screws.
8 – Stand
No Christmas tree can be without a stand. So why not make one with your leftover quality logs. Mark & Cut the horizontal stand to size, ensure it is long enough to support the size of your tree. Then fix it to the bottom of the trunk using long screws.
Cut another similar length piece of log and fix it to the back of the horizontal stand.
9 – Star – Christmas Tree Pallet
Using this template. Cut out a diamond shape depending on the sized star you require.
Using the diamond as a stencil, draw around it onto another piece of pallet board. Cut the diamond out with a hand saw, then draw and cut 4 more diamonds.
Push the diamond pieces together to form a star. Using either wood glue or a staple gun, fix the star pieces together.
Complete your tree by securing the star onto the top of it.
Finishing touches – Christmas Tree Pallet
Your Christmas Tree structure is now complete!
But why stop there? You could either keep it as it is with it natural rustic pallet look, or paint it with traditional colours. You could also add baubles real tinsel and maybe some fairy lights?
What an excellent idea and very clear instructions — thank you