


Every company has a responsibility to start taking significant steps to become more environmentally friendly, this is a statement we firmly believe in here at TUIN. We have been looking at our systems and products to see where improvements can be implemented and these Eco roof tiles are a great step in the right direction.
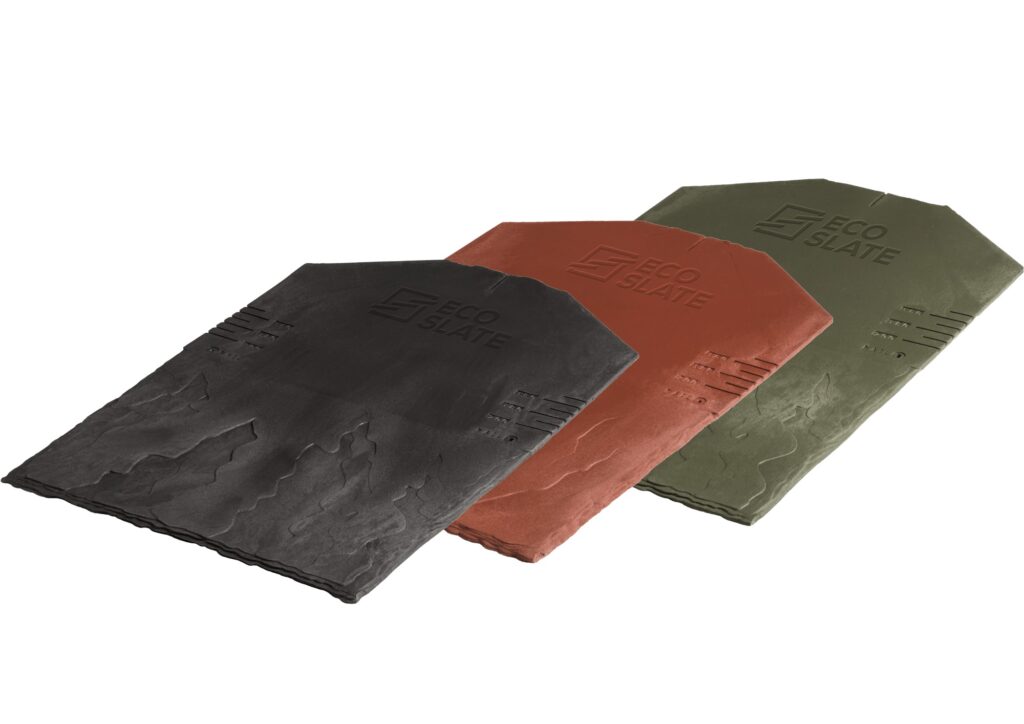
We’re slowing adding these new Eco roof tiles to our range with the ultimate aim of removing the less Earth friendly alternatives commonly used. Available in three different colours and supplied in kit form to match the shed or log cabin chosen you can be sure to have everything you need.


Eco roof Tiles Features and benefits
Our Eco roof tiles are crafted from 100% recycled plastic and are fully recyclable at the end of their lifespan, promoting sustainability. These tiles have a wide range of applications, from new build houses to sheds. With a natural slate-like appearance, once installed, they seamlessly interlock to create a wind and rain resistant roofing system.
One of the key advantages of using these Eco tiles for roofing is that a single tile can be utilized for all details, eliminating the need to purchase additional products for ridges, hips, or gullies. These flexible eco tiles can be easily shaped and adapted to fit in these areas. The installation process is straightforward as the Tiles are directly fitted onto the supplied wooden roof covering. A standard breathable underlay is placed underneath, followed by securing the tiles with hot-dipped galvanized clout nails in two designated locations. It’s a hassle-free process that anyone can handle.
By opting for our Eco roof tiles, you not only contribute to a more sustainable future but also benefit from their practicality and ease of installation. Say goodbye to unnecessary waste and complications, and embrace a roofing solution that is environmentally friendly and efficient.
Eco roof tiles Key Points
- Quick and effortless installation process
- Suitable for low-pitched roofs ( Down to 10 degrees )
- Self-bonding capability
- Lightweight construction
- Made from recycled plastic and fully recyclable
- Class “A” fire rating (BS476… Part 3)
- Highly durable with no breakages
- 50-year non-prorated warranty
- Requires no maintenance, preventing moss or mildew growth
- Minimizes waste
- Flexible Tiles that can be used for ridges, valleys, and caps
- Provides enhanced roof insulation compared to traditional slate
- Unbreakable and resistant to vandalism with a Class 4 impact rating
- Can be easily cut with a knife or snips
- Compatible with roof windows or solar panels for easy installation
- Designed to withstand winds of up to 110mph
Installation process
The installation of these Eco roof tiles couldn’t be easier due to the features and materials used throughout all parts of the roof kit. Below are the basic steps to follow but for a better insight please watch the video at the end.
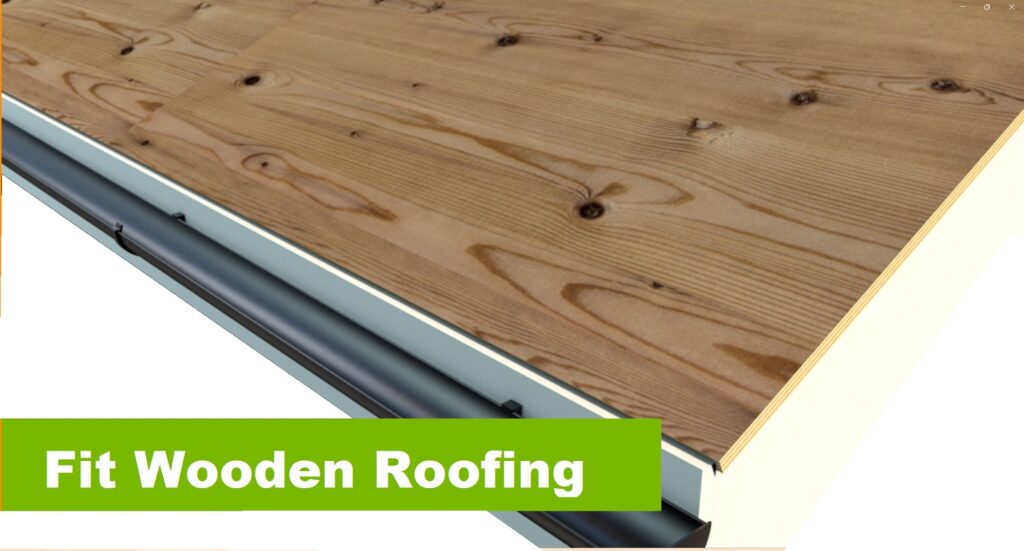
Step 1. Roof Construction
Install the wooden roof on the log cabin / garden building itself, The blank canvas for you to start working on.
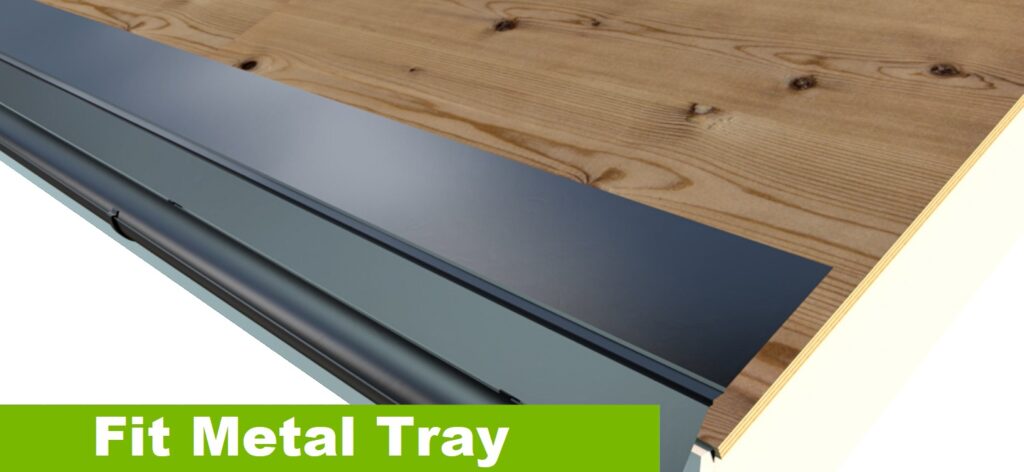
Step 2. Eaves Tray
Fit the metal tray on the edge of the roof on all low sides with the supplied clout nails. The tray will overhang the edge of the roof by 15-20mm
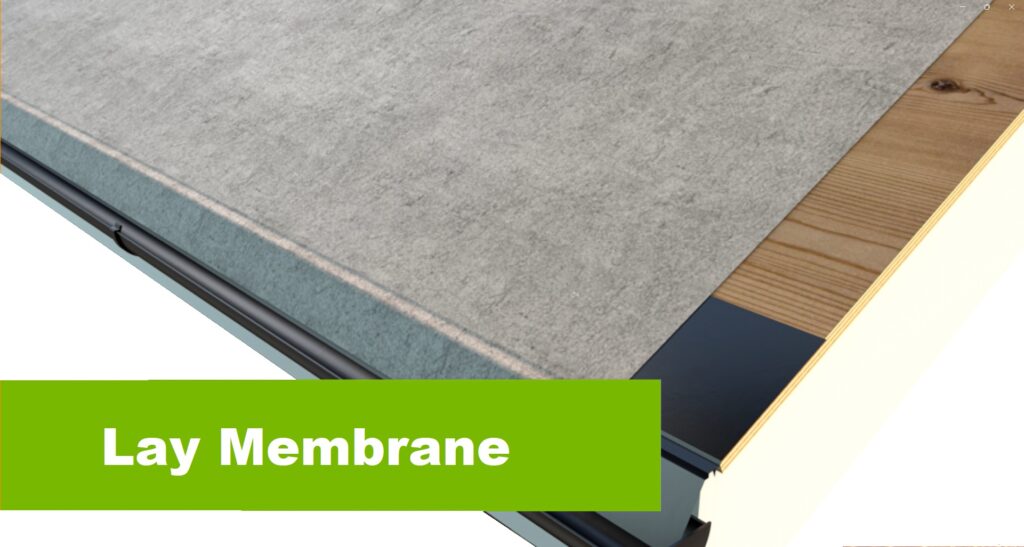
Step 3. Membrane
Lay and secure the supplied membrane over the whole roof using the supplied clout nails.
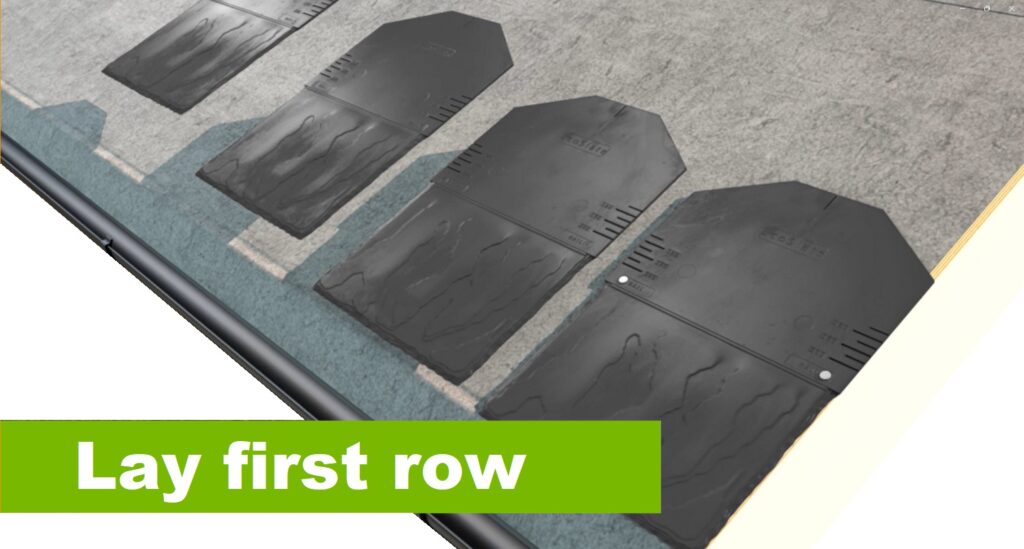
Step 4. Eco Roof Tiles
Now start laying the first roof of Eco roof tiles, Two clout nails per tile in the marked locations. The tiles start lined up with the bottom of the tray
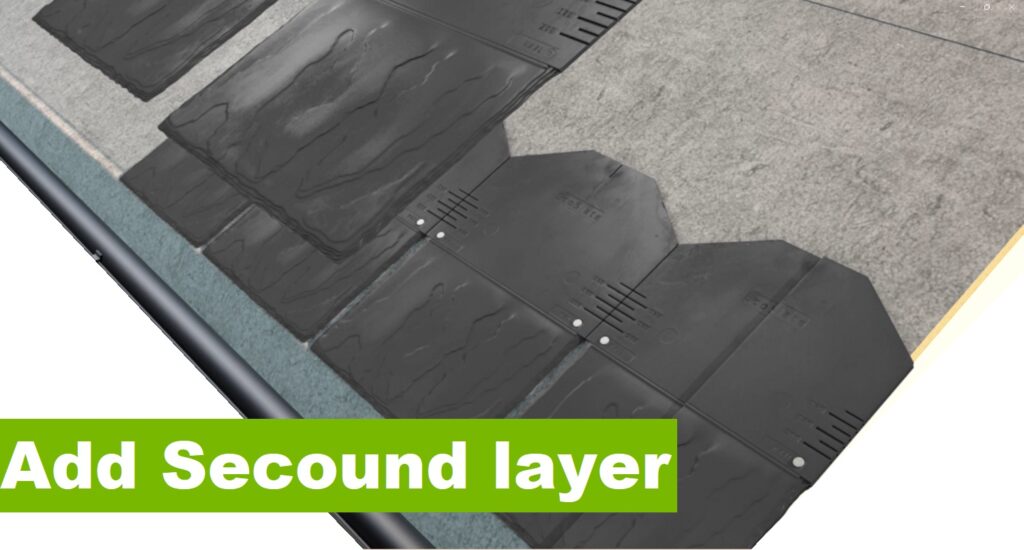
Step 5. 2nd Layer
Add the next row directly ontop of the 1st so the top is flush. the first tile should be cut in half which will then start a half/half overlap
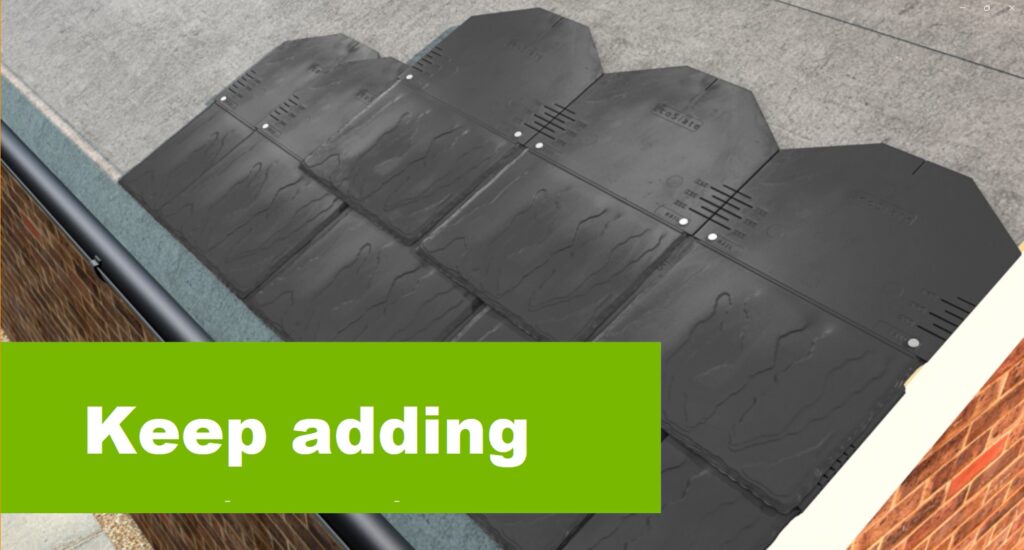
step 6. Progression
Keep working your way up the whole roof, the tiles should be laid in a half over half fashion which creates the tiled effect.
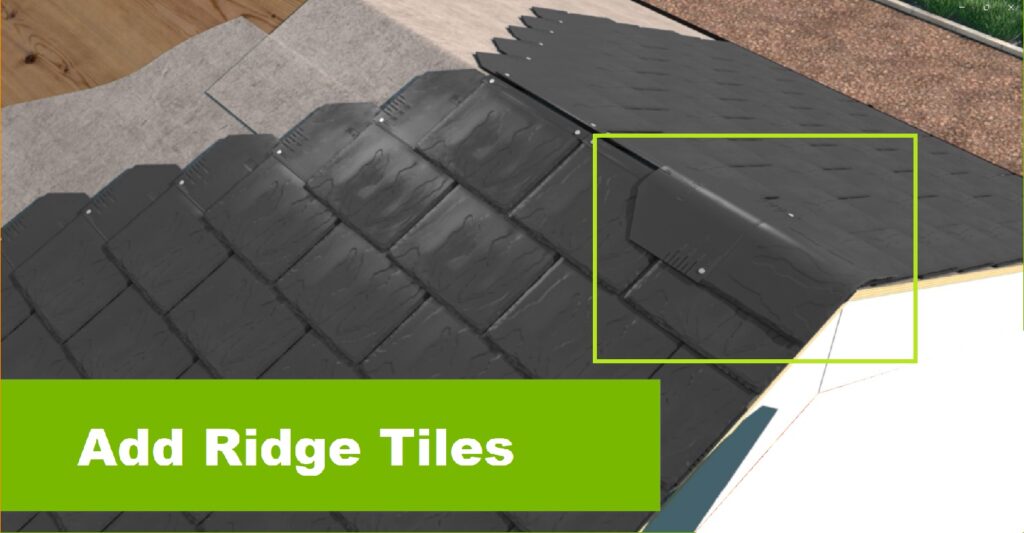
step 7. Ridge caps
Finally start adding ridge tiles to the very top, or to all roof connecting points to cap everything off.
For an installation video please see below from Nuevo We will add new videos as and when available.