


Now that the seasons are changing it’s starting to get quieter for this industry, but we do still have customers installing their cabins! For example, Mr M’s installation and review of their Shepherds Hut Deluxe to which he kindly sent in some images along with some commentary and tips for future installers.
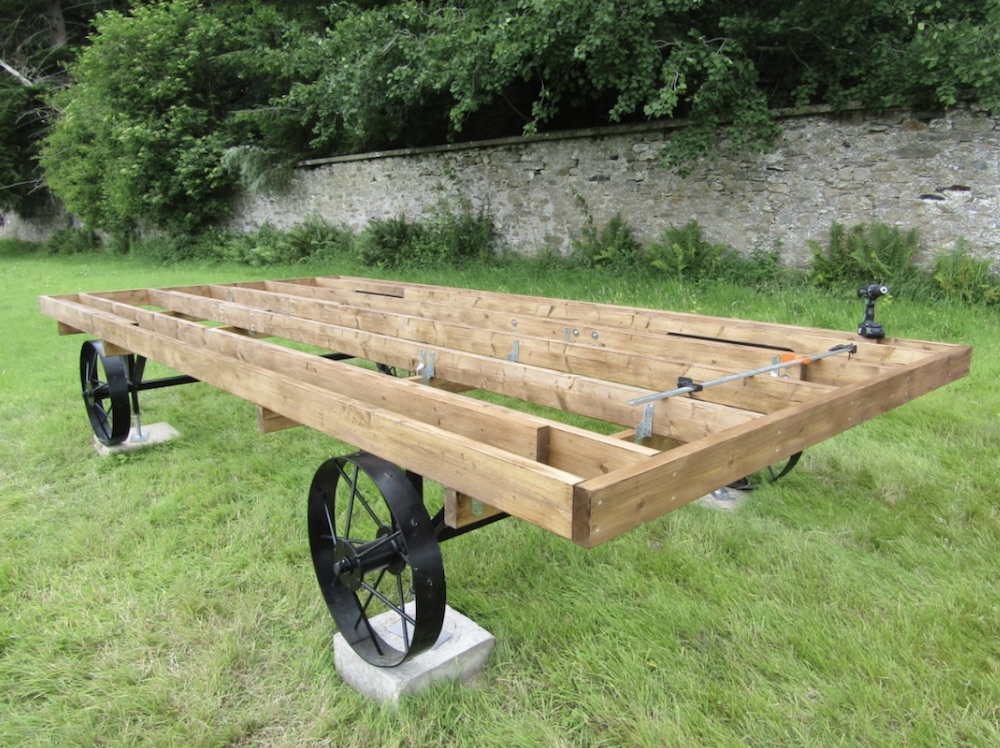
Laying the Base
A stable-full of beams and panels. Get it all under cover if possible. We started off by completing the base after correcting the three warped centre joists with modded joist hangers. Note the bases – just paving slabs laid on a bed of sand. Nearest is a thicker cast concrete slab also laid on sand to correct for the slope away from the wall.
Extra Support
Extra joist hangers were needed to correct 20 degree warp in the beam. Tuin supply 18 but you will need 10 or 12 more if your beams are not straight. Ours were cut-down joist hangers (they are only twisted plates) – not brilliant quality but good enough. Not sure if Tuin could sell you more of the real thing, I didn’t ask. (Note: We do sell joist hangers)
-
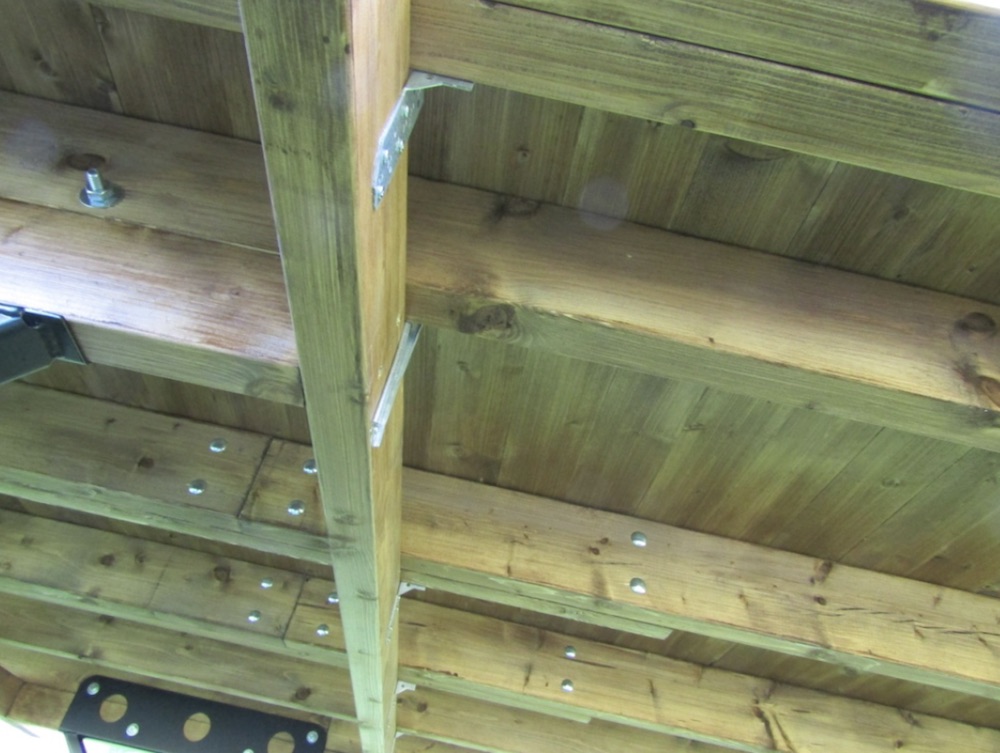
- Underside view showing the hangar spacing and some of the beaming-joining coach bolts we used to beef-up the three warped beams.
-
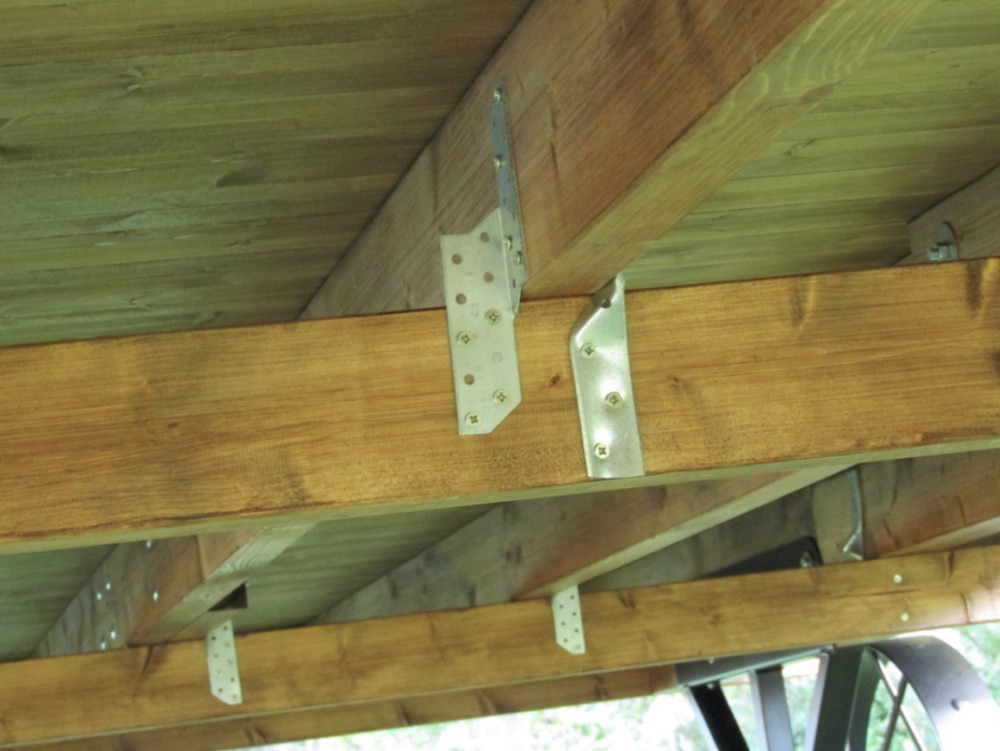
- They were slightly bowed as well but that is easy to correct.
Treating the Shepherd Hut Deluxe
This is by far the most tedious part of the build
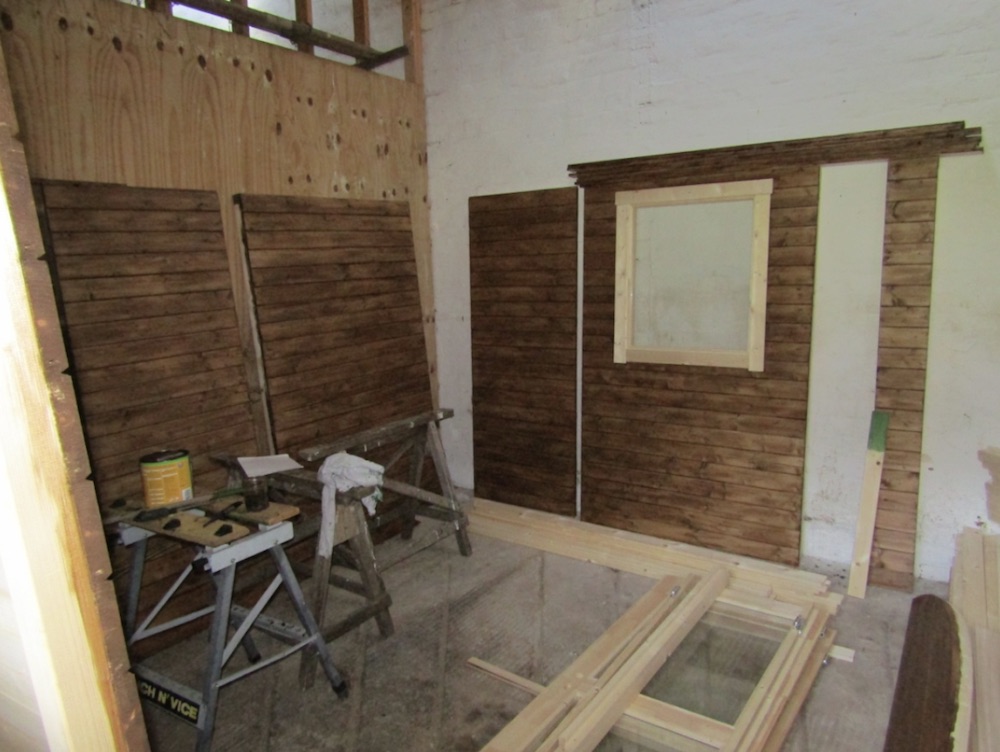
Apply preservative and stain/paint as many parts as practicable before assembly – pay particular attention to the end grain.
Laying the Floor
Flooring goes on late into the evening – note two teenage helpers; almost as essential as the tea and hammers. Also note the clamps – you will need them. We are using cut-clasp nails. You will need roughly three packs – 14 nails in each board. It may sound overkill but it makes the base really secure, better safe than sorry.
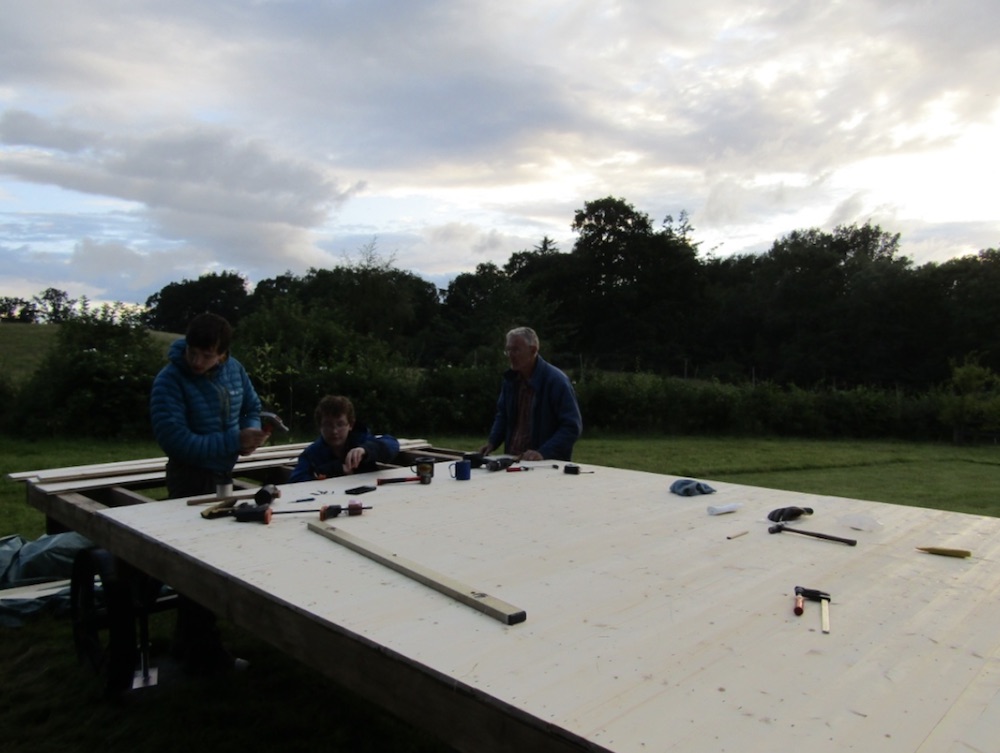
Sides are on in the next image, as are the steps and the door hinge beams. Pay close attention to getting the hinge beams vertical in all planes prior to the roof going on or the doors will be skew-whiff.
The Roof and Doors
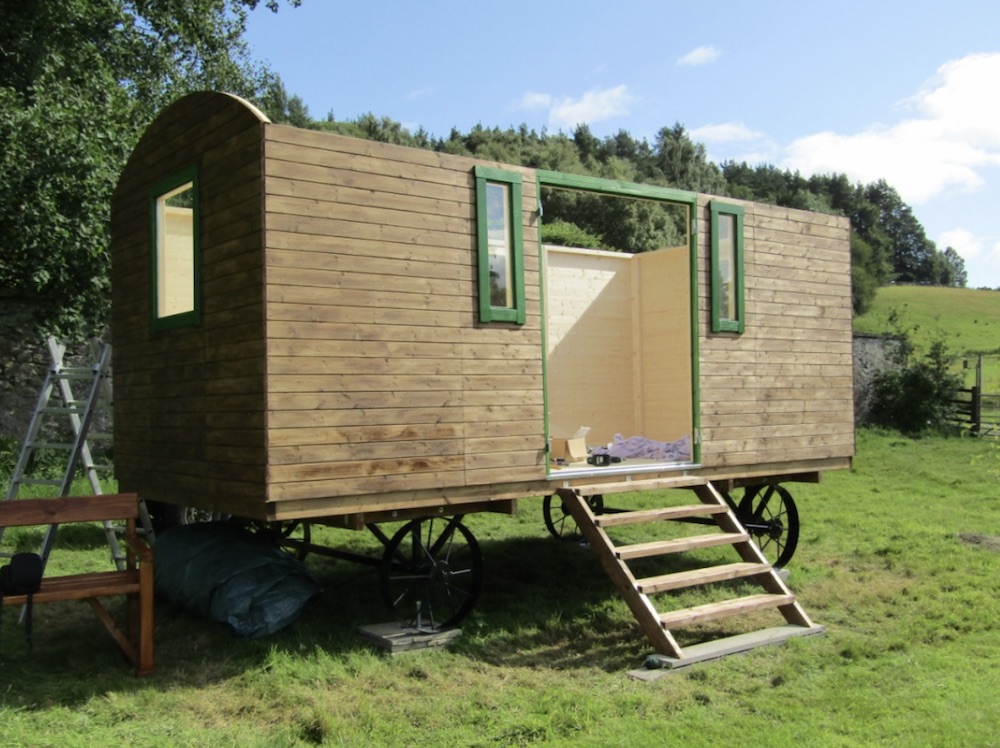
The roof and doors are on the next picture, I did the doors first as the roof will get in the way. The roof is easier than expected, just keep it all tight at first with your sash cramps to keep it nice and square. This is a month or so after the previous pic – I fell off our original step ladder adding the first feather roof beam and cracked a rib. Highly recommended replacement cherry-picker ladder featured!
The Finished Shepherd Hut Deluxe
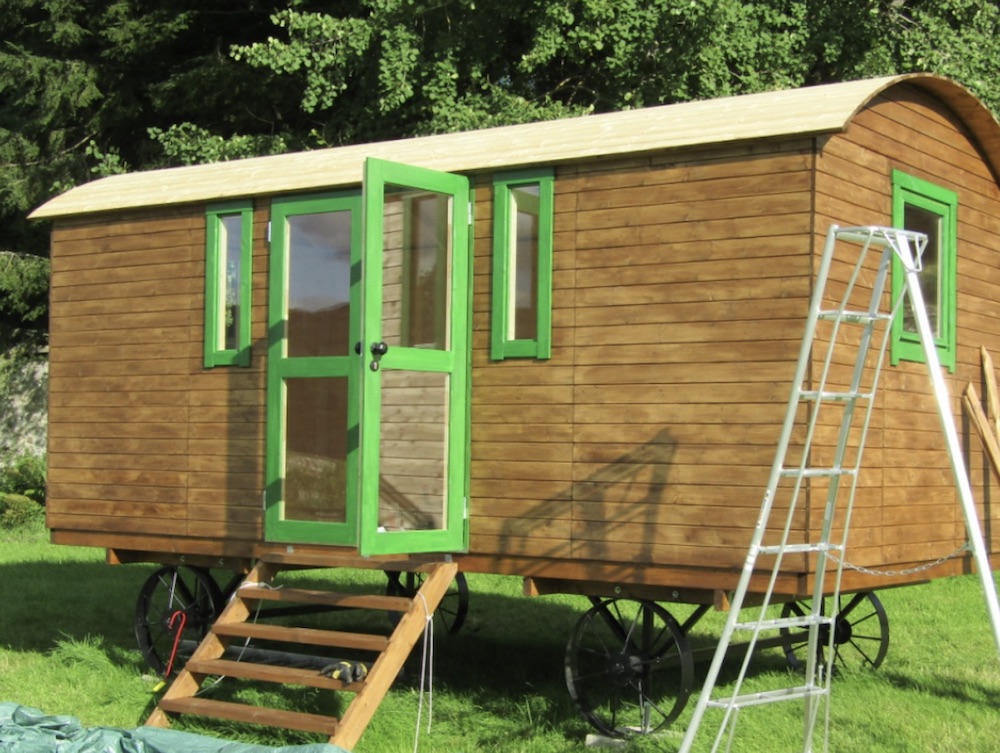
The completed hut. Looks good doesn’t it? The picture was taken after first frosts of the autumn (October 5th). I haven’t added the eight end roof arcs yet. We plan to add a wriggly tin roof eventually, and the roof arcs will finish that off nicely.
Note replacement glass fibre reinforced felt laid across the arc – there are six pieces all glued and clout-nailed with the overlap away from the prevailing wind – important in Highland Perthshire! Laying it this way uses less felt and we think looks better than length-wise. It is certainly easier to do as it has no tendency to want to slide off. I suggest that you check YouTube shed covering videos which show a proper drip edge rather than wrap the covering round the roof edge as the instructions show – that will encourage the rain water to travel up to the sides of the hut via capillary action and you don’t want that.
Bonus Photos
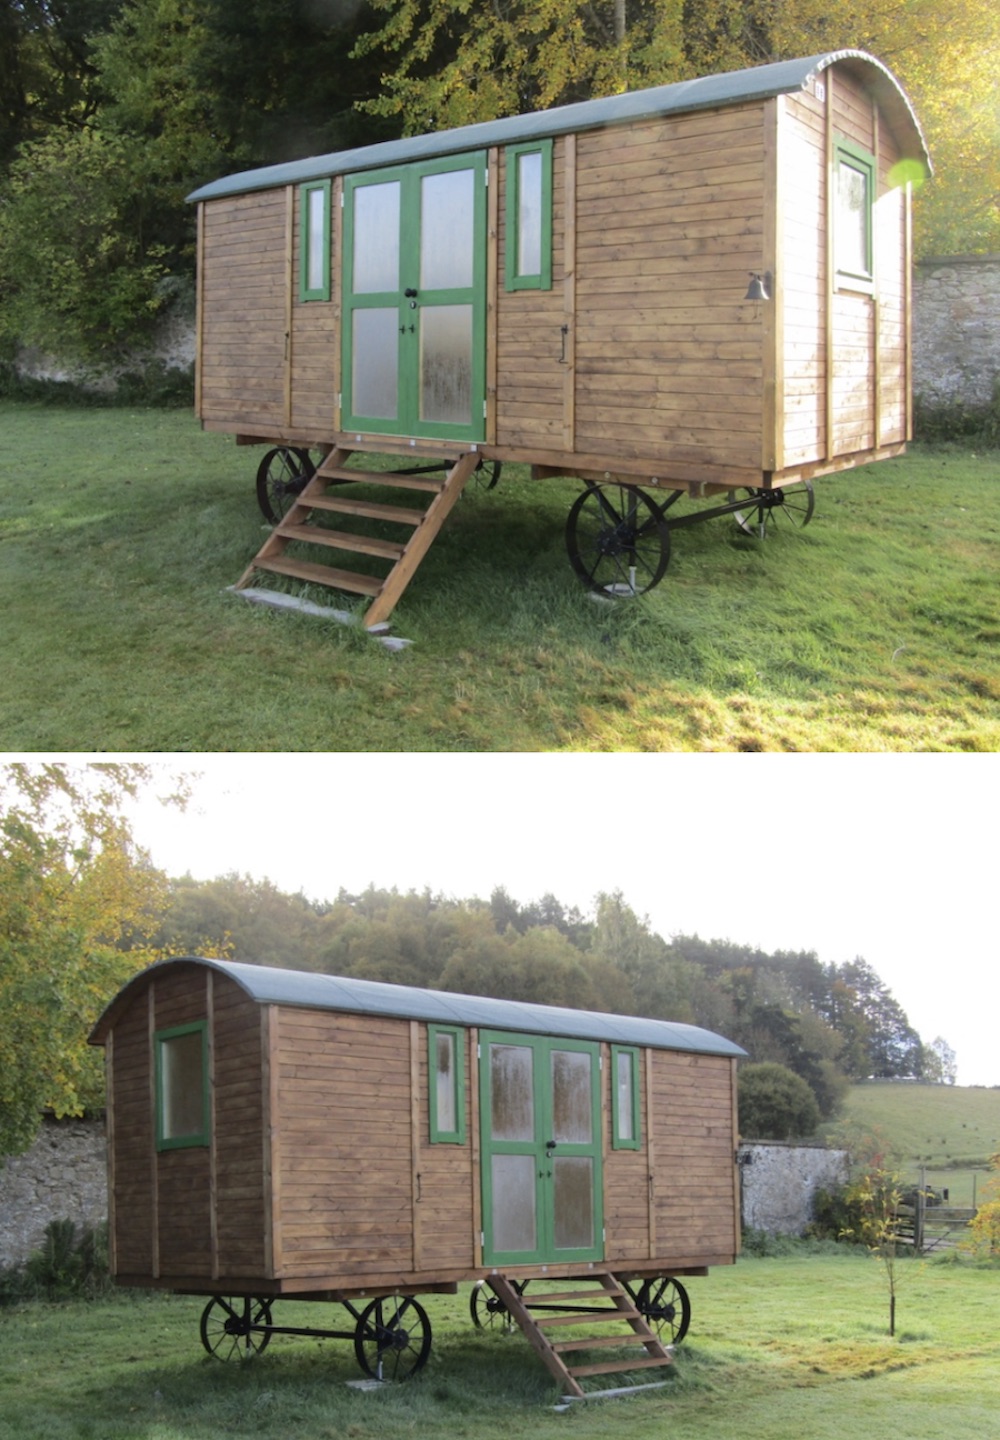
Some very handy tips in this review, though we are sorry to hear about your step ladder incident – I hope it healed nicely! The end product shows how perfectly the Shepherds Hut fits in with its surrounding garden, truly marvelous! Thank you again for sending this in.
Interested in more reviews like Mr M’s? You can find more with a range of cabins at: Tuin Pictorial Customer Reviews.