


The heatwave continues to beat our expectations – And so do our customers! Installing their Log Cabins in this heat, determined to see the finishing result. For example, Mr S’ installation and review of their Gijs Log Cabin. With plenty of pictures to back up his words, but need I say more? Lets read what Mr S has to day about our Log Cabins.
Mr S writes as follows:
I chose to buy the Gijs from Tuin for a few reasons, I’ll list them in case it helps anyone else.
- Design – loved the size of Gijs with the overhanging canopy
- Value – You get a lot for your money and the free shingles offer was great
- Floor – I wanted to do my own thing and they didn’t force me to buy one from them
- Website – I love all the reviews, advice, blog, instructions etc on the website. By far better than anyone else in this market.
- Service – They look like a company that cares about their customers. They do, I have been very impressed.
Safe to say I wasn’t disappointed and would thoroughly recommend this cabin.
I thought I would contribute to the website by offering my thoughts on the build process, and some photos. I hope someone finds this interesting or useful.
Foundations
I have a sloping area at the back of my garden where the cabin was going. That being said, I really didn’t like the idea or expense of excavating and laying a concrete slab so having read the website advice and doing some other homework decided to use pads with a wooden framework on top. Also, I wanted to install a decking area under the canopy so the foundations I needed were almost 6m x 6m.

I used 2 different kinds of pads. 6 of them (4 corners of the cabin plus middle of the front and back walls) were excavated to about 30cm deep by 50cm square, then filled with concrete. I then sank a couple of those hollow construction bricks into the concrete and filled the holes with concrete. The other pads (about 16 of them) were expected to take less load, so I made these by laying some sharp sand and placing a concrete paving slab on the sand, then building up from there using dense concrete bricks. I didn’t bother using mortar – I’m no brickie and my builder friend said they would be fine! If you are using a similar method I strongly recommend taking time to ensure they are all level, it saves a lot of time and hassle later on.
After this I put a layer of weed suppressing cloth down so hopefully nothing will grow underneath.
Laying the Frame
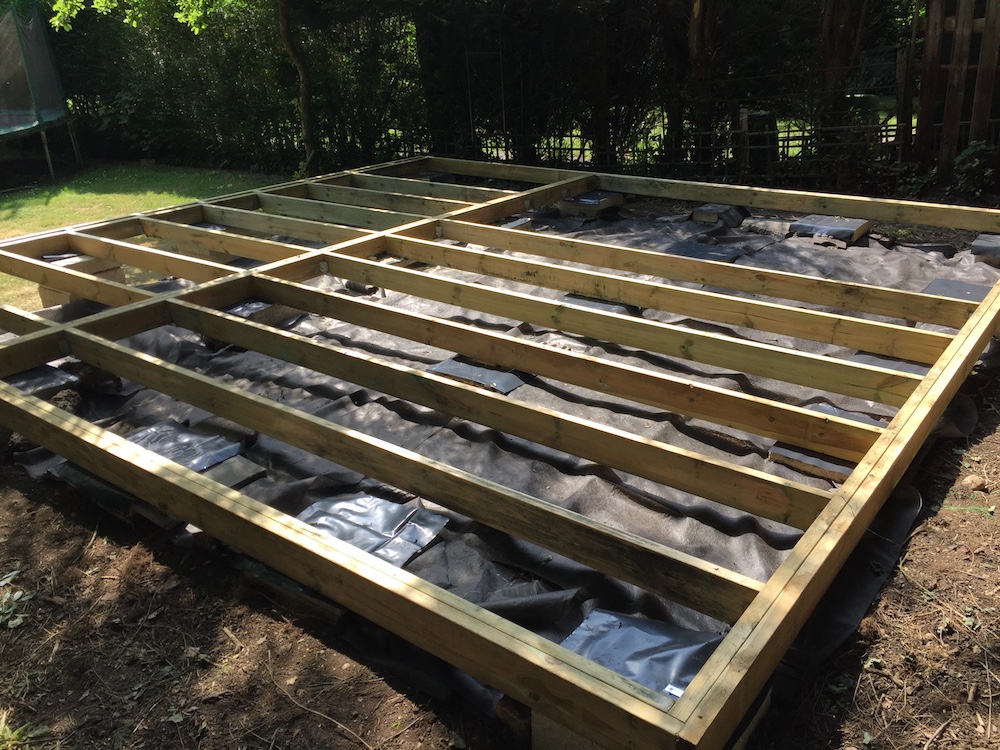
I then built the frame using treated 2 x 6″ timber from the builders merchant. I put a double thickness on the edges where the cabin walls would be. Possibly overkill but I like things to be solid. I needed to use a few wedges here and there to make sure there was contact between all points on the frame and the pad foundations. At this stage I also build the frame for the stairs that will lead up to the deck.
I am a relatively keen DIYer and found the foundation stage hard work physically, but quite rewarding. I haven’t built any foundations before, and had to put up with some sass from my builder friend who thought I’d over-engineered everything. He may be right.
The Delivery
I have helped a friend build a similar cabin so knew roughly what to expect. First stage was delivery.
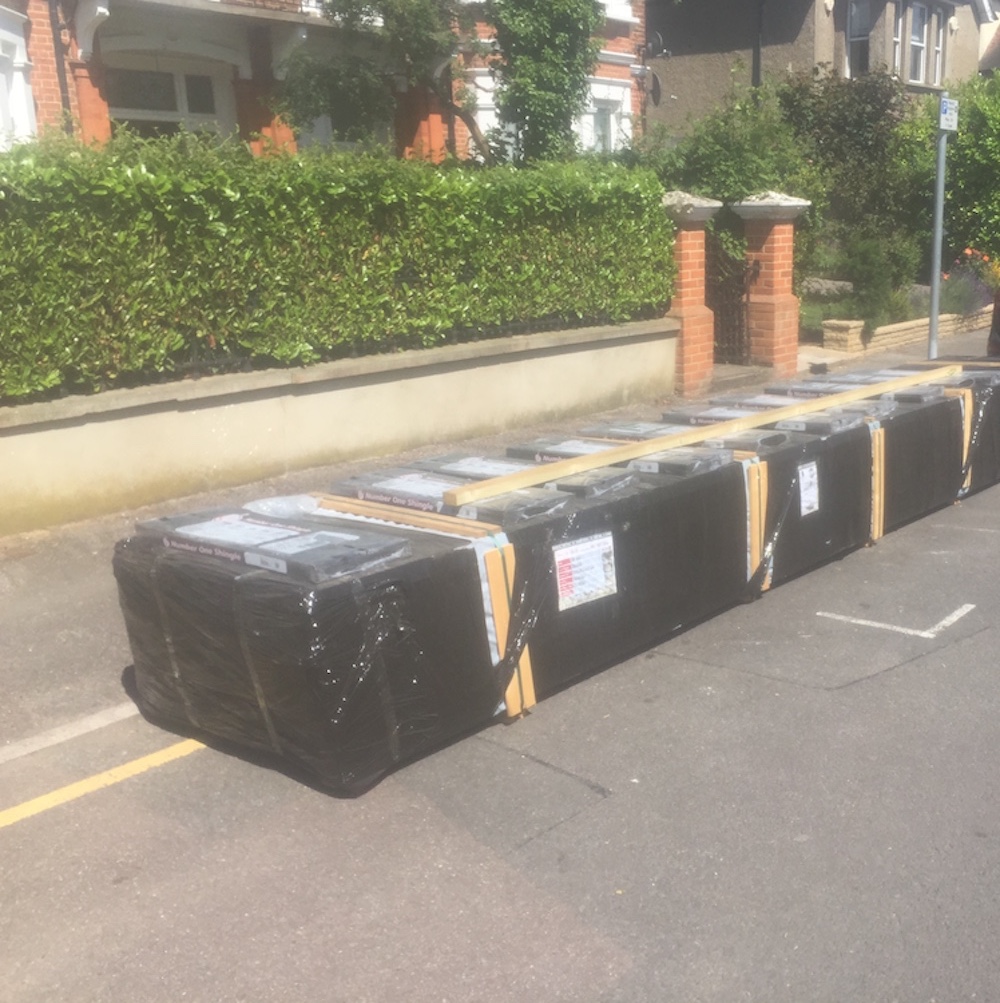
Unfortunately my drive is too narrow for the fork-lift which is 3.8m wide so we had to leave it on the road. The driver was very helpful and the communication about delivery dates and times excellent. Unfortunately this left me with the task of shifting everything to the back of my garden quickly before I got a parking ticket. Fortunately my son had just finished his GCSEs and was willing to help – for some pocket money…
I made one mistake at this stage. I stacked everything horizontally at the bottom of the garden except the doors, which I stood in the house for a couple of days before the build. It was only after they warped that I read the advice on storing them flat. Store them flat!
Building the Gijs Log Cabin
The build is really straight forward if there are two of you – more pocket money for my son. Some of the wall pieces were hard to get in due to warping but could be fixed with some clamping and hammering as advised in the build video.


We had the walls and about 1/3 of the roof completed on the first day. Be very careful of the ends of the apex pieces. They are held on by a very thin strip of wood and break easily. I broke two of them off. It didn’t make a difference to the build and I was able to stick them back in place for the cosmetic look after it was finished. One problem I had was getting the purlins to sit flush with the walls. Mine were a bit warped and didn’t sit all the way down. The website advises getting a plane out, but I wasn’t too happy about that.
I ended up coming up with my own solution of laying draught excluder tape along the front and back walls so that when I added the roof beams, it closed all the gaps. There’s certainly a better solution to this, but it seemed to work for me.


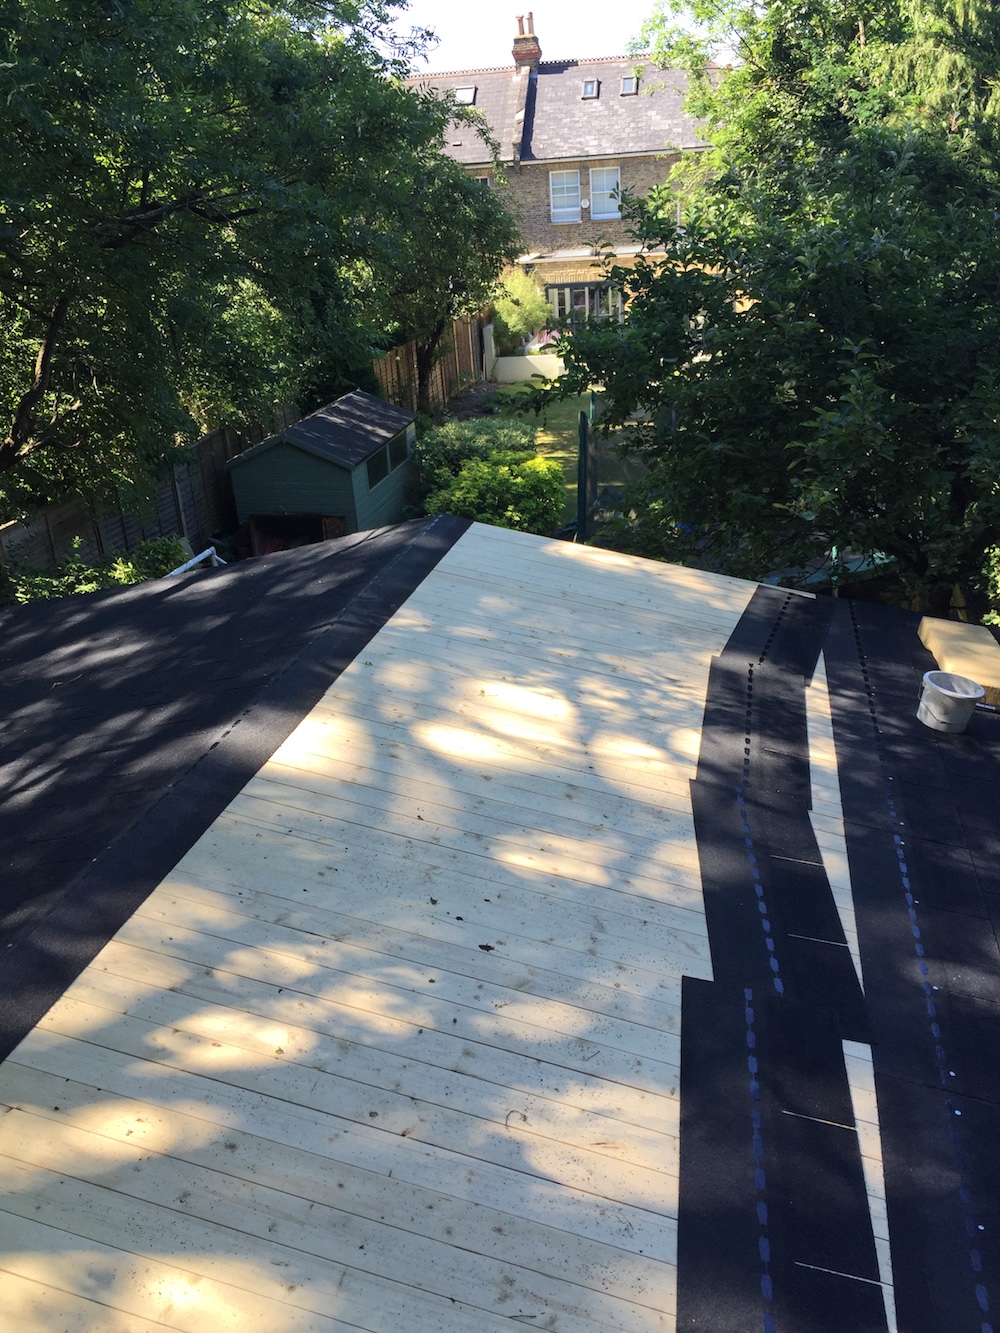
Fitting the Roof
Finishing the roof seemed to take ages, but I was very glad I owned a nail gun. Mine’s a weedy electric one so I alternated between the proper clout nails and my nail gun to make sure it was solid. I then cracked on with laying the roof shingles. Again I found this quite straight forward, just a little time consuming.
I decided against insulating the roof because I’ll mainly be using the cabin as a workshop and I don’t get cold easily. What I didn’t consider however is heat! We’re in the middle of the 2018 heat wave and the black shingles act like a giant radiator – the roof is hot to the touch on the inside. Maybe next time I might put a layer of insulation up there.
Floor
I did decide to do insulation for the floor. I cut OSB board to hang between the joist then cut up sheets of expanded polythene to fit into the voids. Over that went a layer of plywood screwed to the joists, then an engineered wood oak floor that clipped together really easily. It looks lovely.


Finished Gijs Log Cabin
After quite a few test pots we finally opted to use Sikkens HLS (1 coat) and Sikkens Cetol 7 (2 coats) in light oak. It has a slight gloss/silk sheen to it which I like but won’t appeal to everyone.


Final thoughts
An excellent product from Tuin at a very reasonable price. The quality of the boards was excellent with a handful of warped ones. Service, before during and after has been outstanding and I wouldn’t hesitate to recommend Tuin or this cabin. If I were to do anything different in the build process I would spend more time getting the foundation pads exactly in the right place, square and level. A couple of mistakes cost me some time and headaches later in the build (including the use of a car jack to lift one corner up while I put in some shims!). Best of luck with your builds!
A very appropriate treatment choice for this Gijs Log Cabin and a beautiful setting to pair with it! Thank you to Mr S for sending in their honest review of their experience with installing their Log Cabin.
Interested in more reviews like Mr S’? You can find a load more at: Tuin Pictorial Customer Reviews.
Unfortunately I have been left with no alternative than to take this course of Acton.
Following our delivery of the log cabin on the 25/5/20, and recognising some damage this was reported via the contacts page.
We have still yet to receive the replacement section to allow us to commence building.
Have tried on numerous occasions to seek clarity on when to expect these to be delivered, and we are still awaiting a response!
E-mail correspondence on Monday 1/6/20, was replied to on Tuesday 2/6/20 advising shipment would be next day. We now find ourselves on Friday 5/6/20 with no delivery and no means of communication (again after making 2 attempts to contact this company).
The reason we choose to go with this company was due to the reviews and this has certainly not been our experience, very disappointing.
Awaiting reply!
I’m really sorry to hear you have had problems with a part. I’ll ask the office to contact you as soon as they open on Monday.
We have been struggling greatly these past couple of weeks with the sheer demand we have for products, it seems everyone is enjoying their garden and taking the virus lock down opportunity to upgrade. This has resulted in staff being overwhelmed with the sheer volume of calls and emails which is over six times the usual level at this time of year. Even the BT phone system struggled to keep up. Carriers are also struggling a lot to deal with all the deliveries now everyone is ordering online.
The staff do prioritise parts and problems over and above anything else and it may well be that the part was sent but the carriers simply cannot cope with the demand as well.
Someone will contact you Monday morning and let you know where the part is.