


I’ve been so excited to share this with you guys since I’ve seen this come through in my email. Thank you to Mr T for sending this in and making a bright situation in such gloomy weather. Lets see their Jenny Log Cabin review, and how they turned it into a Cabin you couldn’t miss from a mile away!
Mr T writes as follows:
Choosing a Cabin
I took a long time deliberating between different type of Cabin; sizes, profile, make and design and eventually settle for a Jenny Log Cabin from Tuin. It is 4.5 x 3.5m, which is slightly better in my opinion than the original 5.0×3.0m I was thinking of. The more square layout gives better usable space IMO.
I opted for the Jenny for the combination of design (I wanted a reverse apex design as it gives a better “frontage” yet doesn’t appear overly large), thickness of logs and Georgian-style doors and windows. It was going to be my garden gym, doubling as a summer playroom for me and the boys.
The seed started when we first move here just over 3 years ago. The garden was very overgrown with some very unkept Cherry Laurel that have overtaken almost a third of our garden. Hidden within this was a 6×10′ shed which has seen better days. We decided that it needed replacement. However, the shed stood on a concrete foundation. That must have been created after the laurel spread out over many years. As such it was awkwardly positioned well out into the middle of our garden, to one side. Keeping a shed there will not do at all and we also wanted something a bit better – much better. Our search expanded to log cabins and that was when it all started.
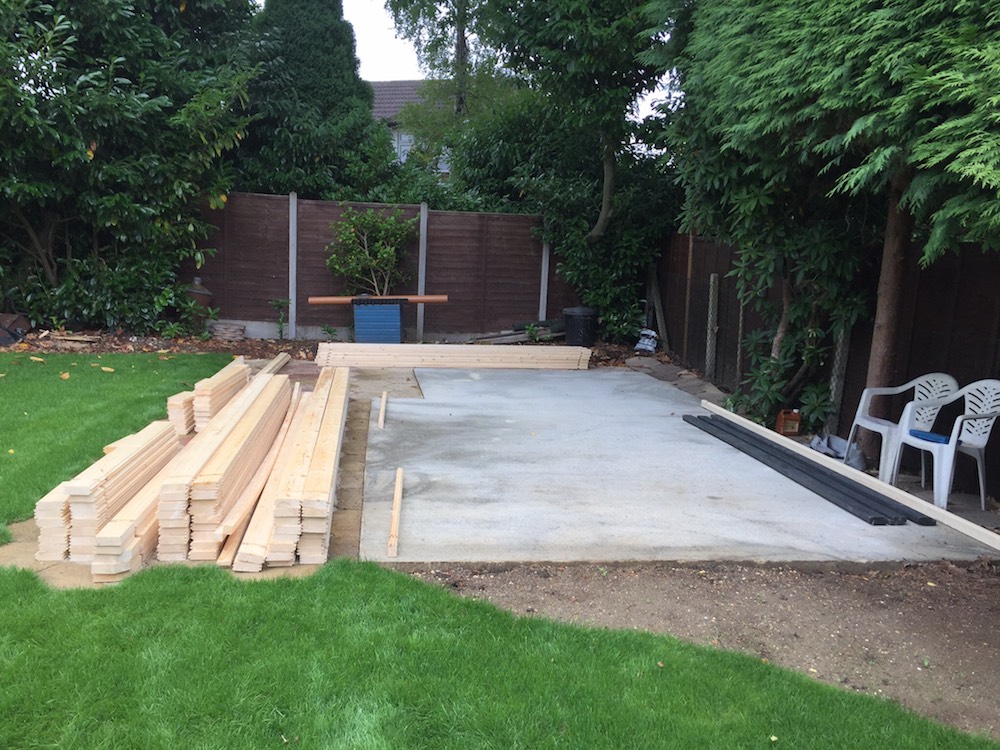
Having chosen the Jenny, we needed to expand the concrete foundation as the existing foundation was too small. We toyed with the idea of just adding to the existing foundation but given its undesirable position, we ended up needing a new foundation entirely. We called a tradesman in for this. Since we would still need a shed of some sort, we wanted to have a single foundation. This would cater for both the Jenny and a shed next to it. Efficiency is key, especially since the tradesman will be doing this at the same time.
Anyway, back to the real story about Jenny.
The Delivery
The package arrived well packaged delivered by a large articulated HGV straight from Holland with a forklift attached. It scared the neighbours silly when the forklift drove down our road with the package (5m long) across the road. Luckily, the forklift maneuvered really easily, depositing the package neatly on our drive. It did stay there for a couple of weeks untouched as I needed to ensure the space was ready to receive it.
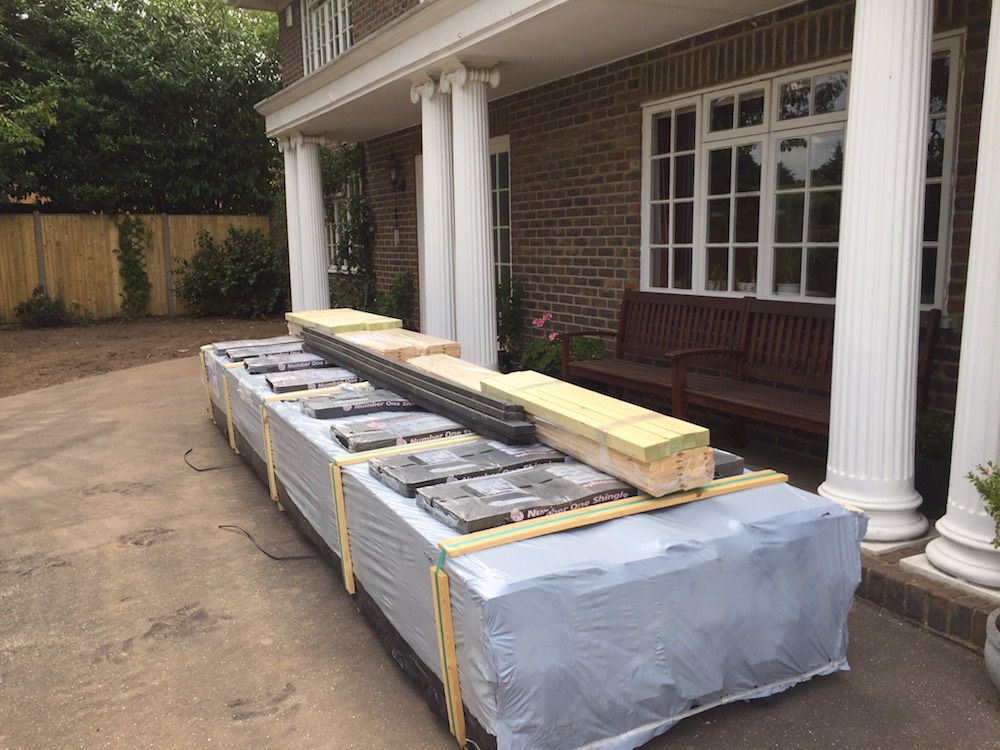
When there was finally a good weekend-weather window the job begins. On unpacking and taking inventory, a few “additional” planks securely packaged the items. However, this also makes it quite a challenge to determine which are originals and which are packing planks.
As usual, some of the wall log pieces were a bit warped. The video from Tuin reassured me that this is quite normal though. There are techniques to deal with warped wall planks since they interlock.
There were also a couple of very long (5m) square planks which, for whatever reasons, were extremely warped. At the time, I thought little of them thinking there will no doubt be ways to deal with them. These were in fact the eave slats for the roof (used to stiffen the edge of the roof board and provide a surface to nail the fascia covering) as I later discovered. This turns out to be a much bigger problem than I anticipated…


Setting Up
So first step was to lay the foundation beams. I bought the recycled plastic foundation beams as these would never rot. Getting these cut to the right size and angle was actually quite challenging, as they’re just slightly too big for my mitre block. In addition, as they only comes in 3m length. I had to join them for all 4 walls – well 3 actually as the front has the gap for the door anyway. Given the importance of getting the foundation absolutely squared, this was IMO the most critical step in the entire build.
With the unpacking/checking and moving the logs into the garden ready for the build, setting the foundation layer took me into the following day. In fact, it took me almost another 2 hours the next day before I was happy to proceed. I also had the help of my lovely wife to check the squareness of the base layer as once it started going up, you don’t want to undo it!
Building the Jenny Log Cabin
Before I started the build, I also laid down a layer of DPM (plastic membrane used to prevent rising damp). I know the advice was only laying it under the foundation pieces and then, once completing the build and readying the floor, to add the floor covering, as puncturing during the build was a risk. To be honest, the DPM did get a bit battered with all the foot traffic but they stayed intact. In any case they were cheap enough that I bought twice the required amount which allows me to have a second layer once I am ready to install the floor. 2 layers of DPM protected it well from rising damp I think!
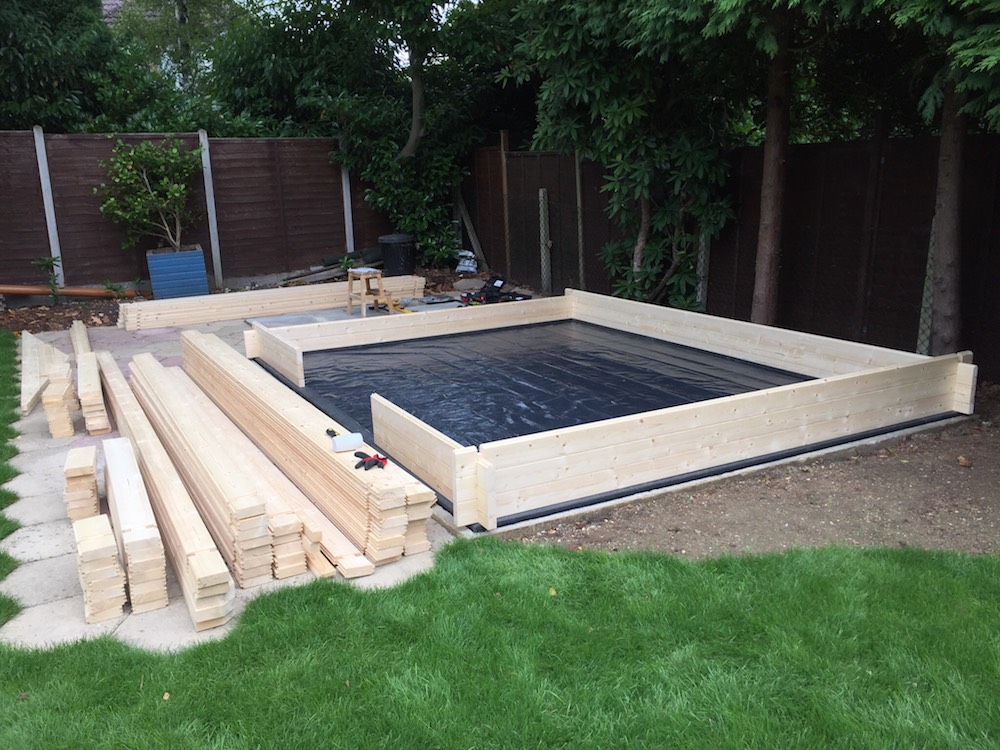
Once the foundation layer is in place, the walls go up surprisingly quickly. You do need a good (heavy) rubber mallet for this which was something I found invaluable. I bought a 32oz (about 1kg) white rubber mallet just in case my (smaller) black one would leave marks but was very glad for the heavier mallet, which really help to hammer the logs into place. A couple of good, strong Irwin Quick Grip XP clamps helped the few warped pieces into place. The door frames (which needed to be put together from the 4 separate pieces) goes in after 5/6 layers of wall logs. BTW, be careful when putting together the door frame especially the stainless metal covering the bottom piece – it is very sharp and will easily slice your fingers. Don’t ask how I know.
The windows go in once you get up to the right level. Be sure to get the window frames down squarely and adequately as if not, you may find later that the first full length log will not fit. It had me scratching head for quite some time before I figured this out.


Once the final wall logs are in place, it is time to fit the apex logs. At first, I worried that it came in one piece (which can be quite heavy) as you will need to raise it quite high. However, it comes in normal, log size pieces which interlocks into each other via T&G so quite easy to install in the end. Installing the long roof purlins fixes the apexes in place and make the whole structure very stable. Next step is installing the roof boards!
Installing the roof was the most onerous job in my build. Since we sited the cabin close to the edge of our property and under the existing hedging conifers (which I wanted to keep as much as possible) meant that we needed to install one half of it under the conifers. Installing the roof boards was actually not so hard as you can do this from inside the cabin using a step ladder/platform, but the roof shingles was an entirely different challenge. Also, because of the proximity of the conifer I ended up having to jigsaw off about 5cm along the entire length of the roof once it was already in place – due to the proximity of one of the conifer tree.


Once the roof boards are on, it was time to install the shingles. These came free with the cabin and we got the rectangular one. We would have preferred the hexagonal shingles but as it is free, one cannot complain. This took quite some time to complete especially the half that is under the conifers. I had to crawl along the roof under the conifers with very little headroom whilst measuring, cutting and nailing the shingles in place. It was the hardest part of the build but also a tremendous sense of achievement once completed. I have to admit the shingles really finish off the cabin in fine style.


We also bought the floor kit with the cabin, since this finishes off the cabin nicely. The thought of using OSB boards after the personal effort and attention of the build makes me cringes. As the floor is inside, there was no real rush to do this but unfortunately, there were a couple of weekends of heavy rain so exterior work has to wait. The floor boards were installed in a similar fashion to the roof boards (in fact, I think they are the same except for the numerous finger joints that exist with the floor boards) but here you have to cut all the boards at exactly the right place in order to ensure both pieces can be supported by a floor joists at the joint. I used plenty of nails and luckily there were plenty supplied.
I was really keen to ensure protection of the exterior of the cabin ASAP. For this we got Sickens Rubal Saturn Plus in a specially mixed colour, with complimentary shade for the door and windows. These are the “thickest” protectant we found which Tuin recommended. We also got the Rubal Undercoat to make sure the final colour is nice and uniform and to give it 3 coats in total – I don’t intend to have to repeat this in the future and the attention and details will only be justifiable when the whole thing is “nice & new”. These paints were really good – nice and thick with strong opacity but boy, they do take some effort. Luckily, there were quite a few days of good sunshine, but I had to take extra days off work just to make sure the painting was completed.


The Cabin Interior
With everything completed, it was time to deal with the interior. We wanted to keep the natural wood look inside but thought it best to protect the floor. Unfortunately, there doesn’t seem to be clear equivalent of the Sickens Rubal. As such, we ended up with Tuin’s own recommended Carefree Protectant Timber Treatment. We don’t need that much but as you have to order 2 tins, we thought that if they are anywhere as good as claimed, we would be more than happy to use them for our garden furniture as well.
Applying the Wood Protectant to the floor was very quick and the Protectant goes on extremely easily – almost like painting on water in fact. Once we have applied one coat of the Wood Protectant we apply another, normal coat of wood varnish to reduce wear. This also gives it a slightly darker shade, which is actually quite nice.
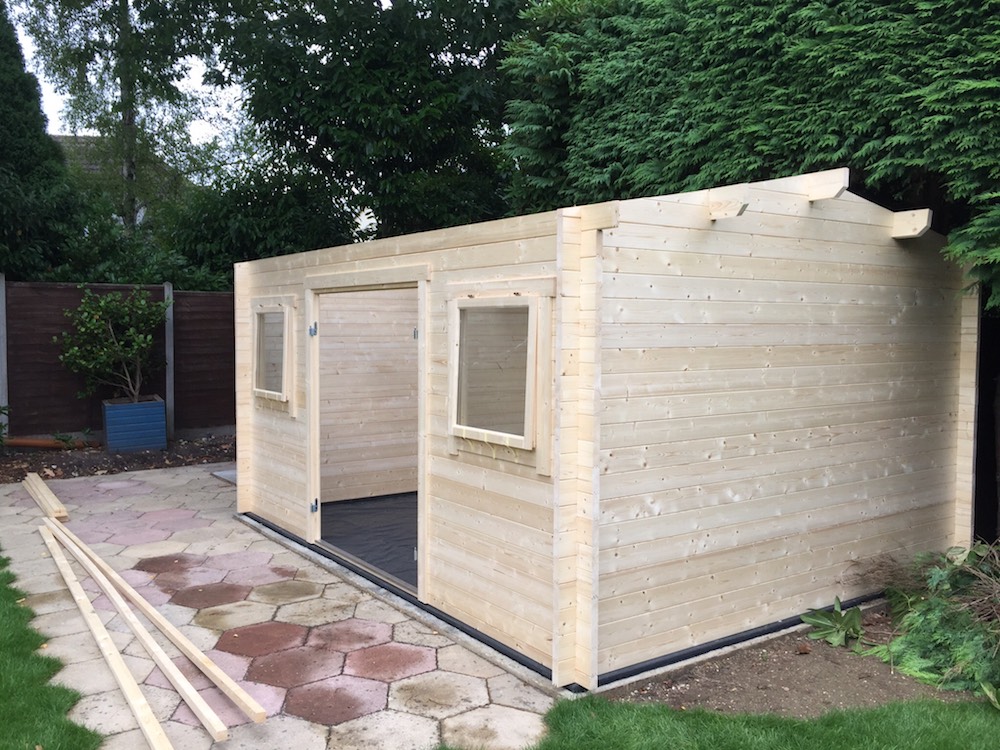
The Finished Jenny Log Cabin
Overall, I am very pleased with the quality of the Jenny Log Cabin and the service from Tuin. I would definitely recommend Tuin for their quality cabins which are quite reasonable price-wise. The free shingles, if you get them, is a no-brainier and really completes your build.
A few thoughts and tips from my experience:
- Use some good, large brushes when applying the protectant to the exterior. There is so much surface that you will be glad to have a decent brush which can cover the area quickly.
- Be careful when installing the Georgian door & window frames. The frames are very simple wood strips which you have to nail to the door/windows. They are not bespoke made, leaving some doubts as to how they fit. In addition, they are not really long enough thus leaving little space to put the nail. In fact, I cracked both my window panes as the nail hits the glazing. With hindsight I now understand why so many of the builds do not have these frames installed (even on Tuin’s own website).
- I would recommend getting the best wood protectant you can find. The amount of work required to do this will outweigh any cost considerations and you will regret using cheap stuff (or just end up doing a sloppy job).
- Get a decent rubber mallet (ideally white so that it doesn’t leave marks).
- Make sure you have a good set of strong quick grip clamps as you will need these when installing warped logs or the roofing eave slats. They are also an extra pair of hands which you will find invaluable at times.
- Take your time with the roof shingles (if you are using them). They take some time to install. The quality and appearance of a well-laid roof shingles really add the cherry to the cake.
- With the cost of the cabin and effort required to build, I would strongly recommend getting at least 2 layers of DPM. This will ensure protecting the interior and floor from any rising damp. They are also inexpensive.
- You will most likely need an impact driver to install the first layer of logs onto the foundations beams. If not, prepare for some cursing and sore hands.
If you do decide to go for one of these log cabin, prepare for some real hands-on action. I hope the above write-up would provide some assurance. I am a reasonable DIYer but nothing in this build can be considered difficult. The initial start is the most anxious part but once you are on your way, it is really not that difficult – certainly within the capability of most competent DIYers. The satisfaction and sense of pride after its completion, however, will be there to enjoy for decades thereafter. Good luck with your build.


Thank you to Mr T for such a lengthy and informative Jenny log cabin review! As for some of your confusion that you guys may have with the window and door frames – They are for decoration purposes and the timber isn’t very thick. For the Georgian look, you will have to be careful with installing them. Some people tend to opt out for them as they don’t like the look. If not, they feature on some of our showsite buildings!
Why not look into the Jenny Log Cabin for your unique garden canvas?
For more in depth customer reviews such as Mr T’s, browse through our Pictorial Customer Reviews.
Superb review of the installation – I am going to take the advice here to assemble my cabin which has just been delivered. This has been a great help. Thanks