


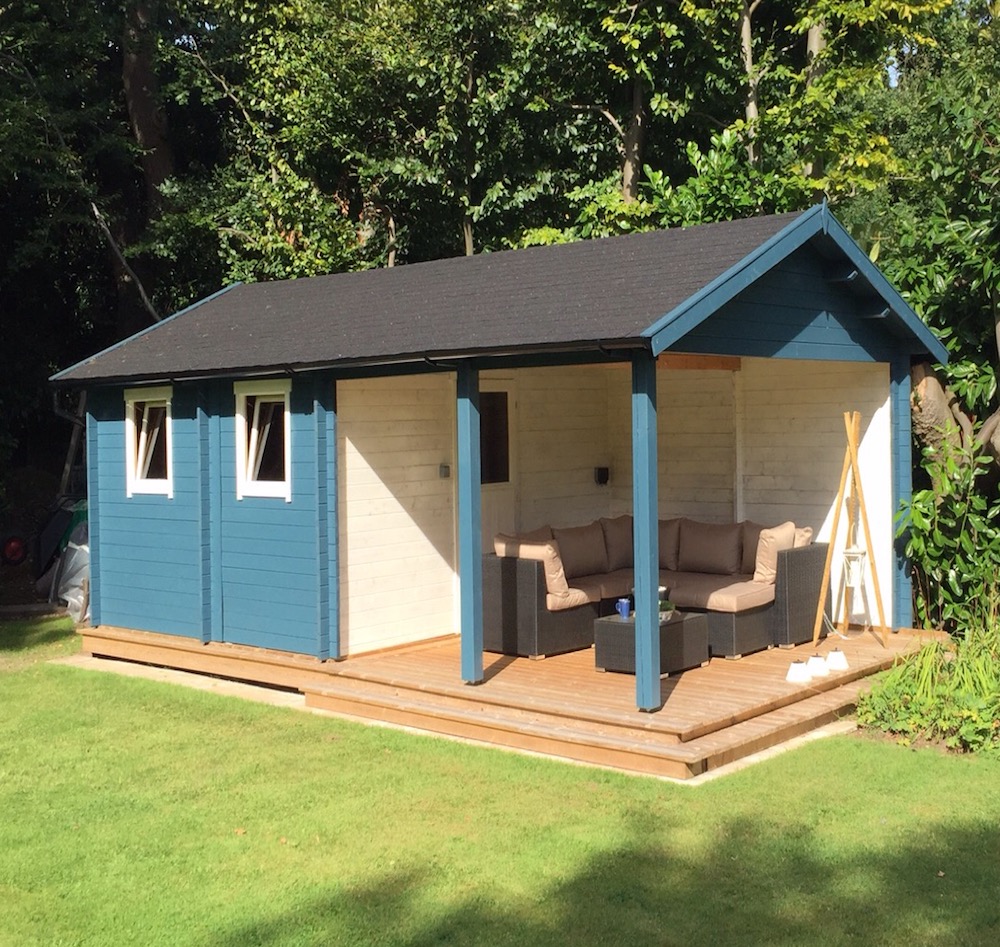
This is a review kindly sent in by Mr KVDL. This is an adaptation of our Carport Ever Log Cabin. to meet Mr KVDL’s requirements.
Requirements
Garden shed/log cabin with floor area of at least 15m2 with sizeable covered area for outdoor seating.
Research
Following extensive research into log cabins, gazebos, carports etc., I came to the conclusion that our requirements meant adapting a standard building. I came across a carport being offered in the Netherlands. I was also pleased to find out that Tuindeco had representation in the UK through Tuin.co.uk
In dialogue with Richard and team Carport Ever was adapted by decreasing the carport space and increasing the shed area by adding extra logs. In effect the inside wall was moved forward and the extra logs were used to fill the gap created using an H-profile.
Ever was ordered with factory impregnation. Something, which does not appear to be common in the UK but is a pretty common standard back in the Netherlands. Richard’s advise on the matter was useful though not conclusive.
One of the big advantages of dealing with Tuin is the exhaustive information available on their blog. Many articles from Richard but also from customers which is great for prospective buyers.
Ordering
The order process was relatively straightforward and specification for the incremental logs were added to the original order. I specified black shingles and whilst this appears to be the most common supply, at the point of order Tuin is unable to guarantee the color. I find this rather intriguing as to why the client can not be guaranteed the specified colour in the same way that additional logs can be ordered. In my opinion Tuin should consider this.
Delivery
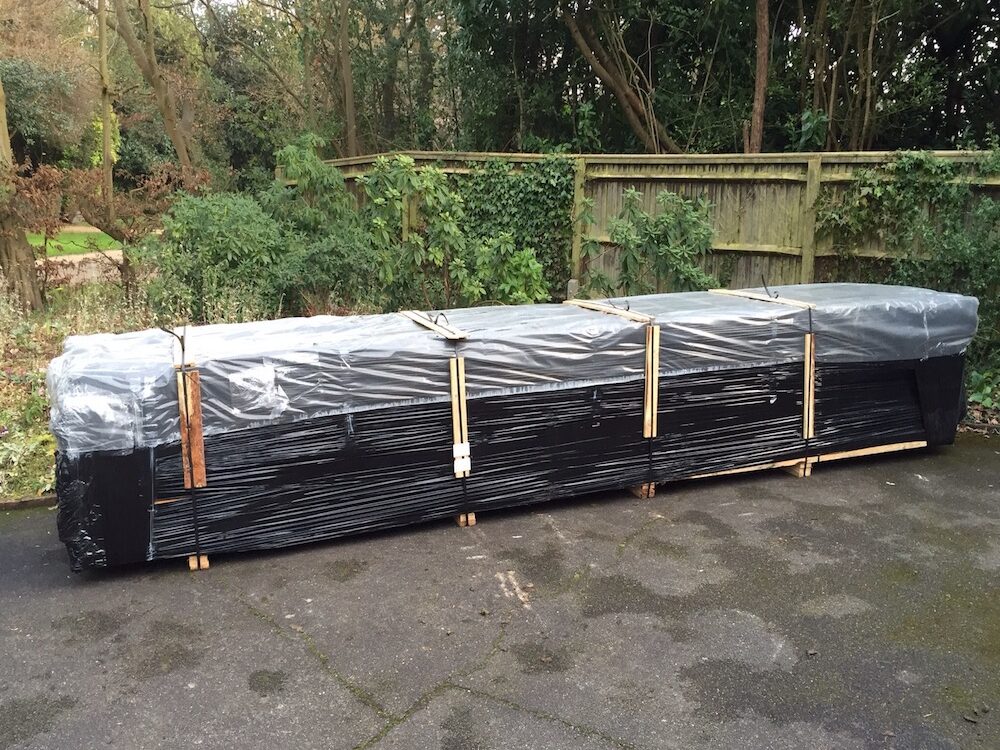
Within the specified delivery time, Carport Ever was delivered. Likewise, the transport company was brilliant in their communication and whilst there were minor access challenges the Moffit was expertly driven and the “parcel” delivered in the preferred area. Also, the wrapping of the package provides great protection from the weather.
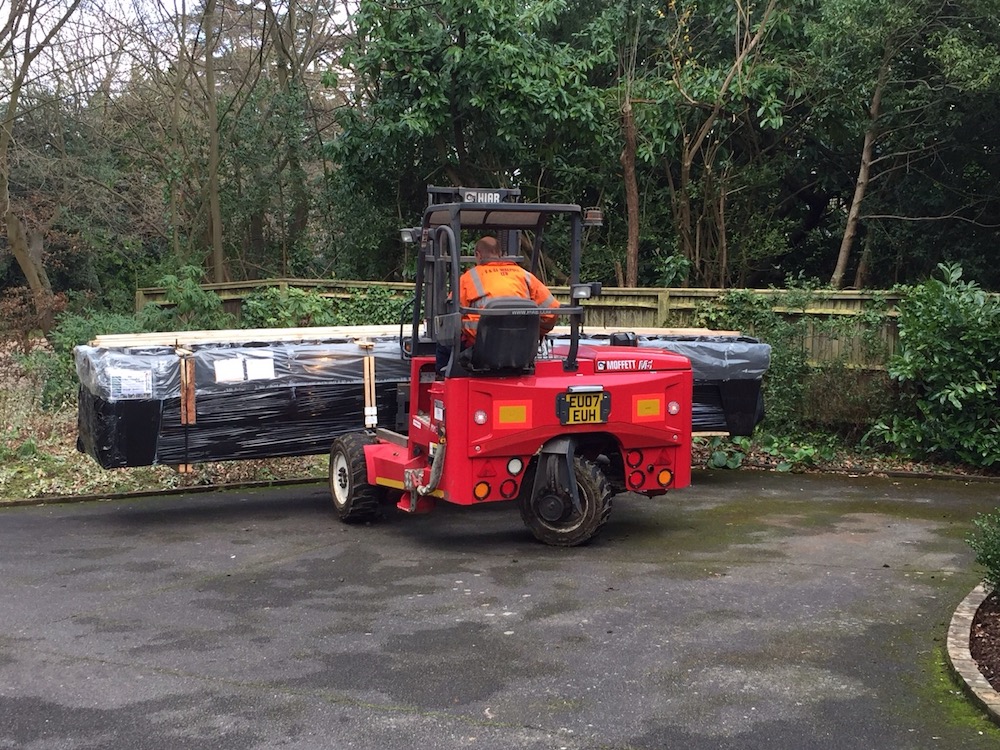
Foundation beams were delivered at the same time but it was clear that one of the beams was different. Tuin was notified and within 48hrs a replacement was delivered. This delay did not affect the building process.
Additional Notes
On the blog you can find information on mallets and based on this, I ordered two different versions from Amazon. A 24oz non marking Roughneck and a similar weight, white/black Silverline version. After extensive use the Roughneck was preferred simply because it appeared to have a better, firmer hit.
The drawings delivered with the building are A4 size and with the number of parts of this specific building, it takes time to study them and work out the various parts and their use. With the built taking place in early spring I had all the drawings laminated as well as enlarged to A3. With rain and coffee and tea spills the £5 spend on laminating was well worth the money and made reading the drawings much easier.
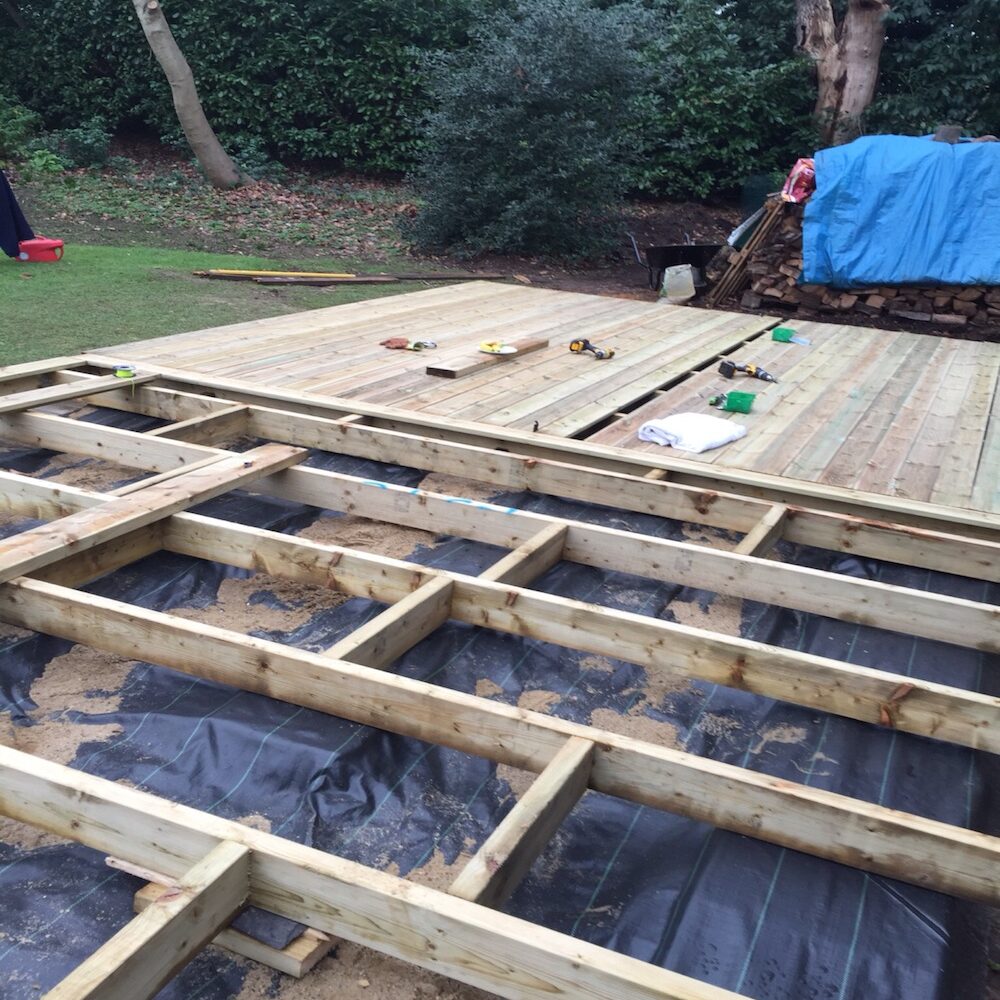
Note; all decking supplies were not ordered from Tuin and supplied locally. Spaxx decking screws were used; relatively expensive but easy to use and no split decking boards!
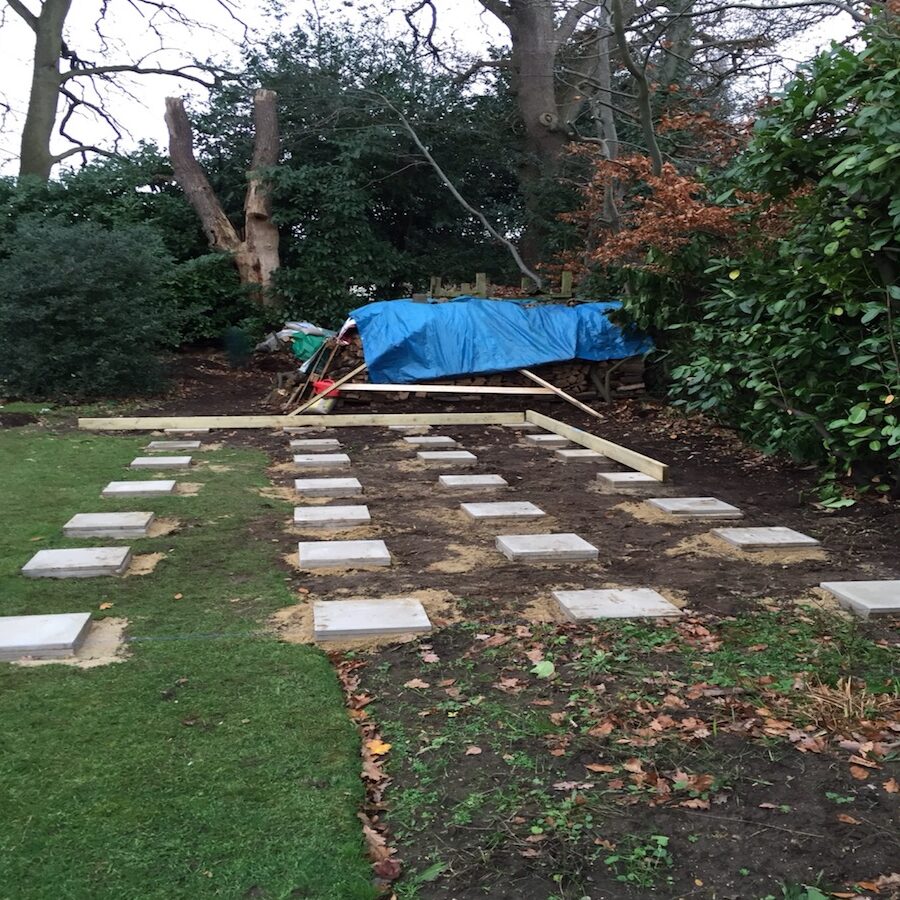
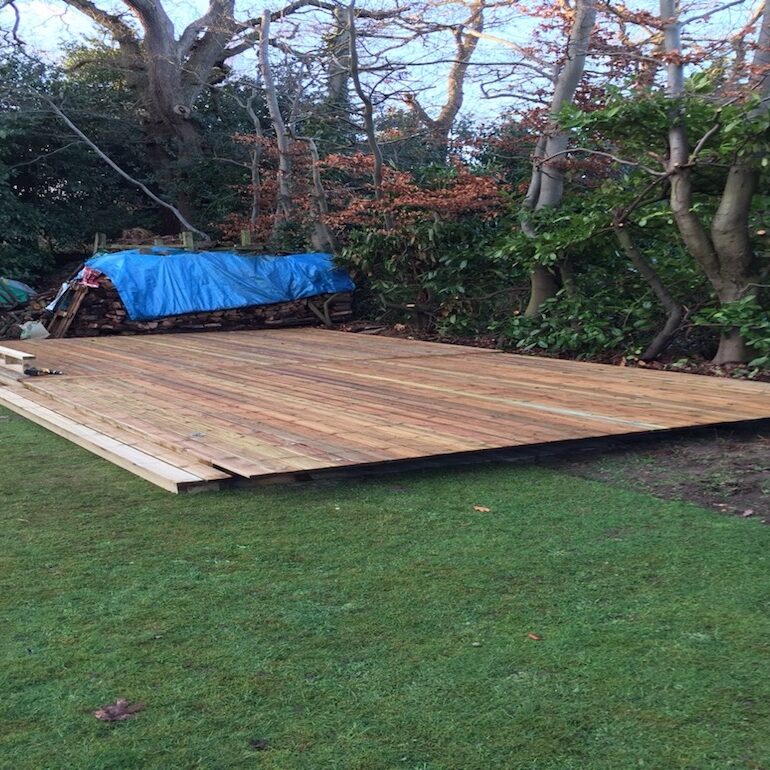
Foundation
Richard’s blog provides ample information about foundations and we opted for decking because of its intended use with double slabs used under the joists and weed suppressing matting to combat weeds coming through.
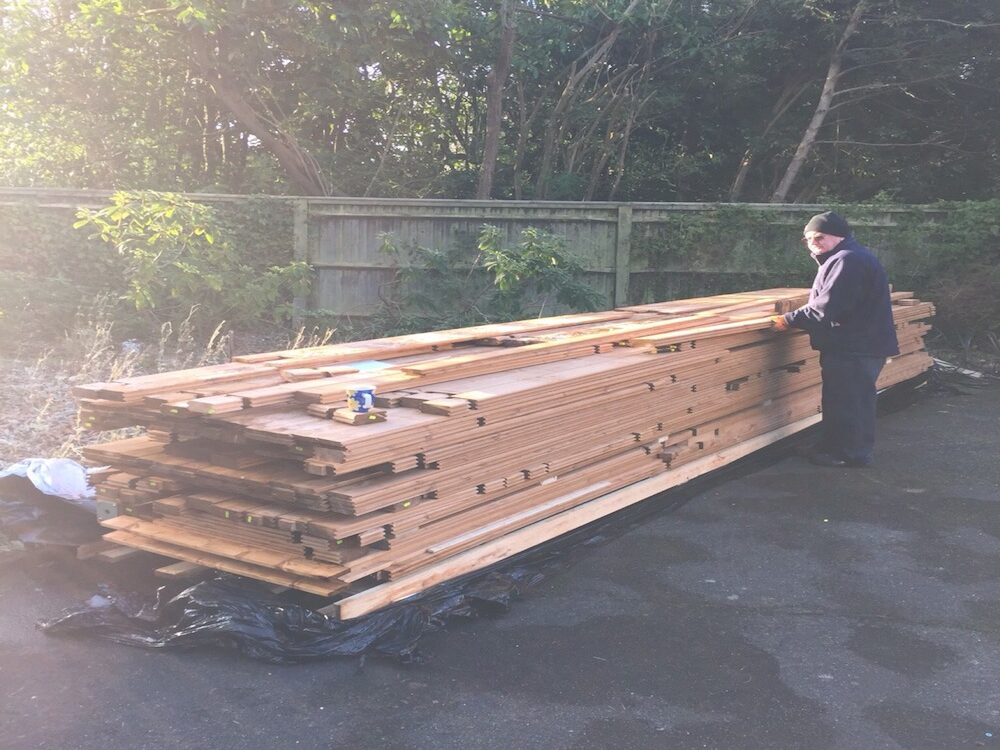
Unpacking
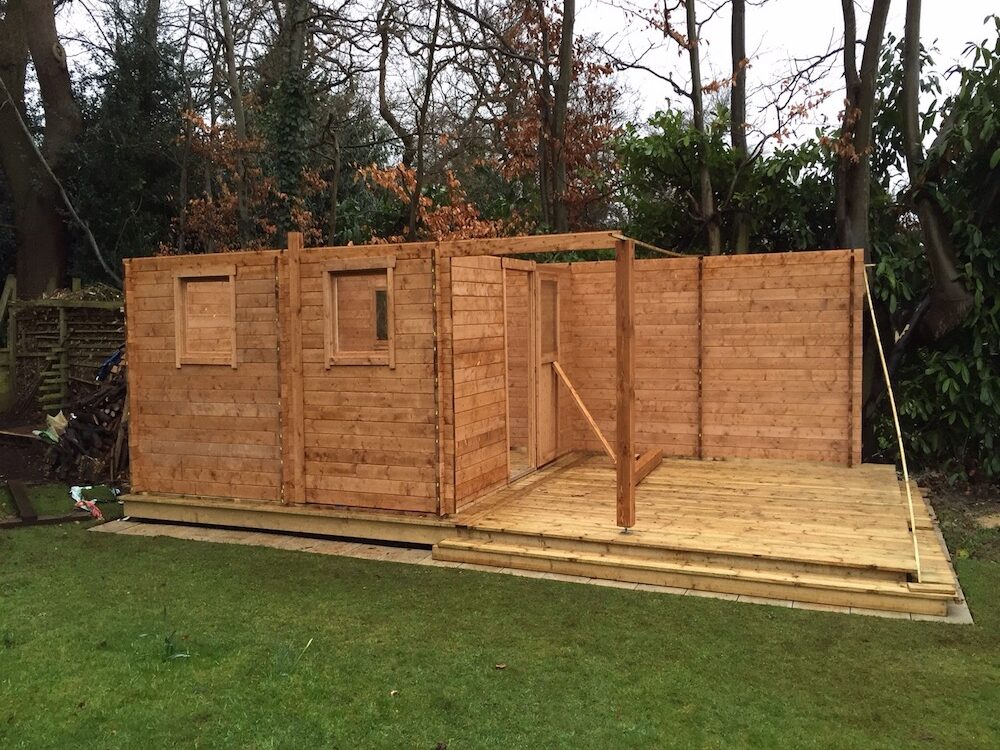
Upon opening the package the number of parts may seem overwhelming. Yet all parts are numbered which match the numbers on the drawings. It took 4 hours to carry all parts to the back garden and all parts were sorted in piles based on their respective numbers and indeed use.
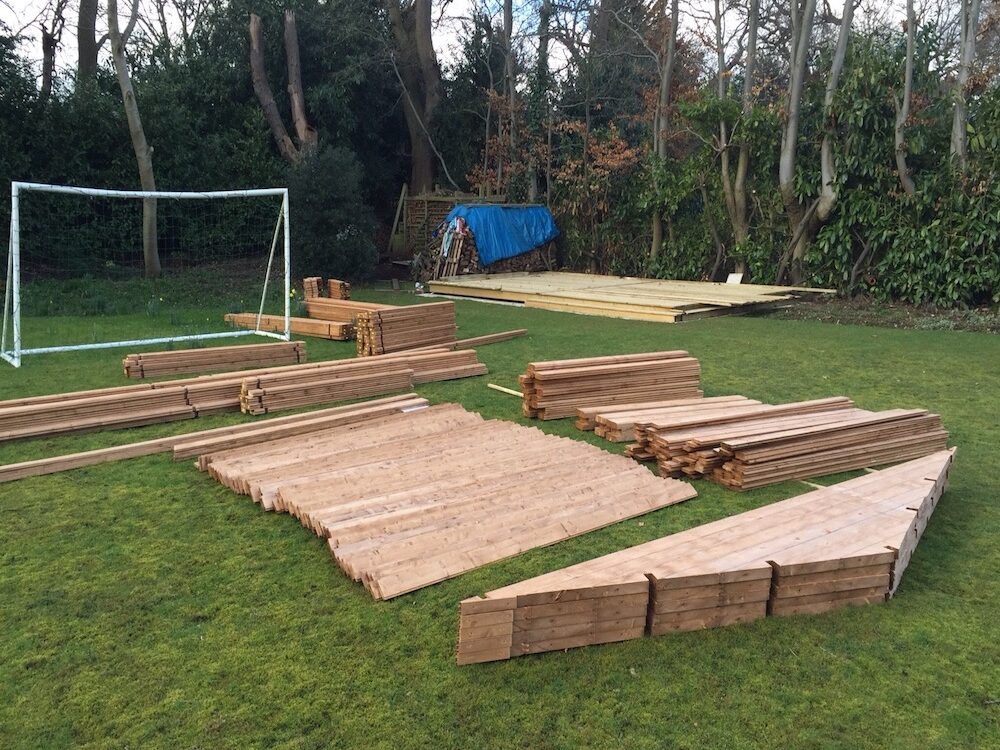
At that point it became clear that the additional logs ordered had not been factory notched ( as originally ordered ). Richard was informed and he arranged for Wayne to come to site and notch the logs in situ. Whilst present, Wayne also was able to pass on some of his experience from the numerous cabins he had built. Overall we lost approximately half a day in the built process but probably gained in other areas because of Wayne’s suggestions.
Building the Log Cabin Carport
With a built this size, two adults are required and an extra pair of hands comes in handy from time to time. Starting square and staying square takes its time throughout the initial layers of logs but after a while the shape remains firm and other than occasional checking the building does not move again.
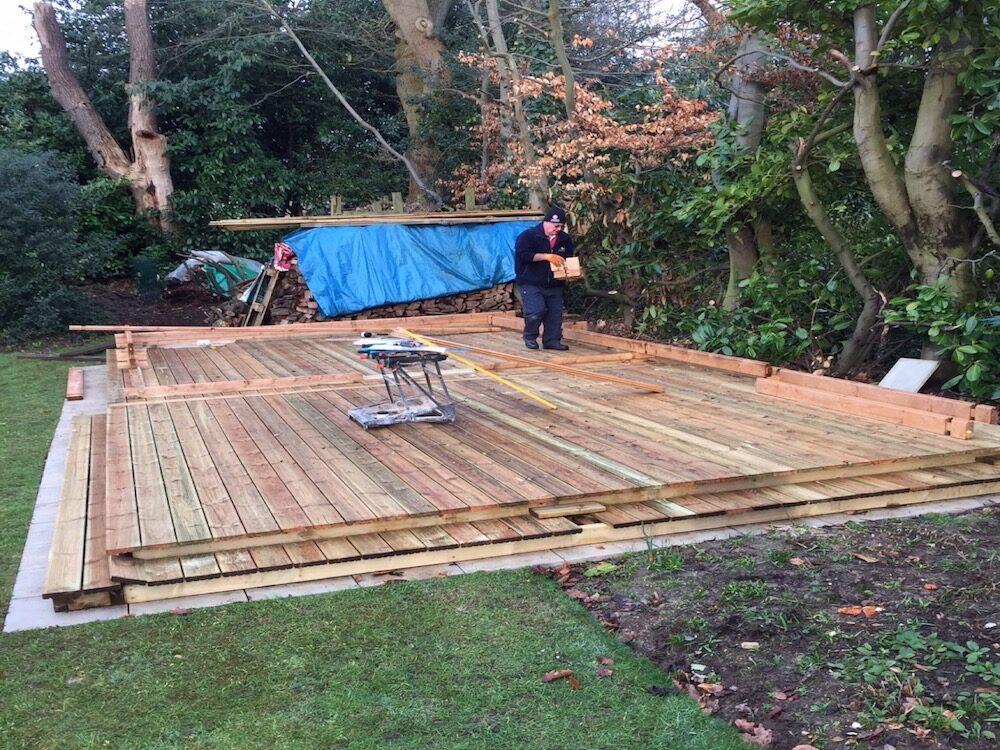
A3 drawings to hand and all parts sorted by number, spirit level, a large square, drills, some nails, hammer, saw, mallets and plenty of coffee in supply, the work commenced.
Initially the proceedings are slow. However, after the first two hours, the built logic (building by numbers) caught on and towards the end of day 2, we reached gutter height successfully. The following two days were spent on the roof. Additionally, the gables are very heavy and somewhat unstable (they are delivered pre-built). Unless you have 3-4 adults on site for this task, it is difficult to see how these lift in situ. We ended up removing some of the screws and lifting them up in two separate parts; much easier to lift and indeed reassembling is no issue at all.
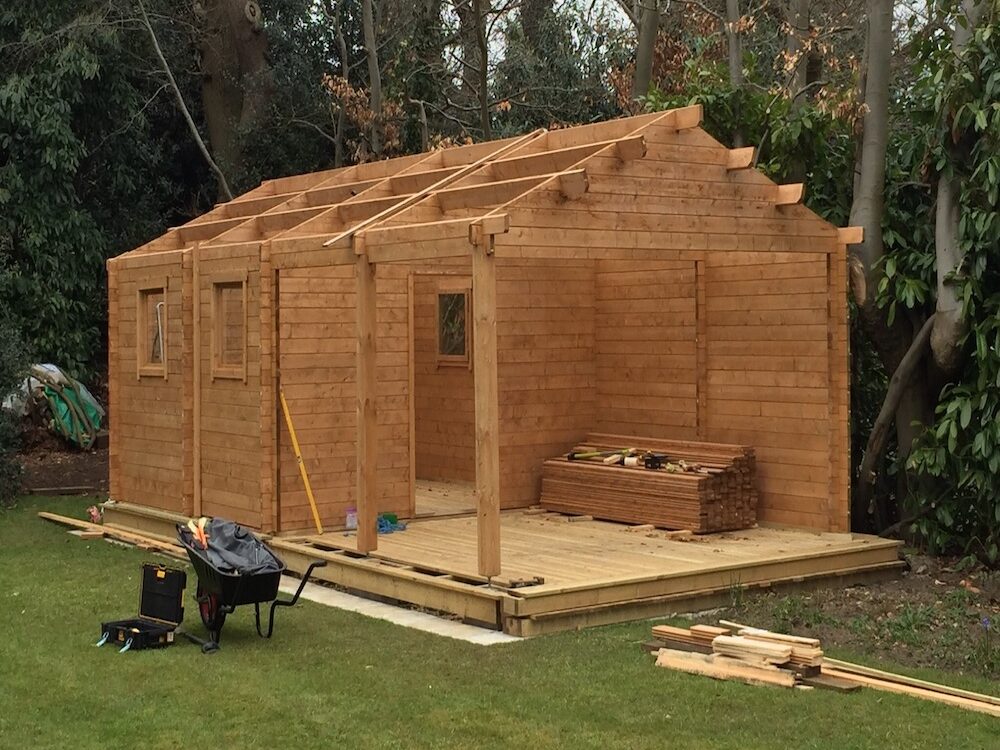 Purlins were fitted with relative ease and a large part of the remainder of the day was used to fit the many, many roof boards.
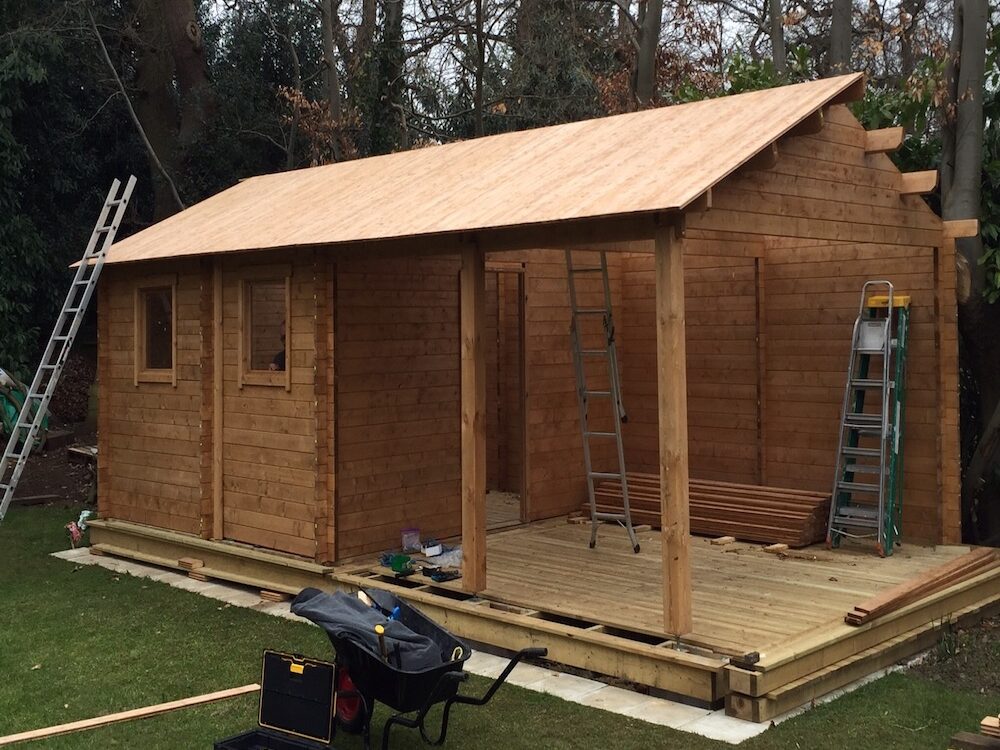
Fitting the Shingles
Before fitting the shingles, it is worthwhile reading the blog once more. Likewise, there are some really good hints/tips here which will make fitting straight forward and ensures a great finish. Overall, it took a full day to fit all the shingles.
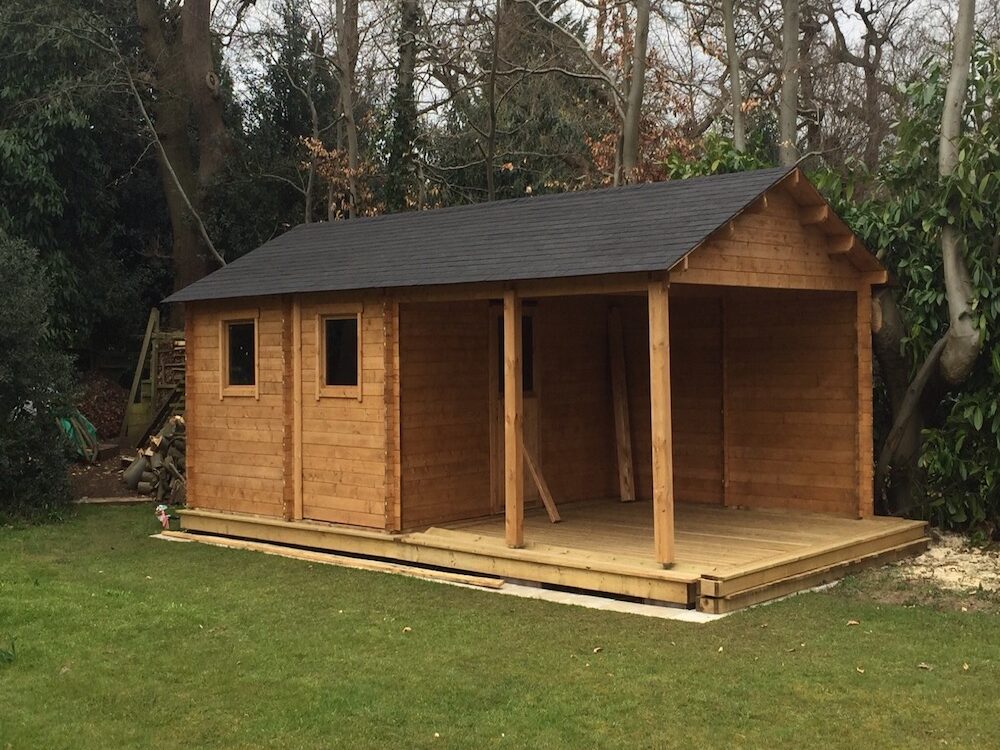
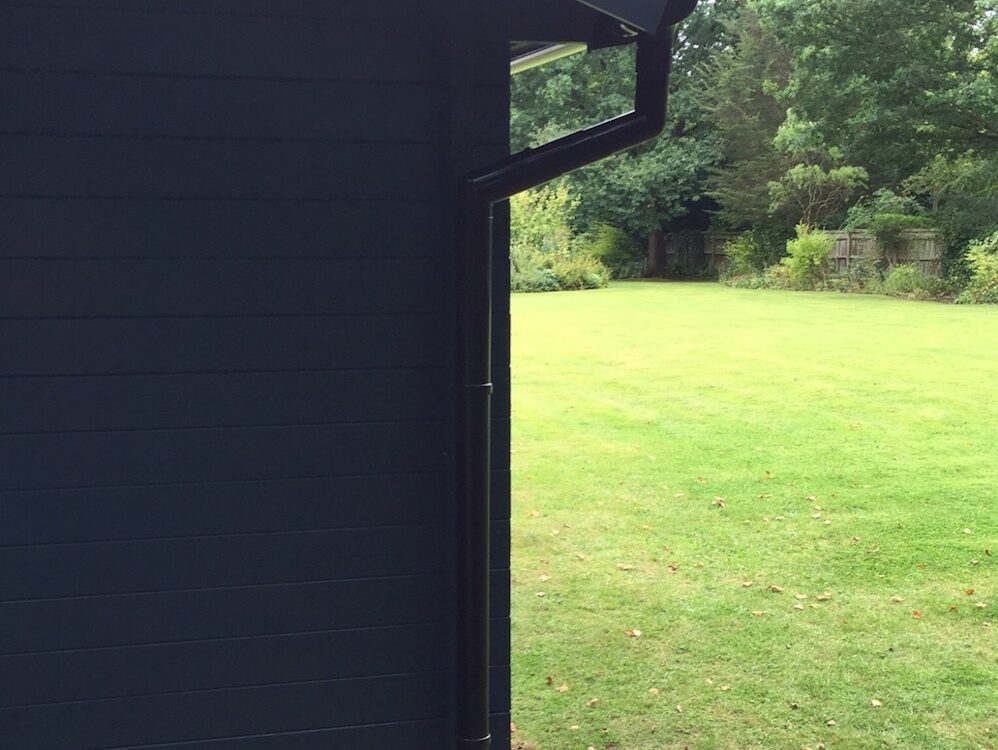
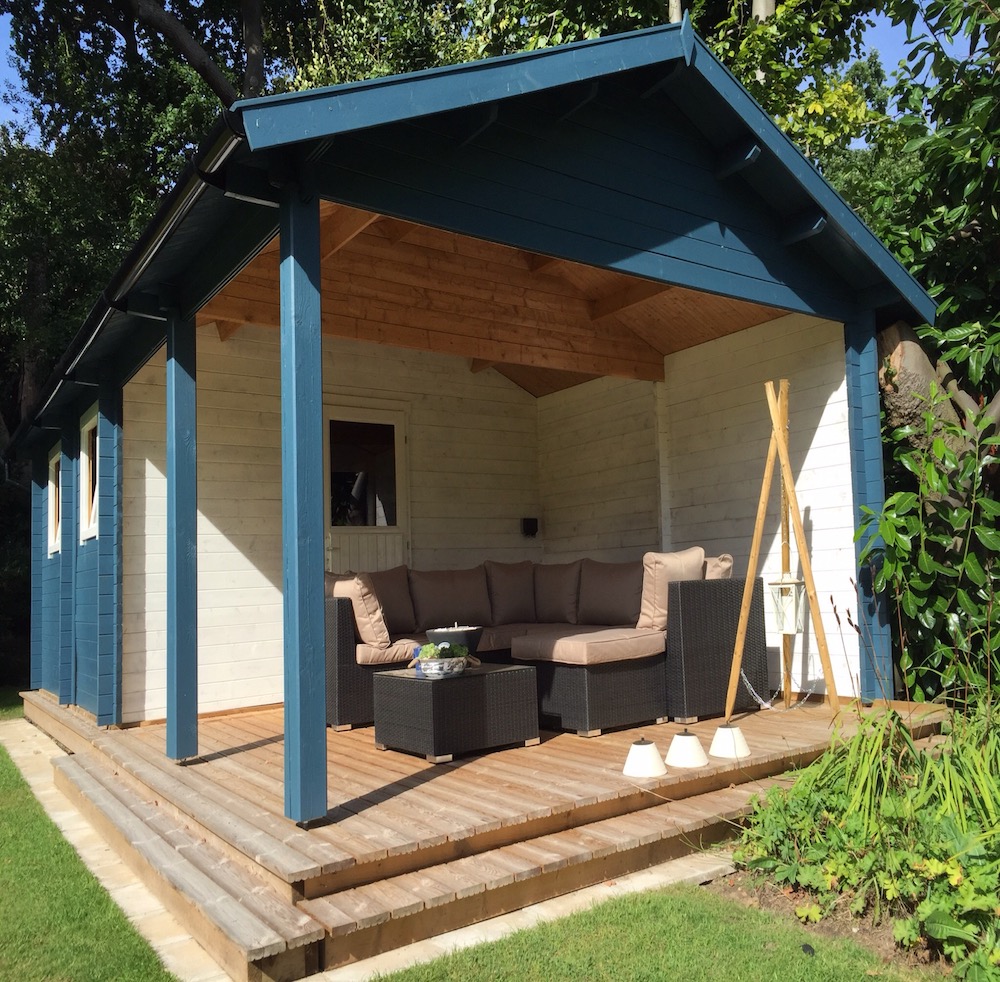
The building comes with barge boards, but using these “cold” against the purlins does not give a great finish. Instead, we used gutter boards, creating a much neater finish (see finished and painted building).
We fixed the guttering using spare logs. This then ensured that water drains away from the building.
Subsequently, we fitted electrics as well as a free standing workbench and shelving.
Painting the Cabin
Finally, we finished the building in Steel Blue and Off White wood treatment from Cetabever (AkzoNobel), a high quality wood stain. Also, the off white combination with the logs resulted (unintended) in a great rustic look. Ensure you have plenty of wood stain supply as the wood (even when impregnated) absorbs the paint extensively. (painting took 2 days; 2 coats).
Finished Log Cabin Carport Ever
The overall building work was completed in the Spring. With the addition of a rattan corner seating arrangement, we’ve used the area fully from Spring till mid November. Even when raining the covered area provides great shelter and still provides a fantastic area for simply relaxing and entertaining. Of course the shed has its own function and we have overall renamed the Ever to “Man Palace”
Thank you Mr KVDL for taking the time to send us a review and for the pictures. Other customers find this really useful and it gives people the confidence to install themselves. Additionally, in your case, you’ve proven you can carry out adaptations to our cabins as well.
You can also enjoy other customer experiences, builds and ideas here: Pictorial Tuin Reviews