


Our very kind customer Mr W initially reviewed our Jos Corner Log Cabin. Below is his experience.
February
An excellent experience – the ordering process, communication and delivery were brilliant. The delivery driver was very accommodating and placed the large Log Cabin package exactly where needed, and I might add with great skill!
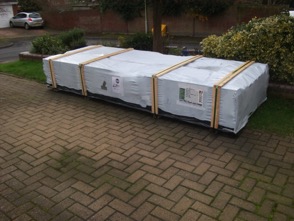
I started sorting out the various bits and pieces whilst waiting for more favourable weather. Likewise, I am very much struck by the excellent quality of all the components.
March
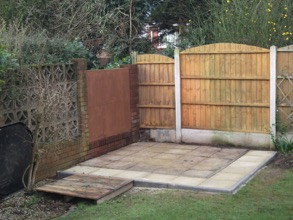
Managed, in between showers, to extend an existing shed base using paving slabs and getting it as level as possible. I think this part and setting out the foundation beams absolutely square are critical to ensure a trouble-free build.
April
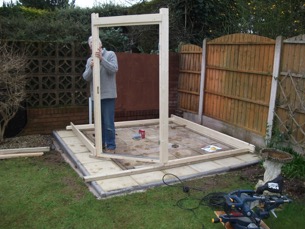
Foundation beams in place and getting everything square……
Laying the first few logs (easy-peasy)!
Not a bad idea to keep the door frame in line and vertical and build up to this. as due to its weight it could be a bit tricky to drop it in afterwards especially if you are building single-handedly as I was. Also, I levelled the foundation beams using wooden wedges. Later, we filled the small gaps under the foundation beams with expanded foam.
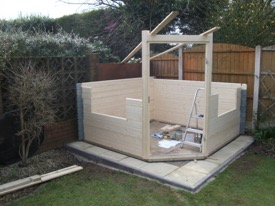
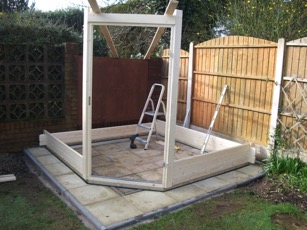
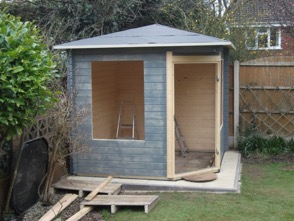
As the cabin was occupying a corner of the garden and two of the sides would be inaccessible after the build, I decided to paint the rear of these as I installed them……
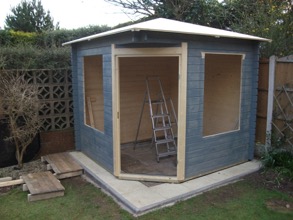
The structure goes up very quickly.
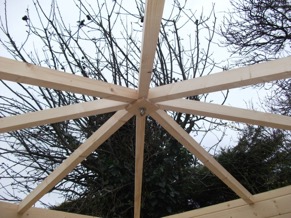
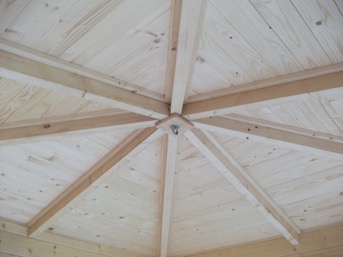
The roof looks daunting but as the timbers are already cut and chamfered it’s really quite straightforward… It’s at this point you’ll discover how square everything is. If things aren’t quite square the whole structure can be manhandled. The positions of the roof timbers will make obvious any ‘jiggling’ that is needed.
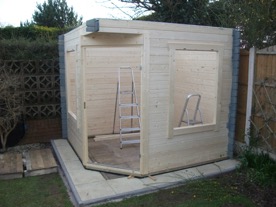
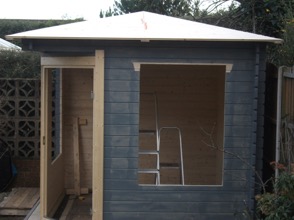
Now the roof boards go on ( I used 3″ decking screws rather than the supplied nails).
At this point I realised that the window frames are easily removed for painting the logs by unscrewing the internal parts of the frame (just 6 screws). This also allowed me to paint the window frames separately in the relative comfort of indoors.
Although not really necessary I decided to staple a waterproof membrane to the roof panels as an underlay for the shingles.
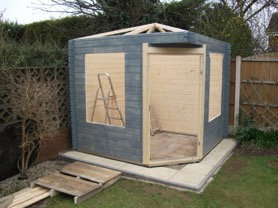
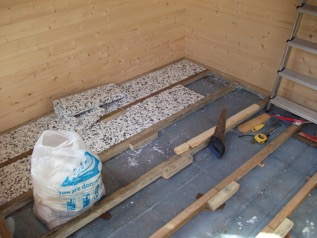
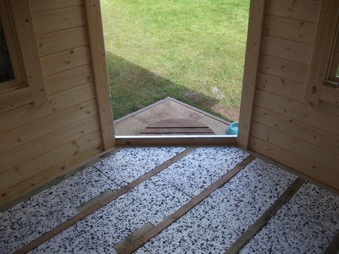
Test fitted the windows and door, I then disassembled them to paint the individual beadings. Meanwhile started the floor. Again, very straight-forward. A nice touch here is to include a plastic membrane under the joists and then some insulation – in this case 50mm Jablite in between the joists.
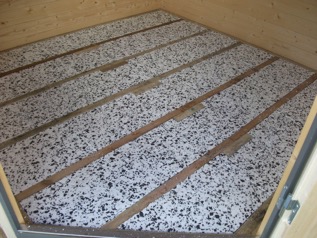
Ready for the floor boarding now…….
I put a 2mm gap between boards to allow for expansion…
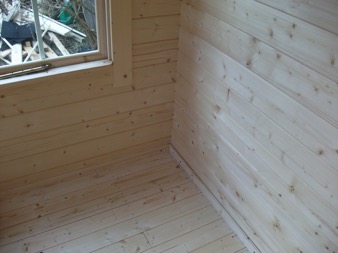
Supplied skirting boards fitted.
Nearly there!
A view of the IKO shingles. I made my own version of the ‘hips’. Also used a 150mm painted steel post cap at the apex of the roof.
I’ve spent the last couple of weeks building it and I am absolutely delighted with my completed Jos cabin. The only minor hitch I encountered was a couple of warped roof timbers. I contacted Tuin who responded very quickly and replaced them within 2 days without any quibble – impressive!
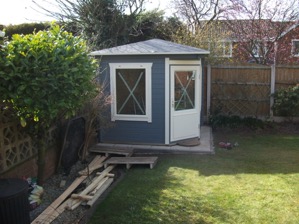
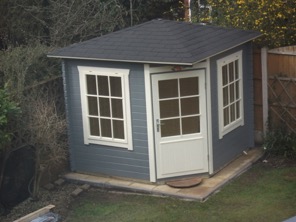
The Finished Jos Log Cabin
And here is the finished job complete with porch light and home-spun window boxes.
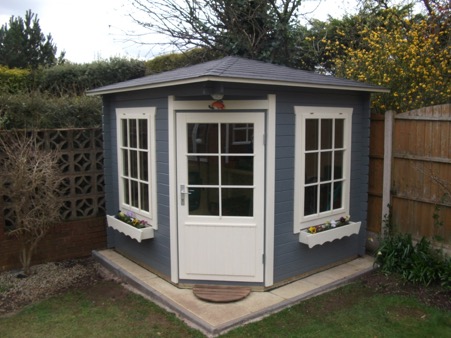
Completed Jos 28m corner log cabin
Many thanks for an excellent product – if only I had a bigger garden, I’d build another!
Keep up the good work Tuin – very impressed!
Thank you Mr W for sending this in. These pictorial reviews really help other people decide if they can install themselves. It also gives different ideas such as you roof cap and own made flower boxes, very nice!
If anyone would like to send in pictures and a story we always offer further discounts on products, presents and in some cases a cheque.
For all Customer pictorial reviews please see this page: Tuin Customer Blog Reviews
Hi looks great Mr W.I am thinking of getting one. I love the colour what is it if you don’t mind me asking.