


The Annabel Log Cabin a popular model in our Modern Log Cabin range. Take a look at this customers overview of their installation process for the Annabel Log Cabin .
The customer writes as follows
We bought an Annabel Log Cabin in the summer. Thankfully the weather was kind and allowed me to get it all up and painted without too much interruption. Overall, we’re very pleased with the cabin. It’s spacious, robust, easy to build and looks great. Delivery was quick, even under the Covid problems. The driver was great, he did a great job of getting it down our narrow cul de sac and right up to the top of the driveway. This meant I didn’t have so far to carry everything round to the garden. I have added some description and pictures of the build.
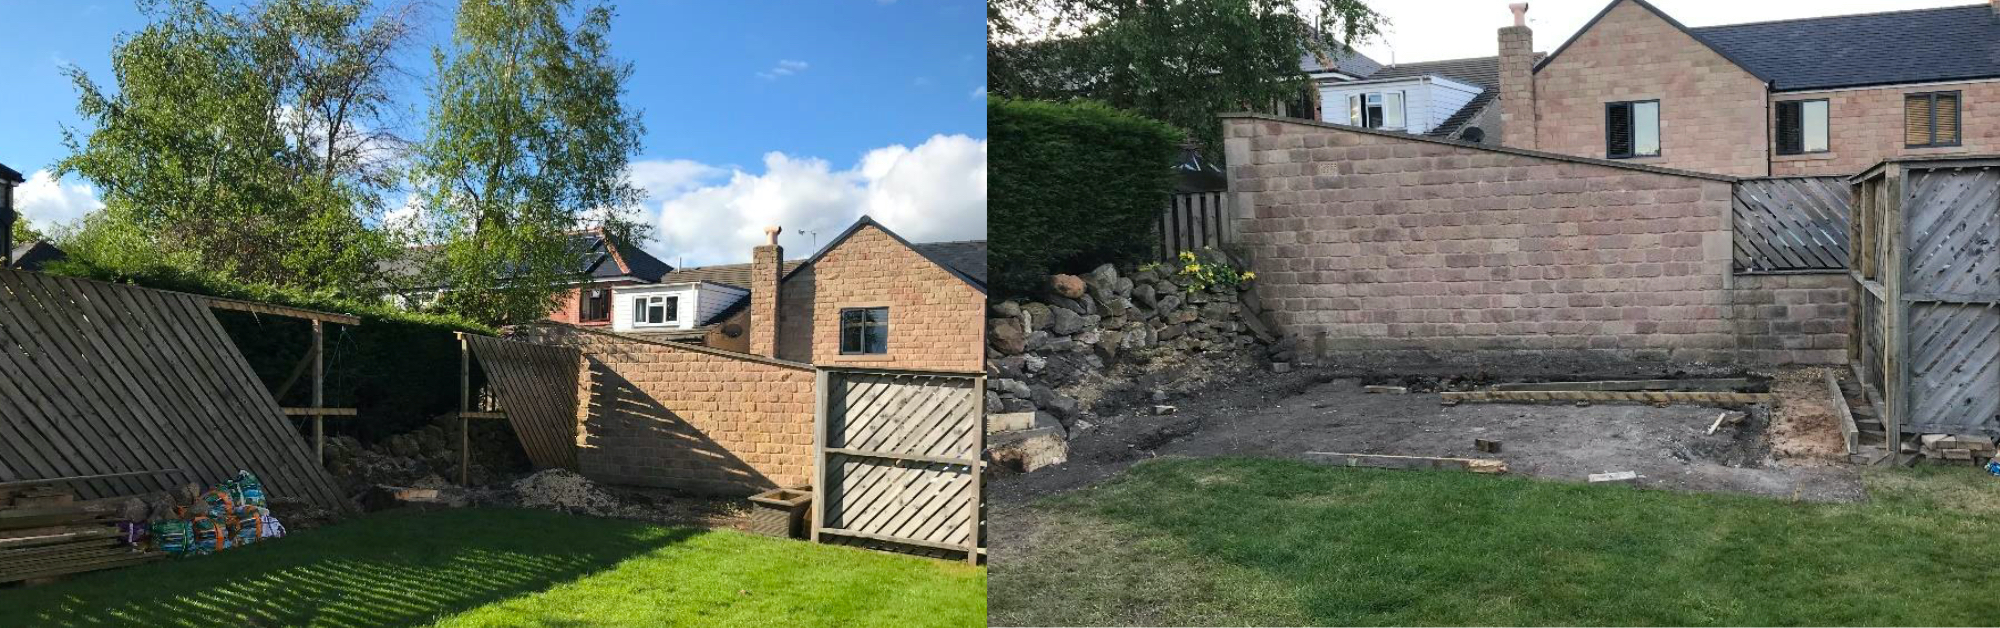
Preparation
This is the site prior to preparation. It had quite a slope on it so we needed to remove a lot of soil to get it level. We removed some of the fencing to another area to give about 50cm clearance all round and have good airflow.
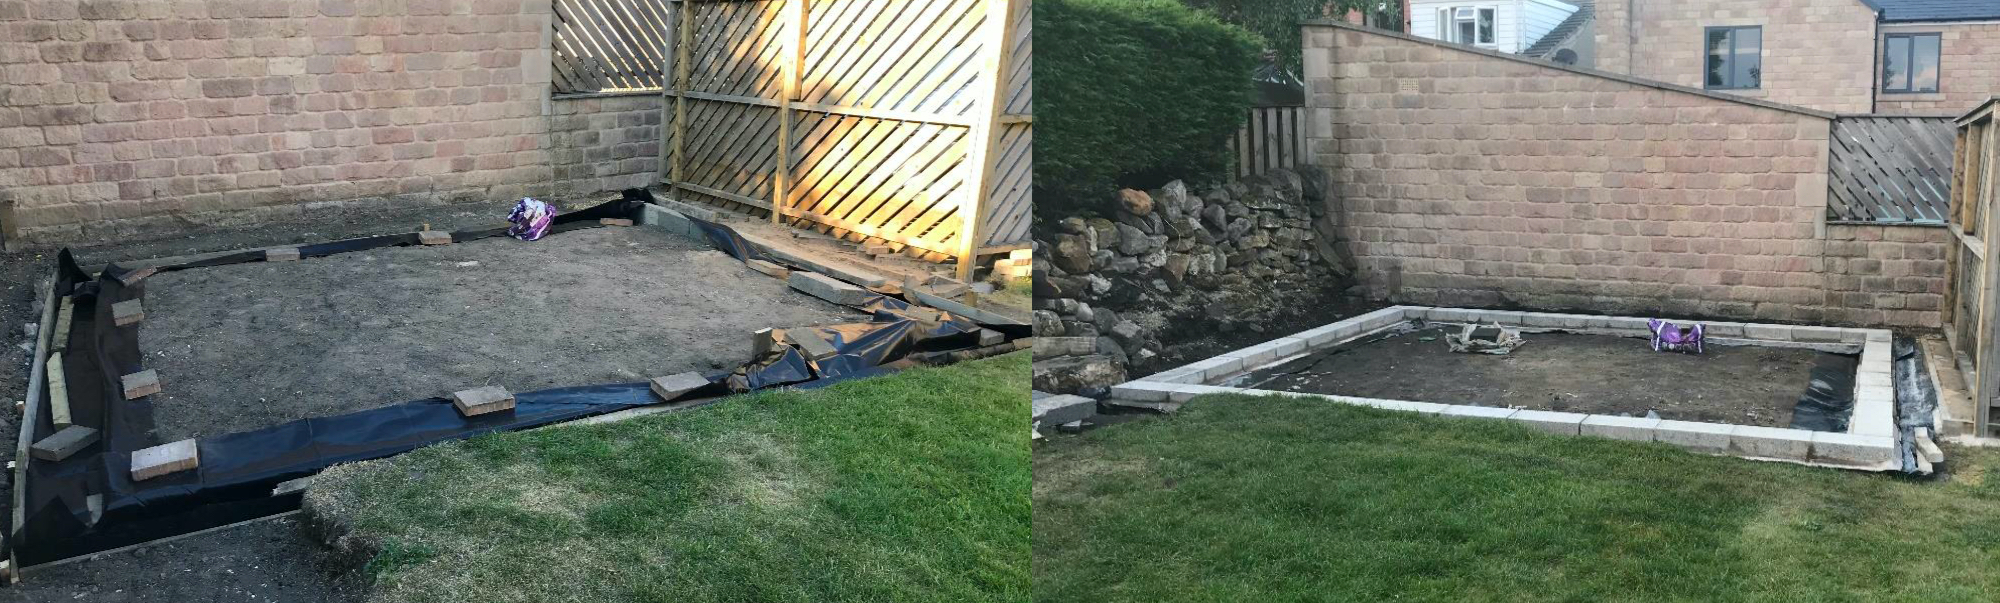
Rather than trying to lay a concrete base and struggle to get that flat, I chose to lay concrete foundations (about 200mm deep) and then laid medium density blocks on top to give a level and solid base. You can see the damp course for under the concrete.
Turned out to be relatively straightforward to get the blocks down and level. I used adjacent blocks and checked across to other blocks as I went along to make sure it was completely level all the way round.
Starting the build
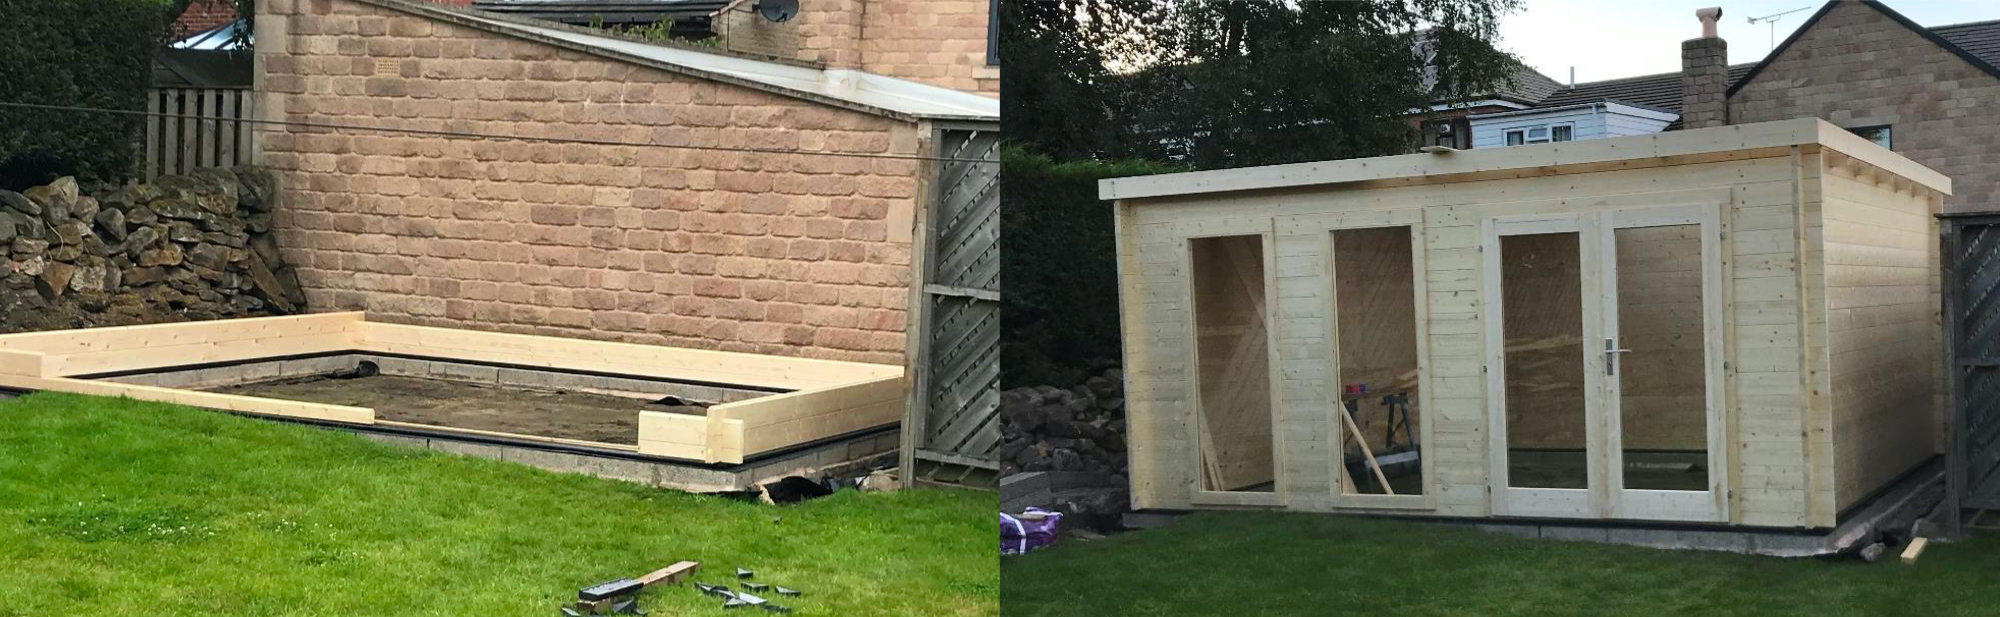
I purchased the composite foundation beams. They are a little tricky as they are not very straight and level. However that improves as you build up the walls and some weight comes onto the beams. You just need to nudge them into the right place when they have enough weight on them. So as not to move the overall cabin – I did this when the walls were pretty much complete.
You can see the start of the walls here – just needed to make sure everything was square especially for the first five layers or so. I used a large square but found that measuring the diagonals was the better way. That also helped make sure the space for the door was correct.
Building the walls is really easy – it is just giant Lego! The walls go up really quickly – I had the walls up within half a day. One thing to watch is making sure the wall segments between the windows and door remains vertical and even. That said, when I came to paint the cabin, I took the windows and doors out so it was then easy to nudge them back into place and get them perfect. I used a further layer of damp proof under the foundation beams – probably overkill.
Finishing touches
In the second image, this is the cabin fully assembled with the roof and facia boards all in place. I did have to cut some additional blocks to support the facia boards at the front and back to make sure they were strong and rigid. All looking good!
I used a rubber roof which was easier to lay than I thought. I put a drain in one corner which in hindsight was probably not the best solution – while it drains OK, there is a small pool of water always left. Perhaps a better way would be to fit a gutter at the back to catch the water over the whole width. The rubber comes up the side of the facia boards which are set slightly higher than perhaps normal – and the rubber folds over the facia boards a little. I then used some timber as a capping to firmly hold the rubber at the edges all the way around.
Treatment
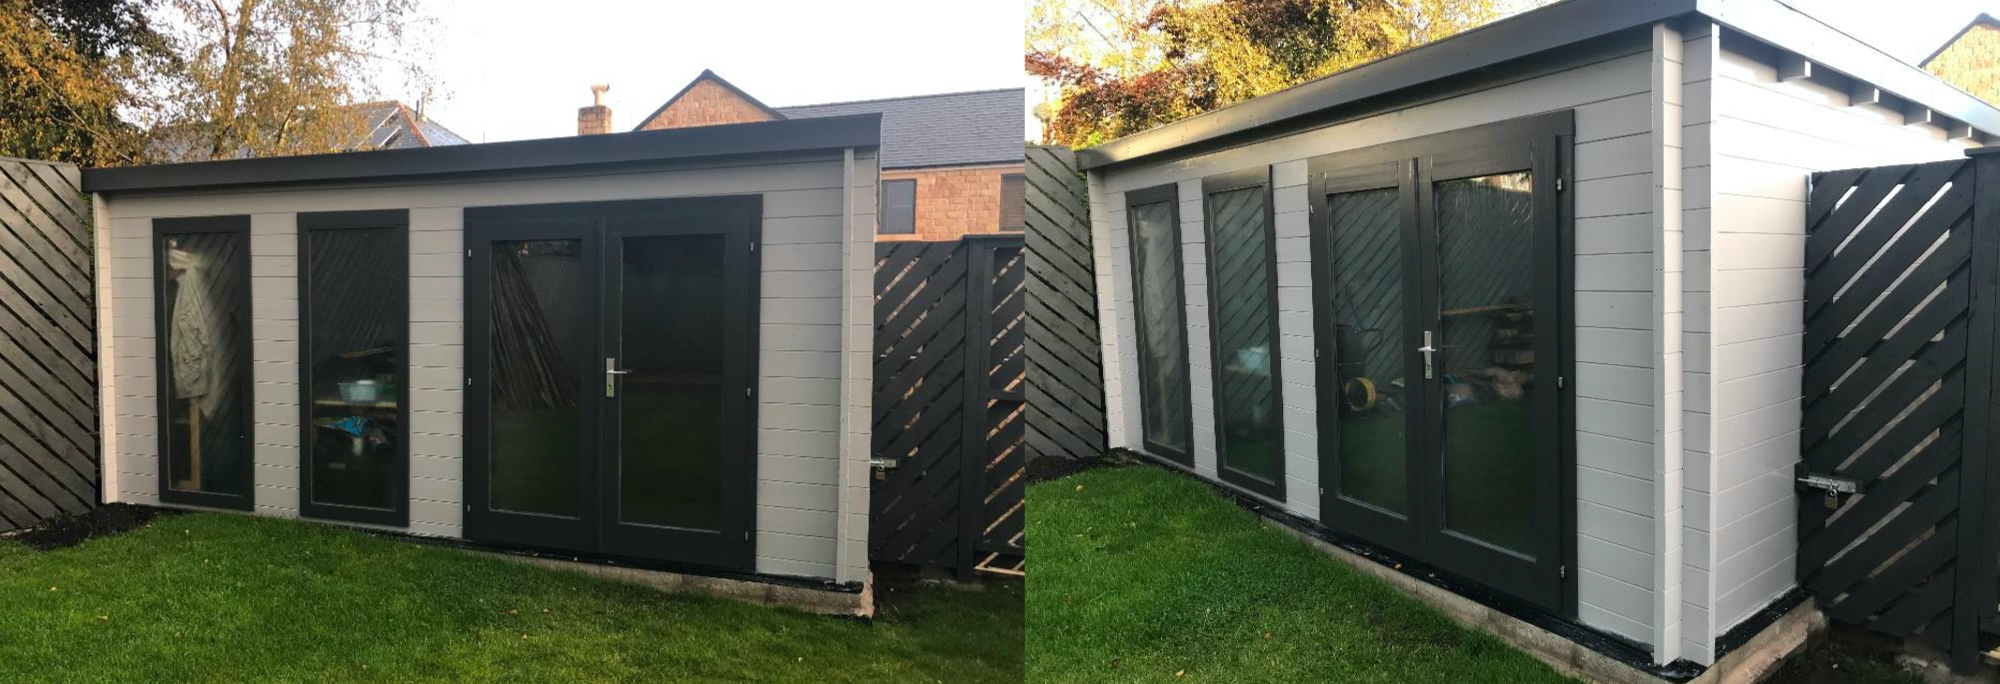
This is the cabin now fully painted and the fencing all back in place to finish it off. Prior to painting I treated the whole cabin – inside and out – with a wood preserver. There were two coats of undercoat and two top coats. I used Sikkens paint throughout. A little expensive, but wanted to make sure it was going to be well protected and would last. Painting took ages – a full day to paint one coat – was pretty glad when that was finished. We did try using a roller but it wasn’t great at getting into the chamfers between the logs so settled on a brush.
I removed the windows, the doors and the door frame which makes both them and the cabin easier to paint. I also used clear varnish on the inside of the cabin to seal it thoroughly.
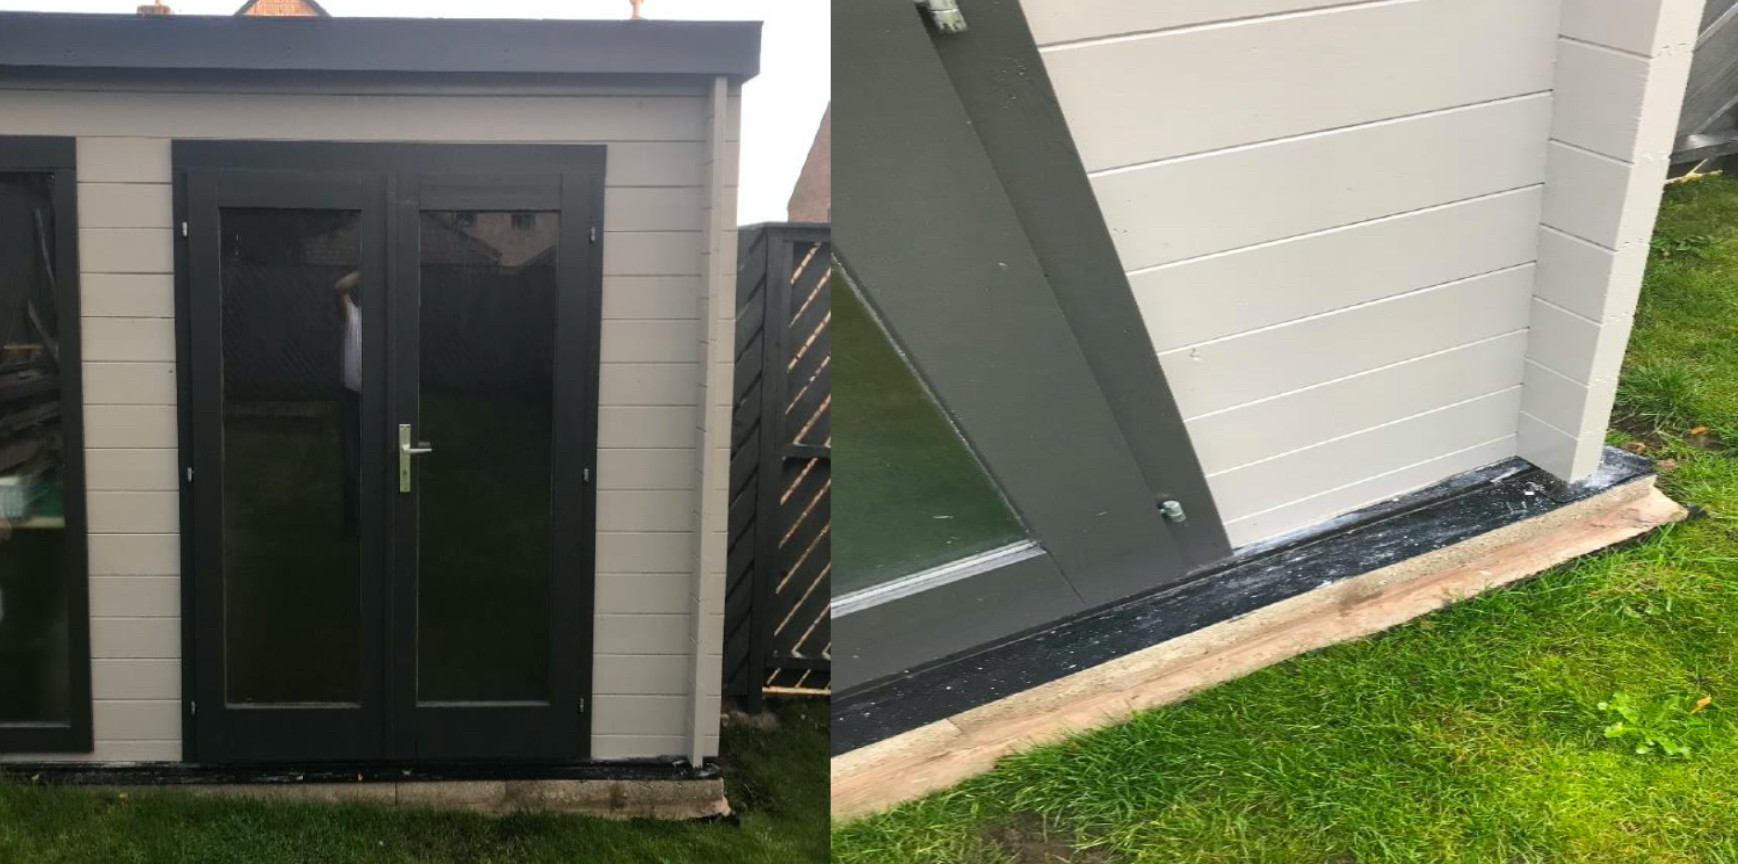
We then sealed all around the bottom of the cabin with clears builders silicone sealant – between the foundation beams and the foundation and between the foundation beam and the bottom log – and that stops any water from getting through.
As I live is right on the edge of the Peak district, it is very windy so I took the precaution of fitting the storm braces. We did have a few windy days and nothing moved.
As this is primarily being used as a garden workshop / garden shed, I opted to use the plywood boards from Tuin – really solid and much cheaper than elsewhere. These were all set on medium density blocks on a concrete foundation which makes them stable and rigid. I also treated each board with wood preserver. If we choose to change the use at some point in the future it would be easy to fit insulation, lay a nicer floor and so on.
Final thoughts
I would definitely recommend reading through the instructions and all the helpful advice on the Tuin website before you begin – it made it so much easier as the instructions that come with the cabin are rather limited. Overall, put in the effort to get the foundations right, building the cabin is much more straightforward and quicker than you think, painting was easy but it is a big area so does take some time but the end result is really satisfying. Now just need to sort the rest of the garden but perhaps that’s a job for next summer.
Thank you so much to this customer for this overview of the installation process for their Annabel Log Cabin. A real transformation with a striking colour scheme to match the sleek style of the Annabel.
Interested in more reviews like this? You can find more with a range of cabins at: Tuin Pictorial Customer Reviews.