Gazebo Installation Advice

I love our gazebos, I think you are hard pressed to find a comparable product for the money and in the materials that are offered. They are now in pressure treated, tanalised timber or the cracking Larch timber. This page shows our full range of gazebos. Meanwhile let me take you through some Gazebo Installation Advice.

Price of course is always a consideration when looking at products but I highly recommend you look at Larch, yes it’s more expensive but the benefits may just outway the extra outlay. I wrote an article a little while ago on larch timber, please see this page: European Larch Timber.

The gazebo I am featuring in this article is the Samos Larch Rectangular Gazebo.

This post is about my advice about the installation of Gazebos, please note it is ONLY my personal view, other people fitting these gazebos may have a better way of doing it.
Gazebo Installation Advice – Gazebo Plans

Plans are supplied with every Gazebo such as this, the picture links to the plans, as an example these are of the very popular Grande Gazebo. The Grande Gazebo is the pressure treated pine version of the one I’m featuring here.
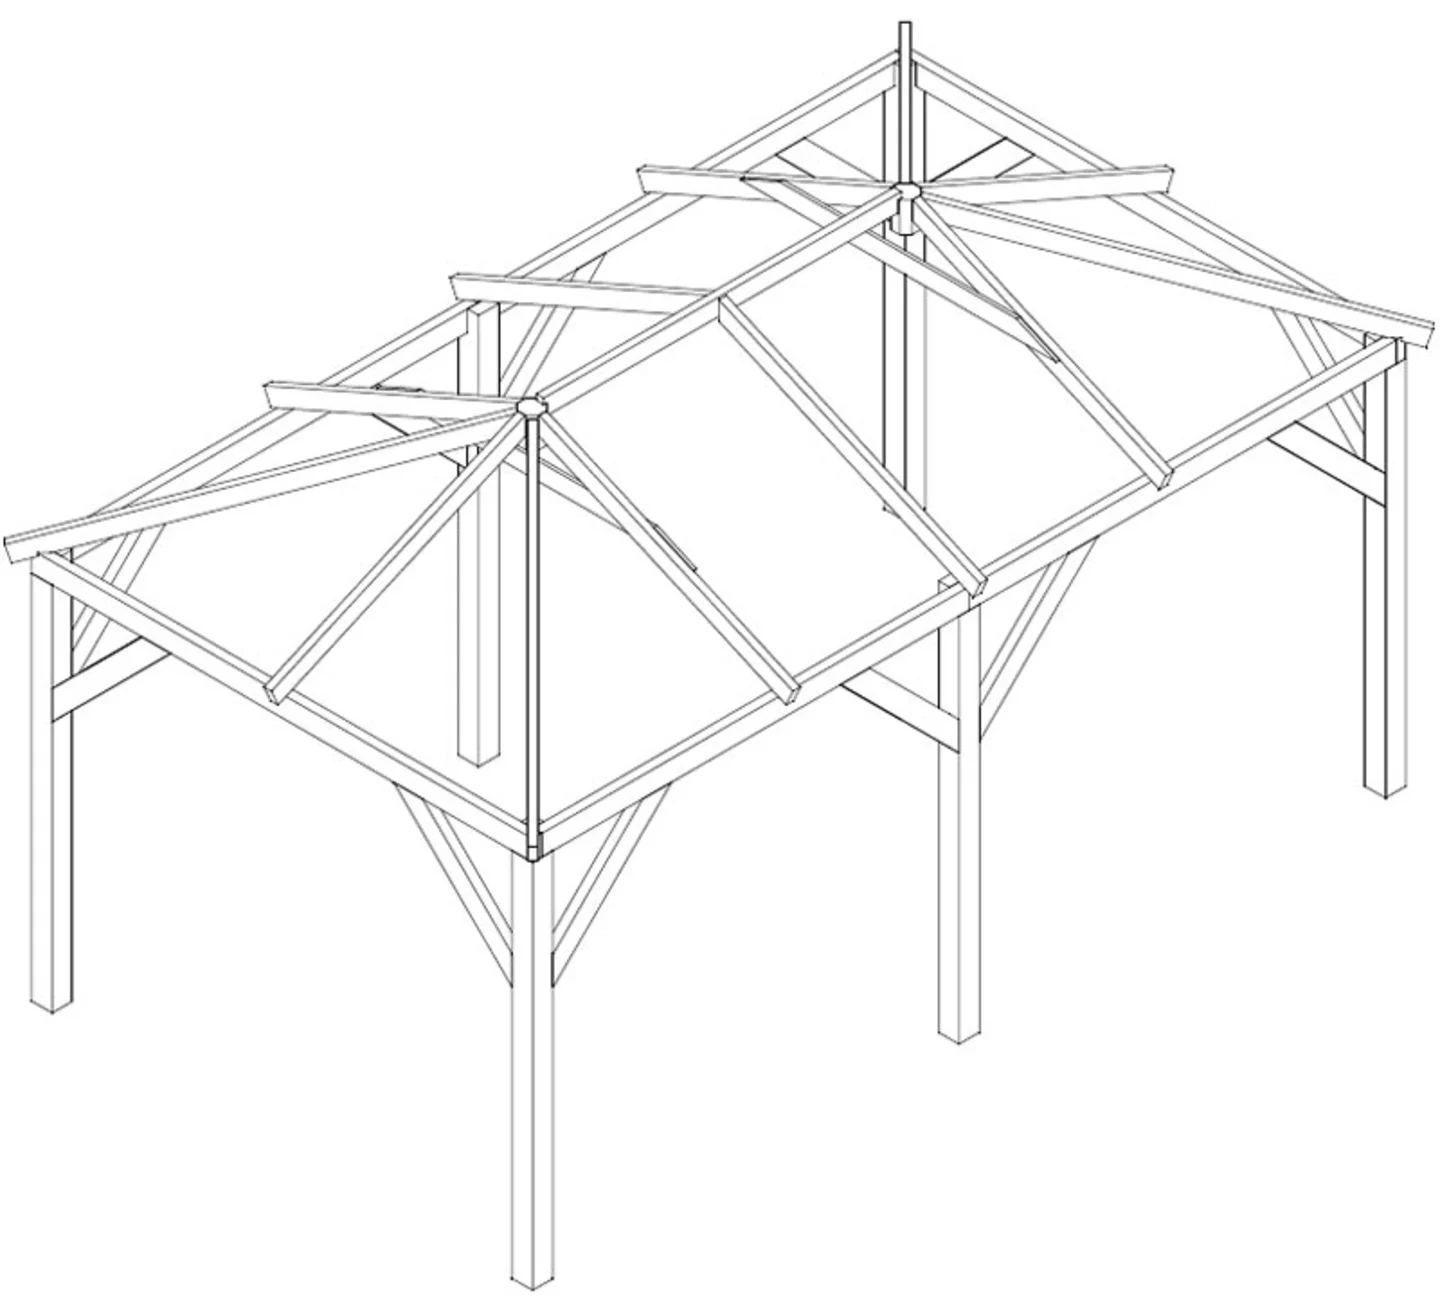
Gazebo plans
Gazebo plans example of what it sent with your gazebo order.

Personally I have never had a problem with these plans, the same as I haven’t with our log cabins plans, this is from day one of my first ever install. But a few customers have had some problems and need a little extra help. I wrote a post on installation advice for log cabins.

This post will be similar for customers that need a different point of view and may need help with some questions while installing.

My perspective on the Gazebo Installation

The plans are good, they show you exactly where the parts go. They then leave you to your own skills and interpretation according to your base, requirements and final finished product. The Gazebos are a full on building and need to be treated as such. It is impossible to give every possible instruction on how to install these, some common sense, DIY skill and understanding needs to be applied. That’s the bit I enjoy when installing all our buildings – The ability to change and adapt to what I require and what my customer wants.

So, with that said, lets deviate from the plans that come with the gazebo, this is my personal way of doing things and NOT the way I am instructed to do it by the plans (other than ensuring the correct parts are in the correct position) Here’s some information and tips from my experience. Of course you can follow the plans, follow my advice or devise your own method, this is a building and it’s up to you how you want to accomplish the install.

How does the Gazebo Arrive ?

The gazebo will arrive exactly like our log cabins, on a really big lorry with a really handy forklift attached to it. Please see this page for more details: Delivery of Large Tuin Buildings.

This is the pallet that will be delivered.
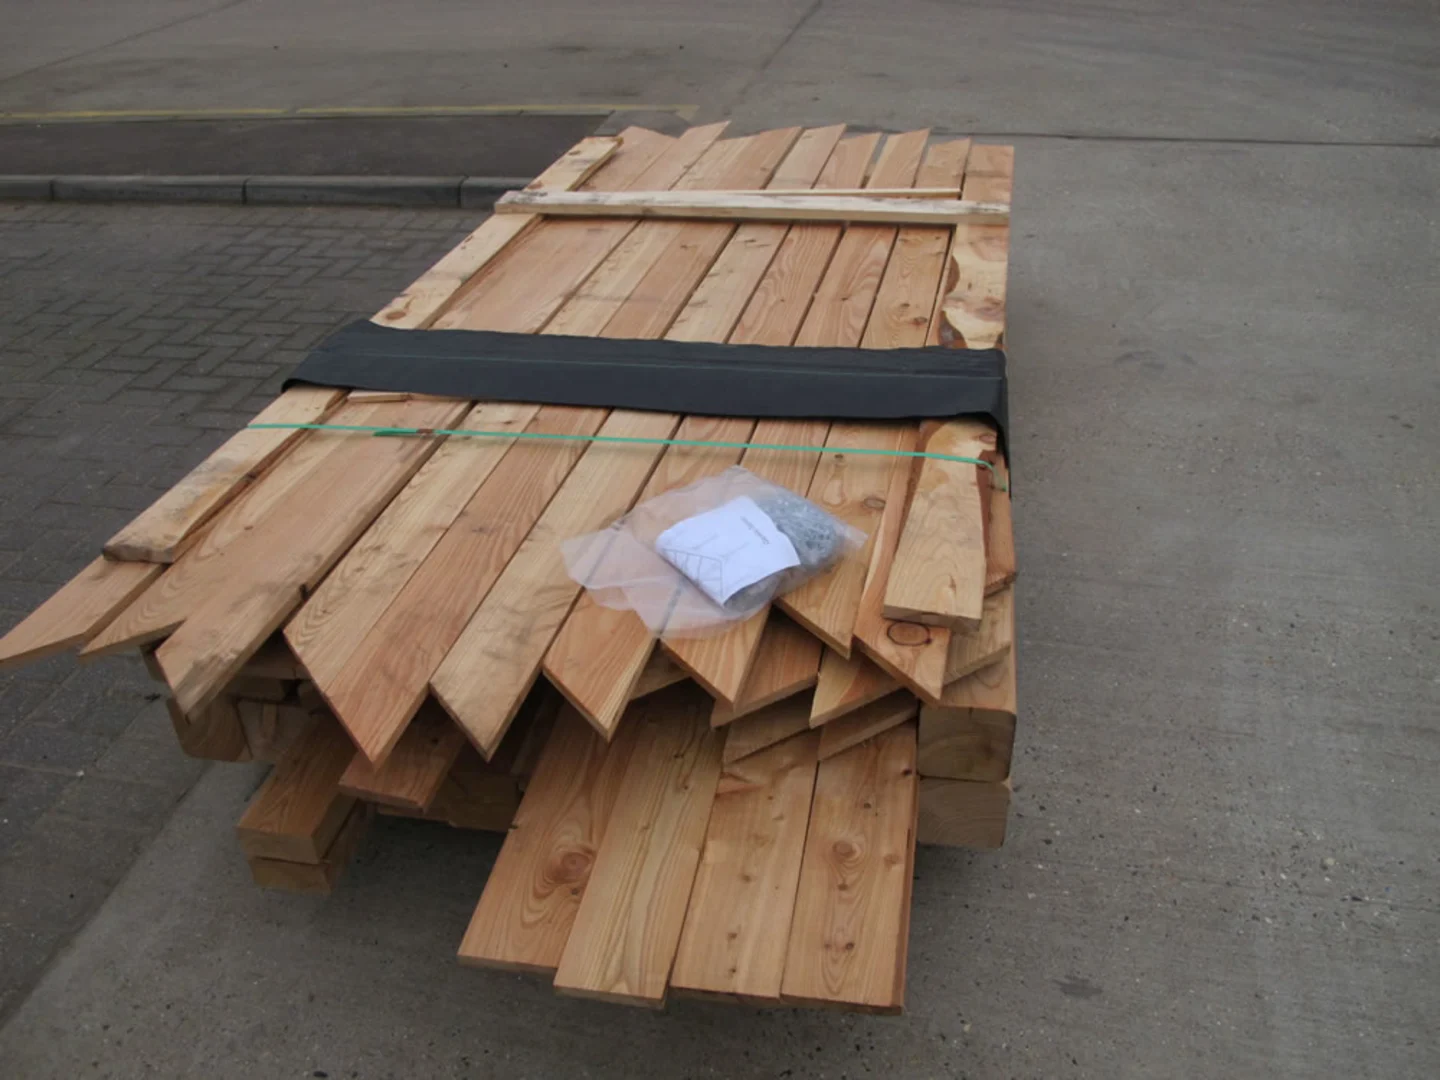
Gazebo pallet
Gazebo pallet, on top of this will be the final roof covering you have chosen be it felt or IKO roof shingles (sometimes we offer these FREE)

Please note a tanalised, pressure treated gazebo will be similar to the above.

Please note, Despite the hauliers best efforts to deliver the gazebos safely, Sometimes the odd roof board can suffer small damage, Luckily they do normally include spares

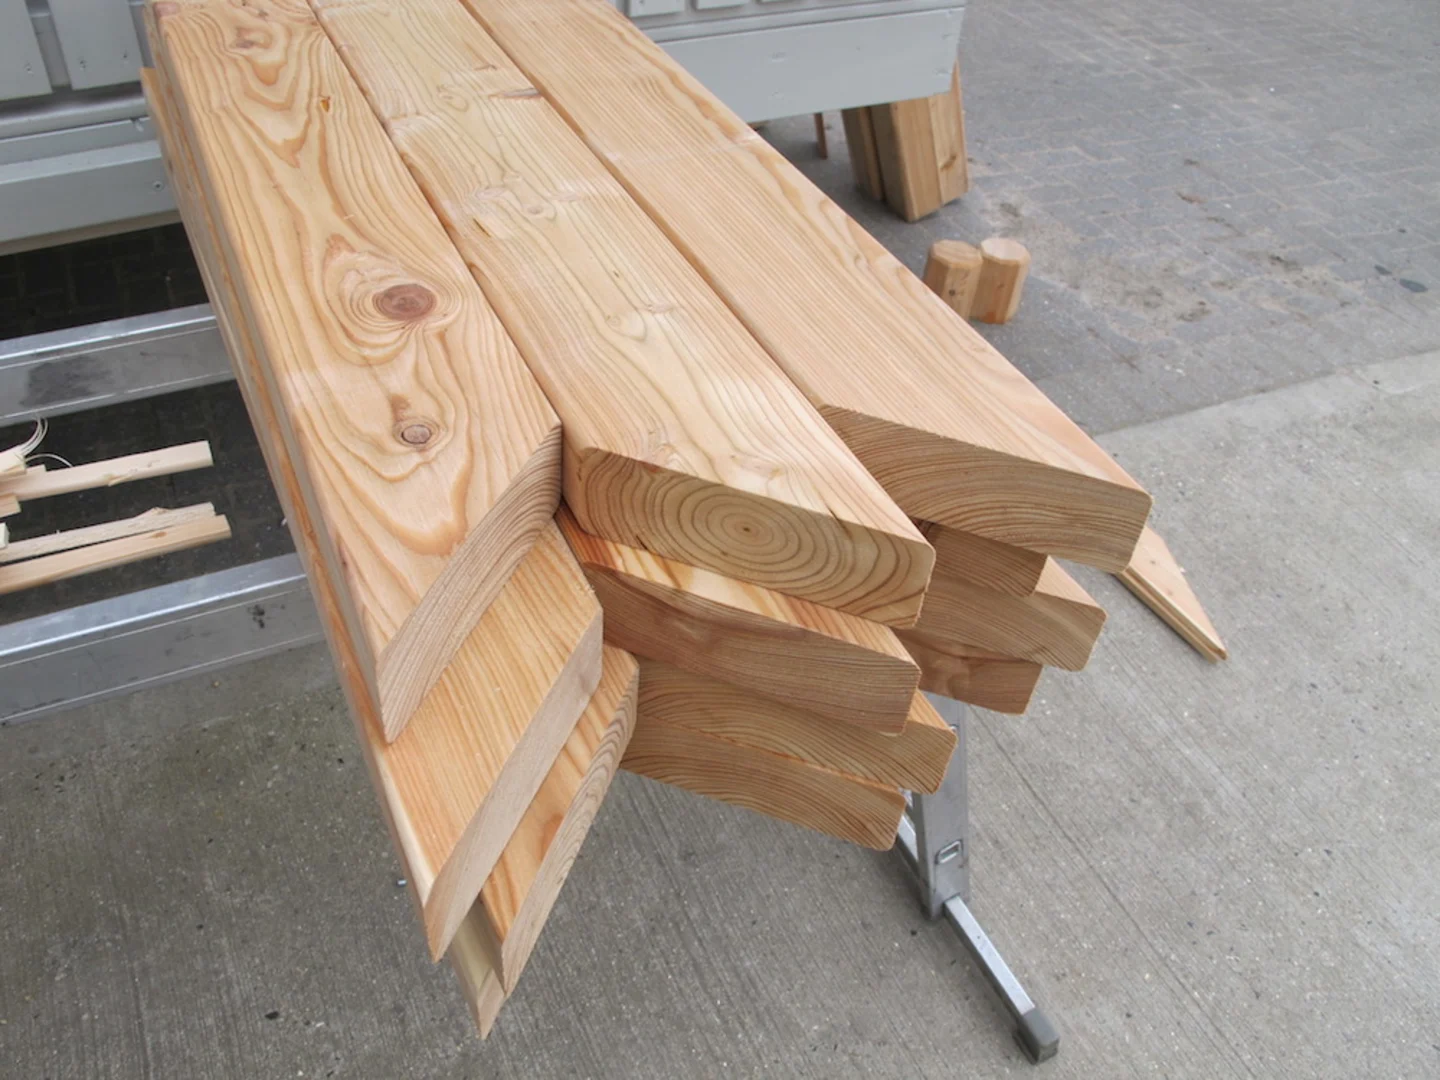
There is a difference though, the Larch gazebo pallet is packed slightly different and each layer is kept apart by slats to allow the wood to dry more and to be kept straight and separate from each other. This is not found in the pressure treated gazebo version and nor does it need to be.
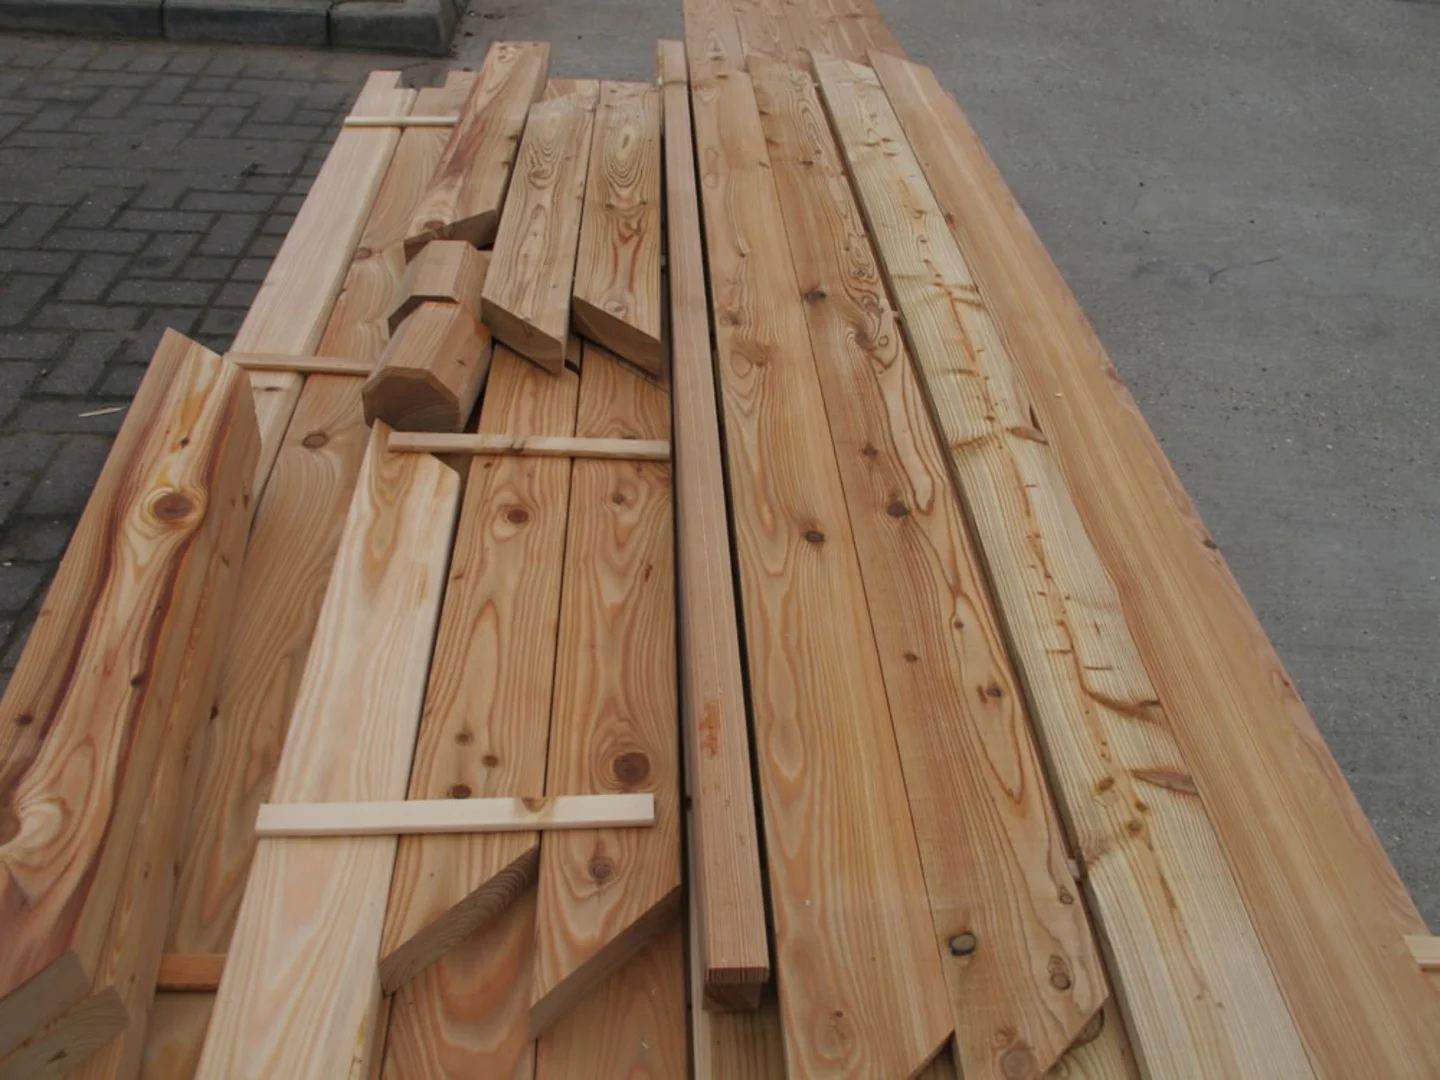
Slats
Slats are present in every layer in the Larch Gazebo. They are stapled on and staples may need to be removed by means of a set of pliers, I find fine point nose pliers the best to remove them.
Removing the slats which separate the layers of timber in the larch gazebo.

Gazebo Installation Advice – Unpacking the Gazebo.

Nope, it’s not labelled and why would it need to be? It’s very simple to see what are the roof boards and what is the structure simply by the size and shape of the timbers.  As I’m unpacking I will sort out the various parts as I come across them in the pallet. Please note sometimes the pallets can be wet if it has rained during loading or brief storing. We tend to keep the tanalised gazebos outside but protected with weed matting to act as shade to prevent discolouration. If you find your gazebo is wet as you unpack please do not let this be of concern as of course it is designed to be outside in all weathers for the next 20 years.

Placement of the Boards

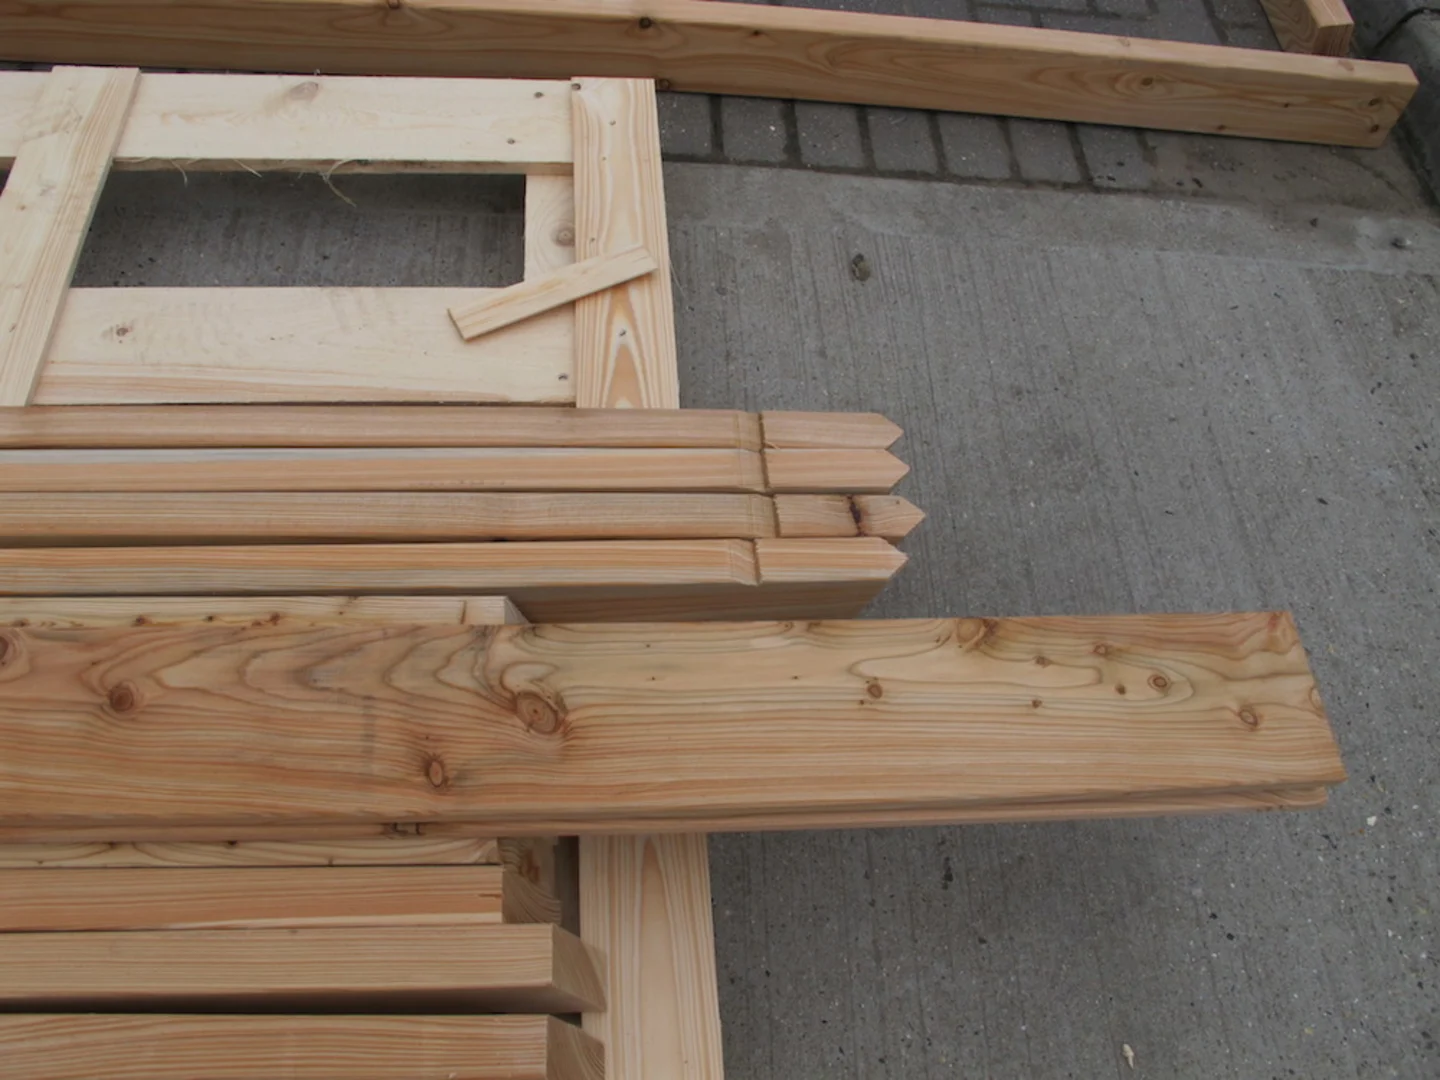
As I come across the roof boards in the pack I will put them in the sections of roof I’m expecting: for square roofs each side will be the same, for a rectangular roof I am expecting two triangle roofs and two extended triangles. It is far easier to do this as you unpack.
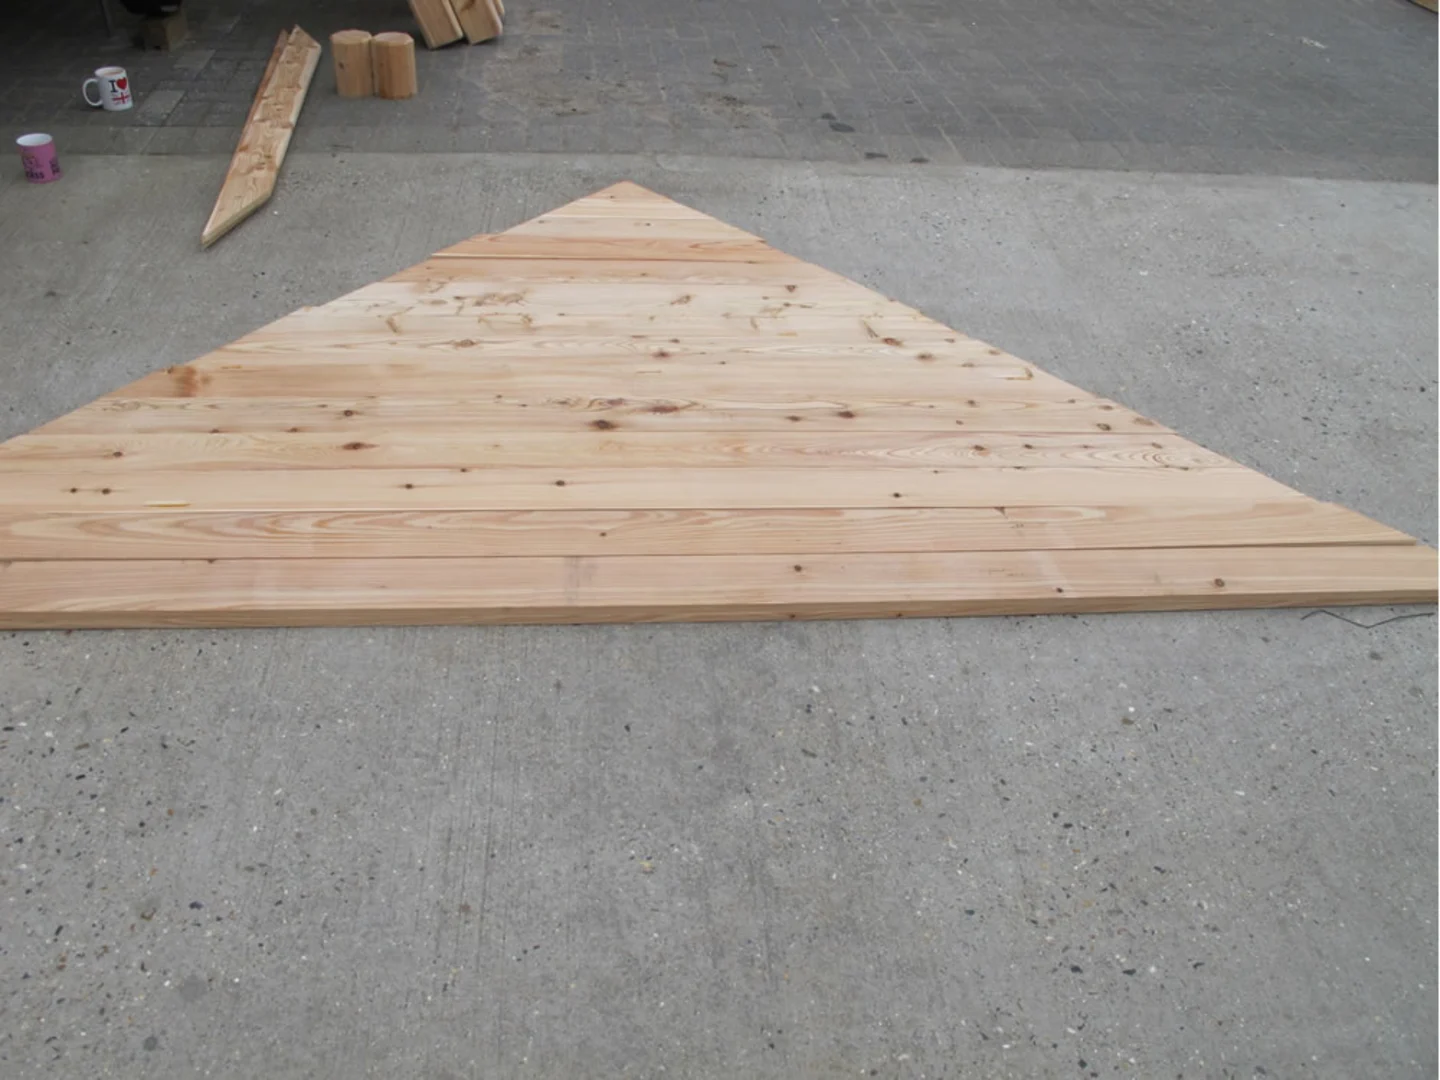
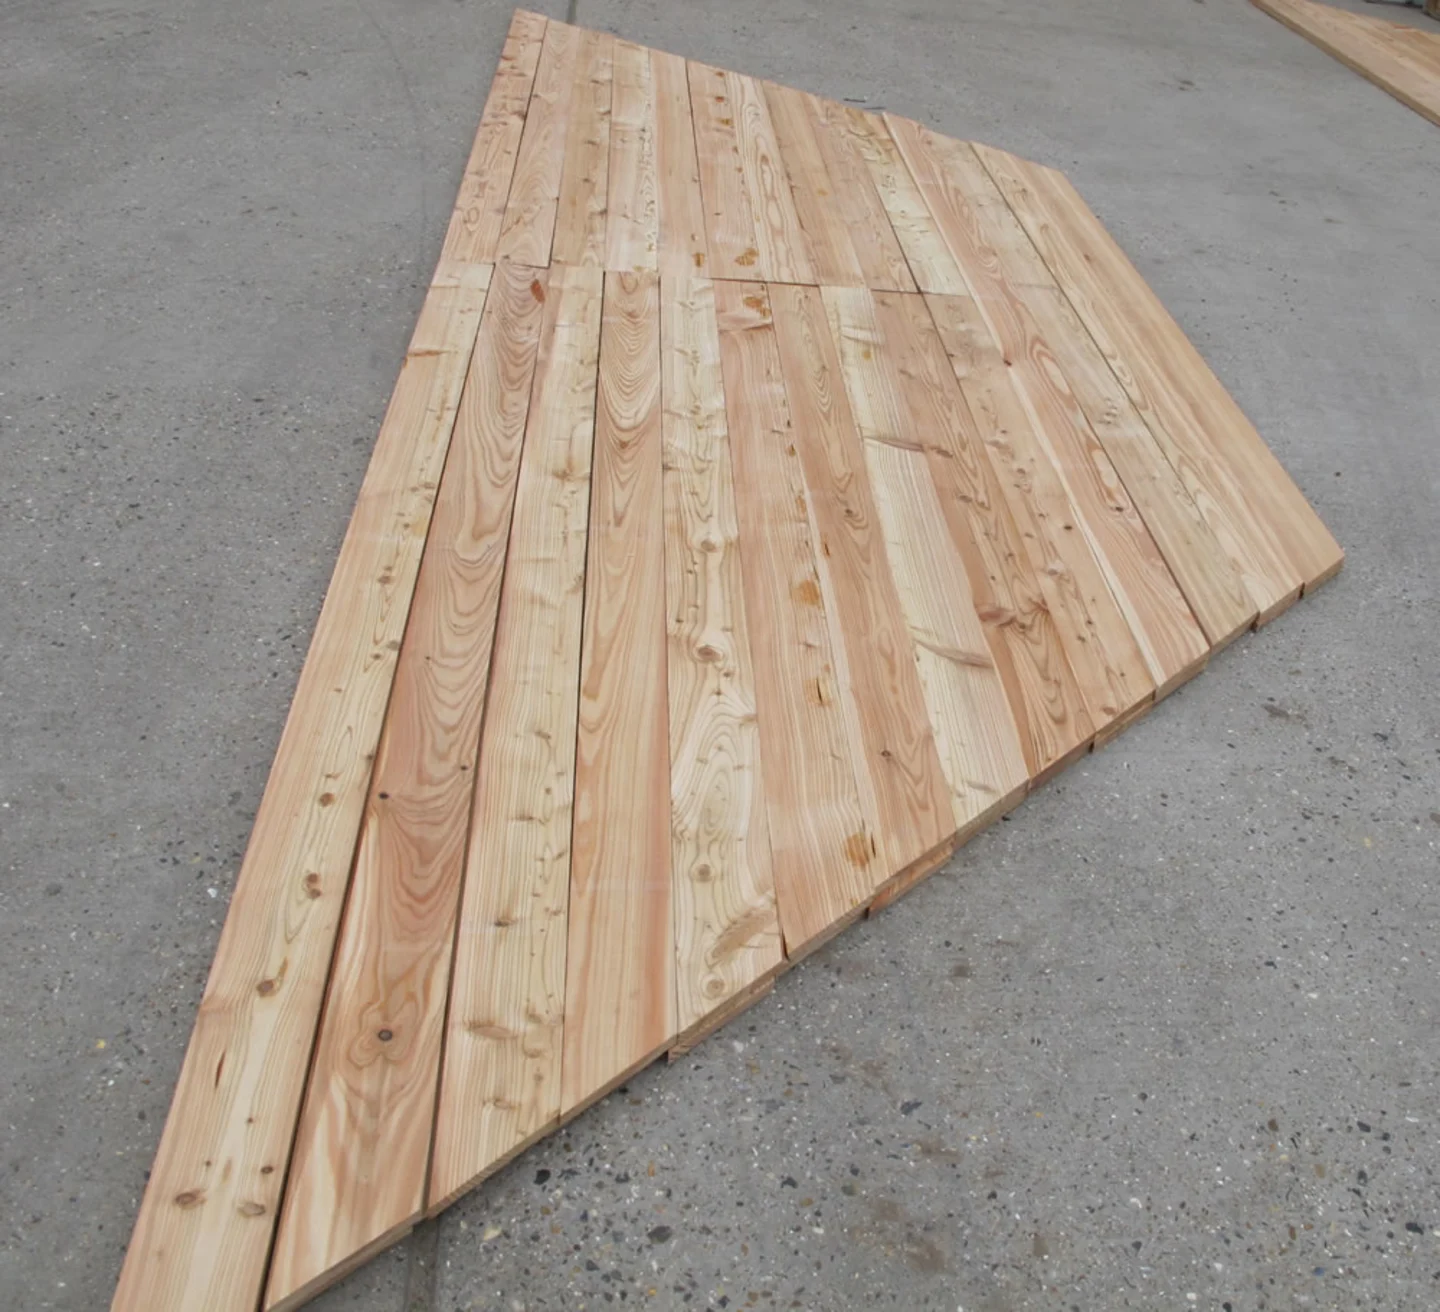
fffdfd
Two sets of end roof boards laid on top of each other. For a square building you would of course have four sets. This is the end roof triangles of the Samos rectangular Larch Gazebo
Extended triangle paid out, two sets for both sides.
Extended triangle roof boards laid out, two sets for both sides in the case of a rectangular gazebo.

Identification of Parts

As well as laying out the roof boards in order I’m also identifying the other parts as I go, the posts and ring beam are very easy to spot.
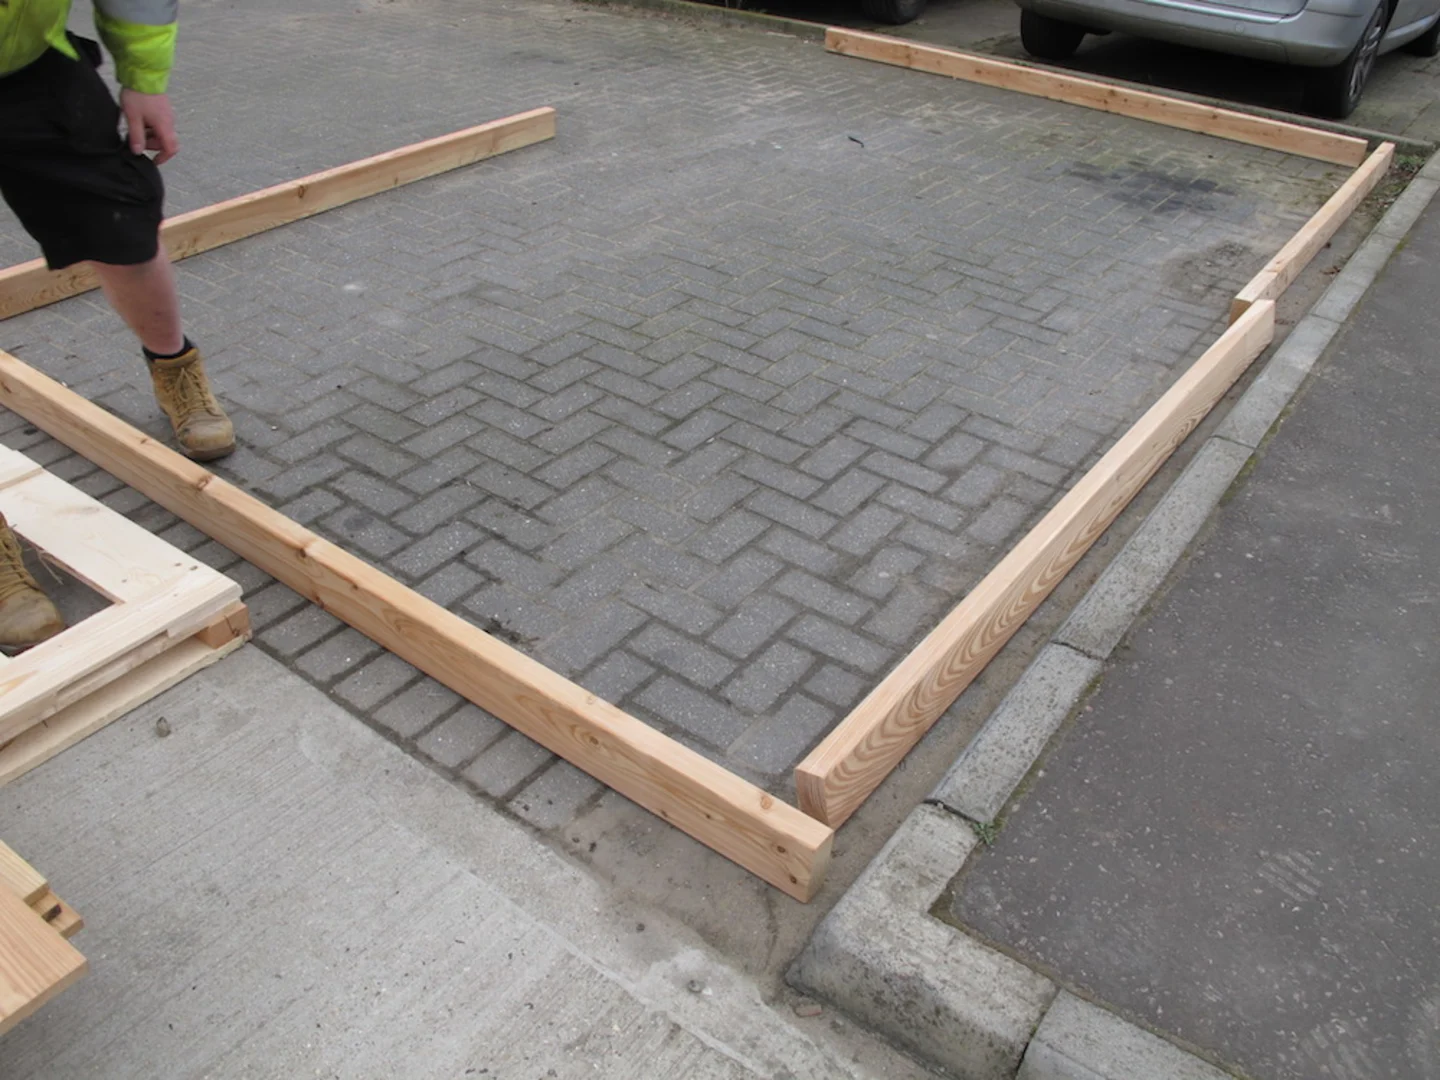
Layout the ring beam as you go. Putting it into it's rough position.
Layout the ring beam as you go. Putting it into it’s rough final position.
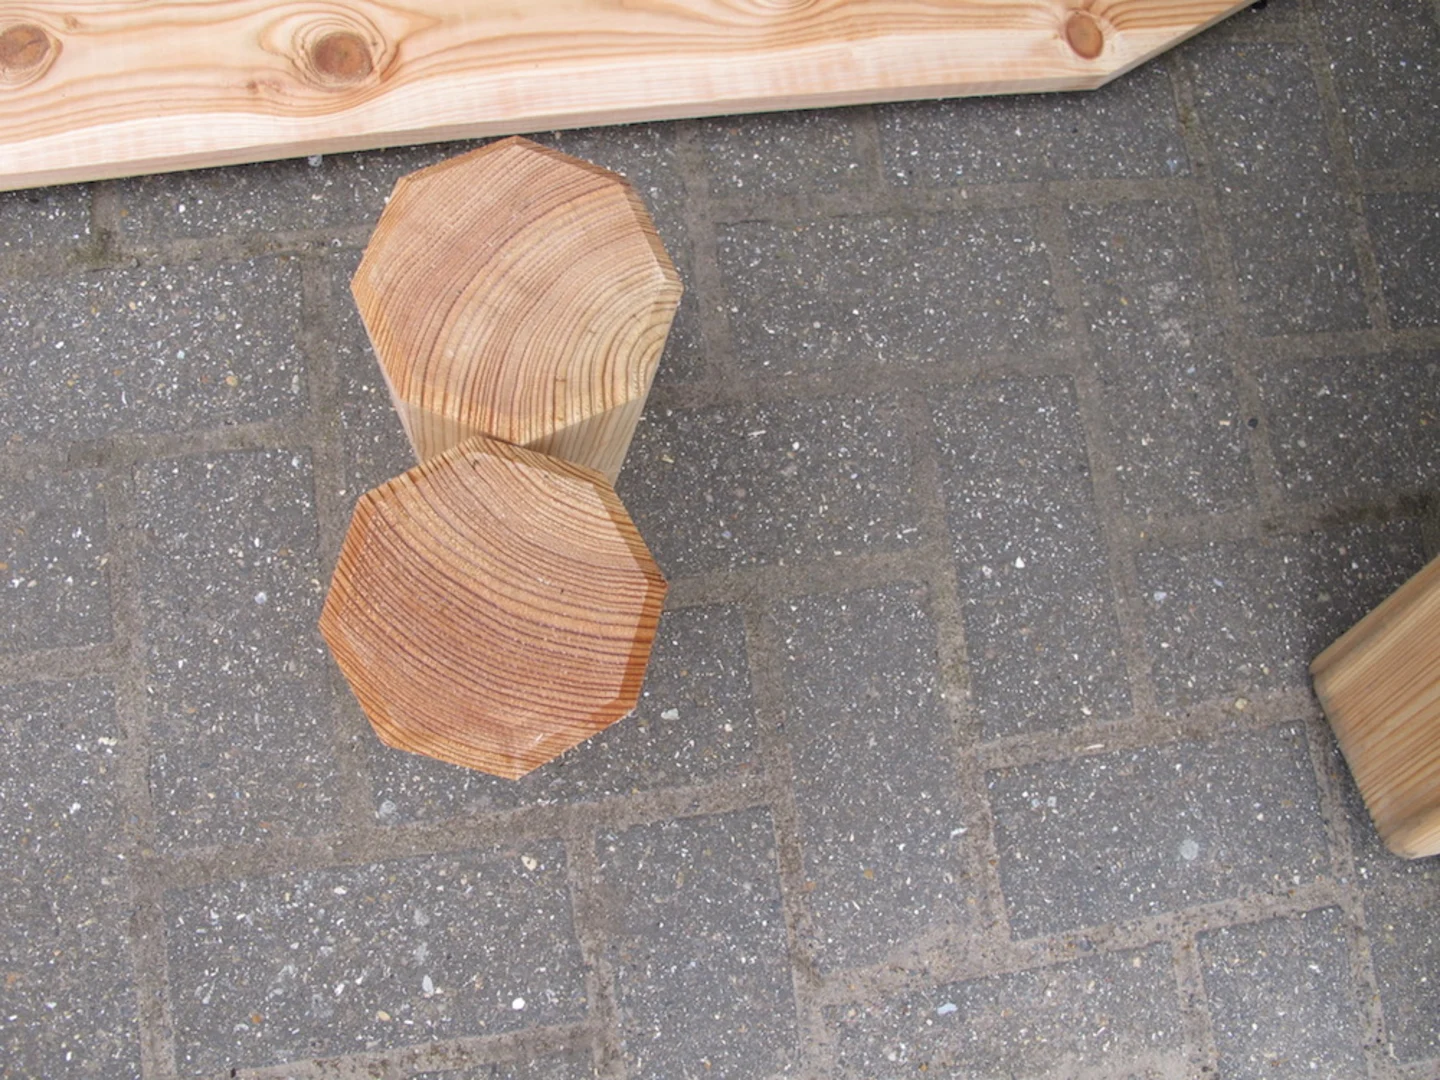
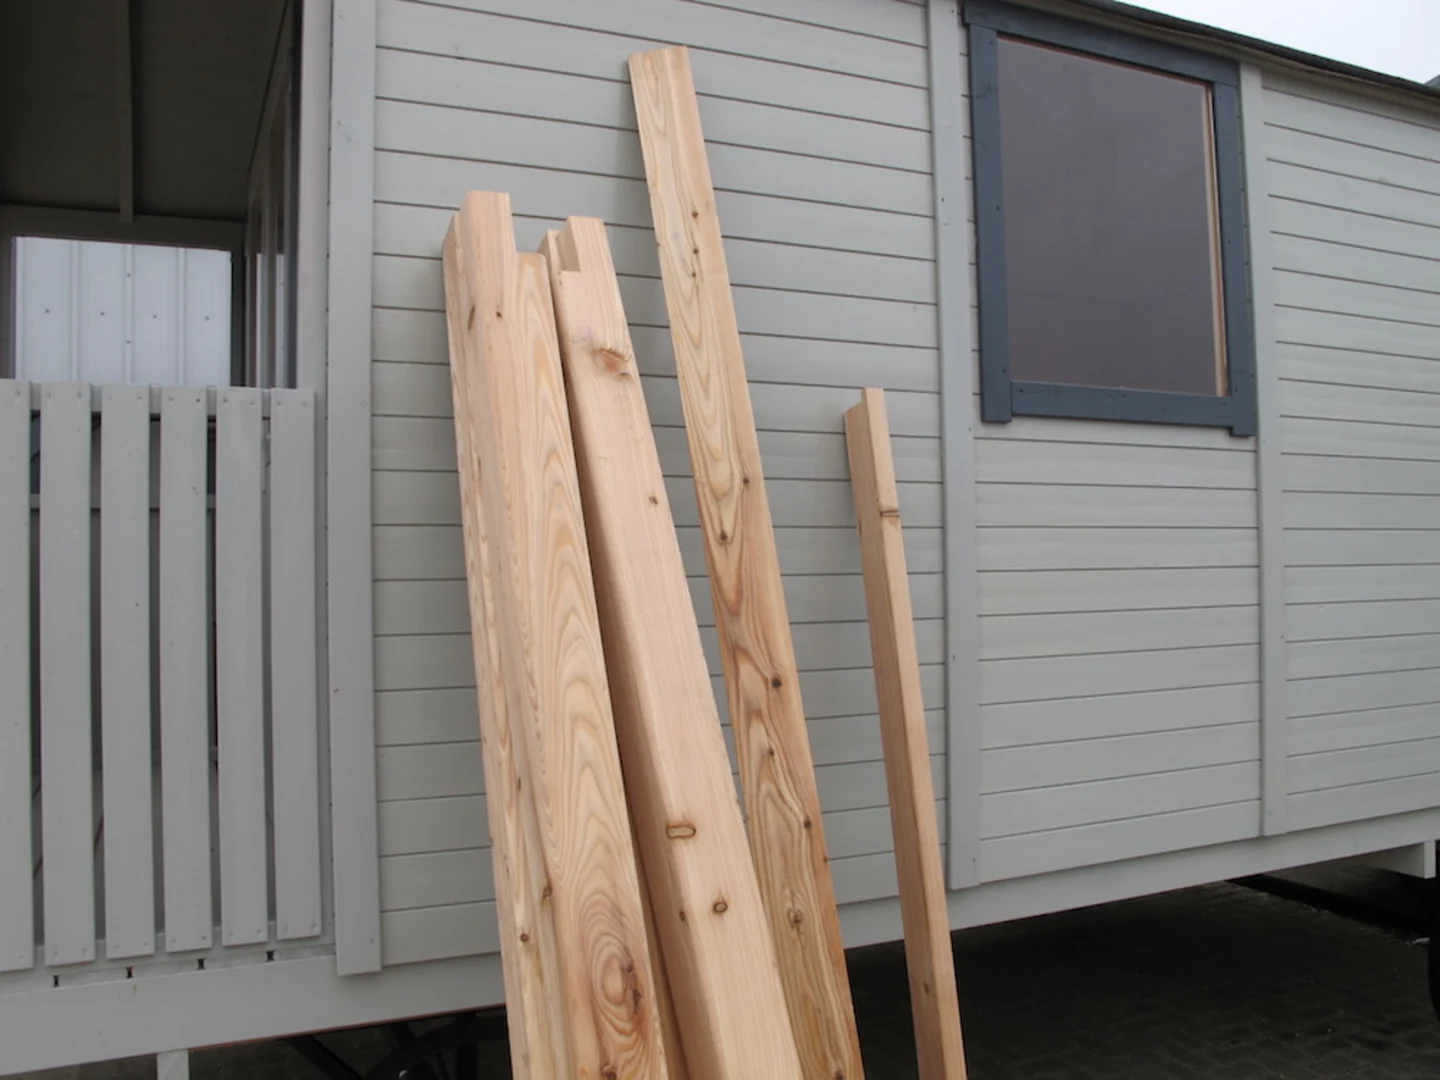
It's easy to spot the posts. On a rectangular gazebo there will be two types. Four for the corners and two for the long edge
It’s easy to spot the posts. On a rectangular gazebo there will be two types. Four for the corners and two for the long edge
Roof rafters are easy to spot as well. Please note there will be some difference in sizes depending on their location in the roof.
Corner braces are easy to spot as well.
King pin blocks which are used where the rafters connect at the points. A rectangular pyramid roof will have two.
The corner rafters can be easily spotted by their length and also by the notch which will sit over the corner of the ring beam.
The corner rafters can be easily identified by their length and also by the birdsmouth notch which will sit over the corner of the ring beam. Note the rafters that form the sides are not notched.

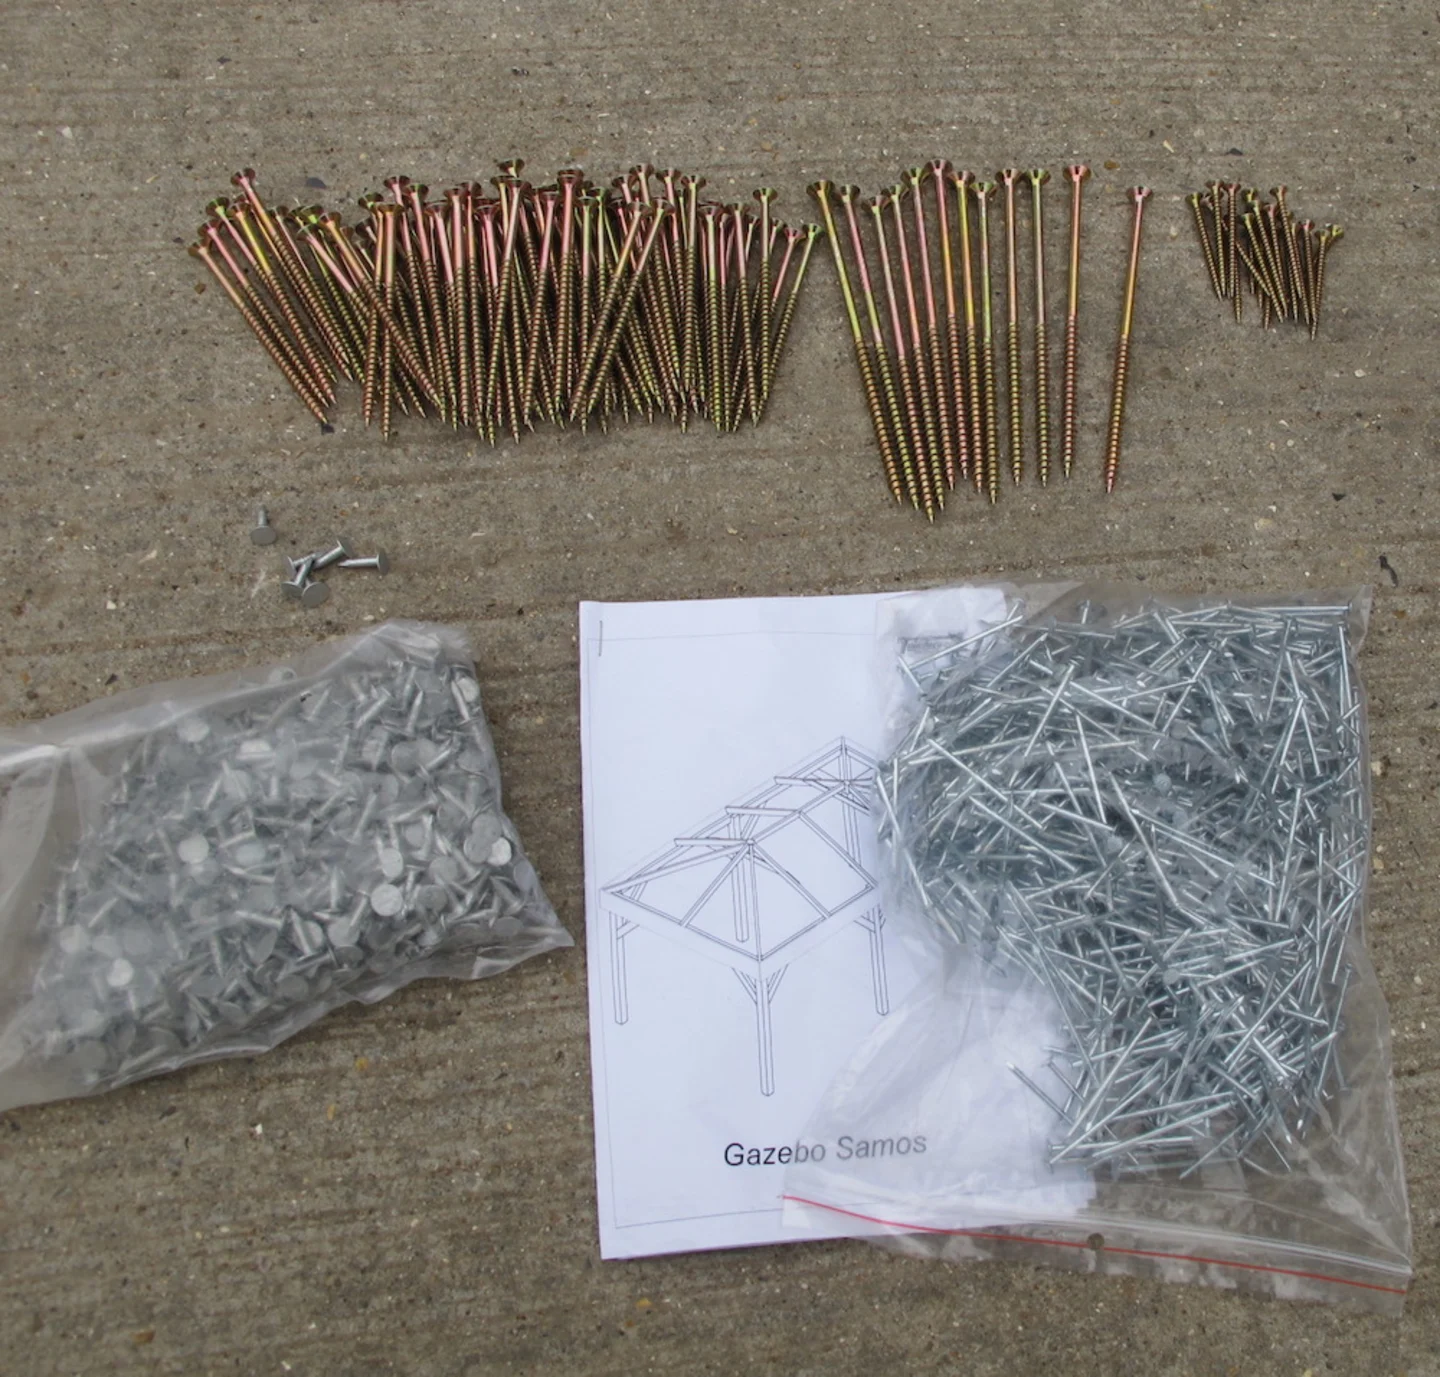
Gazebo Fitting Kit

The Gazebo fitting kit. It's pretty simple, the long nails are for the thickest bits of wood, shorter ones for the thinner and the very short ones will be used for the lateral bracing slats of which there are two in a rectangular roof gazebo. Nails are supplied for the roof boards. Felt tacks are for your final roof covering.
The Gazebo fitting kit. It’s pretty simple, the long nails are for the thickest bits of wood – the rafters. The medium ones for the ring beam, legs and corner supports and the very short ones will be used for the lateral bracing slats of which there are two in a rectangular roof gazebo. Nails are supplied for the roof boards. Felt tacks are for your final roof covering. I differ from the advice in the plans of number and placement of screws, you will see from the following pictures. For instance with the rafters I will only use one screw but use double screws elsewhere. It is of course up to you. You may also want to add additional fixings as you see fit.

Gazebo Installation – Advice

From this point I only use the plans to check that I am using the right parts in the right place. I am not following the construction method or the particular location of screws, this is the way I have found it to be easiest over the years. With this method:

  • You only need two people to carry out the install.
  • It is easier to find the EXACT location of where post holders should be fitted while accounting for timber not being an exact product to work with.
  • It is safer, stronger and quicker.
  • No strain is placed on any joints. Some plans will show building the gazebo on its side and then lifting into position. I have found this method very hard to do and can put strain on the joints.

Tools required for fitting the Gazebo

You only really need basic tools for fitting the gazebo. Two battery powered drills helps save time and clamps are essential really to make a good job, we use them a lot in fitting both gazebos and also log cabins. A very useful tool!
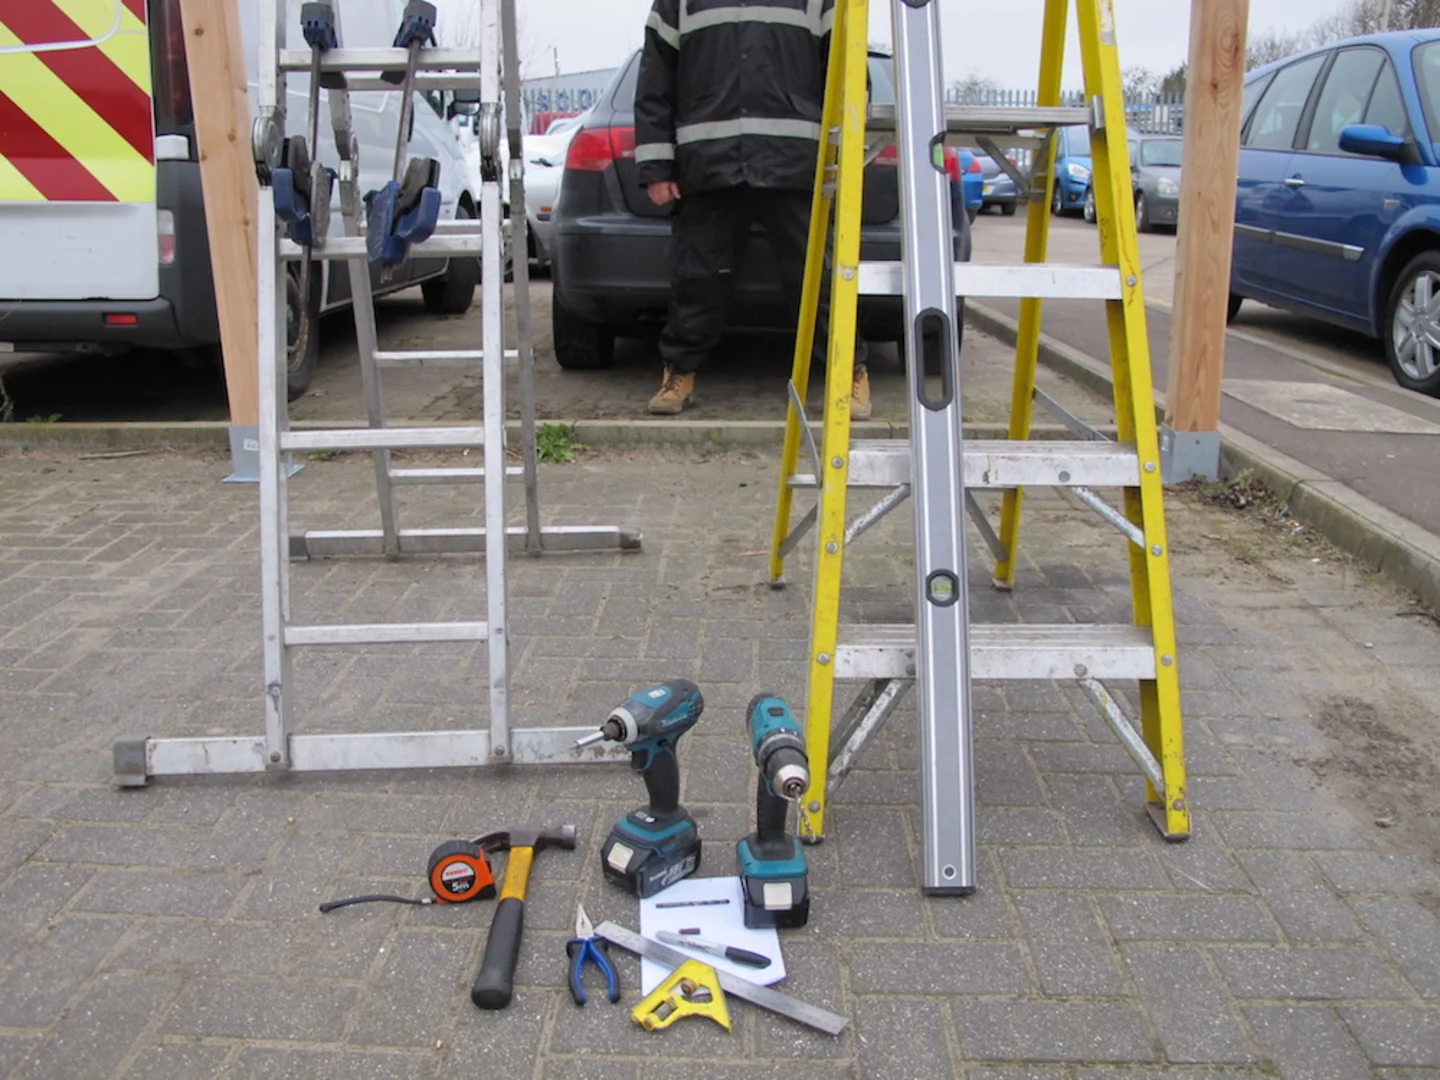
Tools include: Two Step Ladders, Two drills,
Tools include: Two Step Ladders, Two drills, hammers, pliers, long spirit level, marker pen, tape measure and the all important clamps. You will also need a saw for trimming roof boards.

Ring Beam of the Gazebo

I had already laid the main ring beam parts in the location that it will be installed in, now I will carefully check the measurements against the plans. Please note that with square roofs there will be two shorter parts and two longer parts so it can form a square.
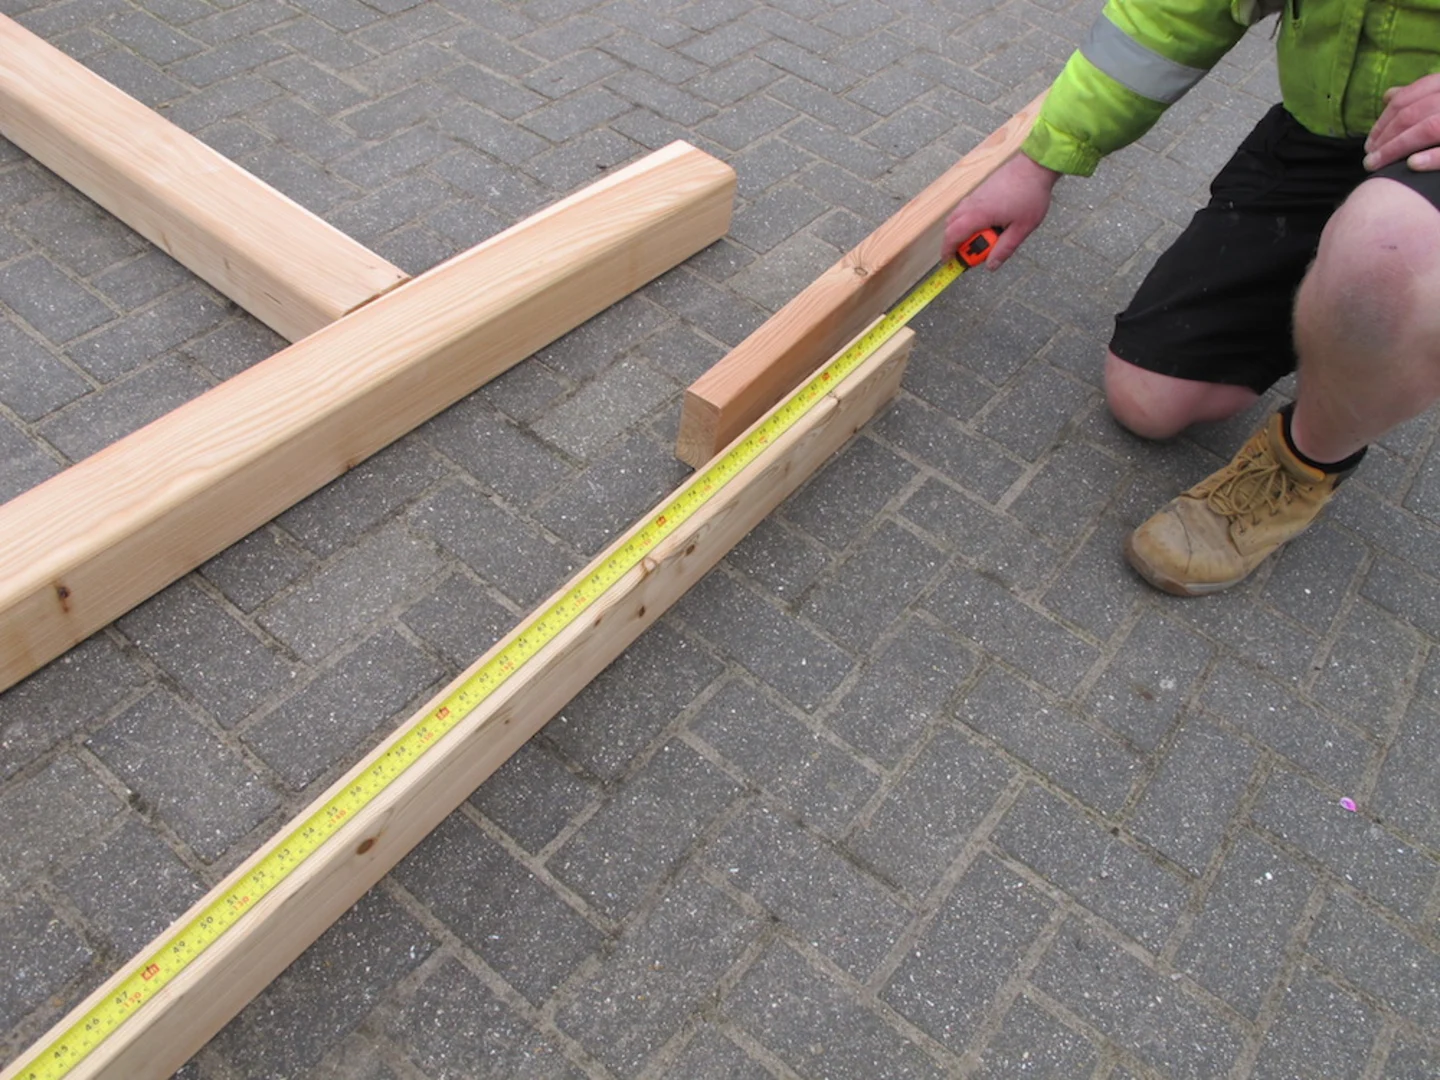
Measure the beams carefully against the plans and check they are in the right position.

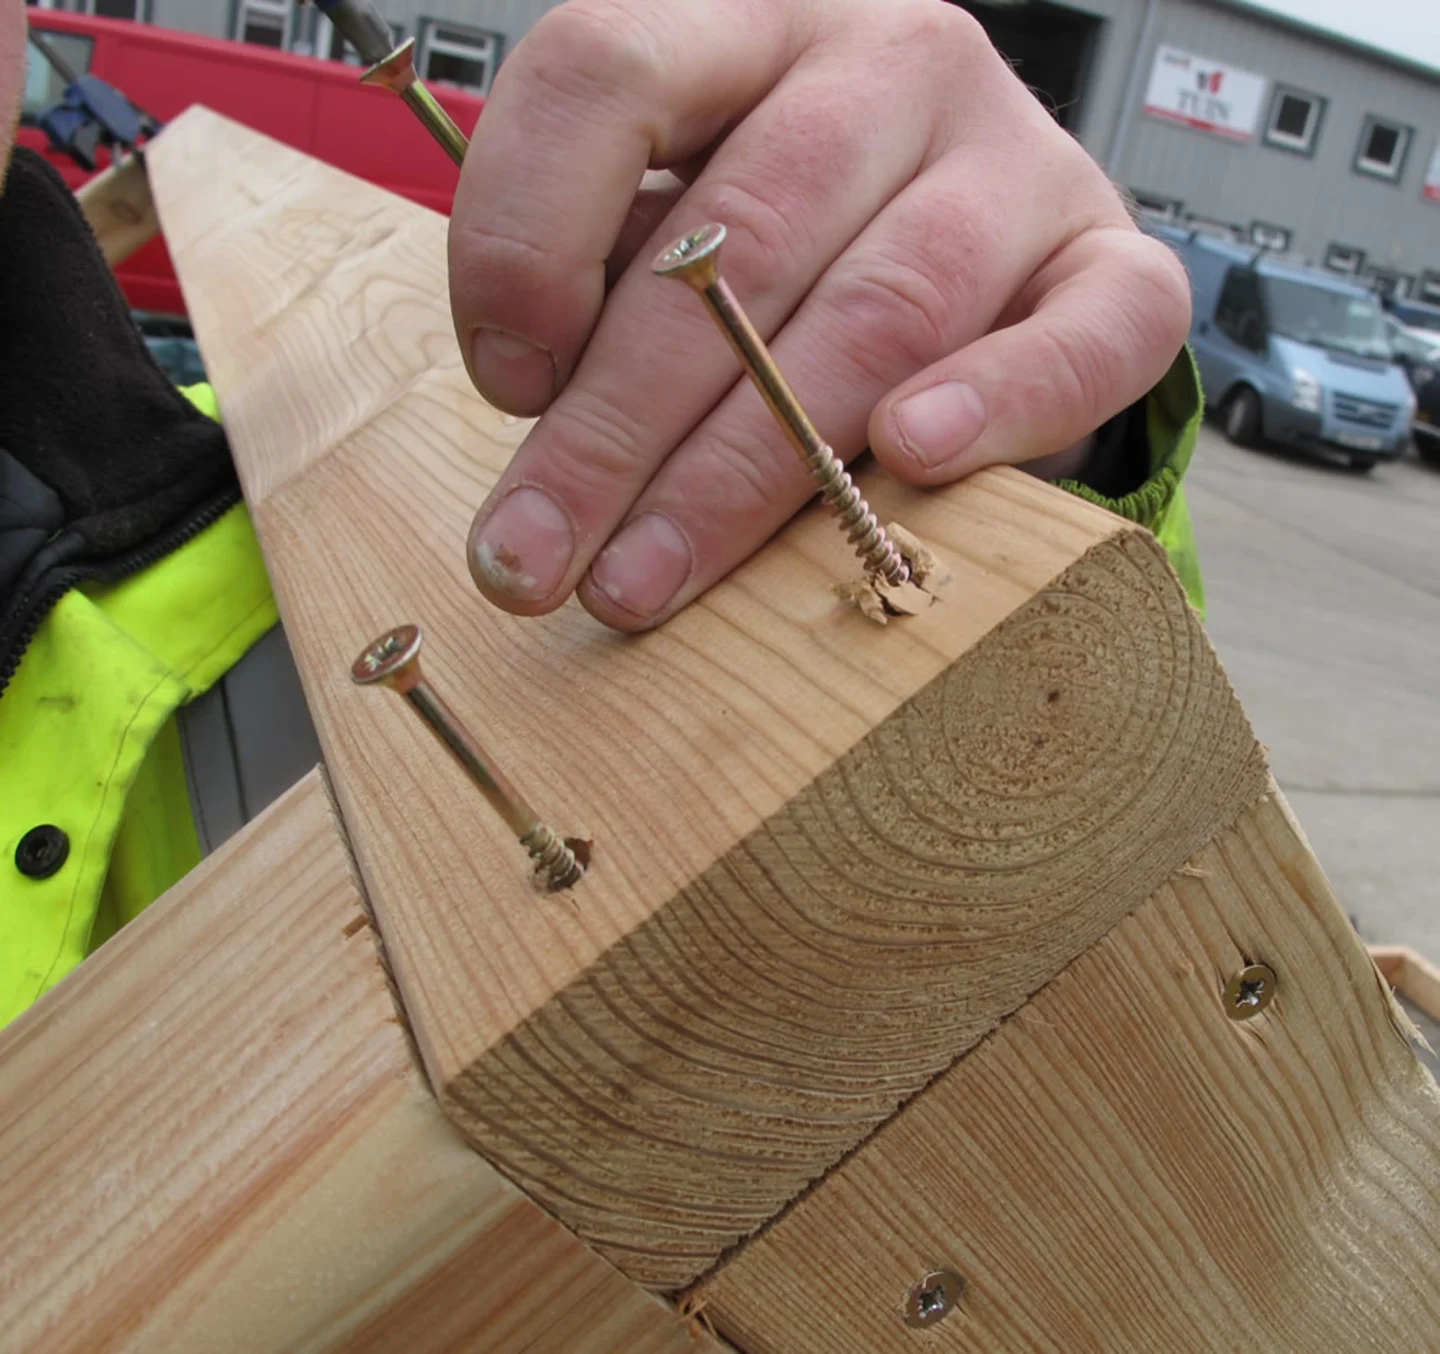
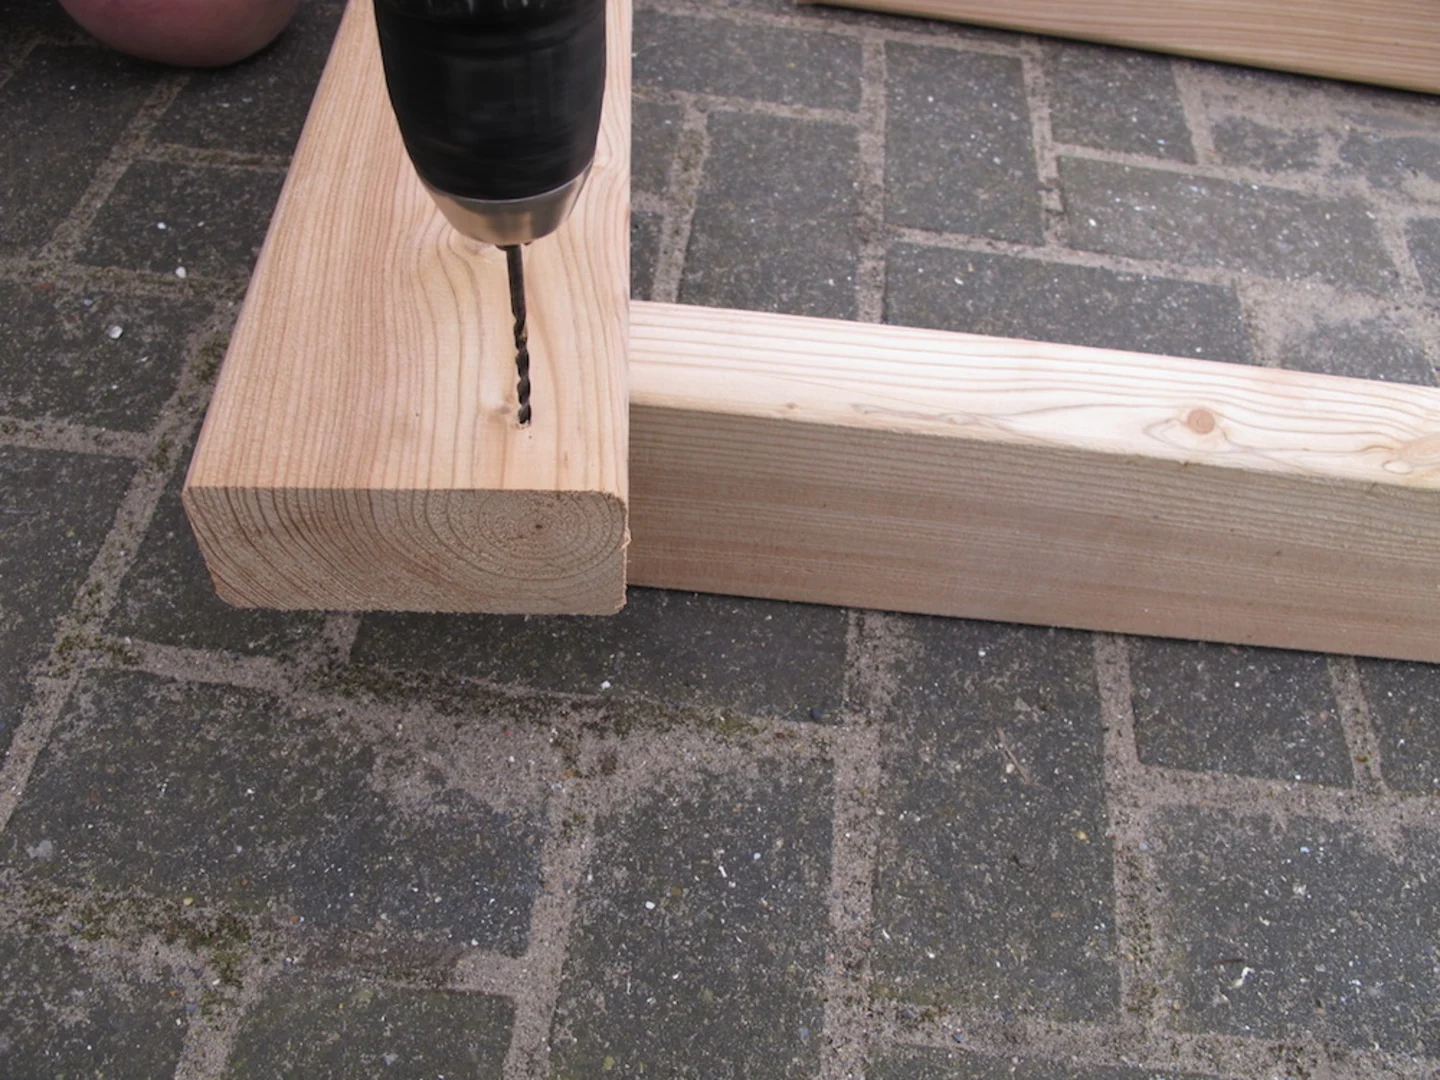
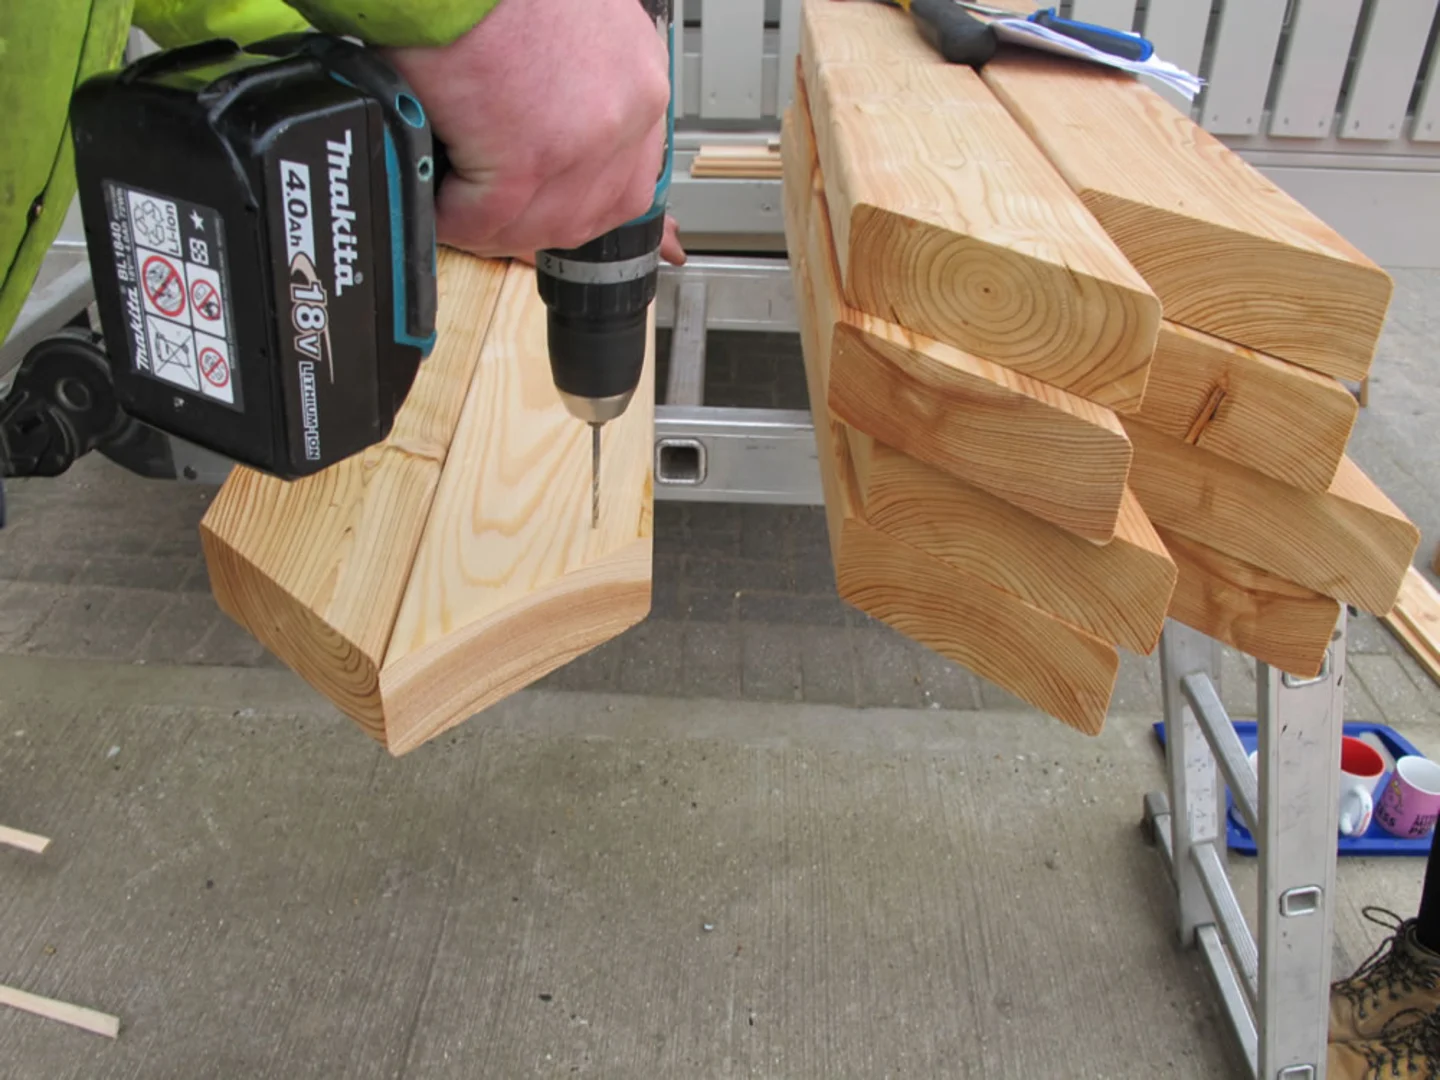
Regardless of what I am installing I will always use pilot holes every time a screw is used. This is particularly important when working with Larch. ALWAYS pilot hole!

Always piot hole
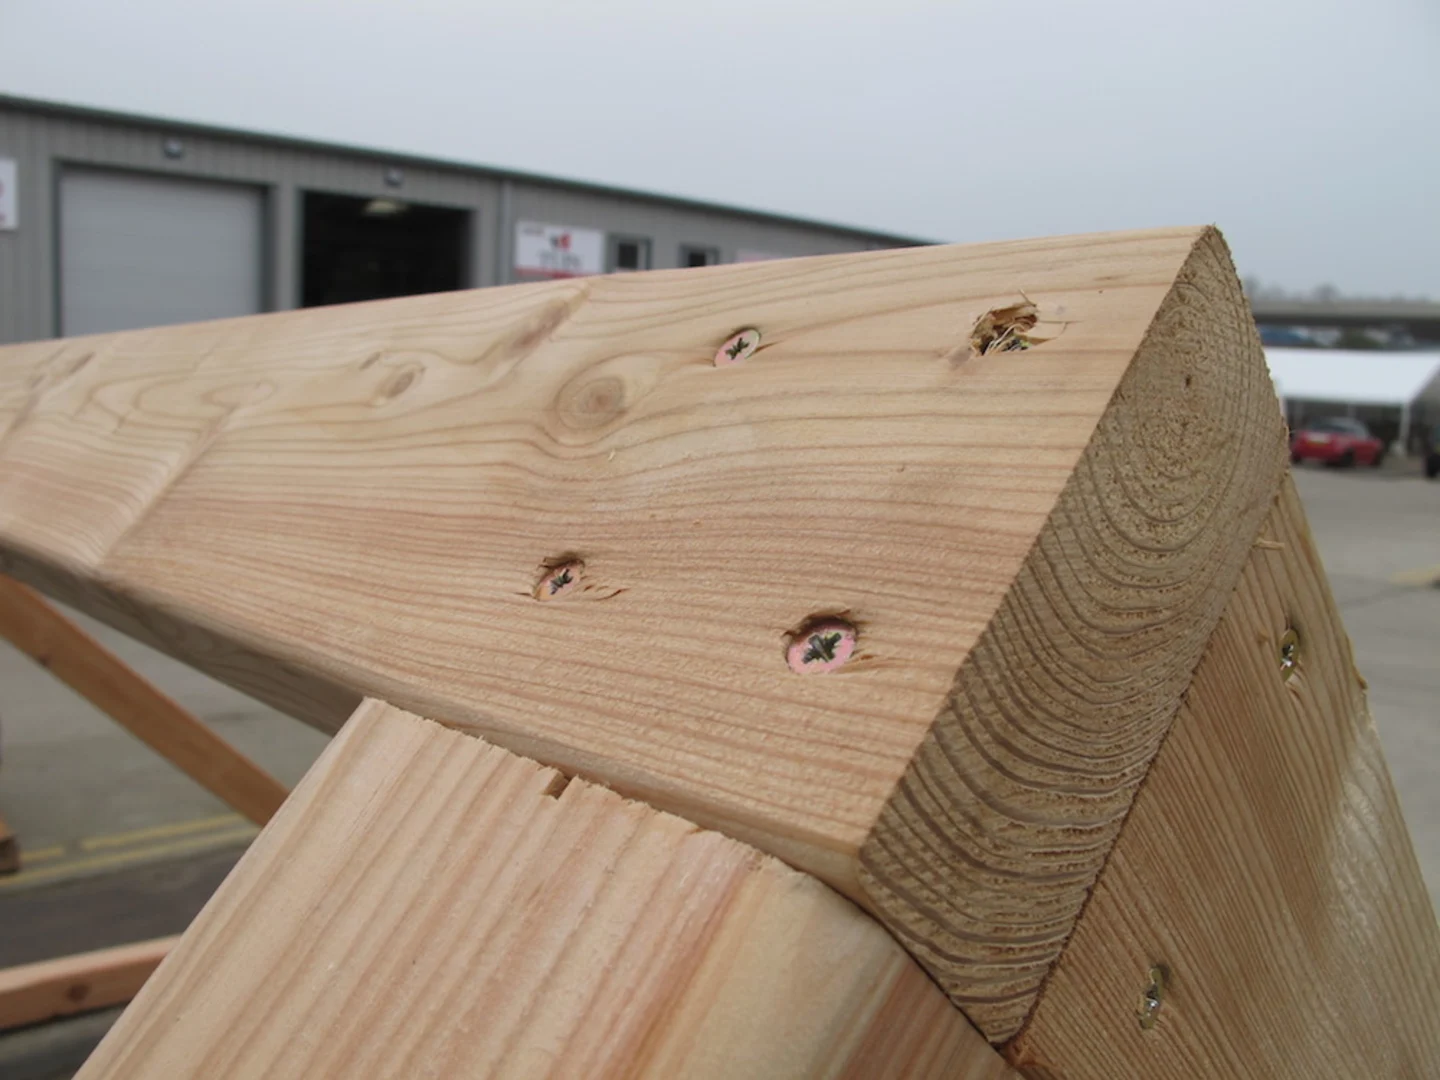
Always pilot hole every location that a screw is going to be used, it creates a far tighter joint and generally stops a screw head being buried for a better finish and easier to take apart. It’s also a lot easier!
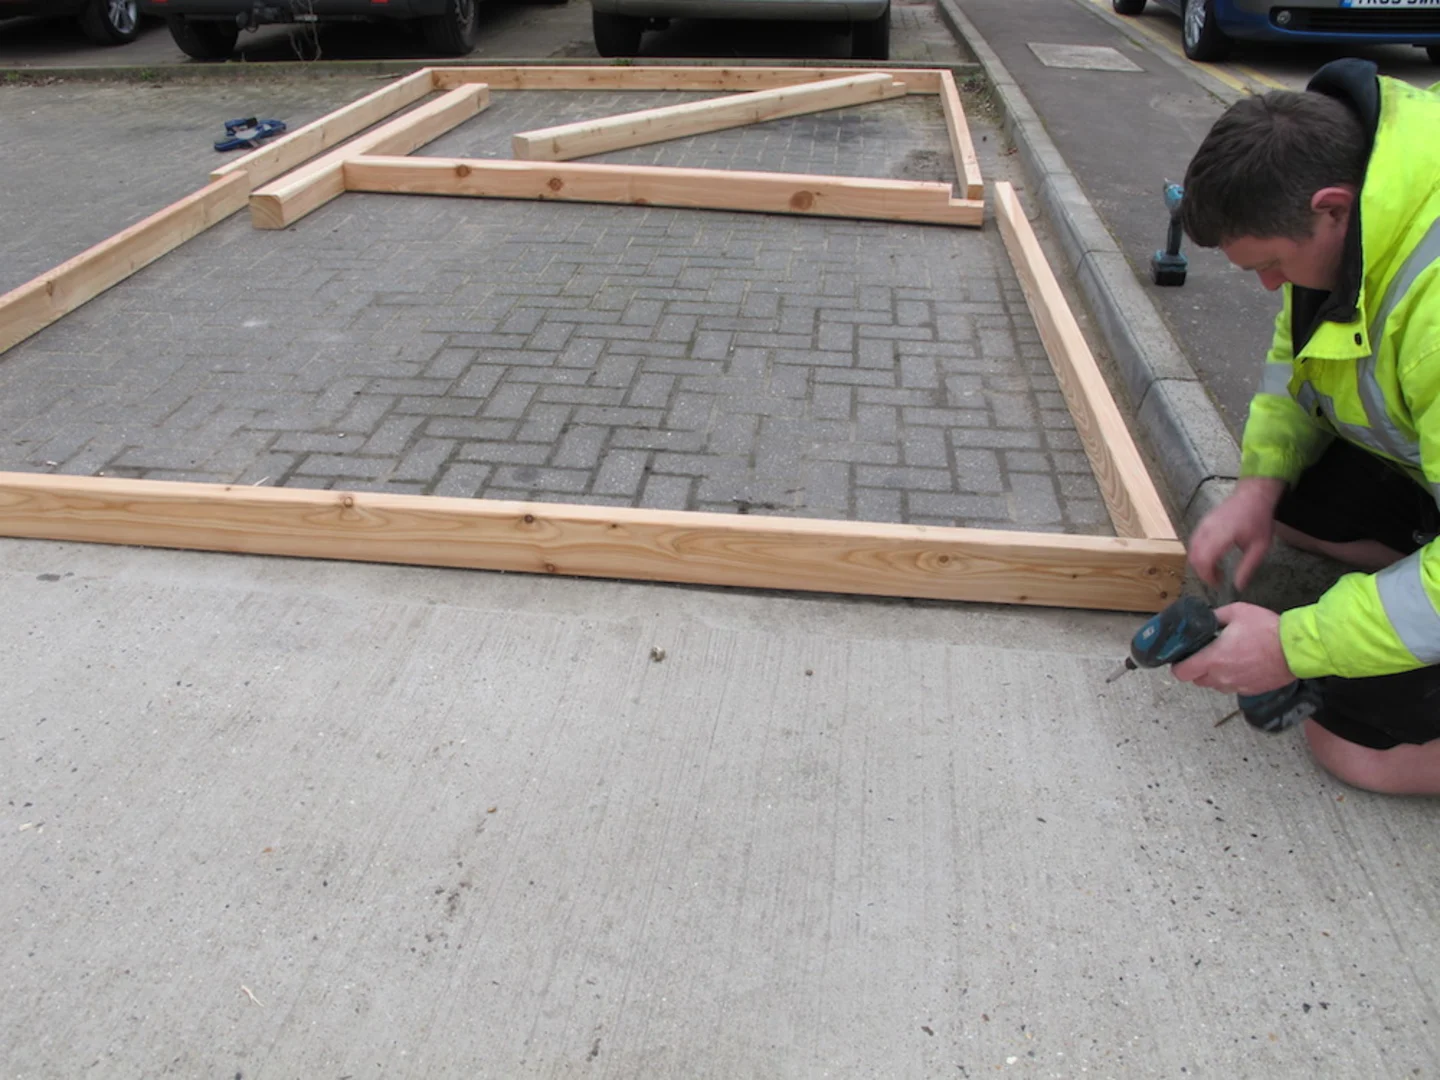
Screw the ring beam together, I use the medium size screws, two in each joint.
Screw the ring beam together, I use the medium size screws, two in each joint. For square roofs all of them will be joined. For the rectangular roof this is not possible until the center post is installed.

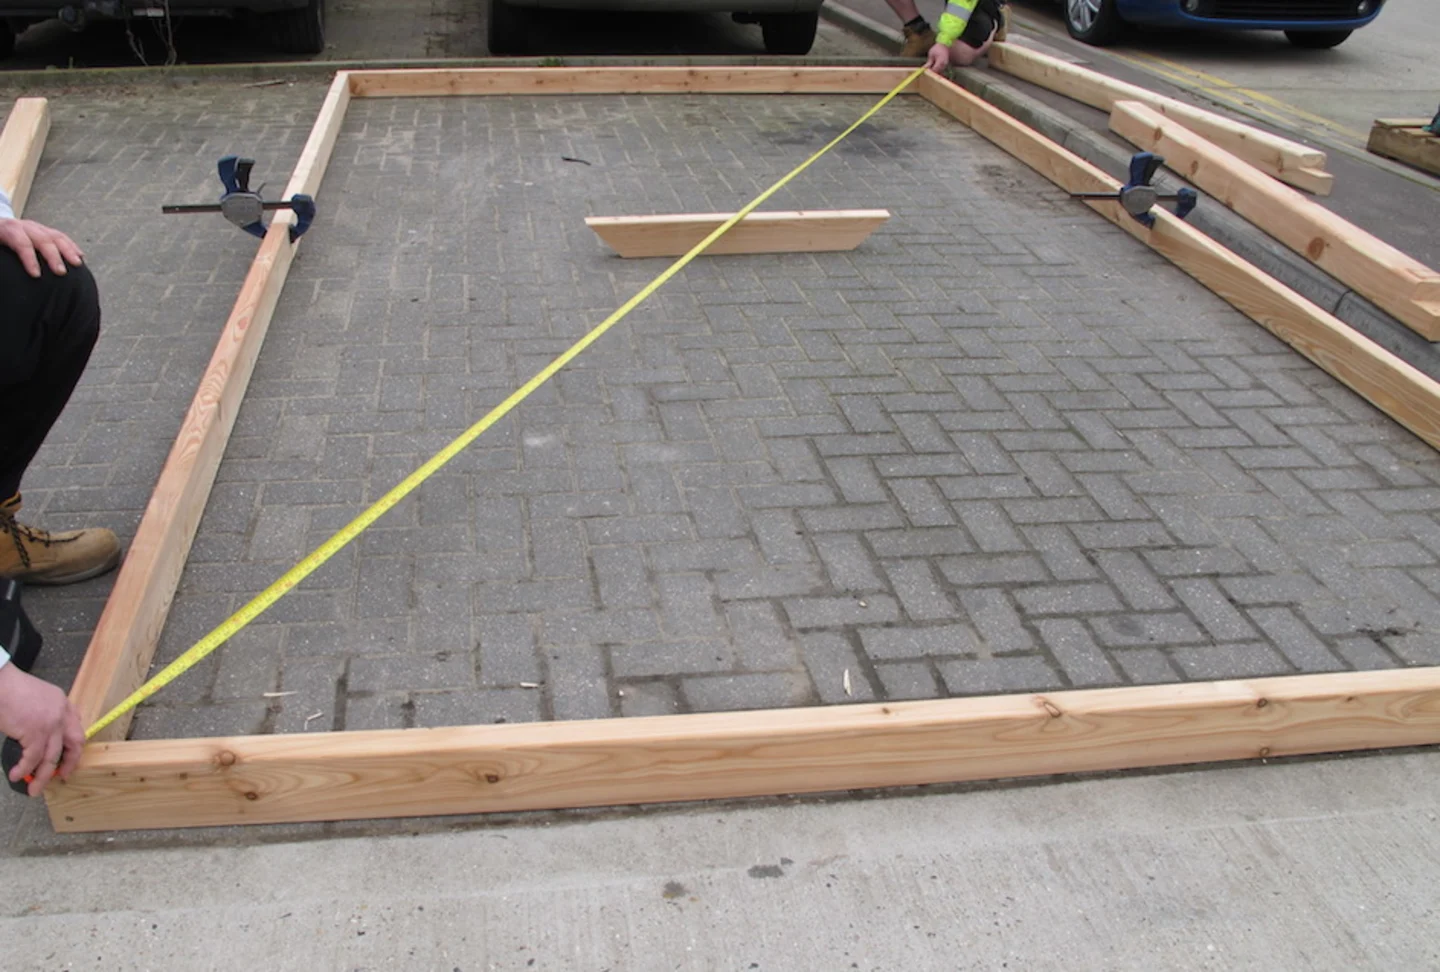
Using clamps we will temporarily fix the center joint together. Using a tape measure we check they are the same distance apart using the end beam as a reference. We then make sure the ring beam is 100% square. (If you are not sure how to square please see the relevant section our log cabin installation advice page).
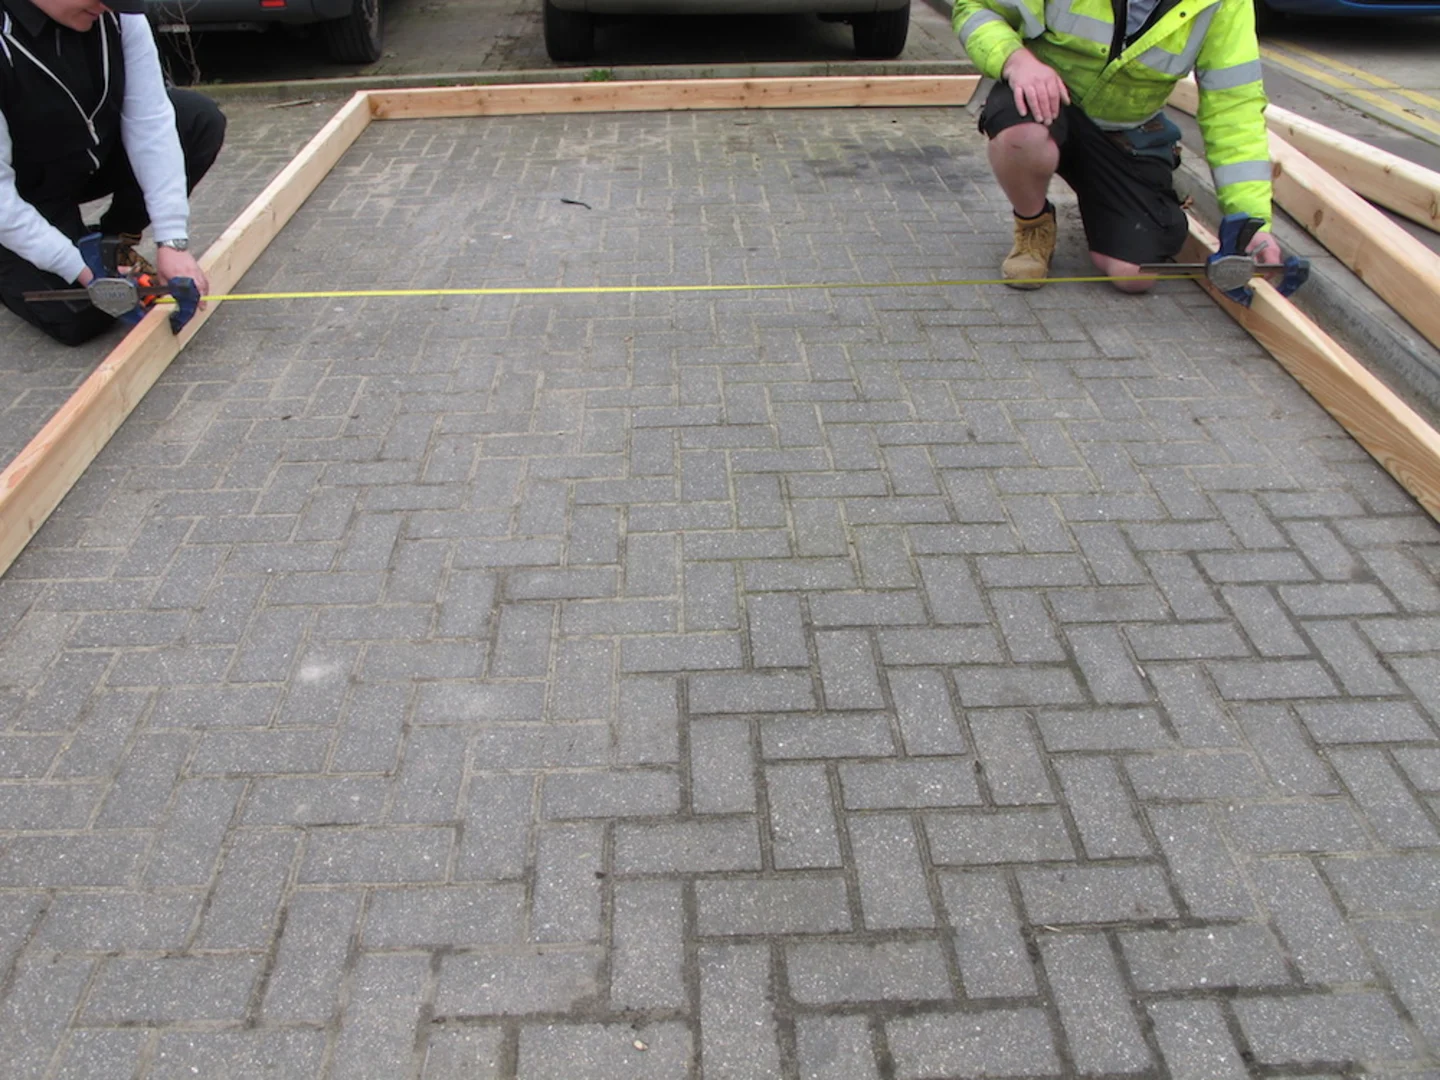
Measuring and squaring the ring beam. The center joint is temporarily held with clamps.
Ensuring the ring beam is square and in the final install position.
Ensuring the ring beam is square and in the final install position. Note we are using a block in the middle to stop sag of the tape for a more accurate measurement.

Posts and Post Holders

With the ring beam of the gazebo square and in the final position of where it will be we can now mark exactly where the legs will be.

Putting the post in upside down in their finished location we can then mark around the post to get the exact position of the posts in relation to the ring beam.

Marking the location of the corner post.
In the case of rectangle gazebos you will also mark the location of the middle post.

With marks in place you can then exactly position your post holders.

Post holder location can be marked for exact location according to the position of the main ring beam
Post holder location
Post holder location marked and can then be secured knowing it is 100% accurate.

Different Anchor Posts

We have several types of post anchors available for use in soft / hard ground. It is very important to secure the posts and the holders do help with this. Without securing the posts if they are knocked during its lifetime you could well have some problems.

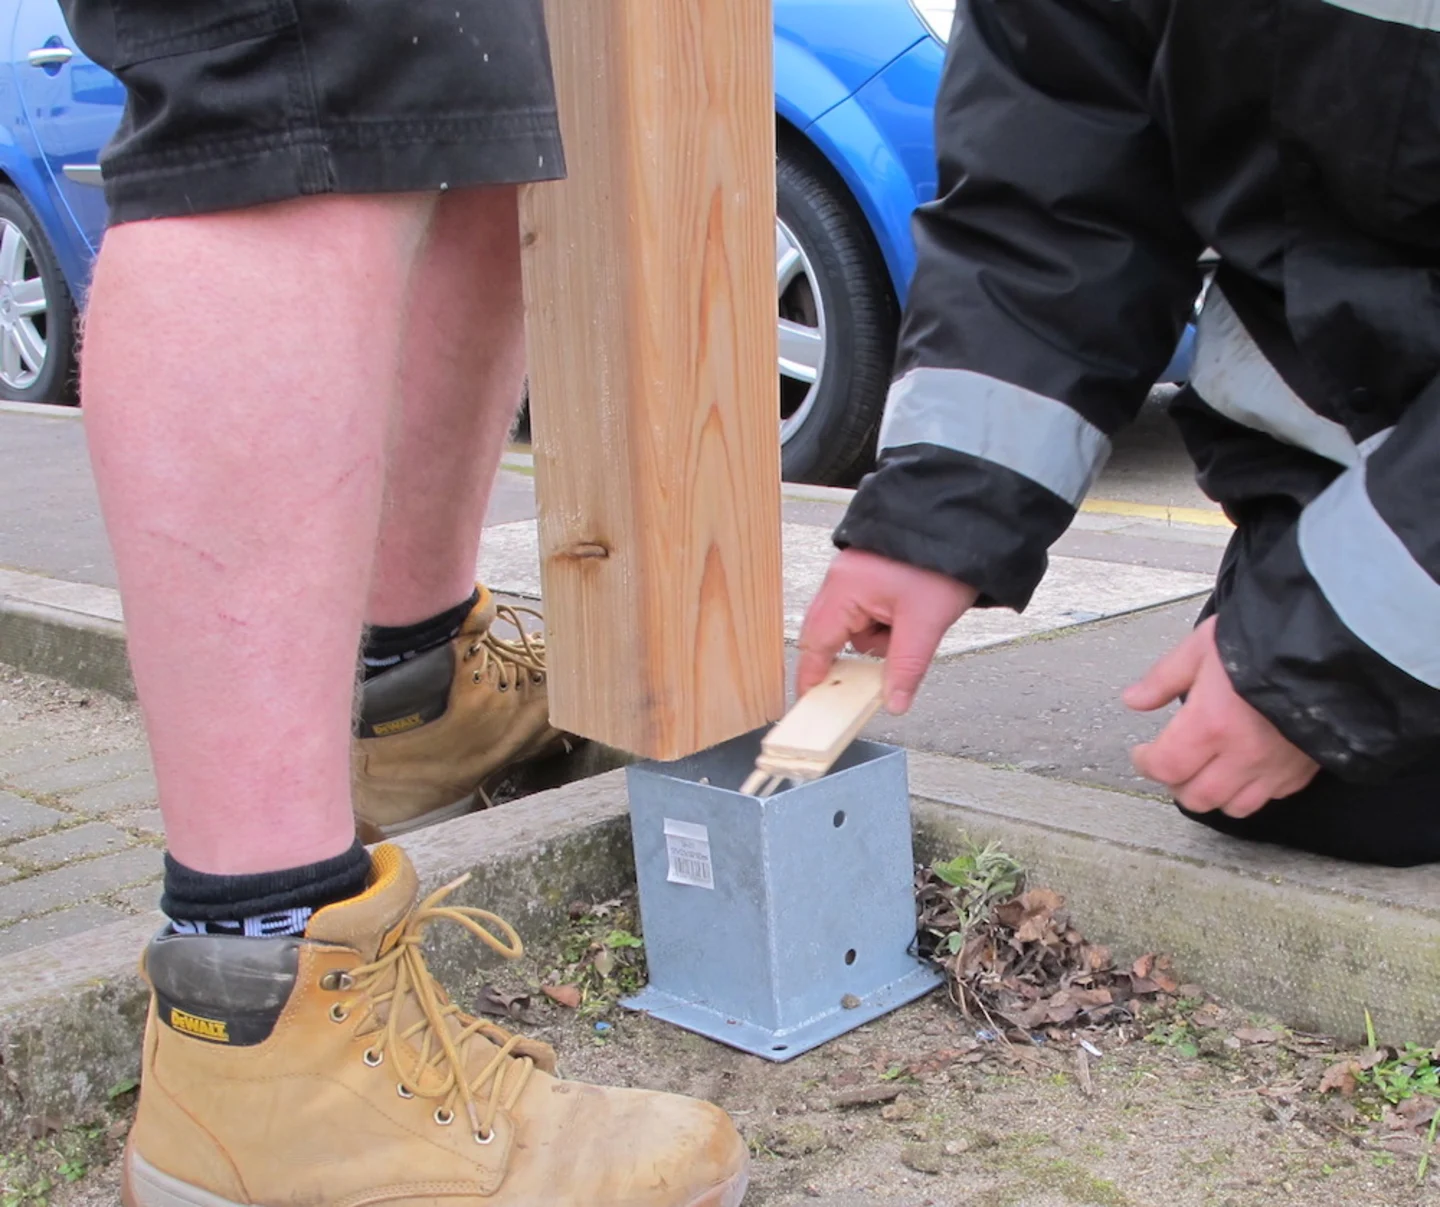
Post holders are handy if the area is not 100% level as we have with this install, we added packers inside the holder to get the post level as it was not possible in our install to break ground

We hid packers inside the post holders to help level the gazebo as breaking the ground was not possible.
We hide packers inside the post holders to help level the gazebo as breaking the ground was not possible.

Here’s another example of using the ring beam to locate the post holders accurately

Using the ring beam to find the exact location of the post holders when concreting them in.

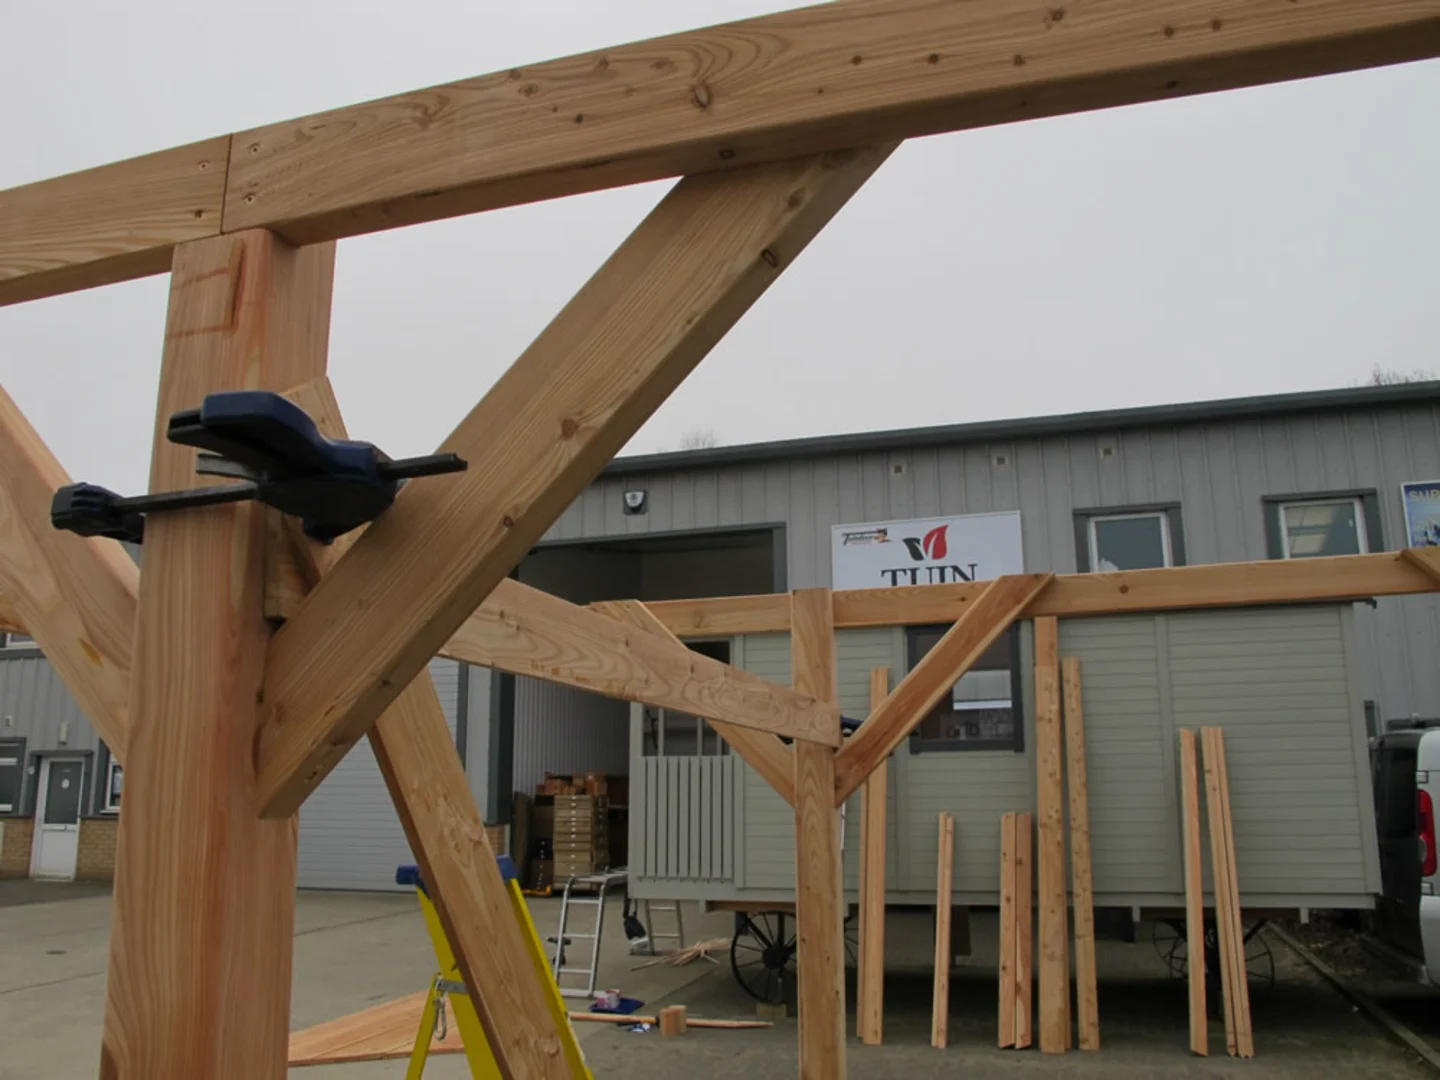
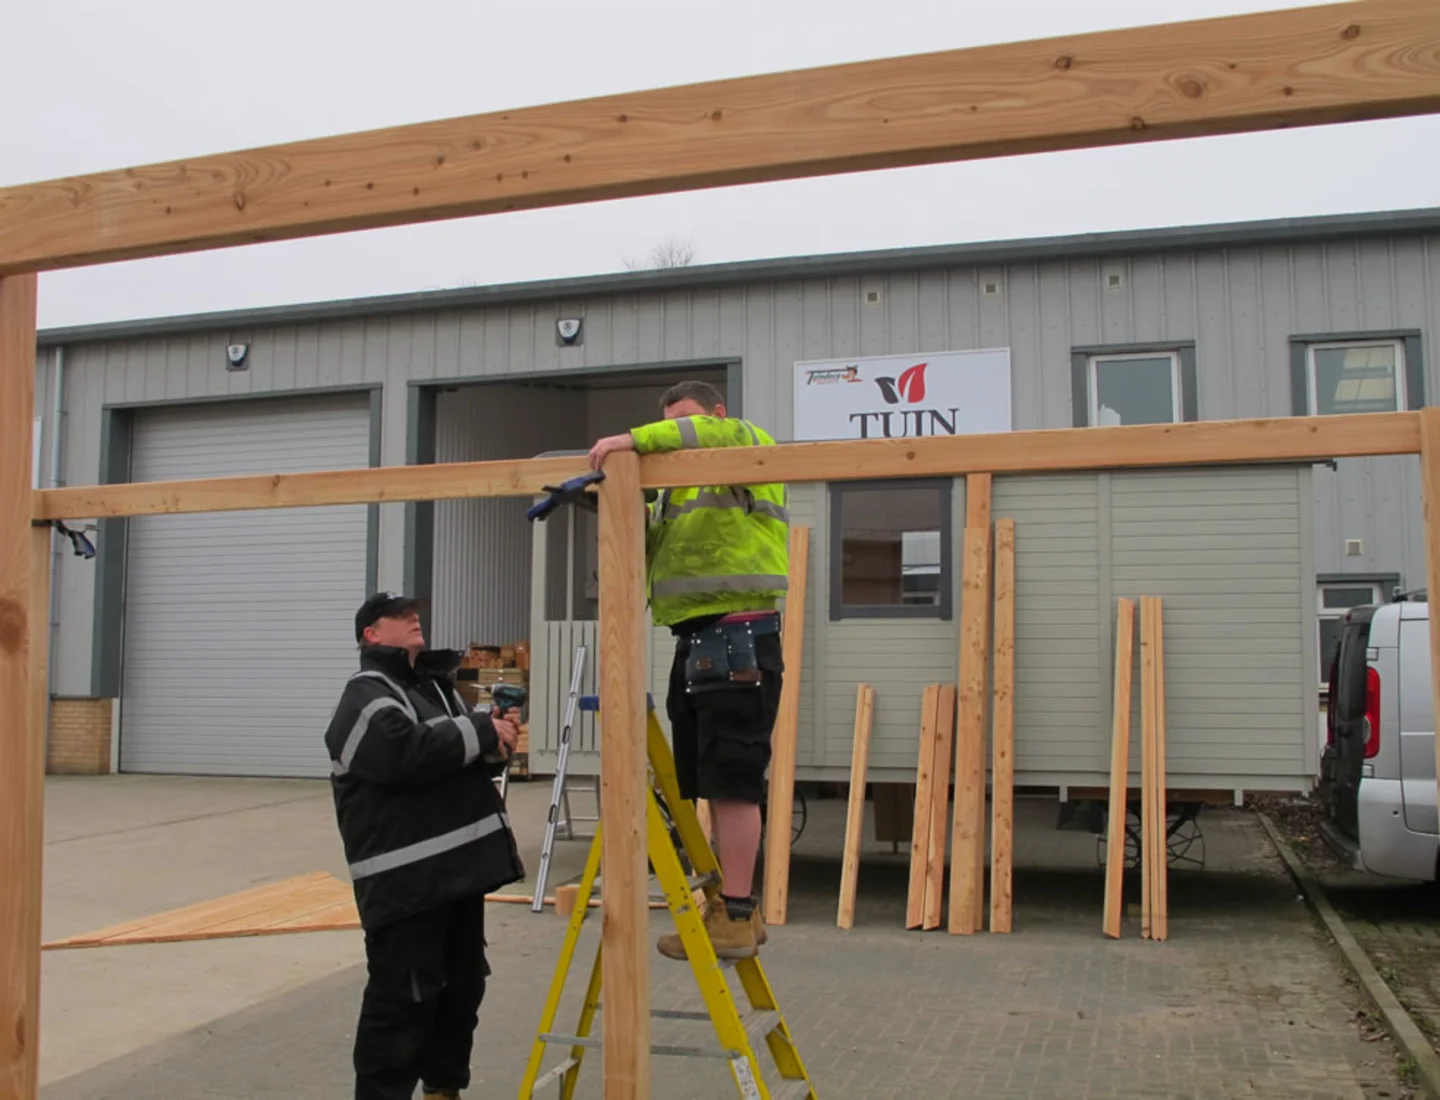
Using our clamps again we will fit two posts into the corner of one section of the ring beam.
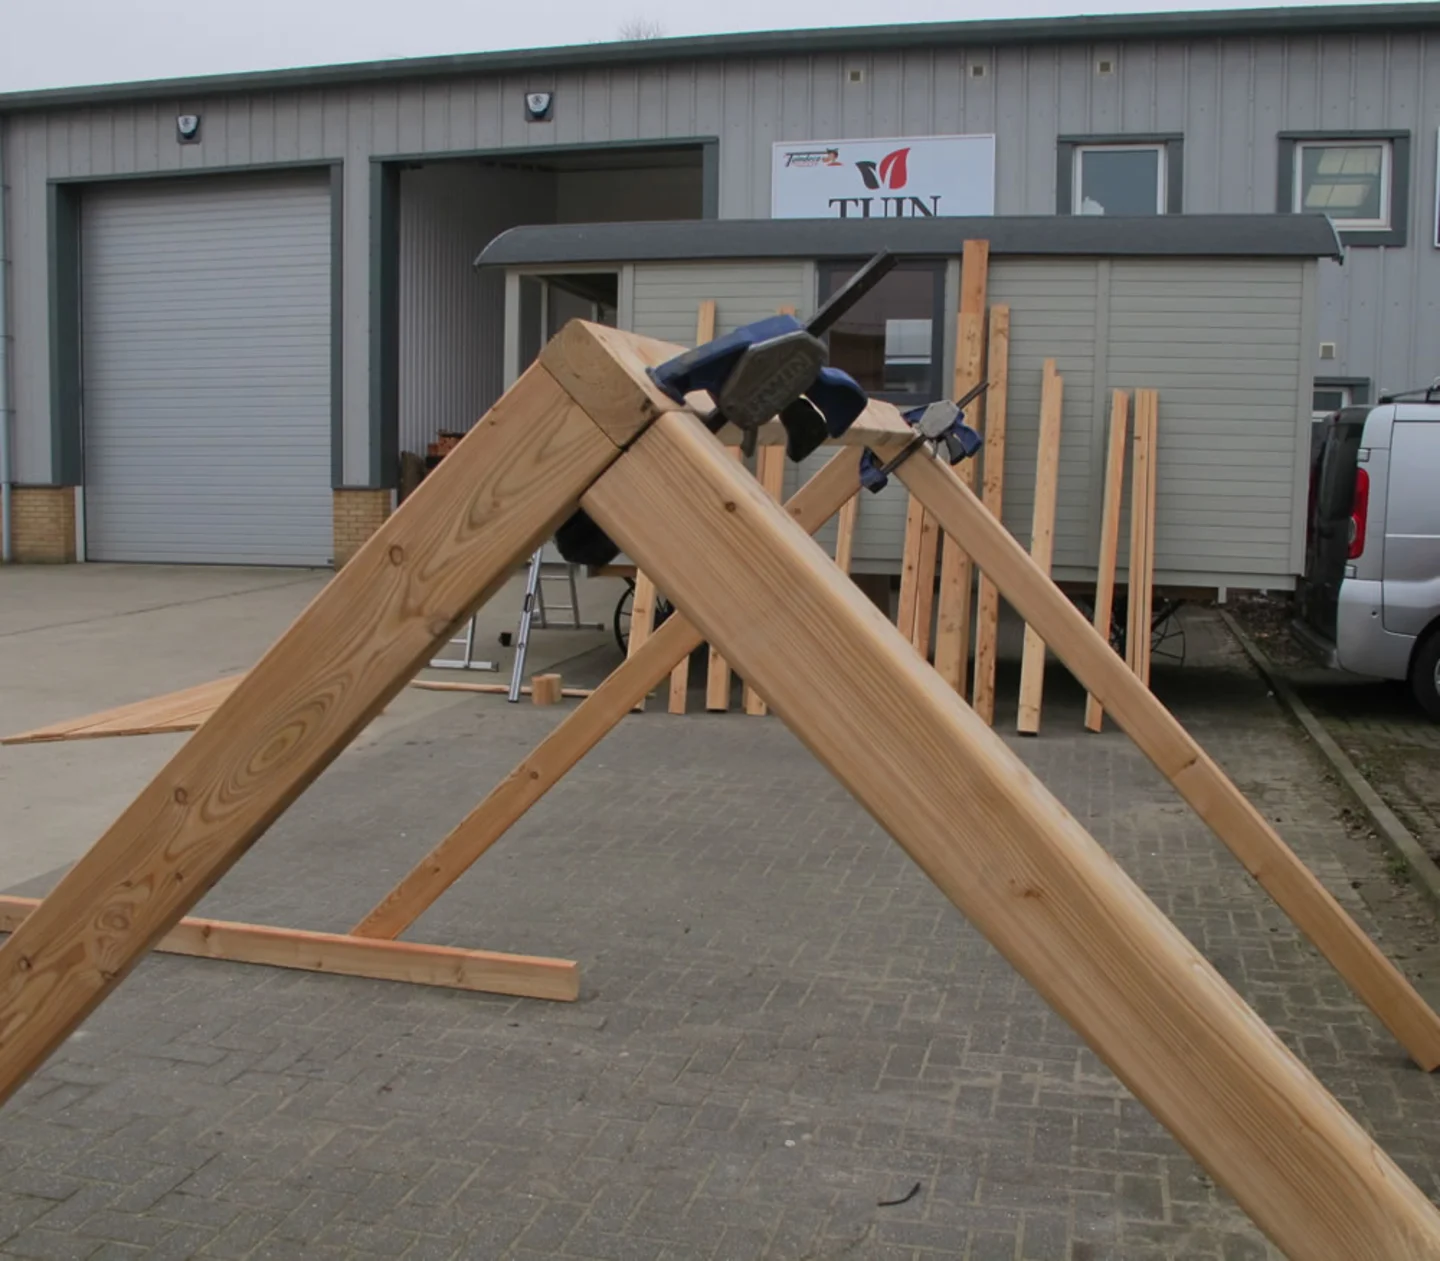
Clamping the post into one end of the ring beam.
Using the clamp to hold the post
Screws into the posts through the ring beam.
Screws into the posts through the ring beam. We’re still using the medium size screws.
Post screwed into position. I am using more screws than the plans may show for strength.

Next we clamp the center post to hold it in position. It is easier at this point to take the second part of the ring beam apart again clamping and fitting each section as you go.
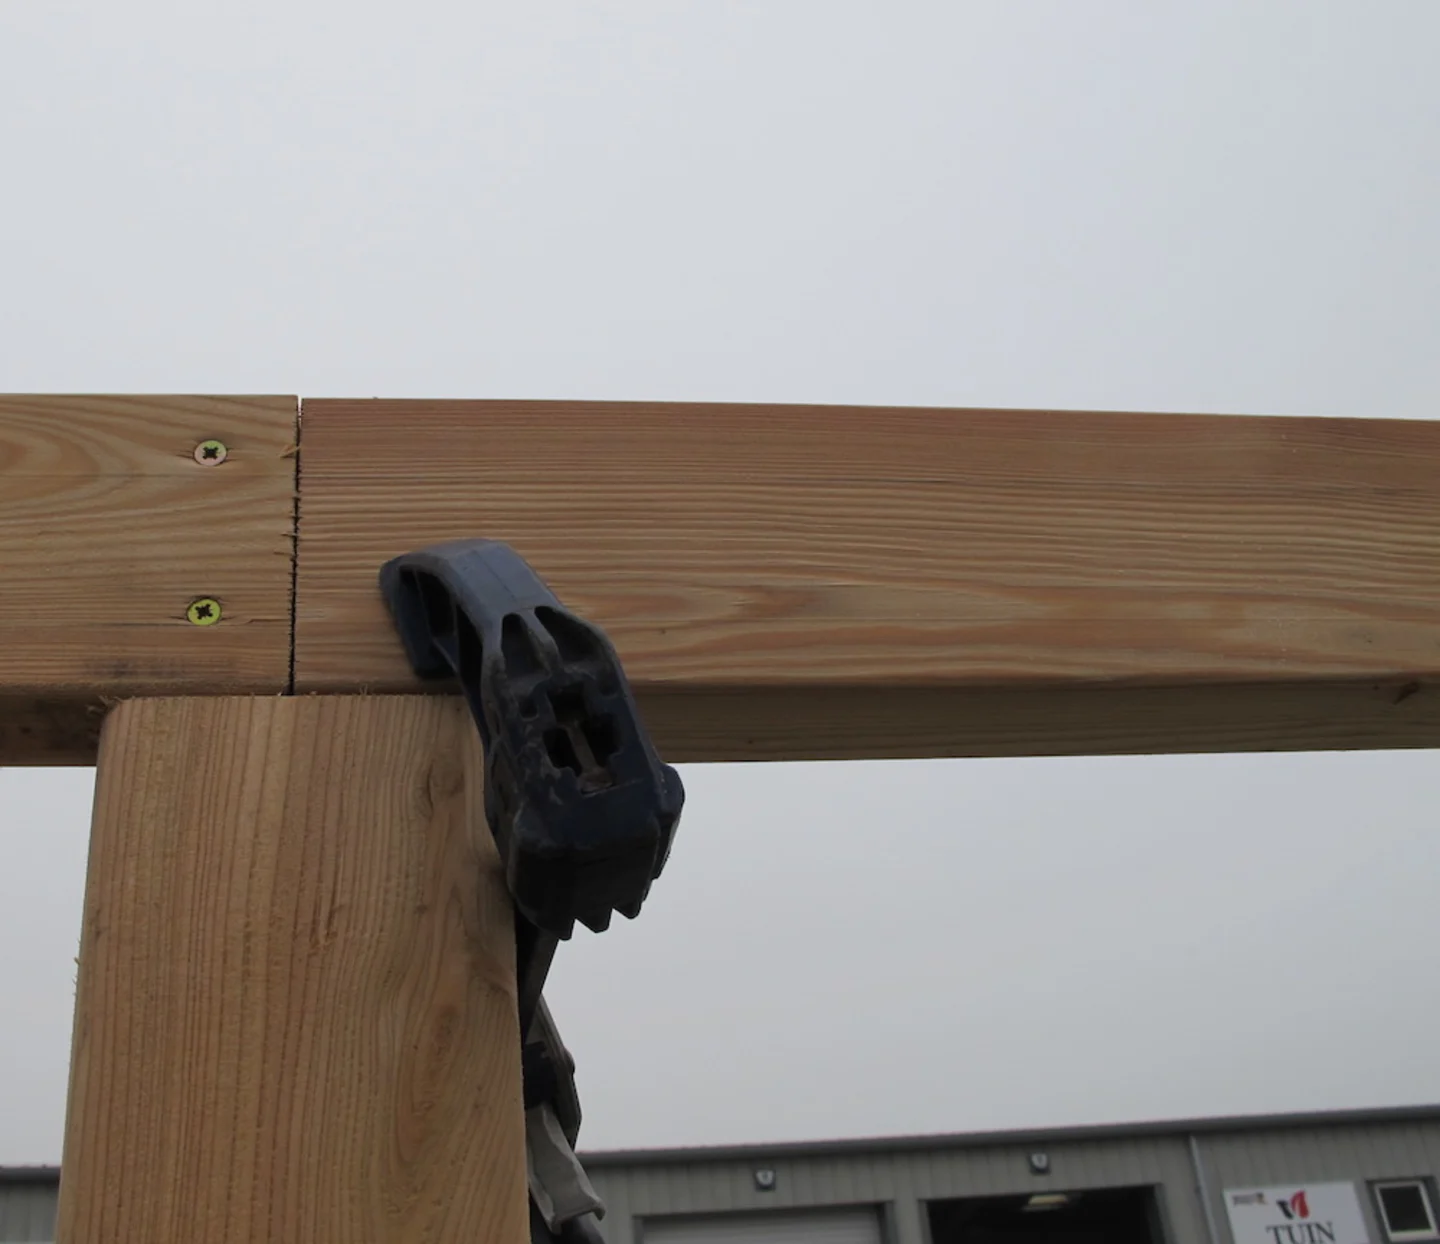
Center post which supports the join of the two parts making up the ring beam.
Center post which supports the joint of the two parts making up the ring beam in a rectangular gazebo.
Clamping and fitting each post as you go.
Fixing the center post. i am still sing the medium size screws.
Fixing the center post. I am still using the medium size screws.
Post and ring beam sections using the clamp, pilot holes and finally screws.

Gazebo Corner Braces

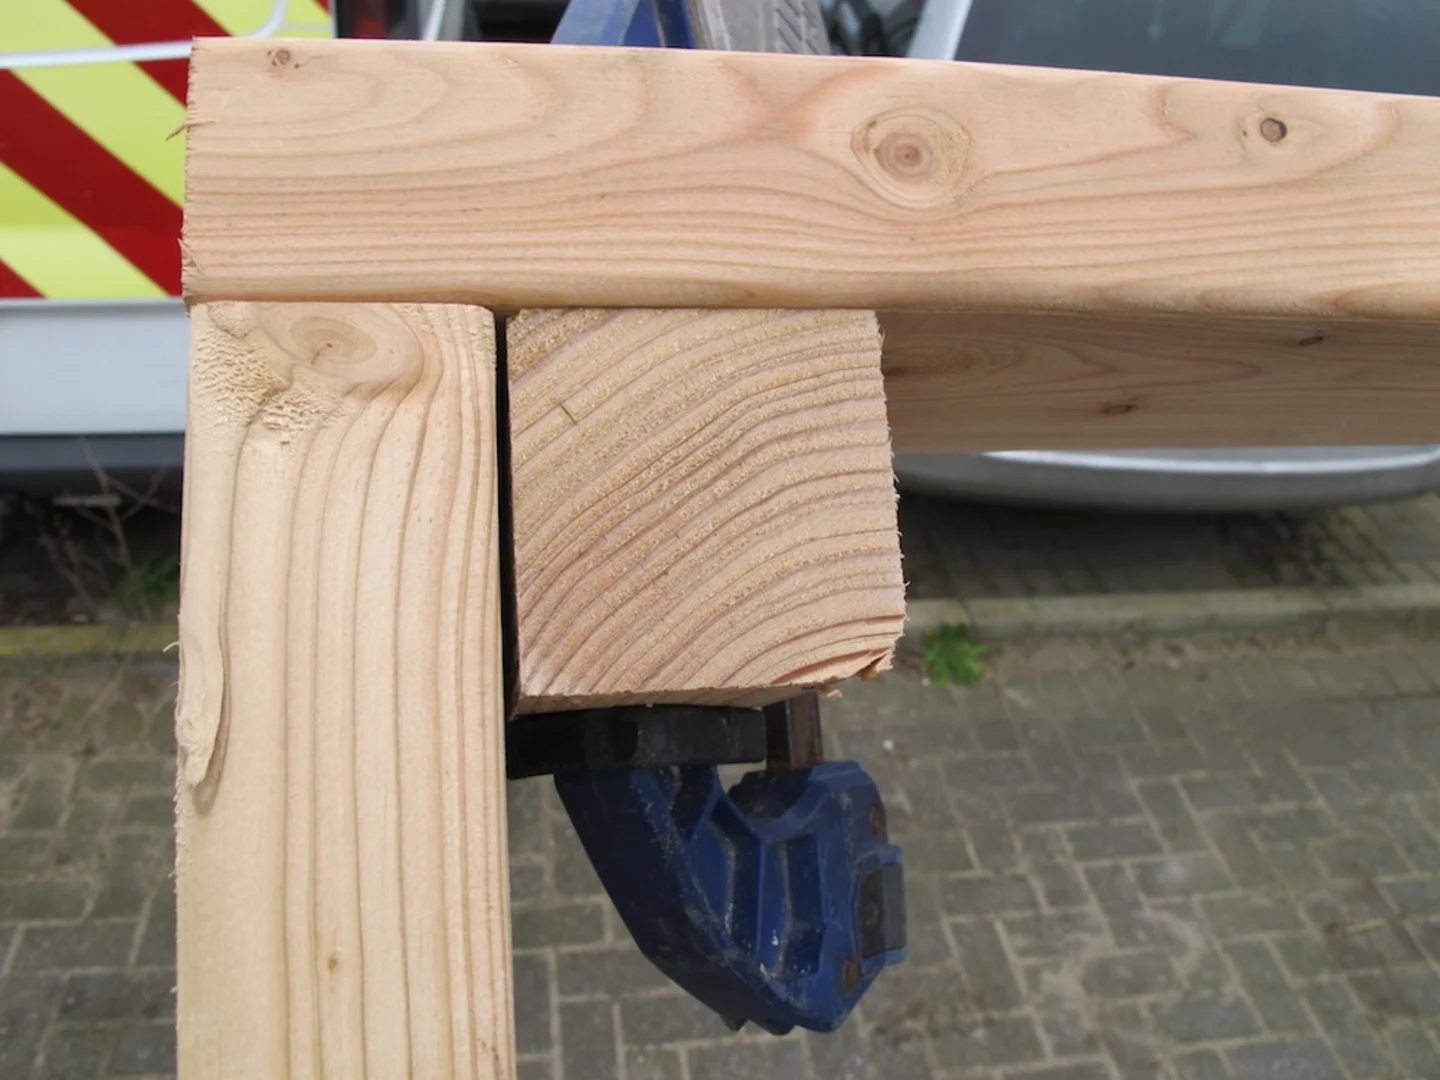
With the posts and ring beam fitted we can now add the corner support bracing. I deviate from the plans here as well. I prefer to set the bracing inside the ring beam. This is what it should look like, you will see as per the plans it is under the ring beam and against the post.
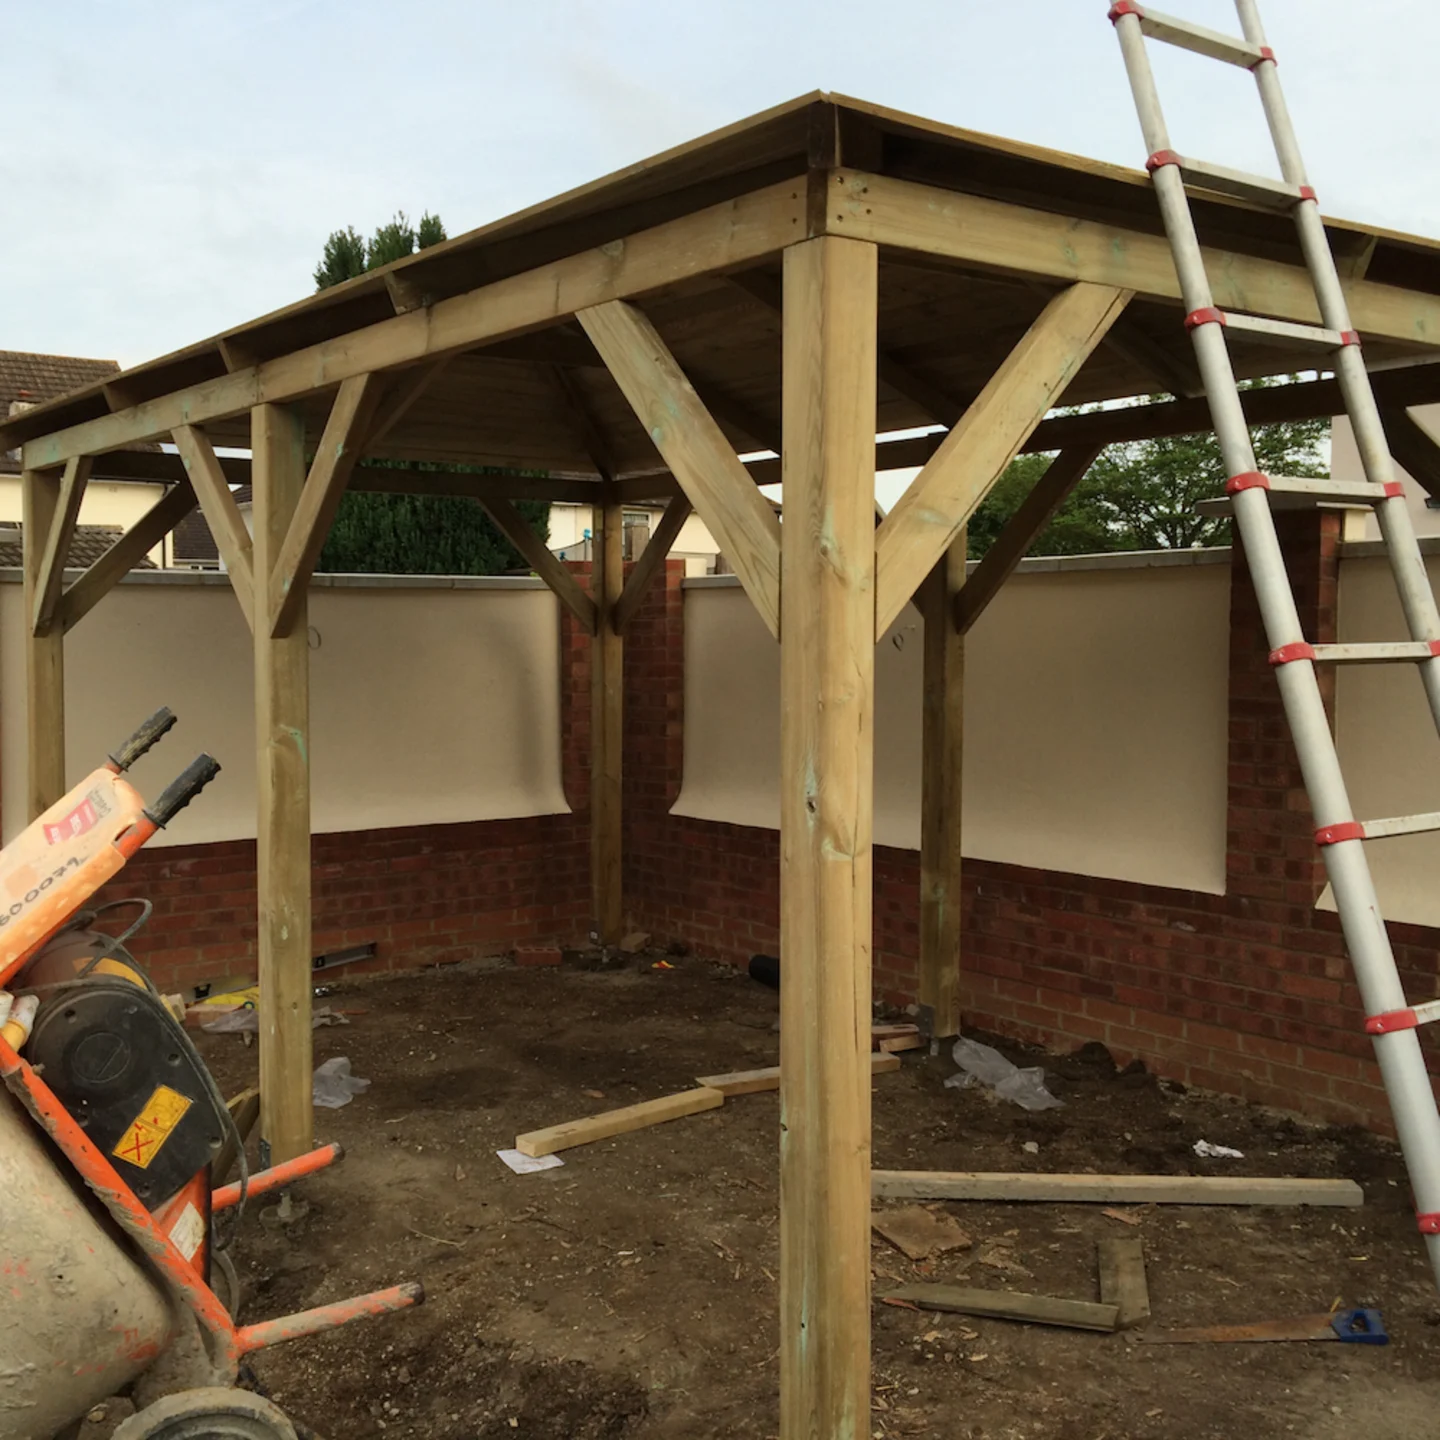
Corner brace on the underside of the ring beam.

I will do it slightly different and set mine inside. I do this because:

  • I feel it makes for a stronger joint and more stable.
  • I can make minute adjustments easier to make sure the post is at a perfect right angle and 100% upright.
  • If there is any slight deviation in the cut angle I can allow for this and still have a lovely tight joint on the leg for aesthetic reasons.
  • It gives greater head room at the corners and less chance of bashing your head.

It is of course up to you and what you prefer when fitting the corner braces, this is only my personal preferred method.
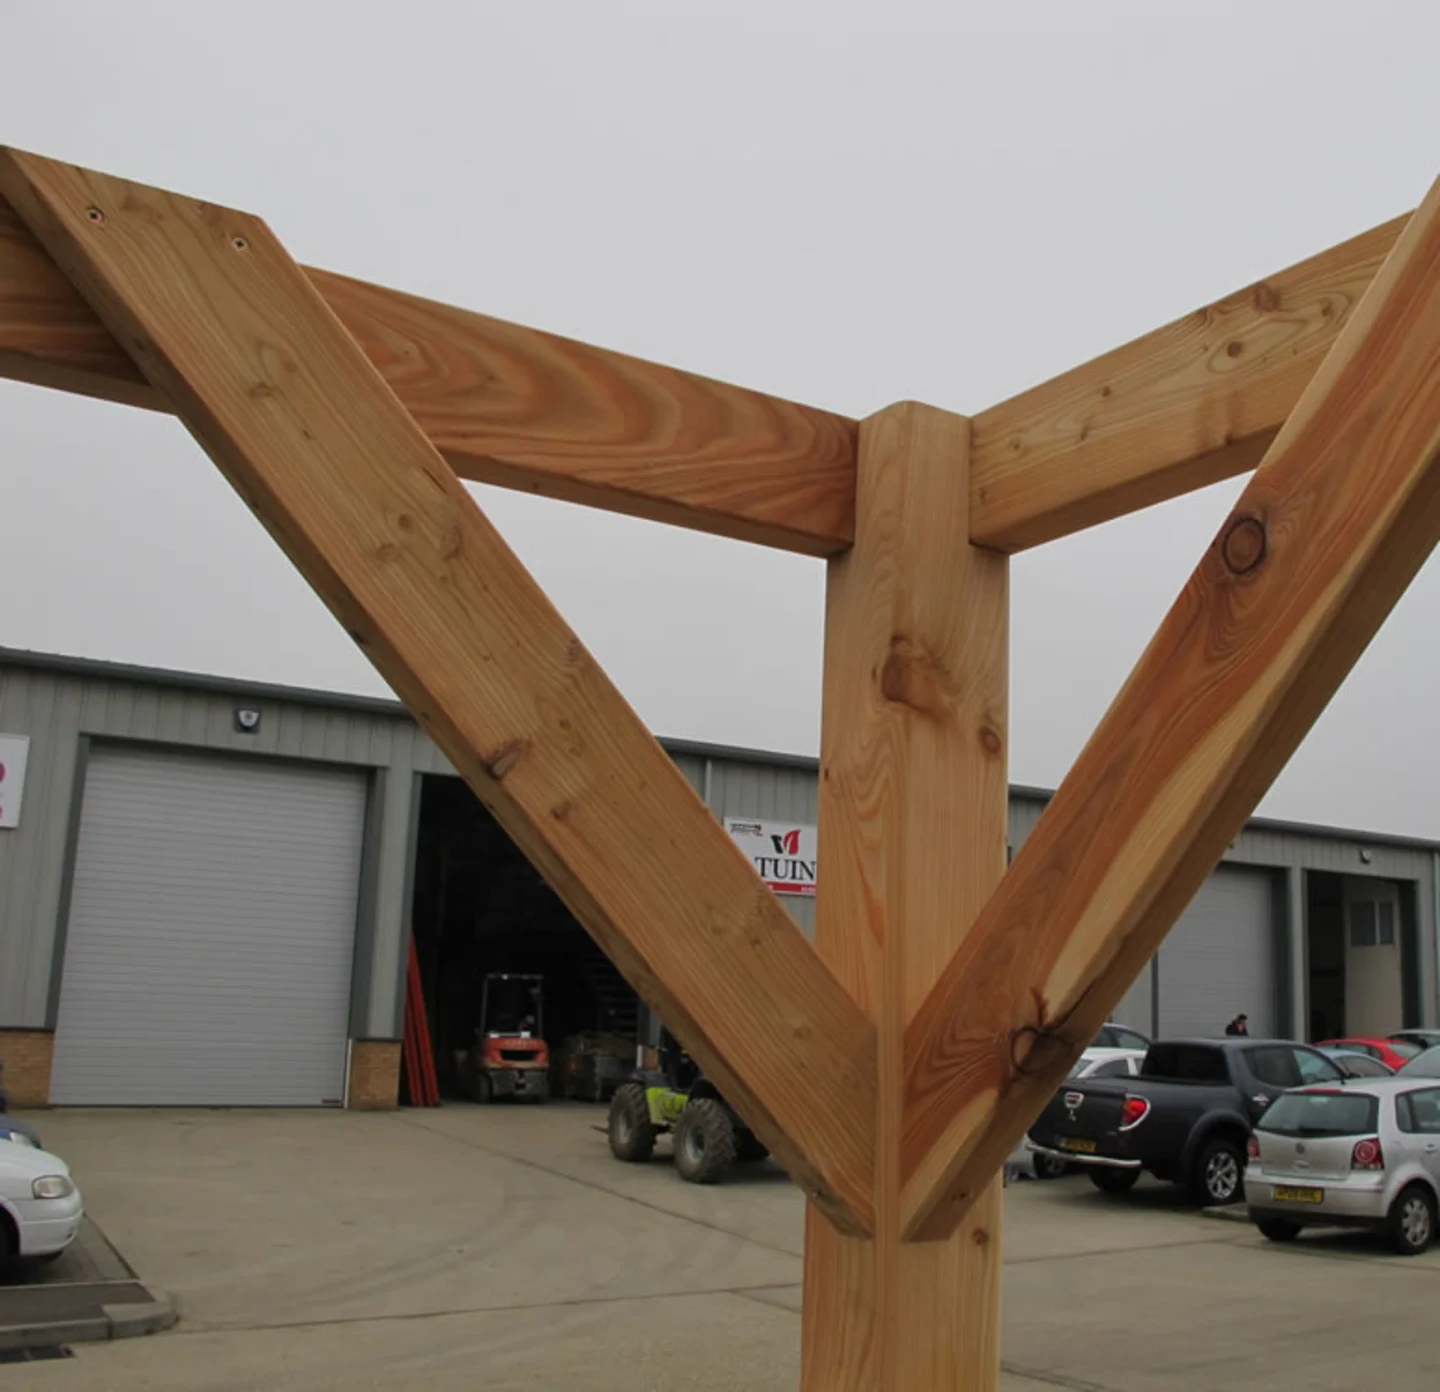
Corner brace, my preferred method is to set them inside the ring beam.

Preparation always makes it quicker so consider pre-drilling the braces before installing them all together.

Pre-drilling the corner braces
Pre-drilling the corner braces, doing them all together helps to speed up the install process.
It's a good idea to brace the center section until the roof is being fitted and while you are fitting the corner braces.
It’s a good idea to brace the center section until the roof is being fitted and while you are fitting the corner braces as it keeps everything nice and straight.

Ring Beam and Post Complete on the Gazebo Installation

You may see from the plans depending on your particular gazebo that they show it being built and then lifted on to the three posts. As I have shown my method is an alternative that you may wish to consider. I find it easier and you only need two people. It is of course up to you though how you think it is best to do. This method is of course also highly relevant for the flat roof gazebos.
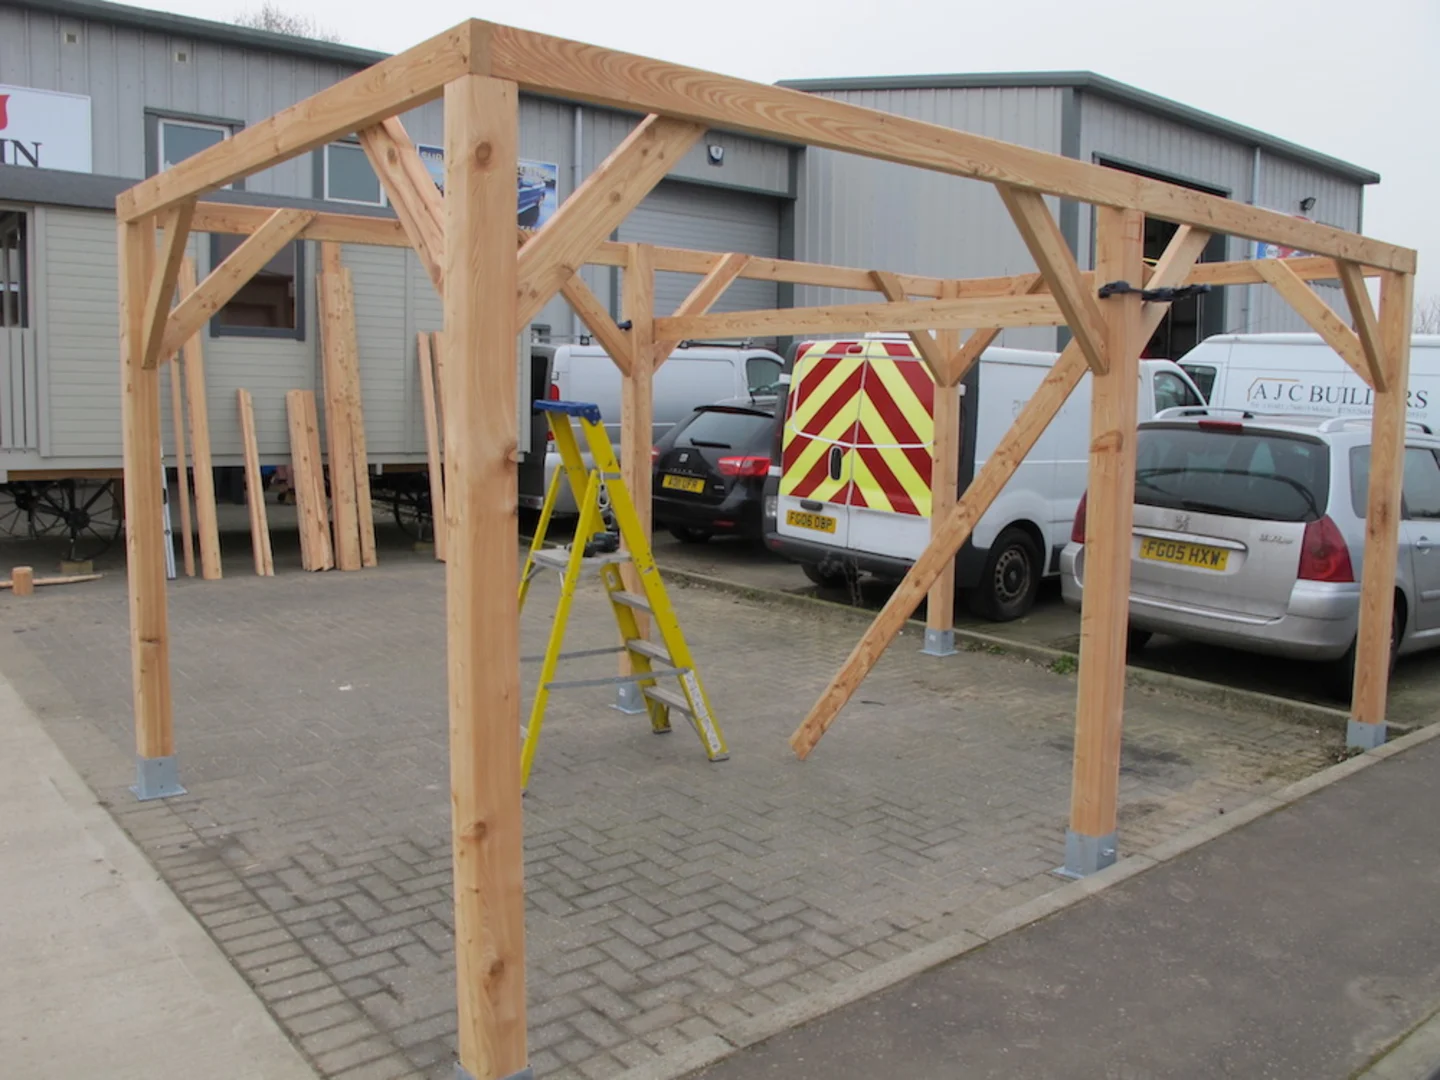
With the ring beam, braces and posts fitted we can now move on to the roof install.

Roof – Gazebo Installation.

I’ve decided to do the roof install in a separate post as much of it is also very relevant to our log cabins so there will be combined advice.
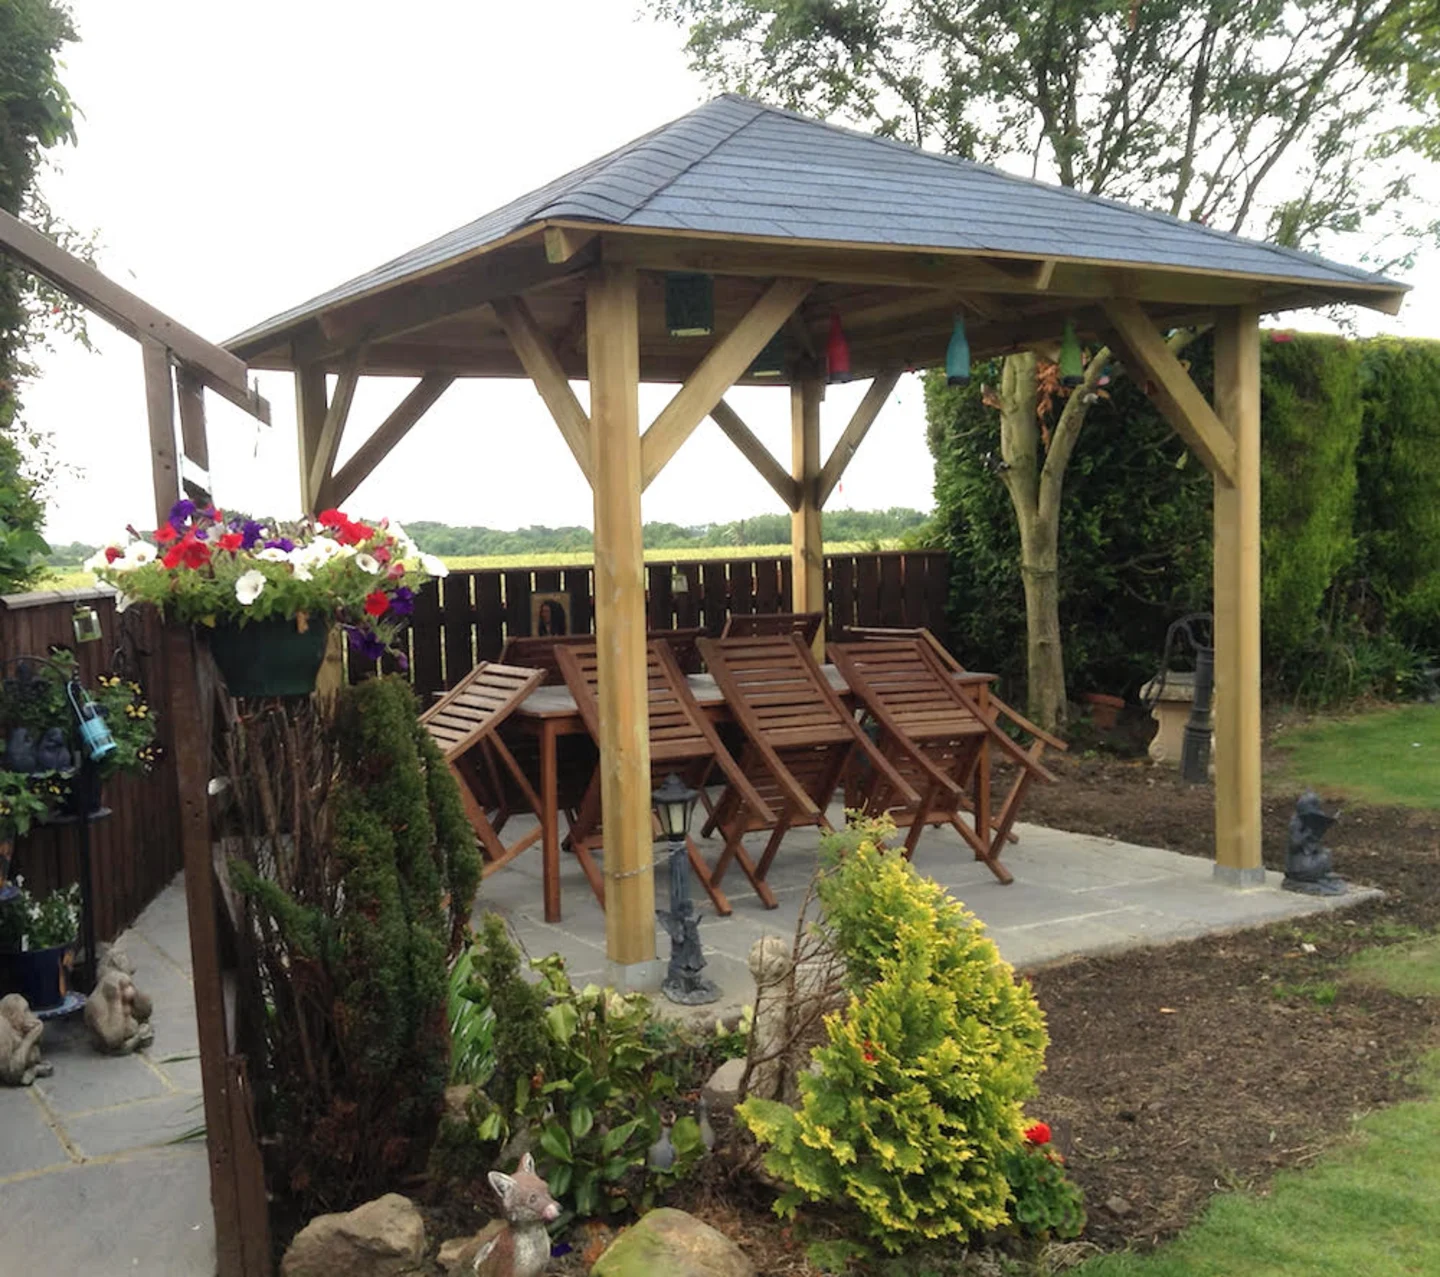
Please see the Pyramid roof installation advice post.

Installation advice for pyramid roofs.

The flat roof installation is a doddle once the main structure is up and doesn’t need any further explanation.
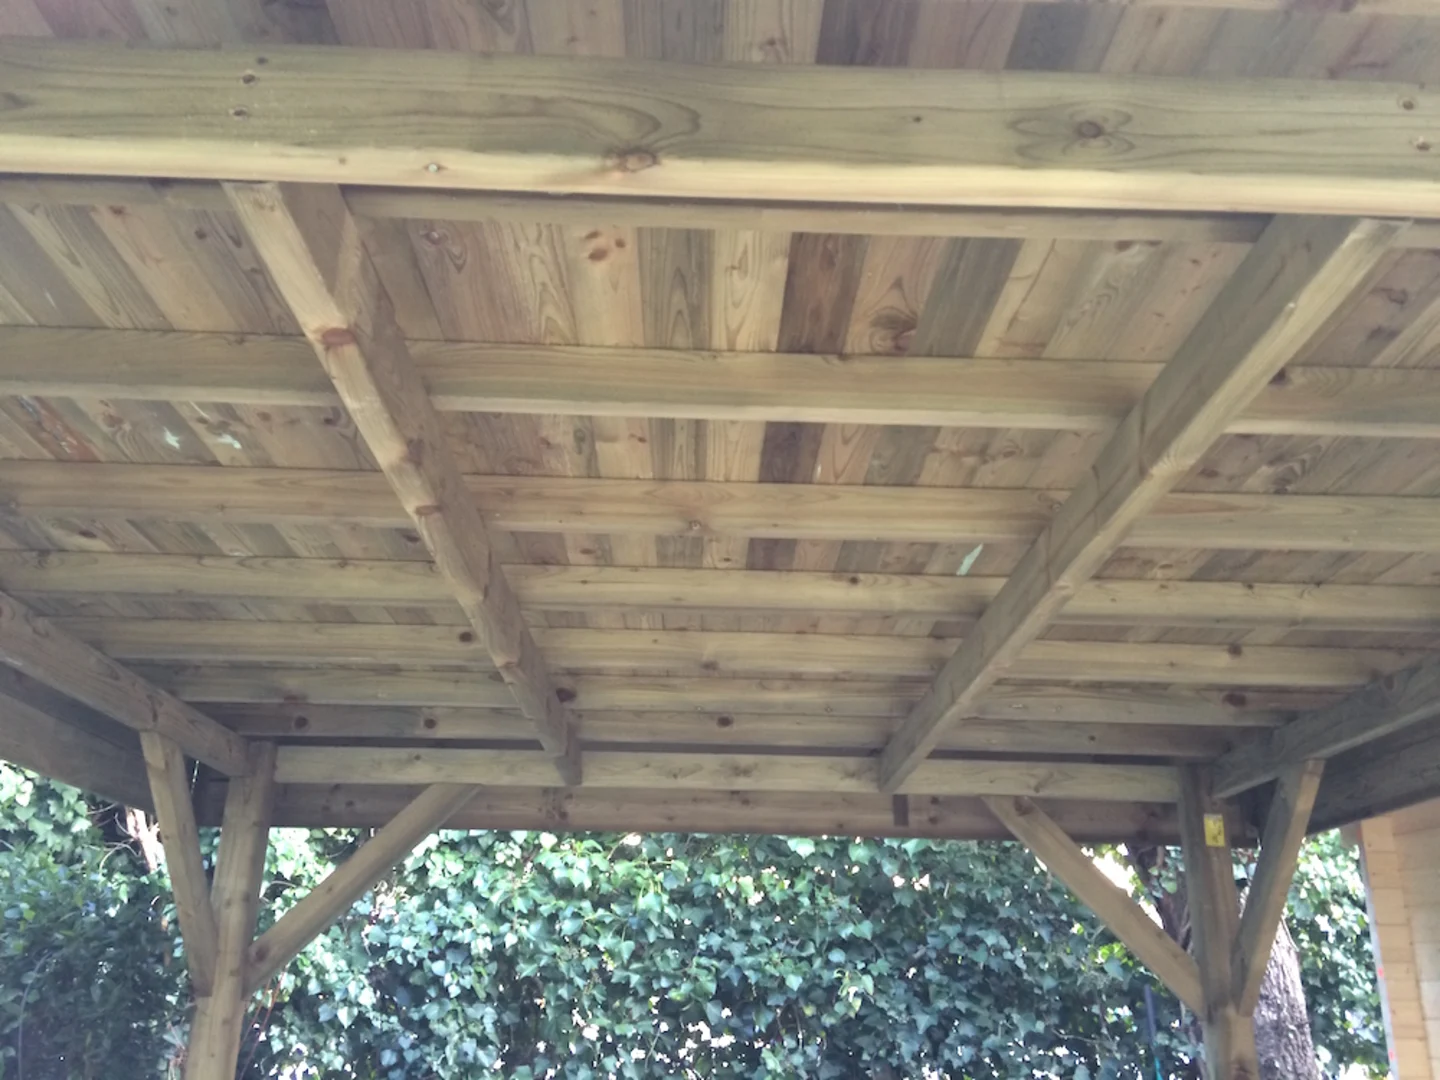
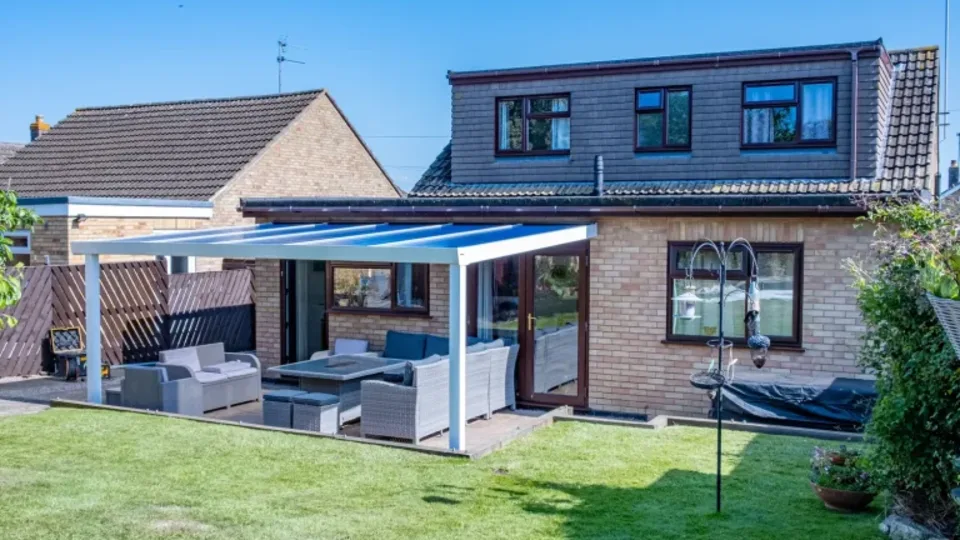
Flat roof modern gazebo installation is very straightforward.
This entry was posted in Tips and Installation and tagged , , , , , by Richard. Bookmark the permalink.

About Richard

Meet Richard, a dedicated professional with a rich history at Tuin, contributing 25 years of experience within the garden timber industry. With an expertise in garden buildings. From design, manufacturing and installation for a range of timber buildings. Sheds to log cabins and all the way up to timber framed houses. In his time he had worked with experts all over europe, and also included his own personal experience of installing and testing Garden Buildings from a range of companies, models and sizes. You will find a majority of his blogs to include expert installation advice for your Log Cabin. Information on how timber reacts to different environments and the best way to preserve your garden buildings.

13 thoughts on “Gazebo Installation Advice

  1. I’m just about to order the classico but can this be fitted on 600×600 concrete slabs using the cup type post holders or should I be looking to lift the slabs and make a concrete foundation underneath. The slabs are currently sitting on a sand/concrete/hardcore base of about 100mm and weigh an absolute tonne.

    • Using the cupholder type post holders allows some movement that personally I don’t like. I’d prefer a stronger hold like a concrete foundation or metal held into concrete securing the legs.

  2. I am planning to buy one of these to put up in the garden on grass. What do I use to clamp the legs in place as it will be on lawn – or should i dig them in to the ground and set with concrete?

    • I think it would be best to set them into concrete to give you a sturdy structure. You could use the spiked post holders but I don’t think this will give you enough strength.

    • Im in the middle of building my gazebo and from personal experience you will definitely need to secure the posts to something more sturdy than grass due to weight and movement. I have used surface mounted post holders on a secured deck and until I added timber walks there was still a lot of movement in the structure

  3. Absolutely fantastic write up Richard, finally a truly high quality guide. Can’t thank you enough – the pictures were outstanding.

  4. Hi

    I am considering buying a grande gazebo but was wondering whether it is can be fitted on top of of a wood deck and which post fittings will be required?

    Thanks

    • Yes you can build this gazebo, and any other one onto a timber deck. You can use post holders of the cup type like these: Screw down post holders

      But if it was me I would not use these. I would send screws through at an angle through the post and into a joist supporting the deck (pilot hole first!). This way I do not have to look at the post holder which personally I do not find very aesthetically pleasing, the post will then be supported, two or three screws maybe necessary. You could also consider using L brackets to secure a post.

      • I found that drilling a 20mm hole in the bottom of the post and again in the decking allowed me to use a 20mm dowel to locate the post and stop sideways movement. A screw in the back at and angle as suggested above holds it all down.

  5. Hi we have had your gazebo fitted this week, it look super but we have a problem with the net side that i have also purchased, there’s no fitting instruction???? Please can we have some asap. please. thank you Wendy.

Leave a Reply

Your email address will not be published. Required fields are marked *