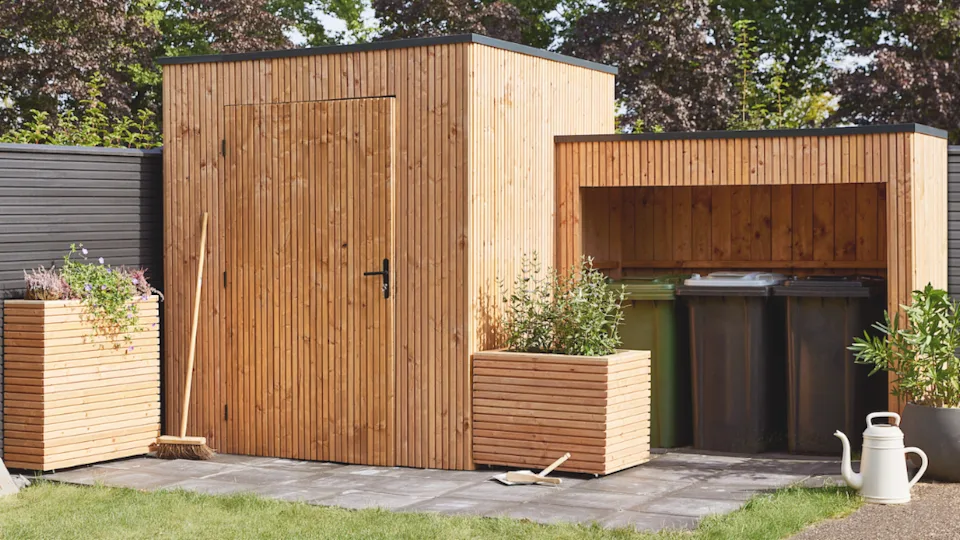
Aluminium polycarbonate veranda kit | Install tutorial
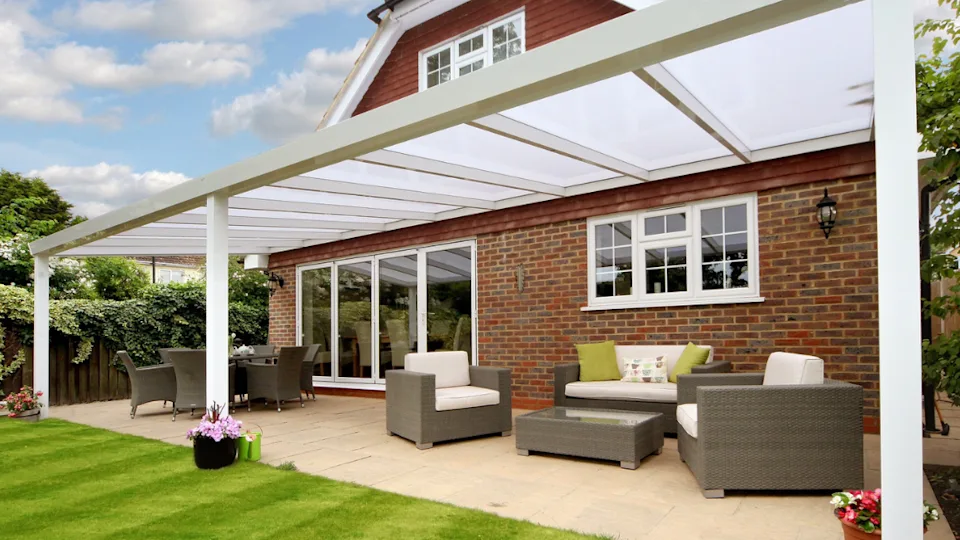
While we do sell a range of Garden Verandas. In this blog we will go through the benefits of our custom polycarbonate verandas and the installation process.

Durability
Polycarbonate is an extremely durable material that can withstand harsh weather conditions such as rain, snow, and UV rays. It is highly impact-resistant, making it less likely to break or shatter compared to other materials like glass. This durability ensures that your veranda will last for a long time without requiring frequent repairs or replacements.
UV protection
An option is to add UV-blocking roofing. The material can filter out a significant amount of harmful UV radiation while still allowing natural light to pass through. This feature protects you and your furniture from the damaging effects of prolonged sun exposure, such as fading and deterioration.
Thermal insulation
Polycarbonate verandas can provide excellent thermal insulation. The material has good insulation properties, helping to regulate the temperature within the veranda. This means that it can keep your veranda cooler in hot weather and warmer in colder months, creating a comfortable environment for relaxation or entertainment throughout the year.
Light transmission
Polycarbonate has high light transmission capabilities, allowing ample natural light to enter the veranda. This creates a bright and inviting space that can be enjoyed even during cloudy days. The light transmission also helps to reduce the need for artificial lighting during the day, saving energy and reducing utility costs.
Lightweight
Compared to traditional glass structures, polycarbonate verandas are lightweight. This makes them easier to install and less demanding on the supporting structure. The reduced weight can also help minimize the risks associated with heavy materials, such as strain on the building. Veranda installation costs are much lower too.
Low maintenance
Polycarbonate verandas require minimal maintenance. The material is resistant to scratches, stains, and chemical damage, reducing the need for frequent cleaning or specialized maintenance. Regular rinsing with water and mild soap is usually sufficient to keep the veranda looking clean and clear.
Cost-effective
Polycarbonate verandas are often a more cost-effective installation than alternatives such as glass. The material itself is generally less expensive, and the reduced weight and simpler installation process can also help lower overall costs. Additionally, the energy-saving benefits of polycarbonate’s insulation properties can lead to long-term cost savings on heating and cooling.
Overall, our polycarbonate verandas offer a durable, versatile, and aesthetically pleasing solution for creating a functional outdoor space that can be enjoyed throughout the year.
The installation of the custom polycarbonate veranda
*Please note, the following tutorial is for a 5m wide by 3.5 projection with 2 posts. Please consult the instruction manual for your specific sized veranda as instructions may differ. Also installation may differ depending on fixings used.
Unpacking of the veranda
The veranda will arrive as a strong sturdy timber framed package which will need unwrapping and unscrewing. The packing will also contain the instructions which is advised to look through before the veranda’s installation.
Drill wall profile
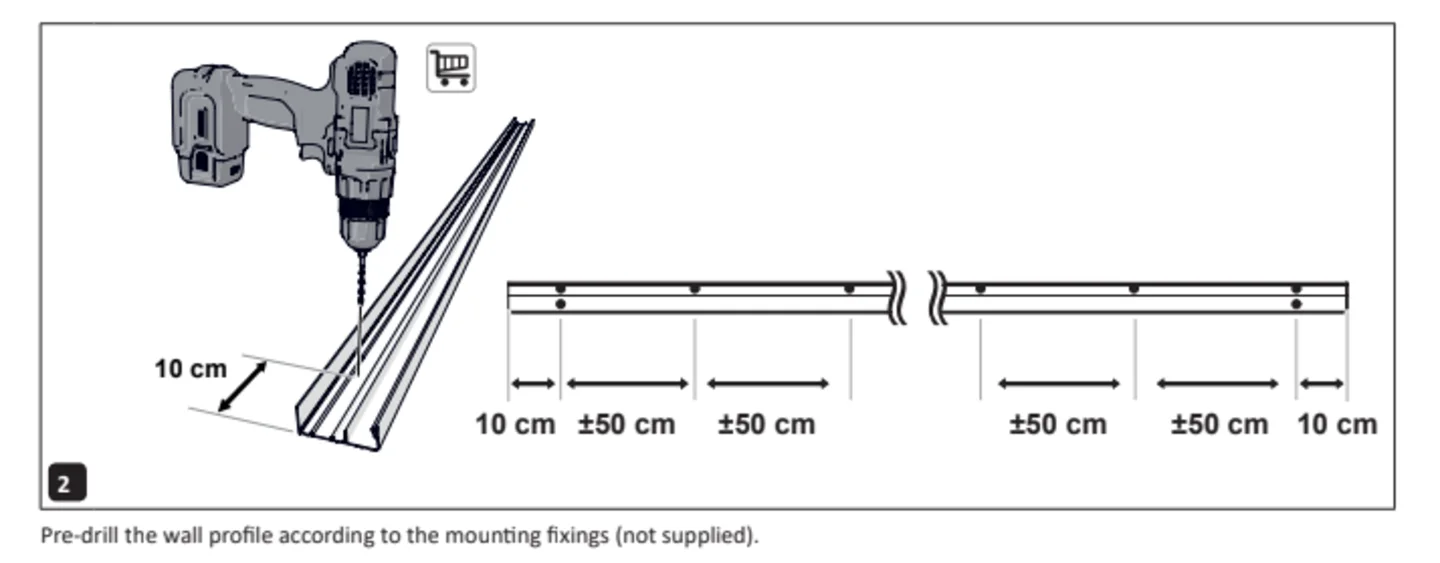
Unpack the wall profile and mark 10cm from each end of the length as well as at 50cm intervals. Then pre-drill holes according to the mounting fixings (not supplied).
Installation of the veranda the wall profile
Decide where you want to locate your veranda and attach the wall profile according to the fixings you’re using. Ensure the profile is level across its length.
Apply sealant around the edges of the wall profile and smooth off with finger.
Attach gutter side caps
Mount the side caps with screws provided.
Attach rubber seals
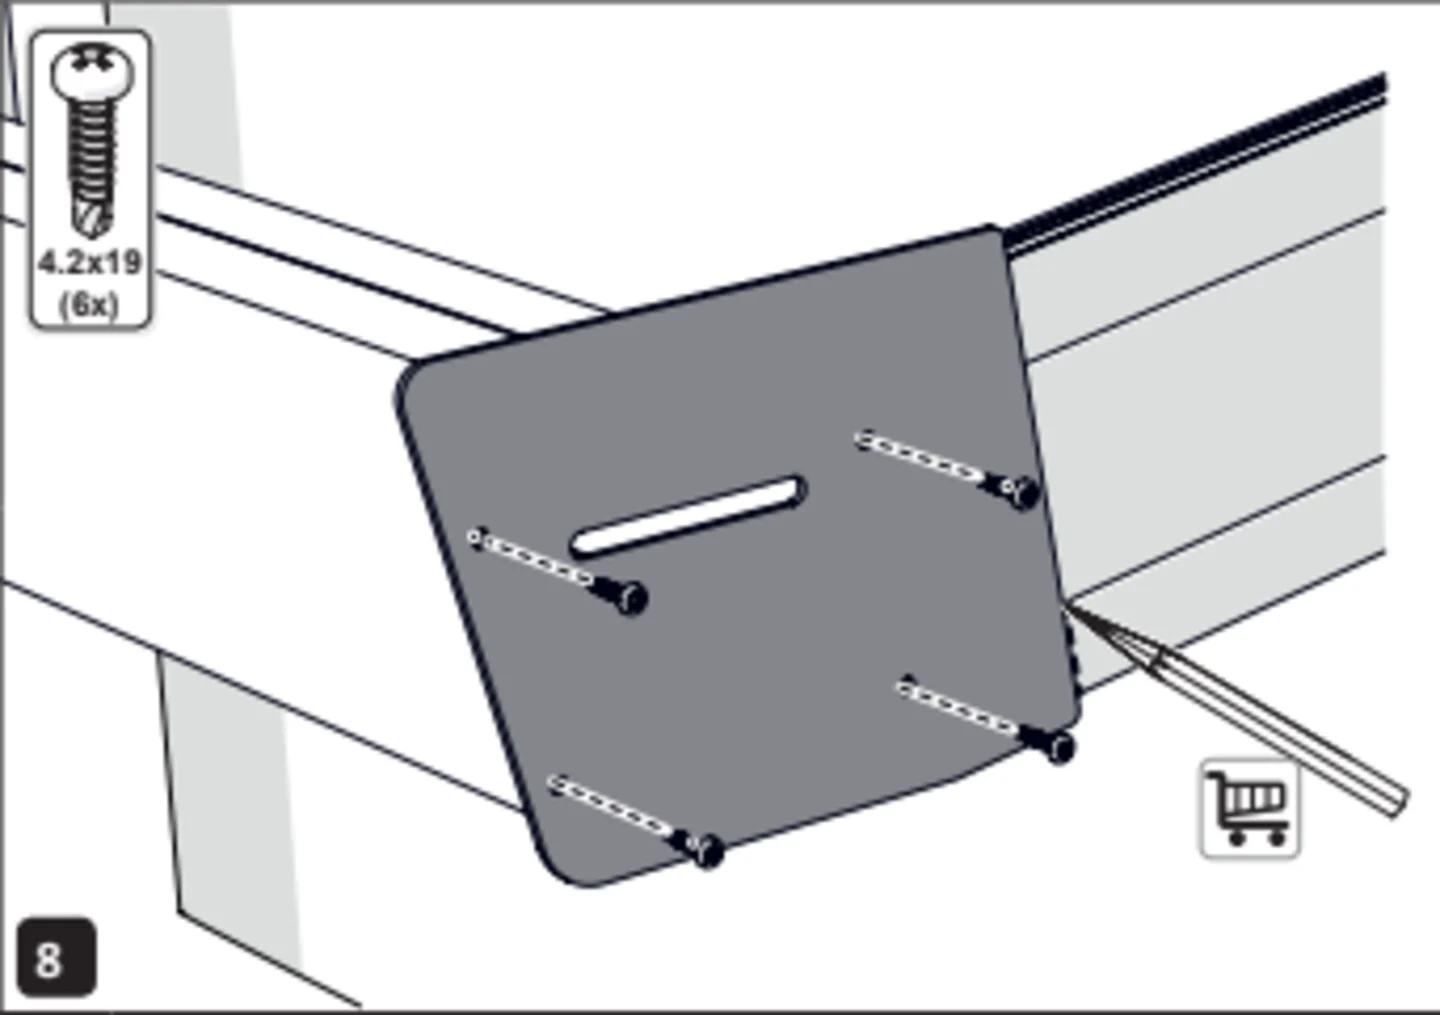
Attach Rubber seals to all intermediate beams, side beams, and side covers. Cut the seals 1cm longer at each end of the beams/covers. (this will be trimmed later)
Preparing the gutter
Place the Acrow props and adjust them to the correct height. Then place the gutter onto the Acrow props. Ensure the gutter is level and Attach the end caps to the wall profile.
Mount the side beams
Attach a side beam against the side of the gutter profile and wall profile.
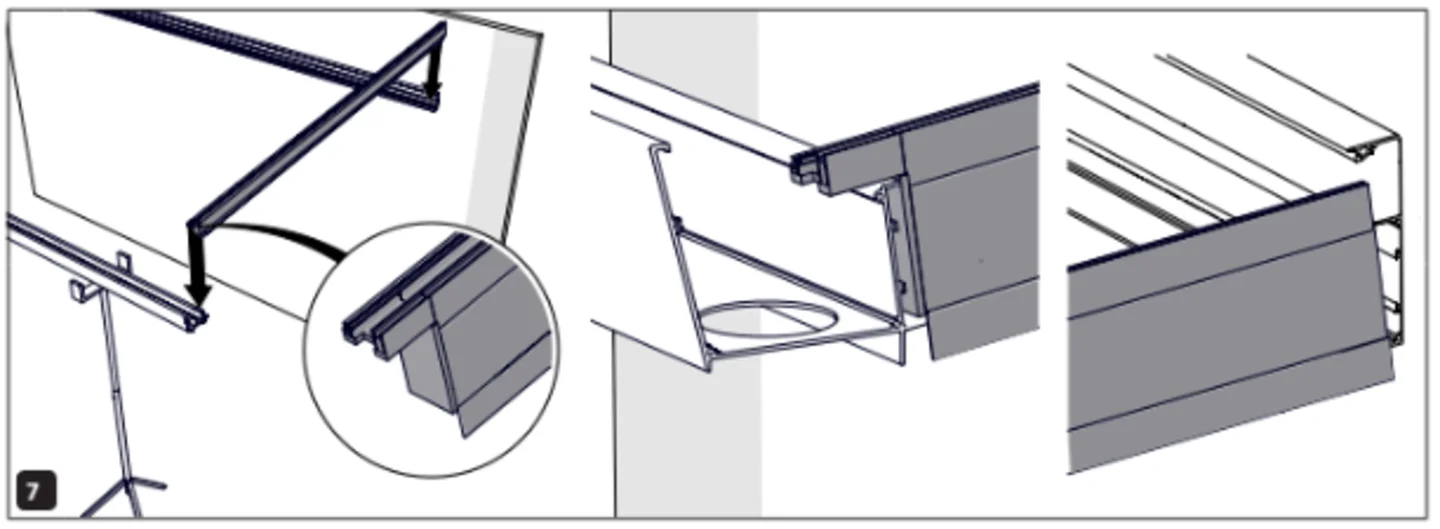
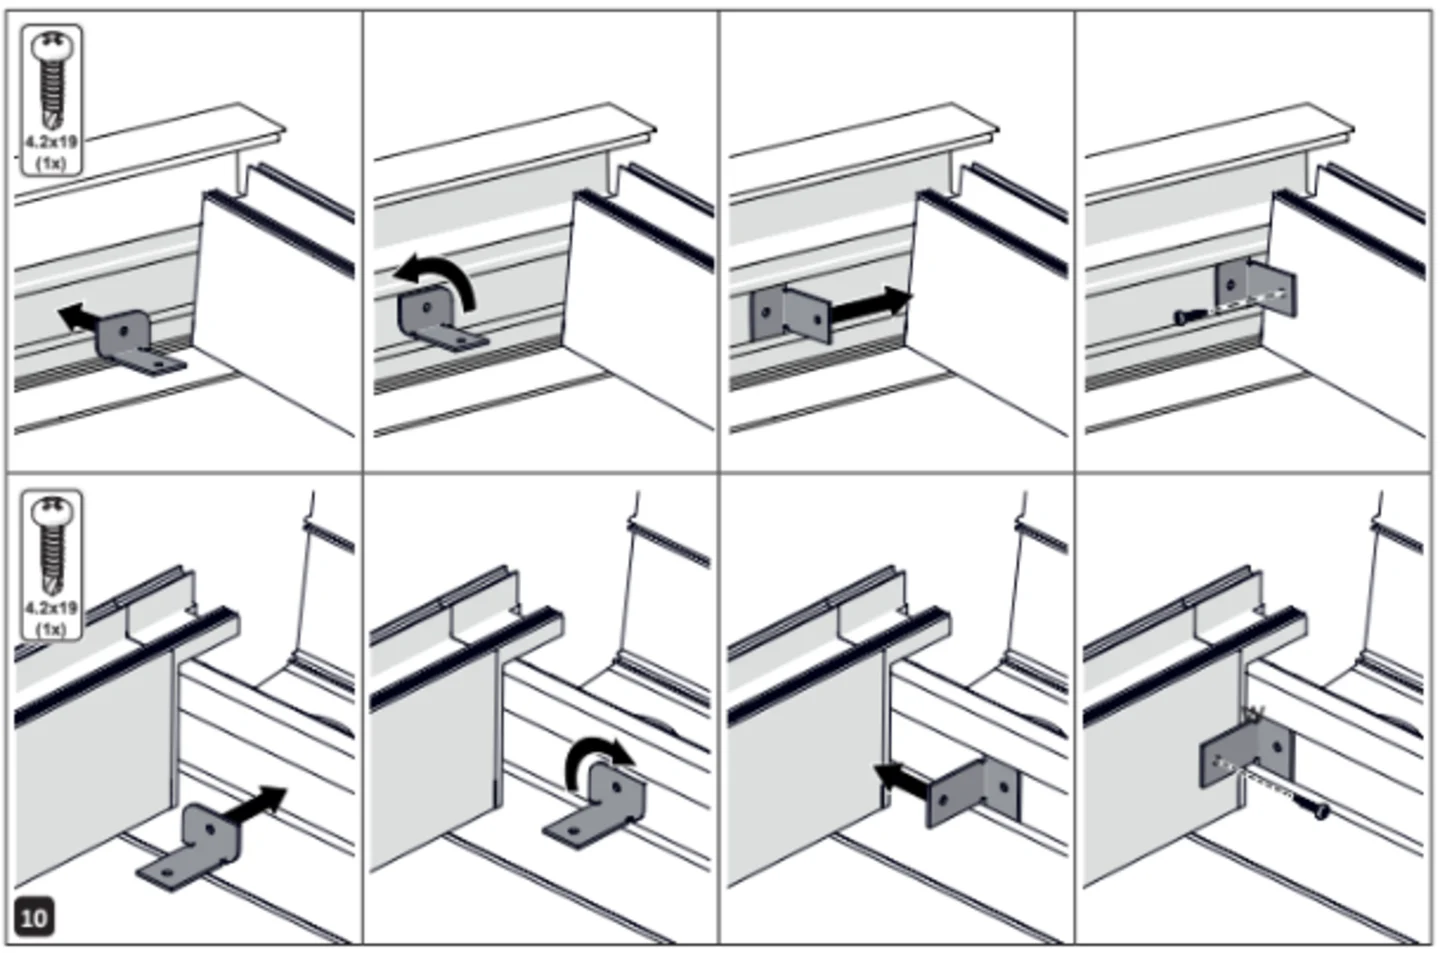
Then attach the side beams with brackets and screws provided.
Check all is square
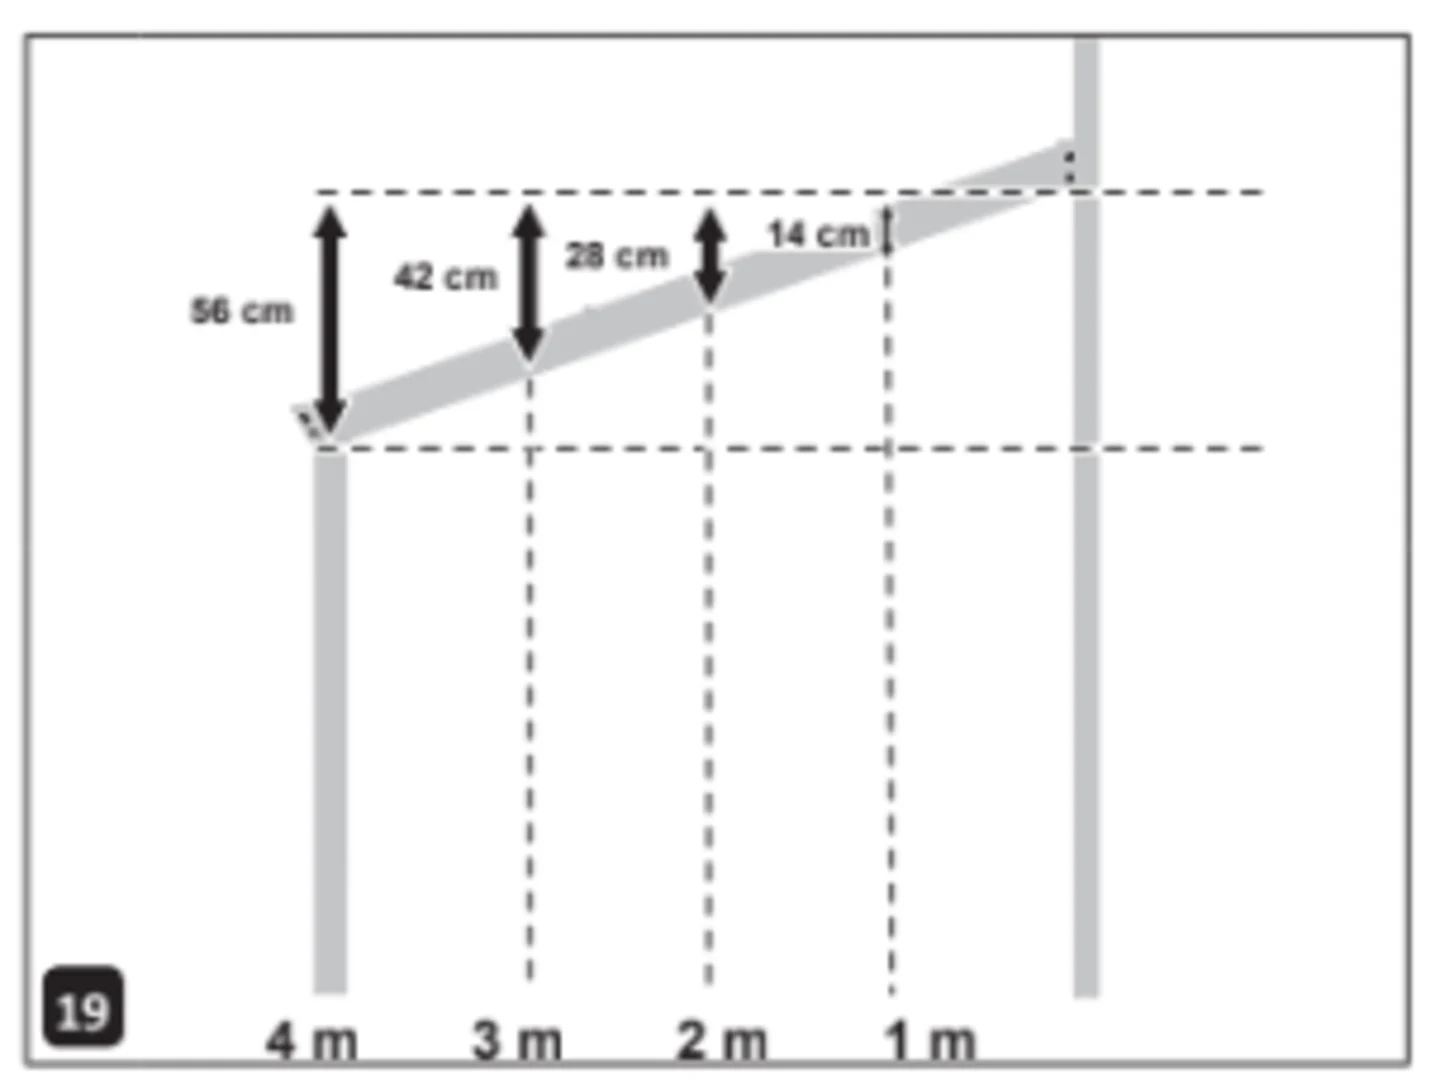
Check the corners to ensure they are square and check the gradient is as required.
Measure & cut posts
Determine the length of the posts.
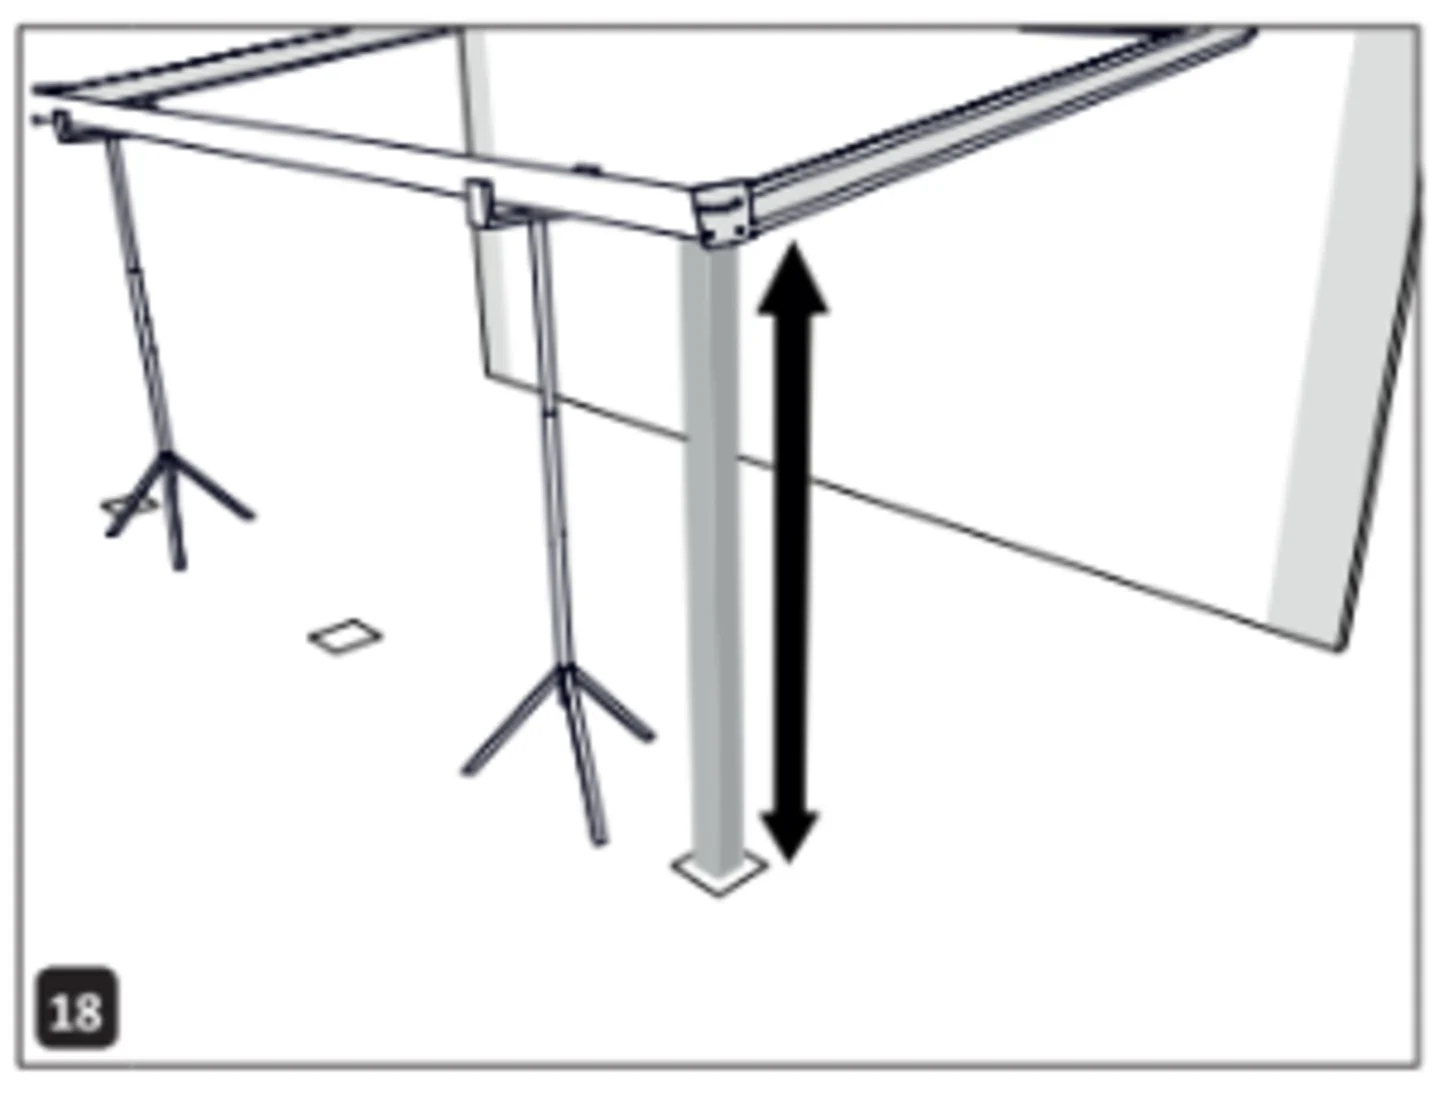
Cut posts to size
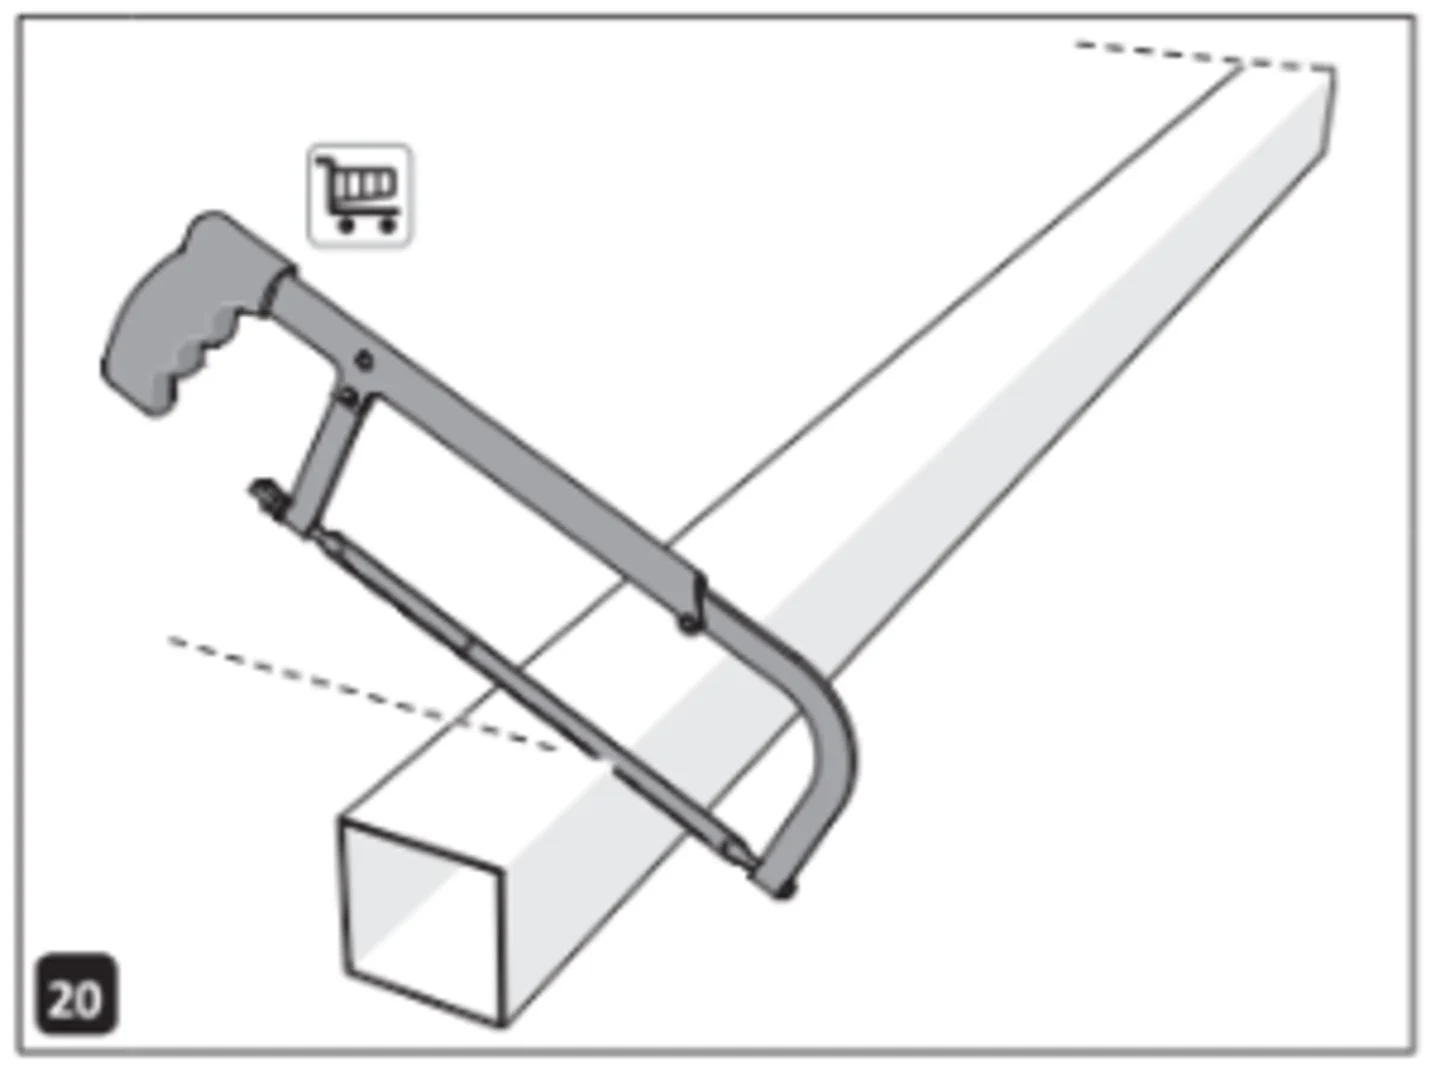
Level posts and mark
Level up the posts and mark where ground anchors (not supplied) are needed. Drill holes in U ground anchor and in slabs, fix with nuts and bolts.
Fix posts
Fix the posts to the gutter using screws.
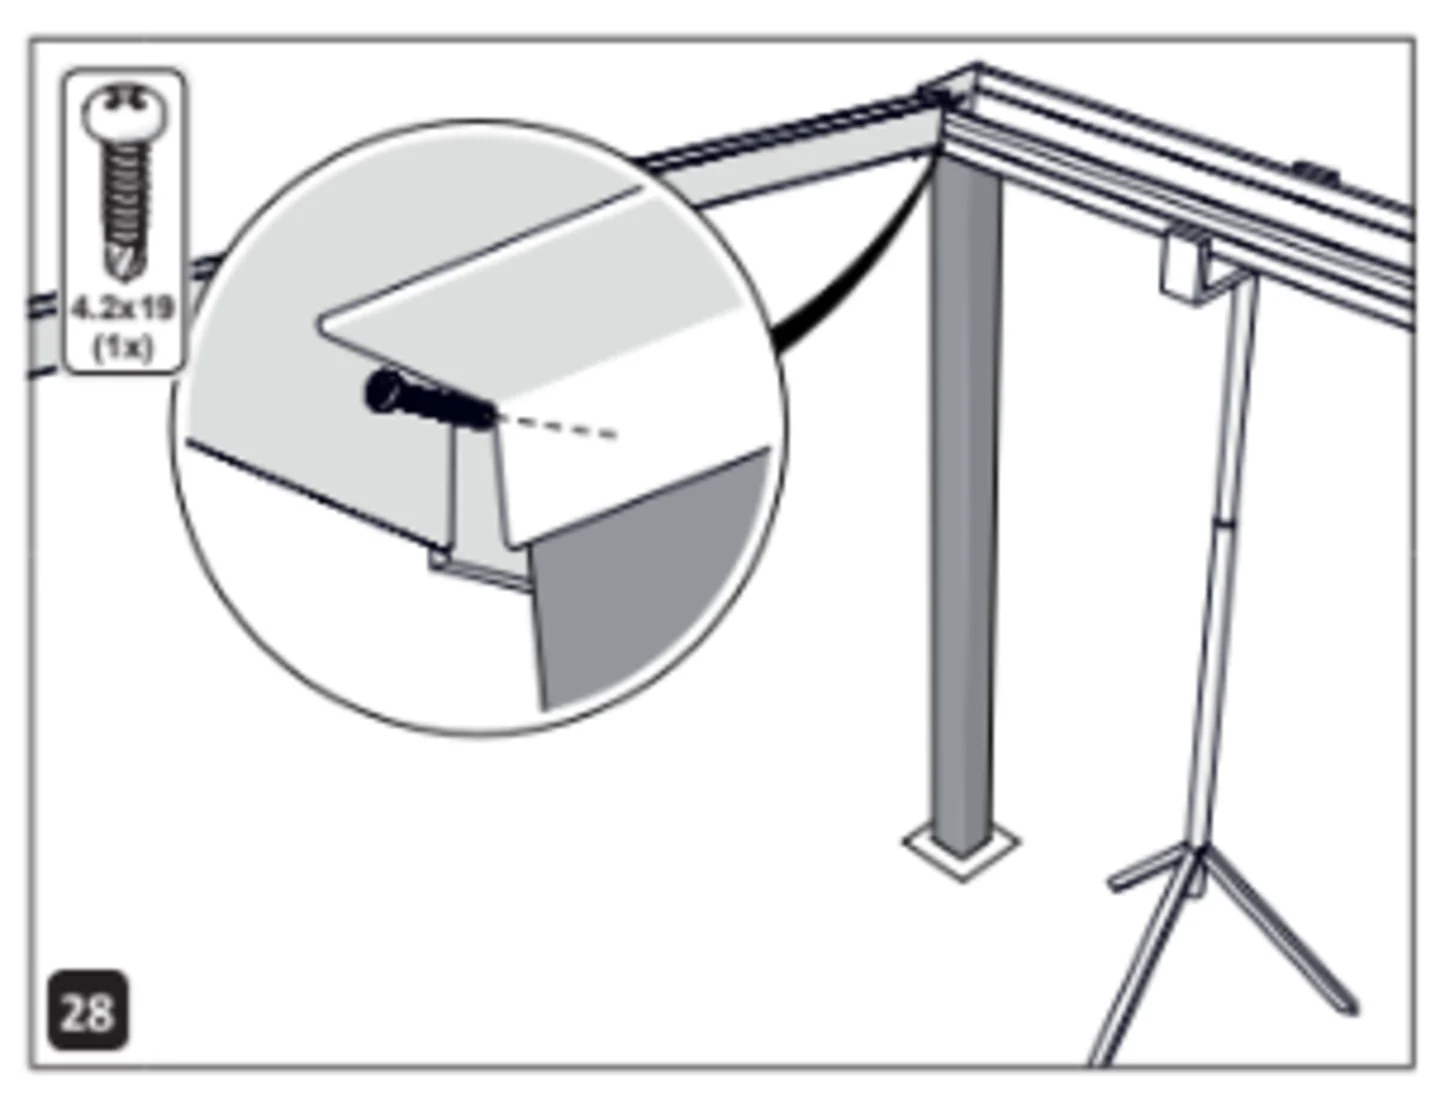
Fitting intermediate beams & click frames
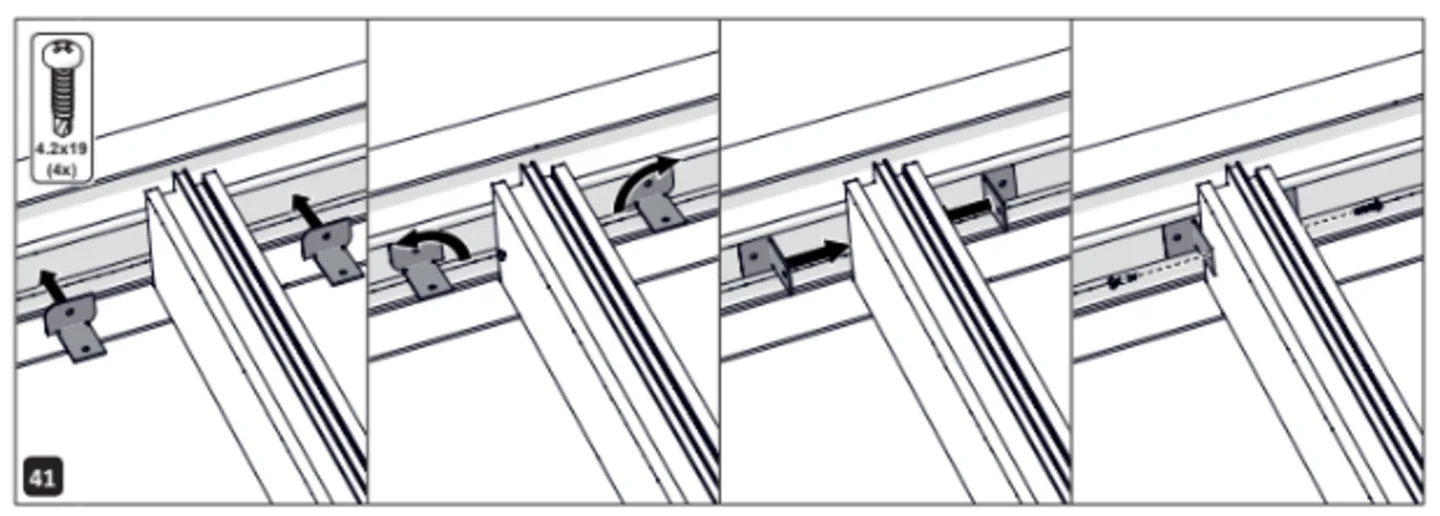
Fix the intermediate beams onto the wall profile & gutter, then fix using the mounting brackets.
Cut hole for leaf collector
Drill one Ø 82 mm hole at the end of the gutter for the leaf trap using the provided hole cutter.
Drill cover profiles
Pre-drill the cover profiles at equal intervals across their length.
Drill angle plates
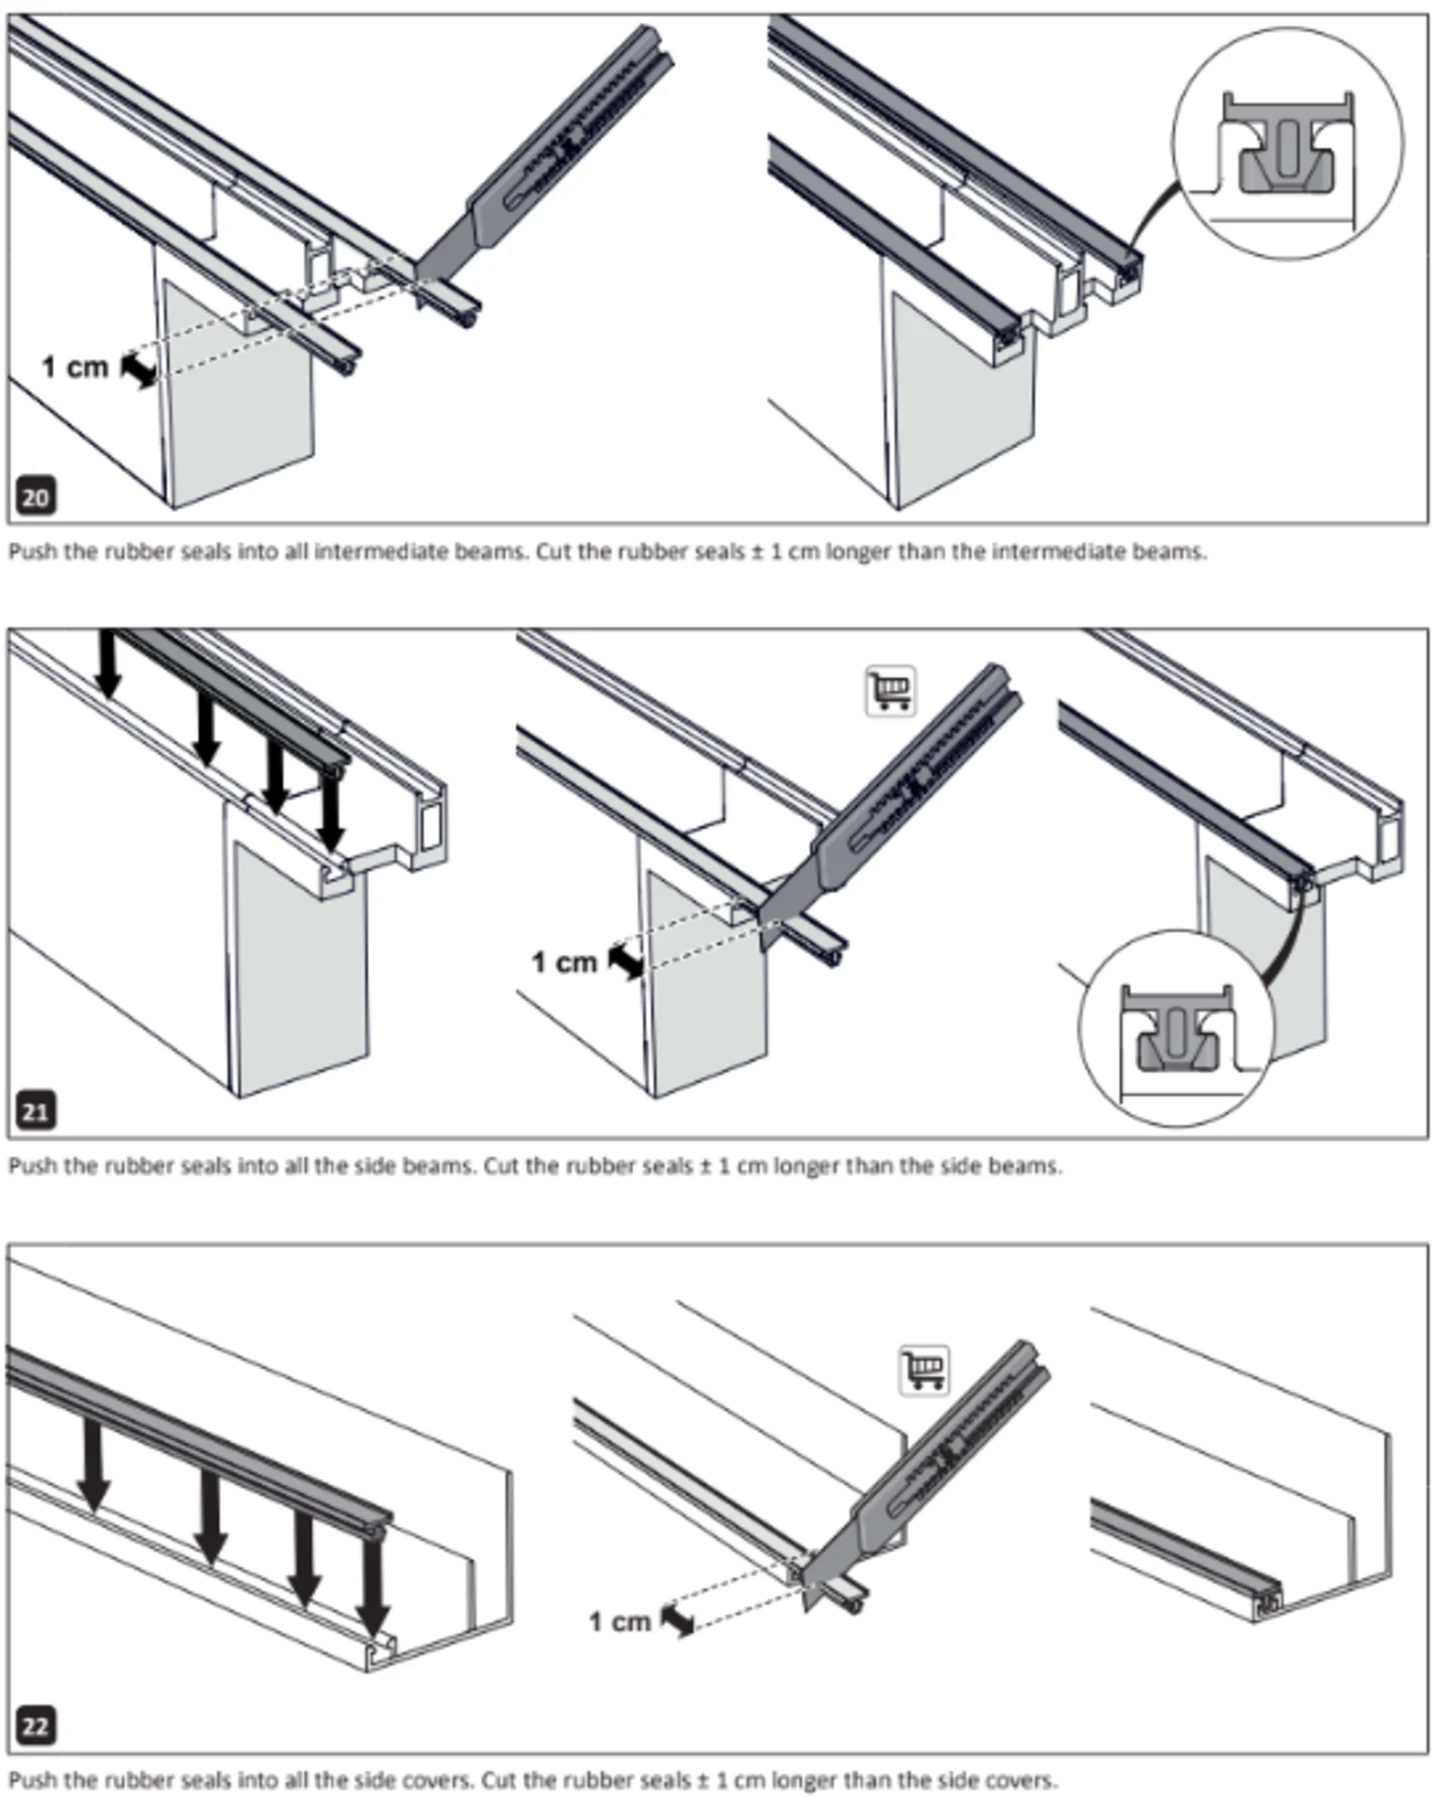
Pre-drill the angle plates
Apply tape to panels
Apply the condensation tape to one end of the panels and ant-dust tape to the other.
Install first panel
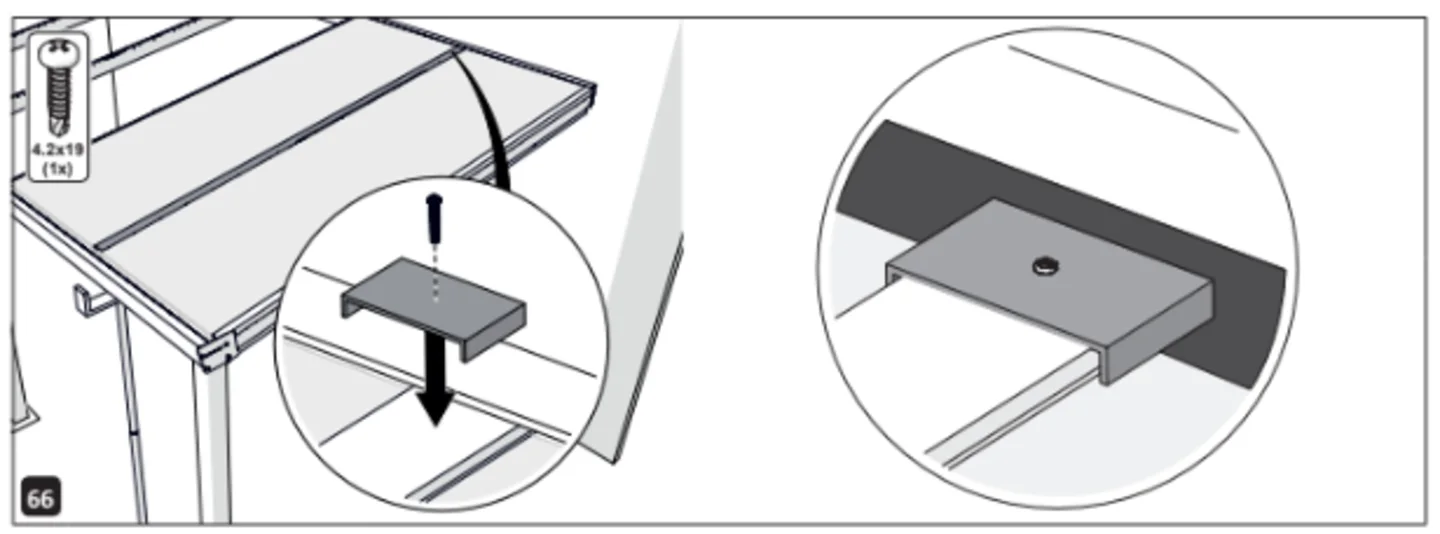
Install first panel onto one end with the ant-dust tape on the wall side. Fasten cover profile onto side beam. Then fix angle plates at the bottom end.
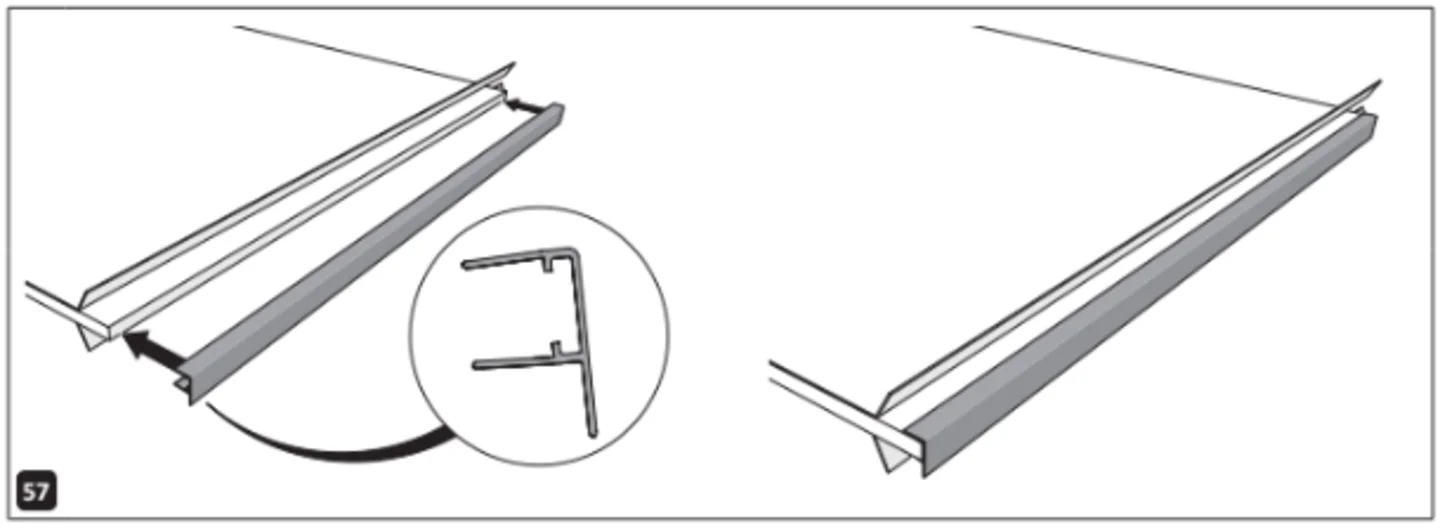
Condensation profiles
Push the condensation profile over the condensation tape.
Continue installing panels
Continue the installation of the veranda roofing panels, cutting the end of the rubber strips as you go. Fix th U-profiles on the wall side using screws. If clearance is insufficient use a right angled screwdriver attachment.
