


Wooden Floor Pack for Log Cabins 26mm 1.62 m ²
- Product number
- P176450
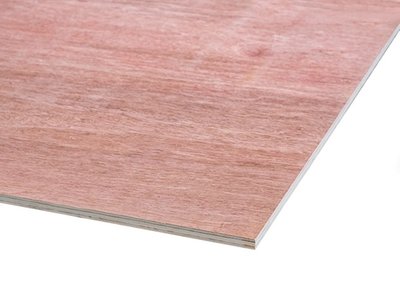
- Our wooden floor packs are created from tongue and groove spruce timber to provide you with a durable, long-lasting and stylish finish for your log cabin. Available in either 18mm timber or 26mm for heavier use, these floor packs are suitable for any log cabin regardless of manufacturer.

70.45
- 10 year timber guarantee *
- Unbeatable Industry Knowledge
- Free delivery to most UK homes *
Specifications
- Material
- Wood
- Colour
- Natural
- Thickness
- 2,6 cm
Wooden Floor Pack for Log Cabins 26mm 1.62 m ²
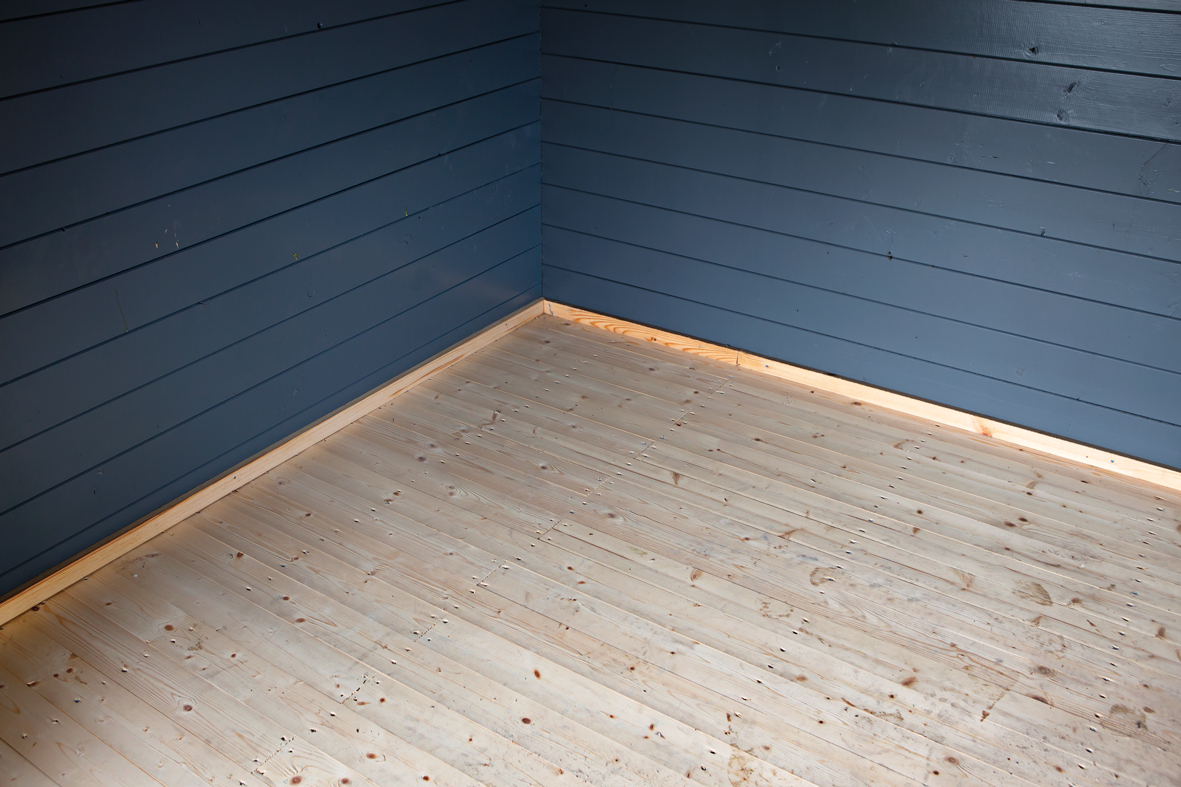
Tongue and groove flooring for log cabins
Our wooden log cabin floor pack offers a premium finish that completes your garden building and provides a strong, durable and long-lasting solution. The 26mm solid spruce floorboards are ideal for larger log cabins, garden offices or spaces that will be used frequently.
Each board is fitted using tongue and groove connections for a quick, seamless installation, ensuring a level surface that enhances both the look and feel of your log cabin. The additional thickness provides stability underfoot, making it the perfect choice for heavy-duty applications or year-round buildings.
Our flooring is also available in 18mm thickness to provide enhanced strength for heavier use.
Manufactured with the same care and attention to detail as our log cabins, this floor pack combines practicality and a modern finish. The natural grain of the spruce wood adds warmth and texture, while the solid construction ensures your log cabin remains strong and aesthetically pleasing for years to come.
If you’re ordering one of our log cabins, please select a flooring option directly on the product page to ensure that your flooring is included in the overall price of your log cabin.
Sizes available
18mm Log Cabin Floor Pack (2.5 m²)
Covers 2.5m²
10 untreated floorboards measuring 18 x 96 x 2500mm
3 treated floor joists measuring 45 x 45 x 2000mm
2 untreated skirting boards 12 x 45 x 2000mm
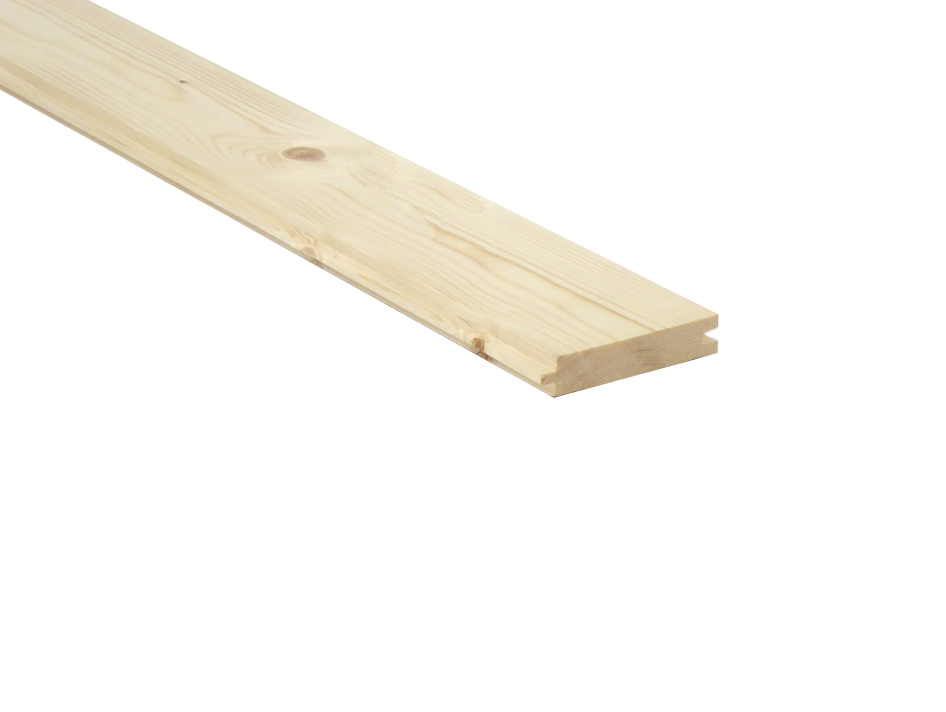
26mm Log Cabin Floor Pack (1.62m²)
Covers 1.62m²
5 untreated floor boards measuring 27 x 145 x 2500mm
3 treated floor joists measuring 45 x 45 x 2000mm
2 untreated skirting boards measuring 12 x 45 x 2000mm
Installation Advice
Floors in log cabins should be laid as a floating floor with a 5mm - 10mm gap all the way around the perimeter. Using a block cut to a single measurement helps to keep this even. Tip - two - three off cut shingles together is a handy spacer.
Floor boards should be as tight together as possible. Use a block to knock them together. No expansion / contraction gap is necessary as this takes place at the perimeter of the floating floor.
If available a Flooring Pull Bar helps to make the joints tight.
Nail two nails in each board where it crosses the joists. Towards the join. Two nails is best and highly recommended to avoid movement of the floor or curling boards as the seasons change.
You can secret nails as you would at home, the nails supplied are not suitable for secret nailing.
If the floor is in wet conditions such as a hot tub consider treating both sides. Double nail is important.
Either in the base or on top of it should be a damp proof membrane.
The skirting slat is used to cover the expansion gap. This can be nailed to the wall log allowing the floor to move under it. This could be pinned for neatness (not supplied). These can be fitted flat or upright as required for aesthetics.
Lay the floor horizontally or vertically as required. Going away from the door looks aesthetically pleasing.
Floor joists evenly spaced across the building no more than 350 - 400mm apart.
If you have an uneven base in parts- off cut roof shingles are excellent for use as packers to level the joists.
Tip - mark the walls lightly where the joist are. Lay the boards and nail every three or four boards. Keep it all tight together. Then a string chalk line from mark to mark. This then gives you a lovely straight line and perfect final nailing.
Tip - Don't nail the last four - six boards until you have cut the final board to fit. It is best to finish at the door. Once the final boards is in use a wedge or floor pull tool to make the final ones tight and nail.
Tip - you may need to cut around the door - or - you could trim the bottom of the door fascia.
Tip - The skirting looks nice when a miter is applied, most saws will have this 45 degree angle in the handle.
Tip - once you start the floor it is a good idea to work with two people. The one inside will take off his boots so as not to mark the floor with dirt.
Treat as quickly as you can after installation to keep its good looks unmarked. Use a top quality floor varnish or treatment as you would in your house. Carefree protectant is a good treatment for floors. We also use this on decking.
Treating the underside of the boards is a good idea if you are not sure of your base. Our impregnation fluid is very good for this.
A floor gains its strength from the base and in turn the joists. To support heavy weights double the joists - move them closer together to give more support.
For a workshop, machinery etc 26mm is ideal. For 95% of other uses the 18mm is fine but consider additional timber for extra joists in heavyweight areas. Our timber here is ideal: 45x70mm Timber
Insulation of 30 - 50mm can be used between the floor joists.
Offcuts can be used to trim the building as required.
Sometimes the door frame will need raising to overcome the height of the floor, Spare offcuts of floor boards can be used for this (treated)
The joists are only designed for a flat and level concrete / paving base. If you use a timber frame base consider adding joist into the design.
Also, if you are using a pier system you will need timber such as: 45x70mm Timber to span your piers or make them to the dimensions of the joists supplied.
Often bought together with

2,299.-
Alternative products

7,874.30