


A very kind customer has written a review and story of his experience with his Justine Log Cabin back in 2017, There was a mistake with delivery which made some interesting work arounds for Mr E. There is also some good advice on hiding electrics, a great timber frame base and some interesting treatment. A great blog article!
The Customer
We recently decided that our plan to extend over the double garage was to go ahead. So where would the garage contents go whilst work was being done?
We could buy a large shed, but once the extension was complete the garage contents would return to their lair, hopefully tidier but kept “just in case”. This meant that the shed could be something more. Something that could be used at least as a summerhouse. Something more stylish and substantial.
The place where we planned to put this structure had a significant slope but did offer the possibility of views to open country over the nearby creek. It also faced the setting sun so would be a place to go at the end of the day to enjoy those last few rays.
My wife, who is a garden designer, had a vision of a more traditional style of cabin. A bit Scandi, and something that would not jar with our surrounding neighbours. We live in a tiny hamlet in Cornwall that was originally a number of farmhouses and barns. All these consist of traditional stone and slate construction so a contemporary flat roof design or a pod-like structure would definitely look out of place.
So the hunt was on to find a suitable structure. We quickly dismissed the usual sheds and DIY warehouse summerhouses as being too flimsy. We upped our sights and decided a log cabin was the way forward. An internet search threw up pages of companies but the one that caught my eye was Tuin’s. This was both for the choice of designs, reasonable pricing but principally for the pages of assembly hints and tips and Richards blog with its engaging blend of disarming honesty and “arm round the shoulder” reassurances. Here was a company that was confident to stand on the quality of its products and the service it provided.
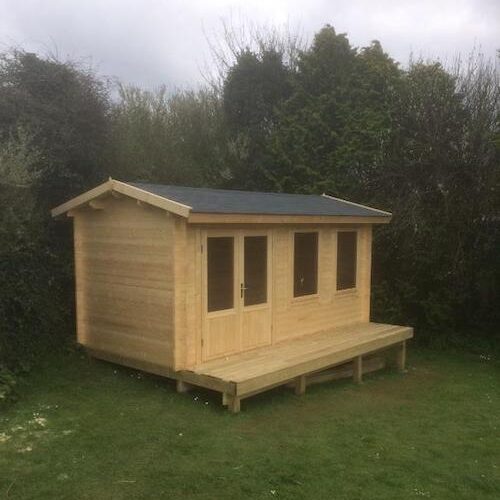
We decided on a Justine log cabin and placed the order with Tuin via the website. As our access is restricted, I was sure an articulated truck can’t get in let alone out, so we paid extra for a rigid lorry delivery. This would become an issue later.
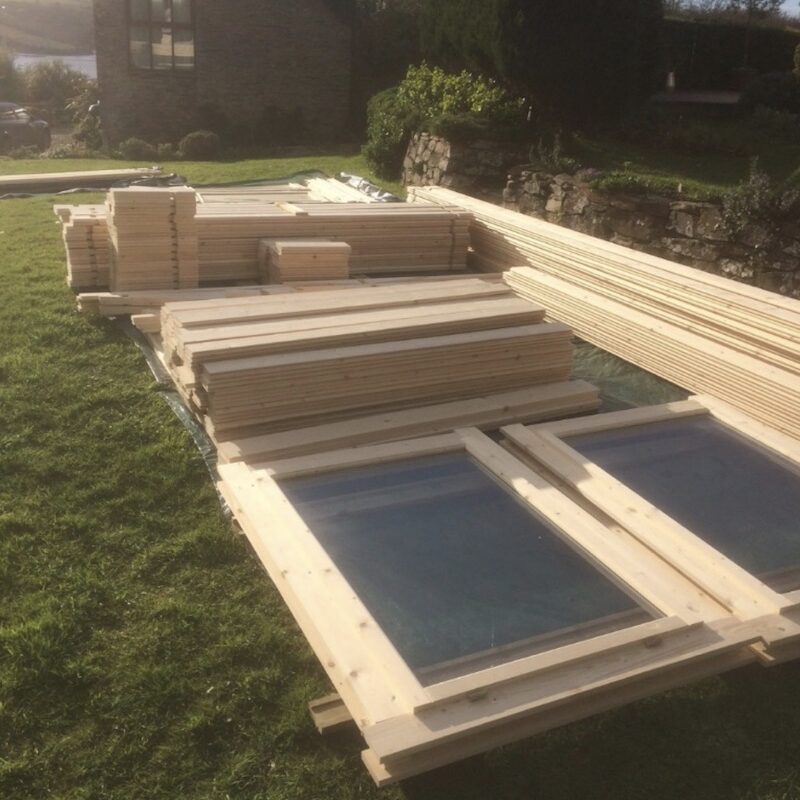
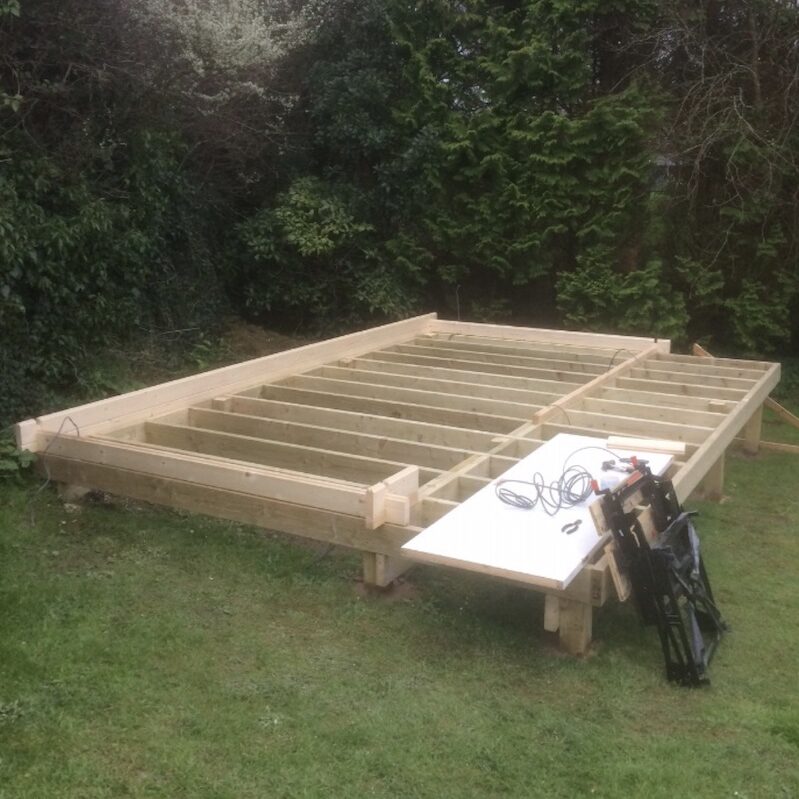
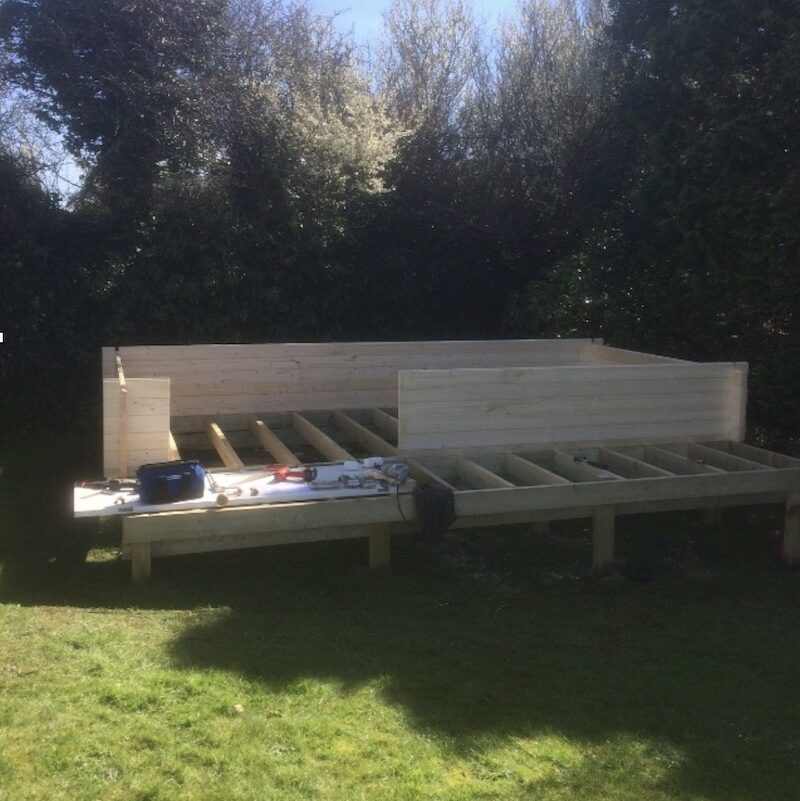
Initially we ordered a floor kit from Tuin. However, a conversation with Richard (I think) convinced me that we should ditch this idea and buy from a local timber merchant. The blog does state this but it was reassuring to get this straight from the horse’s mouth as it were. Using the information on the website we calculated that we needed a timber framework platform 4.8M wide and 2.3M deep with an additional 1M wide area in front for the deck. Overall, this platform would be at ground level on one side and up to .5M high on the other.
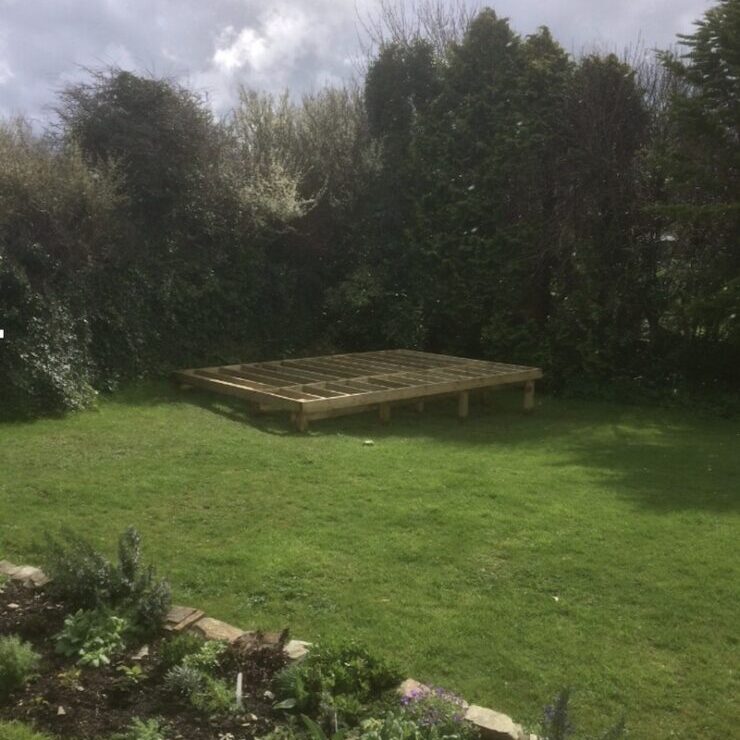
We had this constructed the week before the justine log cabin was due to be delivered. It stands on 12 posts cemented into the ground down to bedrock and has floor support joists every 40cms or so.
Emails from Tuin the week before delivery confirmed the transport company contact details and the delivery method by a smaller rigid lorry. A phone call from the transport company told me my cabin was coming the following Wednesday. All seemed set fair. I had a friend flying in from Gatwick to help me erect the cabin the following weekend in return for a Cornish pasty and a beer or two. The timing looked perfect.
The Delivery
On the Wednesday morning, bright and early I had a call from the truck driver saying he was about an hour away. When asked what type of lorry though, he was in he said “an artic”, oh dear…
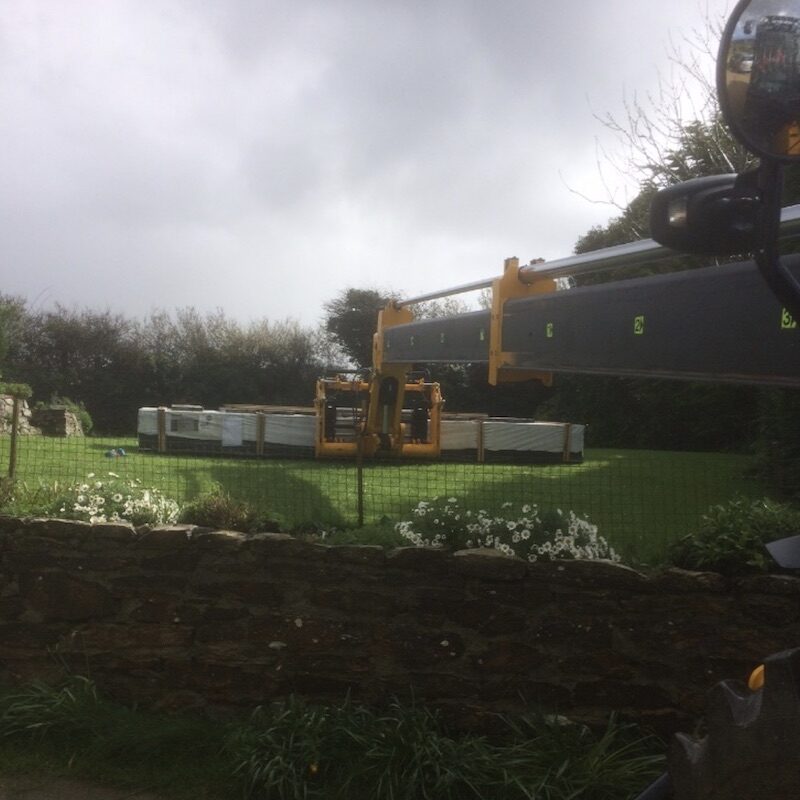
There followed a short discussion during where I explained my issue with the artic. I then tried the transport company advised by Tuin. They told me they didn’t have a log cabin delivery but did have a rigid wagon delivering in my area. I finally spoke to Tuin and Karen explained that the cabin had been put on the wrong wagon, operated by a different company. However, having spoken to the driver he was confident the delivery could be made. The driver phoned again to tell me he was on the main Padstow road and had pulled over and could I come and meet him and discuss the problem. I drove out and met Robin and his big red wagon.
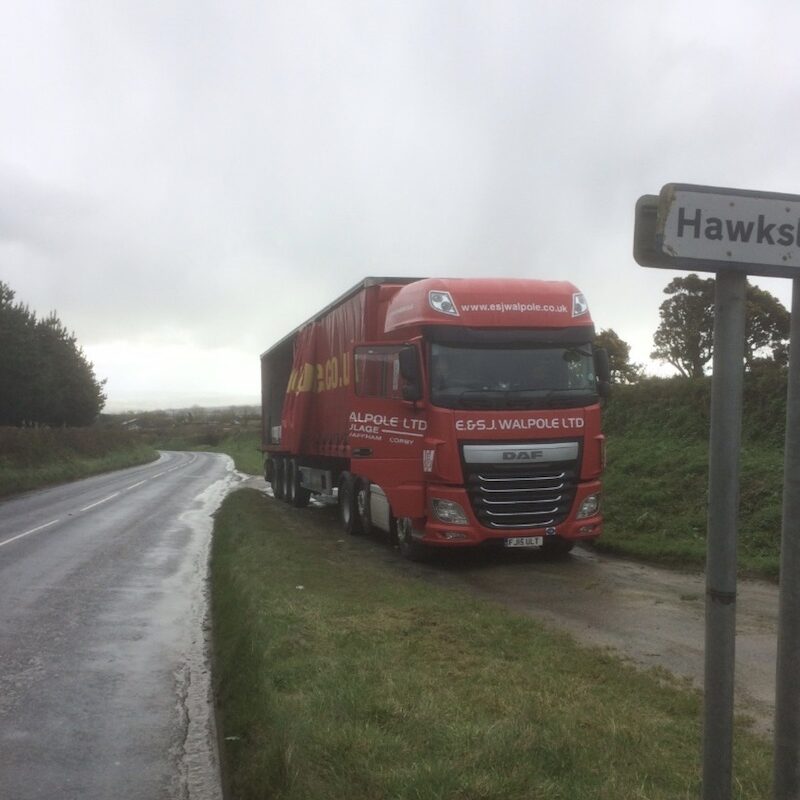
We decided that he should come with me to see the route down the lane and decide if it could be done. We set off and Robin was so ebullient he decided our lane “was like the A30, no problem” but as we got closer to home he got quieter. At the final possible turning point, he decided the lane was too narrow and tight to turn the wagon around. The distance from the wagon to the house was also too far for the Moffett forklift without burning the hydraulic motors out. Things looked bleak. There was no way I was going to pay my mate in pasties and beer with no cabin to build!
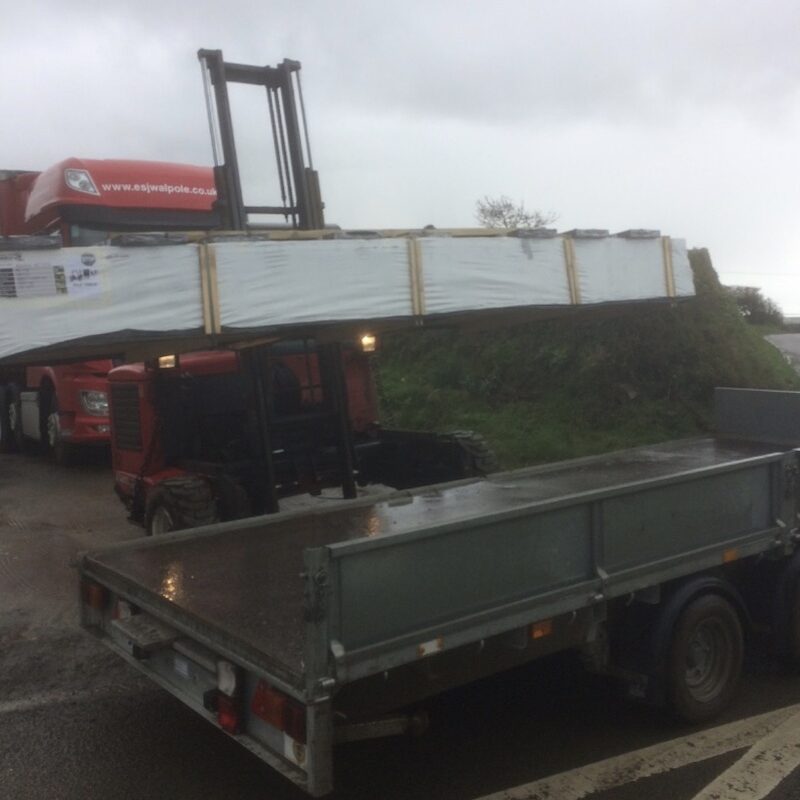
Luckily, I had a Plan B up my sleeve. We have a Grand Design being built not too far from me! I had approached the builder the week before about possible help from them in accepting the delivery if the wagon couldn’t get to the house. So a phone call to Ross got us the offer of a Land Rover and trailer which was quickly on the way to rendezvous with Robins wagon to take over transport of the justine log cabin.

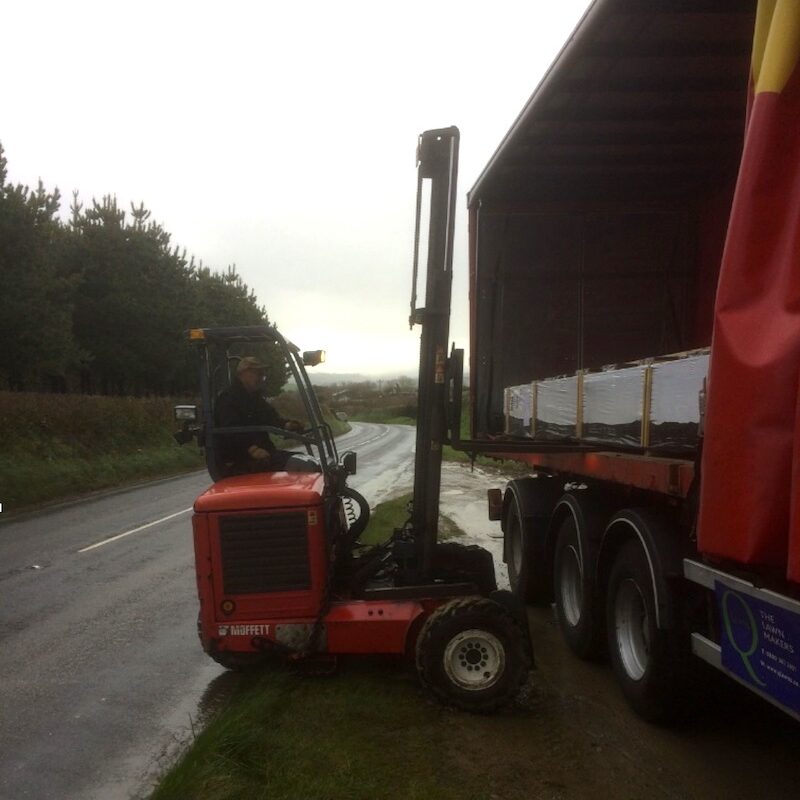
Robin unloaded the just log cabin pallet using his Moffit, with me stopping the traffic on the Padstow road. He loaded it onto the trailer, which then promptly disappeared off into the distance!
Robin from Walpole Transport was patience and more than happy to help wherever he could. He was also a little relieved that he could finally make the delivery. Otherwise he said, it would have been only the third missed delivery in a long career. Shame I couldn’t offer him even a cup of tea. Meanwhile my cabin was heading for its new home on the trailer. By the time I caught up, Ross the builder was unstrapping it with a huge telehandler all terrain forklift right there ready to load it into our garden.

In minutes flat, the Justine Log Cabin was deposited up and onto the lawn – phew!
This cost a few beers but Plan B saved the day, so always have one ready for your delivery. To their credit, Tuin did make an immediate refund of the extra transport charge plus a sum for the trailer and telehandler use. This paid for the beer and was much appreciated.
The weather up until now was grey and wet. However, once the Justine was in place, conditions improved. I laid out my groundsheets and prepared to unpack the pallet. As Richard points out in the blog, you won’t know what all the parts are. Just unpack them, stack them then try and count them. the Justine log cabin is a fairly large building with a lot of parts.
The parcel is a puzzle and incredibly well put together. Likewise, there was no damage and a couple of hours of lifting and stacking had several neat piles of gleaming spruce.
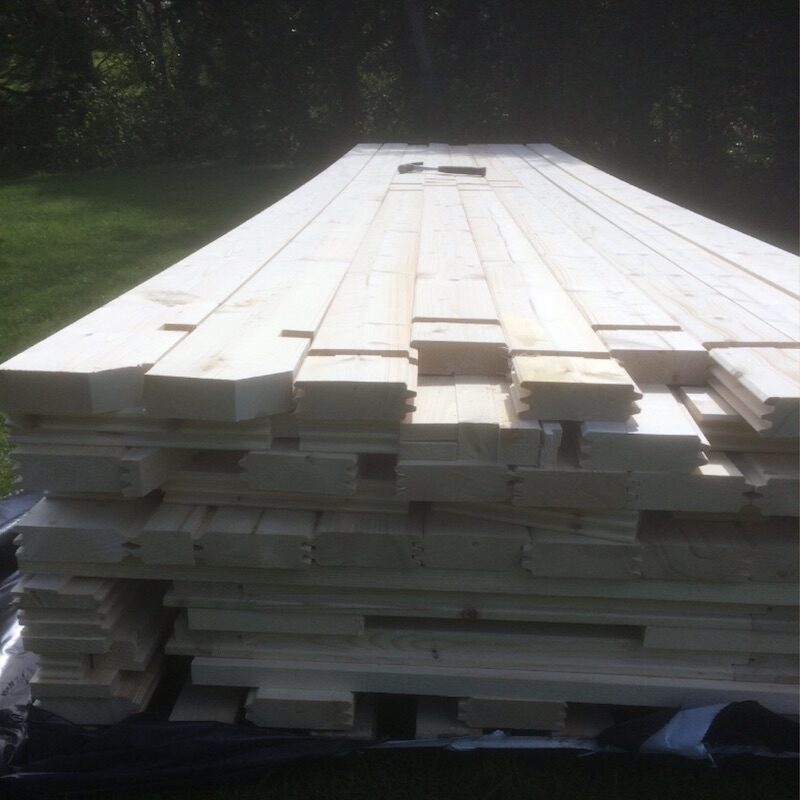
I found the assembly plans pack and a packing list in the middle of the pallet along with a big bag of nails and felt clout nails. Checking things off showed everything was there. The plans are simple and seemed clear enough to me, but then I’ve never had a problem with flat pack furniture either.
Once unpacked things didn’t seem so daunting so I decided that was enough excitement for one day and had a glass of wine and congratulated myself.
The Building – Day 1
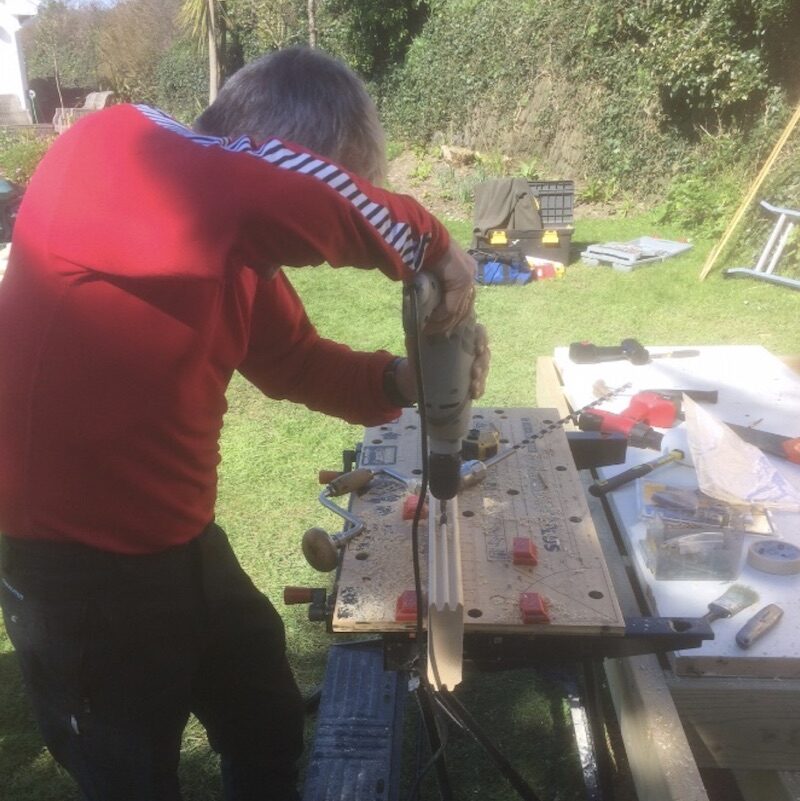
Next day I could start on the Justine log cabin. I got the foundation logs out and trial fitted them to the base to make sure things lined up – they did, perfectly. First job was to put in the basic wiring for the plugs and light ready to feed up through the logs during assembly. I had decided not to have external trunking but to conceal the wiring in the logs. I would tidy things up and trunk the feeds along the base after the justine log cabin was up. The rest of the day was spent getting my tools together and re-reading the instructions in hand and on the Tuin site, just so I had things clear in my mind.
Friday dawned bright and clear and I had to deposit my wife at Newquay airport for her to go skiing for a week. This left me to erect the cabin. Later that day, I would be back collecting Micky, who was helping over the weekend. Obviously, this meant I had to shop for pasties and beer. I was itching to get started but refrained from doing anything lest I spoil our weekend fun.
The weather forecast for the weekend couldn’t have been better. Wall to wall sunshine and the clocks were going back giving us an extra hour of daylight on Sunday.
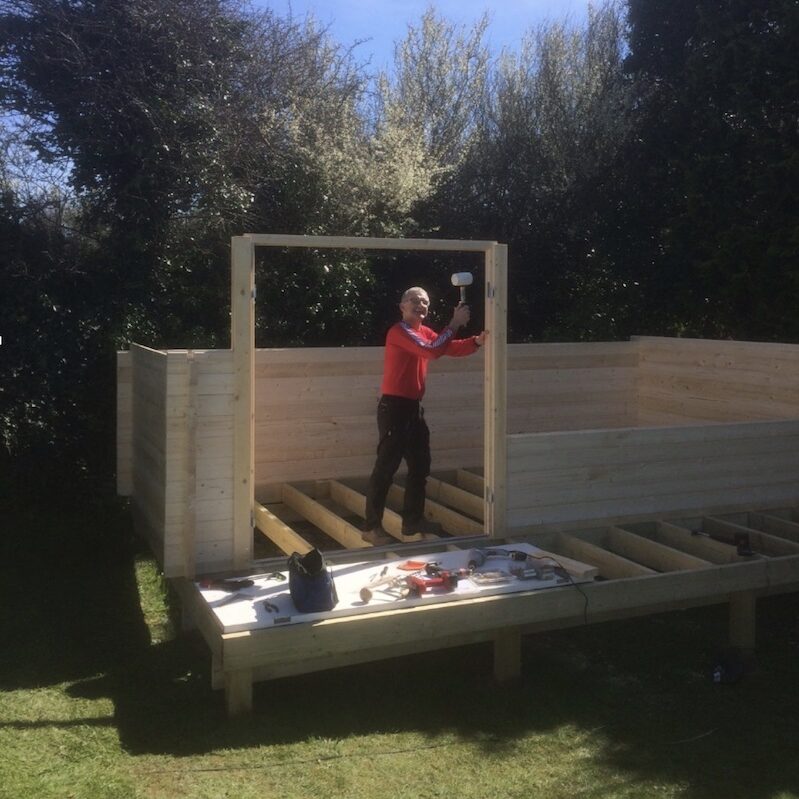
Slowly getting the wiring sorted and drilling the logs as we went. Feeding the wire through from the base. Once we were at the third log high on the Justine (plug height) things sped up. We placed the door frame by mid morning.
We spent some time making sure this was square, packing it up with some spare timber to make sure it cleared the decking once down. As others have mentioned, I didn’t feel the door and window frames were quite as well made as the cabin itself. Despite that, all holes lined up and measurement marks to aid alignment were perfectly placed.
Rubber mallets are a must, it’s surprising how hard you have to hit the logs sometimes. There were very few problems with twisted or bowed logs. The few we had responded to a few well aimed blows, and settled down as others were placed on top.
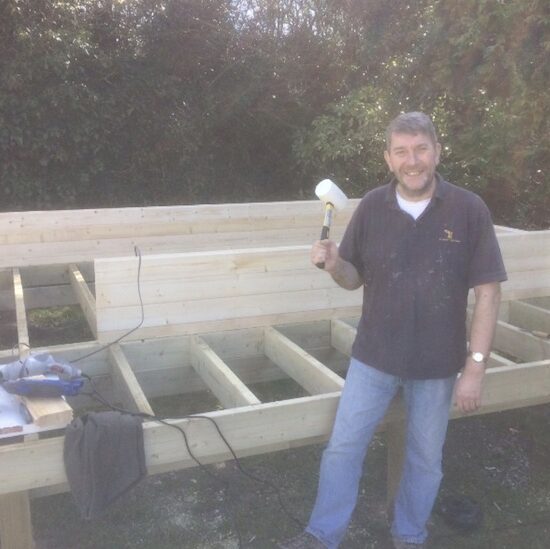

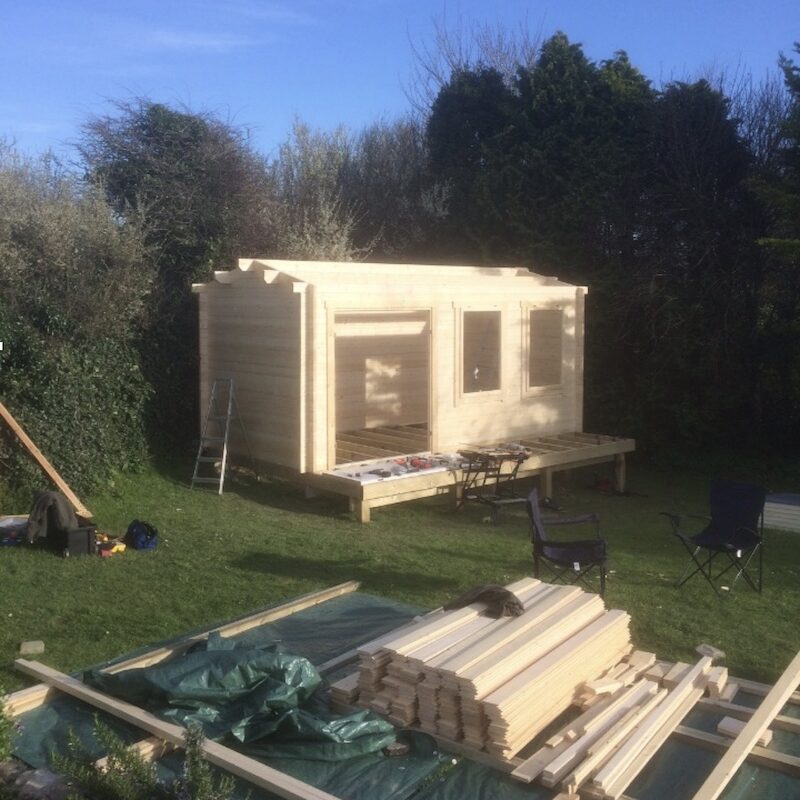
By close of play Saturday the cabin was up, windows in place and the roof beams were in. The latter was quite a job as the raised platform coupled with no floor made the roof quite high at one end and difficult to reach. There was a bit of precarious balancing going on at times.
The Building – Day 2
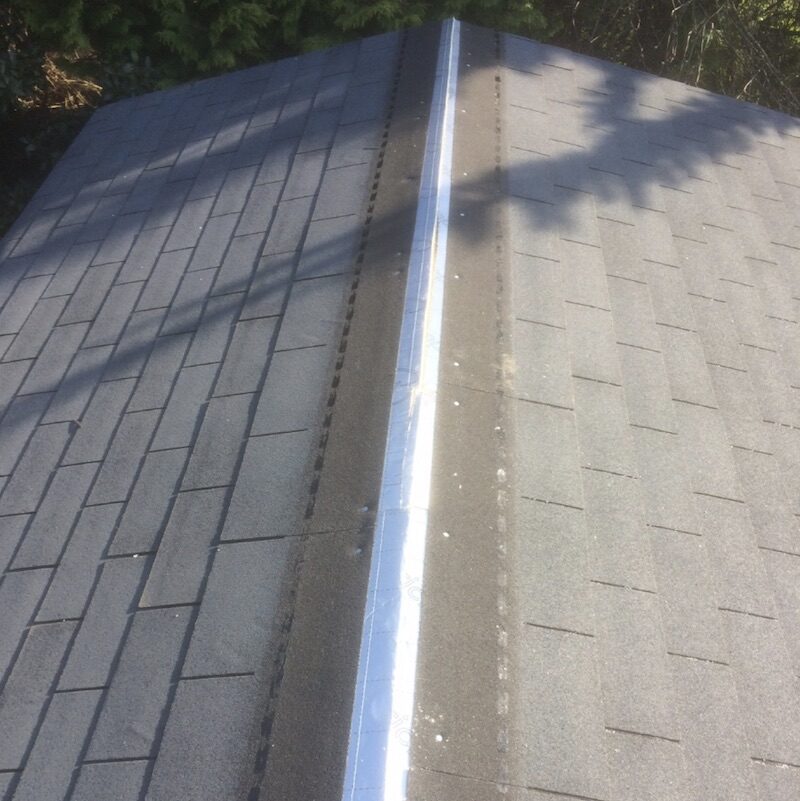
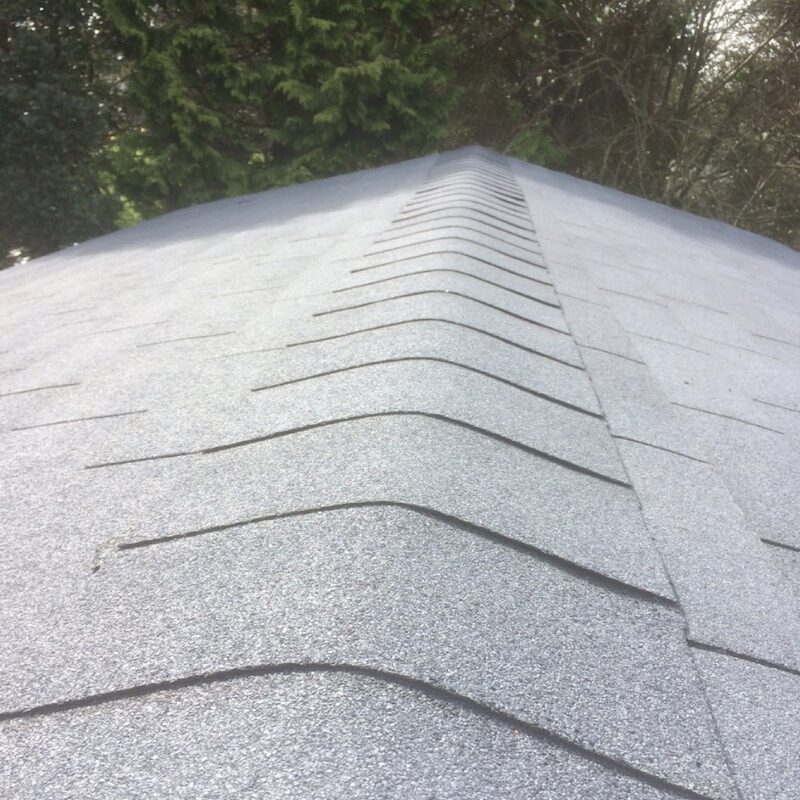
Sunday was roof panel day. We worked as a team, one nailing at the apex and one at the eaves. Working first one side then the other, this took most of the day but was most satisfying. Note the orange line in place to make sure all the panels were level.
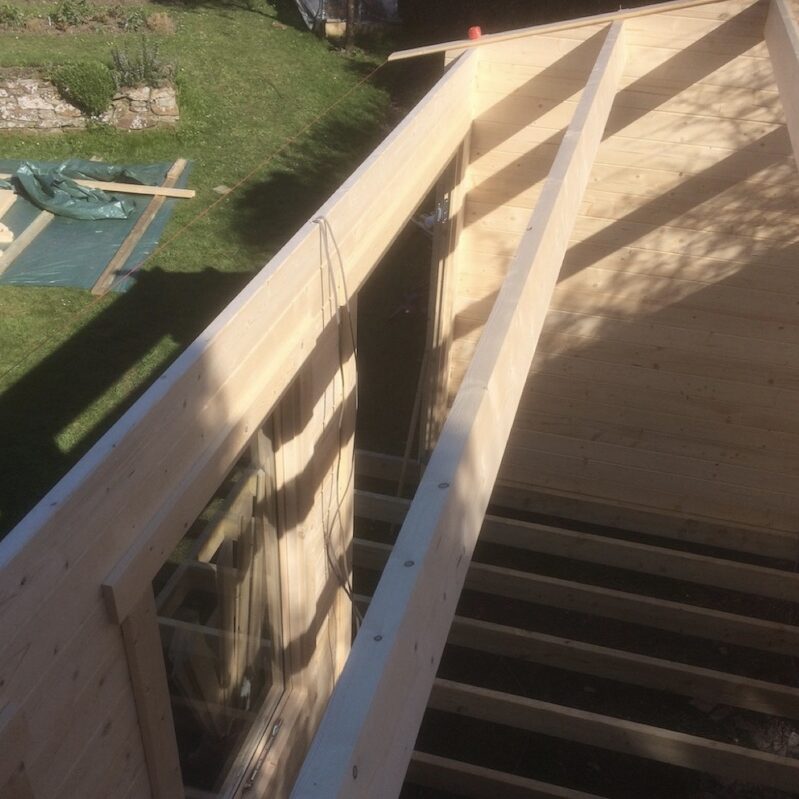
Final job for the day was putting four complete sheets of 50mm insulation on the roof. This left a walking space at the ridge and a couple of infills to complete before laying the shingles.
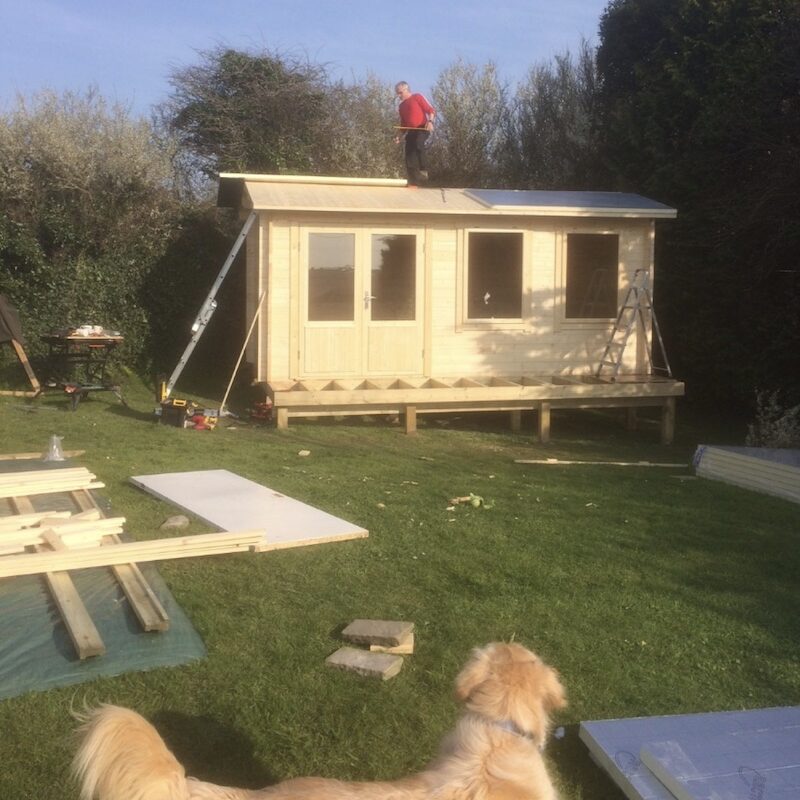
We marked the route of the light wiring on the insulation so we could avoid nailing through them. (Harry my Golden Retriever was a great help all weekend!) We celebrated with a beer then walked into Padstow for a steak – job well done and big thanks to Micky!
The Building – Day 3
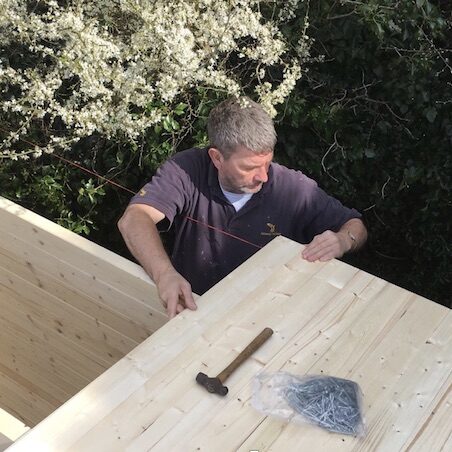
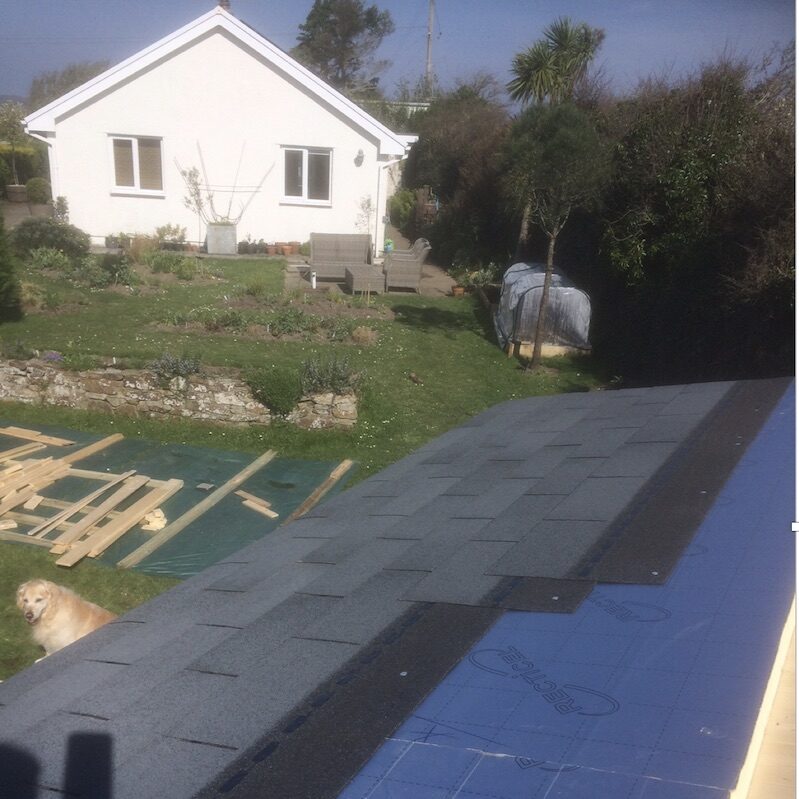
After an early morning run to Newquay airport to drop Mick off (he was back in the office in Lancing for 9.45), I started to apply the roof shingles. I was assisted by my son James who, I think he would admit, is not a natural DIY’er. Initially, I thought he would just do the manual stuff like heaving the heavy shingle packs around and onto the roof. After some tuition though, he tackled the shingles on the back slope.
-
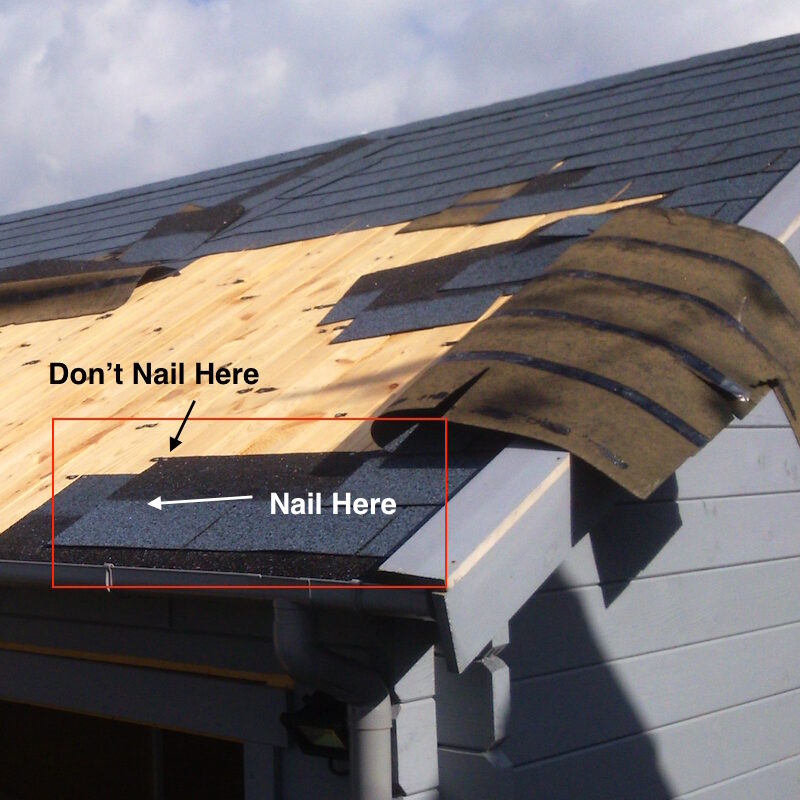
- It is important where the shingles are nailed, ideally across the center strip with at least three clout nails.
Richard’s Note: I have spoken with Mr E and unfortunately, this part of the install is slightly incorrect. It is really important to nail the shingles where directed on the instructions on the shingles packet and our advice here: Roof Shingles. Nailing shingles at the top of the tile can result in them blowing off the roof very easily due to the large flap. Mr E is applying more nails correctly.

I followed the advice on the Tuin site and video regarding the starting line of shingles. Our only confusion was the protective film on the line of adhesive on the back of each shingle. It is printed “Do Not Remove” but that seemed counter intuitive, how will it work with the film in place? Internet searches were a bit contradictory but in the end we left the film in place, are we right?
Richard’s Note: You are right here Mr E, if the film says not to remove then please leave it on.
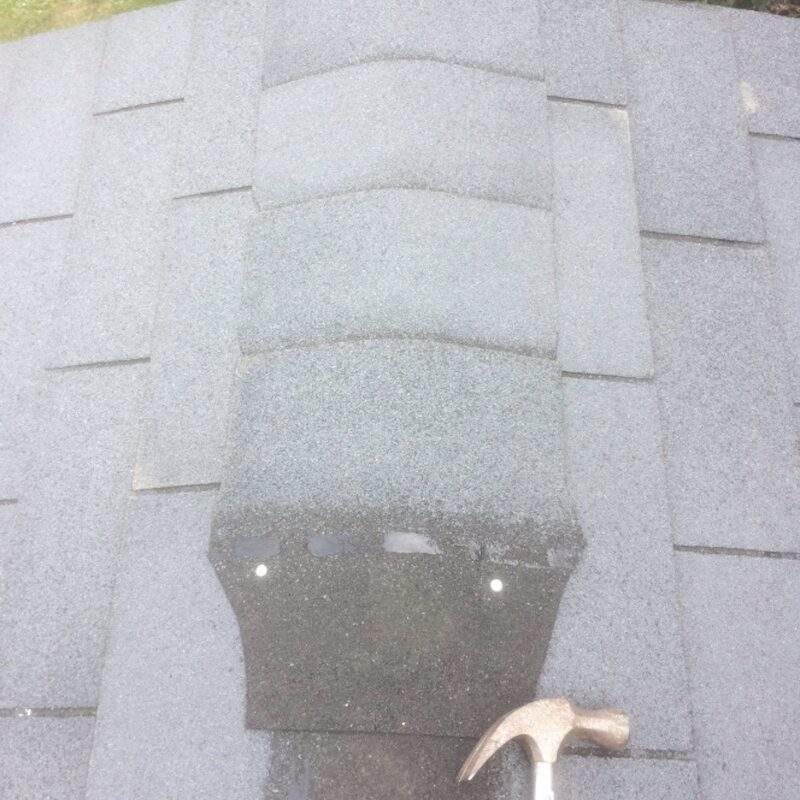
A solid day of nailing finished both sides, except for the final ridge as we ran out of nails.
The following day, I armed myself with more nails. I set to finishing the ridge, overlapping the final rows then cutting the shingles individually. A Stanley knife works fine particularly if you cut from the back.
Richard’s note: Also see my ‘folding over and bashing’ technique – Advice on felt shingles

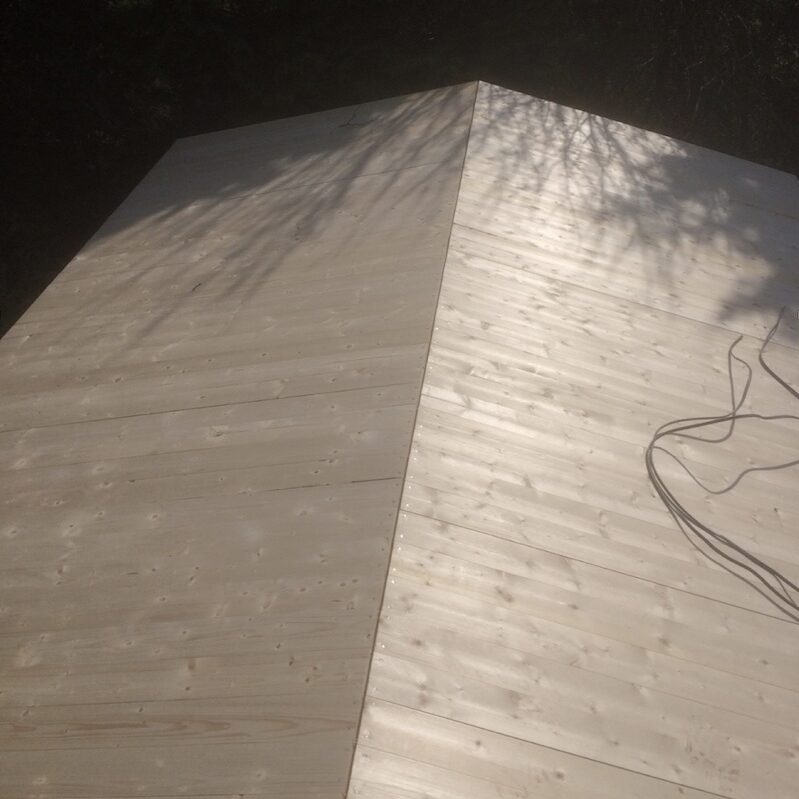
Again this uses quite a few nails but you finish up with this! Not bad if I do say so myself.
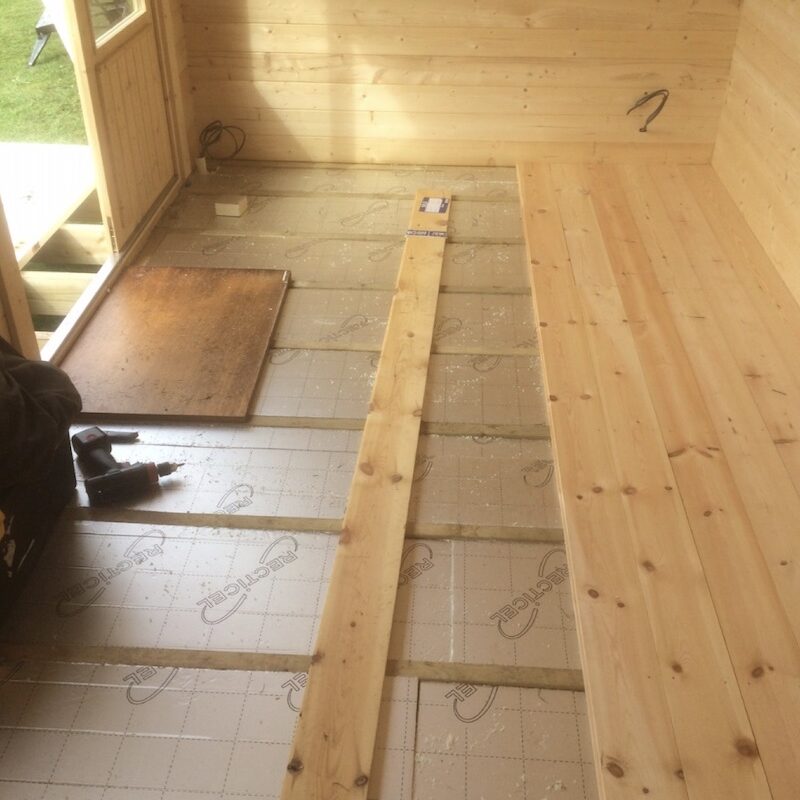
Now to the floor. Once the wiring was trunked and clipped into place I set about installing the insulation. It was a suspended floor the insulation needed supporting. I did this by nailing partially in, 50mm, below the top of the joists then dropping in the cut insulation. If the insulation blocks were just right it was a firm push fit. The nails just stopped any chance of it falling through. I taped with aluminium tape, or used silicone sealant on all edges to make sure it was draught proof.
We ordered the tongue and groove floorboards from the local builders merchant along with the sheets of insulation. I did have a couple of ropey planks but the quality was good. It was a bit thicker than the 18mm listed by Tuin. By this time I was feeling the pace (I work all day at a desk so all this manual labour is a bit of a shock). As such, I took things a bit easier. Laying the floor took a couple of days and the final plank was cut lengthways to fit.
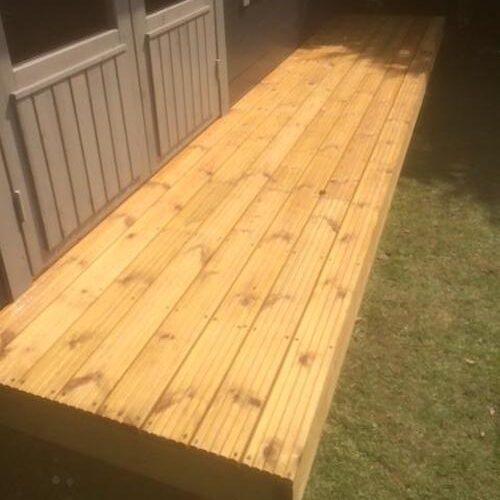
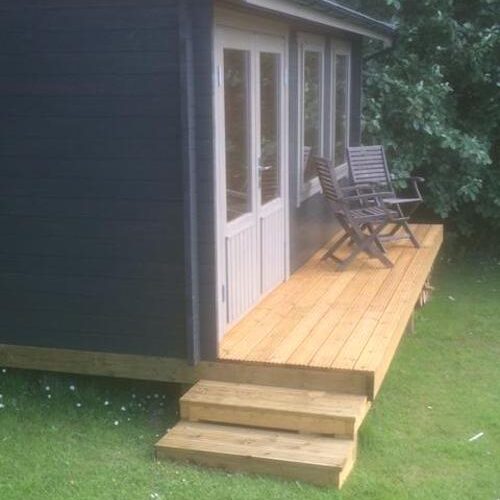
The exterior decking was installed in a morning along with the deeper facia boards and the diamond shaped finishers nailed in place were just that – the finish. So all that remains is to get the electrics hooked up, put up guttering and protect the structure somehow. We had original planned to try Shou Sugi Ban, a traditional Japanese method of burning the surface then applying linseed oil. However, we have decided this may be too ambitious (read foolhardy, letting me loose with a propane burner!).
The Finishing Touches
After building the Justine log cabin comes the finish and protection. Again, this can be time-consuming but is very visible so a good job is vital. The cleverer amongst you will have planned to apply protection to the outside of your cabin before the construction. We didn’t…
As I mentioned earlier, we thought we might try Shou Sugi Ban. This would have meant turning a propane burner on the outside surfaces (eek!), scorching the wood then painting linseed oil on. This gives a long-lasting finish but definitely needs a lot of thought (courage!) and must be done before construction.
With this in mind, we must be happy with a dark colour. We hoped this would make the cabin less conspicuous, but we would use a lighter colour for contrast on the windows, doors and facias. After looking at several websites, including companies recommended by Tuin, we settled on Osmo natural oil wood treatment from Germany. This product promised simple application, got some good reviews and we liked their Quartz Grey 907 as the primary colour.
Osmo recommend two coats applied thinly. As a result that lets the wood grain show through and recoating is simple, no prep just paint over. The product is economical to use and does go a long way. As such, I used a 2.5L of the 907 Quartz Grey. This gives the front and sides three coats (for a more solid colour) and so far one coat on the back (we have nesting birds in the back hedge and I’m trying not to disturb them). Despite this, I have enough left for a second coat! The contrast colour is 903 Basalt Grey and a 750ml can give everything two coats with a bit left over for touch ups. Obviously, it’s too early to tell on longevity but I’m very happy with our choice.
-
- Before Painting
-
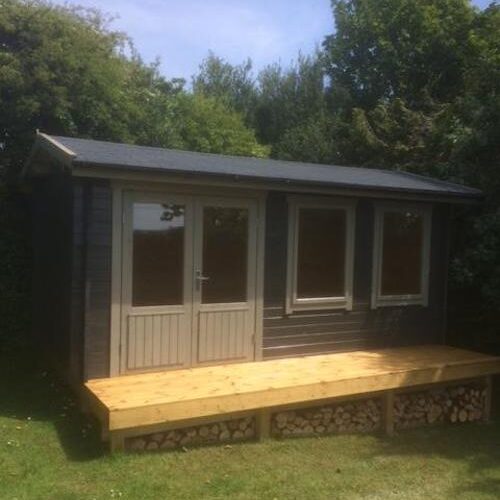
- After Painting
Finally, the deck area has been treated with two coats of decking oil as has the faces of the timber frame. Not to mention, I have put up some black 76mm guttering which will discharge into a water butt.
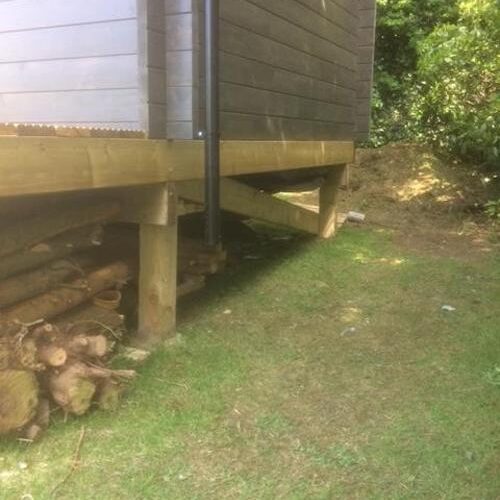
Likewise, the void space below the deck is a useful log store at the front. This time the space below the cabin has a plastic sheet pinned down to stop weeds and damp. I have put in a basic rack using the pallet offcuts so that long timber and our surf boards can be stored in relative shelter.
-
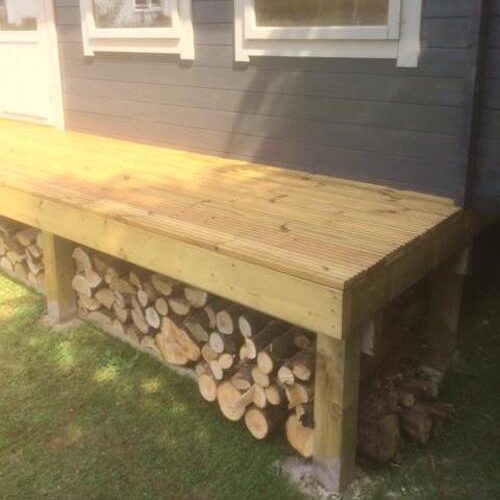
- A raised base used as a log storage
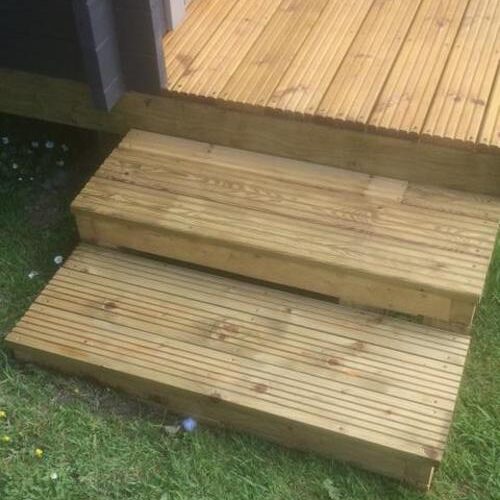
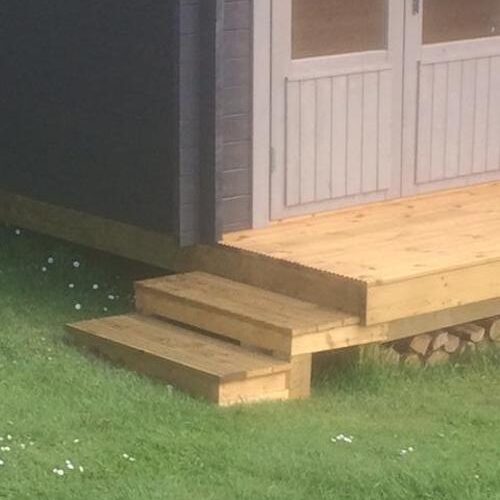
What I thought was the last job has been to construct some steps up to the deck using lots of offcuts from the project. This was made with bits of frame posts, the palate, roof boards and fascia boards, topped off with the last of the deck boards. However, my wife now wants a small lean to shed on the back for ready use garden tools. So, more work is promised!
I hope this is of some use to prospective builders, it has been really fun, though hard work at times. Also, I hear that a friend in Wales that is looking to buy a cabin so Micky and I might have to get our mallets out again.
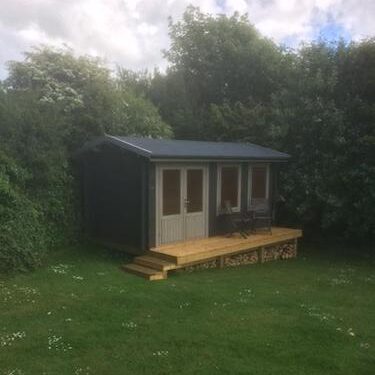
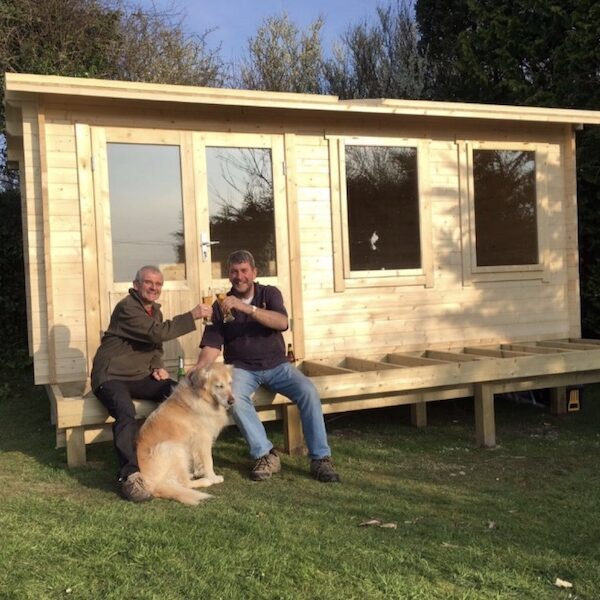
I’m very pleased with our cabin. It is a fine looking, substantial product and building it has proved immensely satisfying both for me and my helpers. It’s not difficult and doesn’t require many specialist tools and the main structure was done in a day. The roof is time consuming, but if you take your time the results are worthwhile. Despite the delivery faux pas, I would not hesitate to recommend Tuin, especially their Justine log cabin and customer service. It has attracted compliments from neighbours and passers-by and the deck is a nice place to sit and watch the sun go down.
Thanks Tuin.
Thank you so much for your article Mr E. This give a great insight into the journey of a finished log cabin that will help other people. We very much appreciate it and hope you enjoy our gift. Thank you again.
Other customer experiences, builds and ideas can be enjoyed here: Pictorial Tuin Reviews
It would be great to hear some more detail about the wiring installation. I am considering buying a similar Tuin log cabin and would like to know how to install the wiring for a couple of sockets and lighting in a neat effective manner
Please see this article for advice on electrics in log cabins: https://www.tuin.co.uk/blog/tips-installation/electric-in-log-cabins/
Richard, thanks for the very helpful link re wiring installation. Regarding lighting wiring, assuming you had a consumer unit fitted and planned to insulate the roof with 40-50mm insulation externally on the top of the roof, would you run cable for the ceiling light up the wall from the consumer unit, using trunking with slots for fixings for expansion and then run the cable through the roof and underneath the insulation, coming through at the point of the ceiling light fitment, or would you use trunking on the inner surface of the wooden roof?
thanks, Alan
It can be done either way, it looks tidier when it is on top of the roof but consideration needs to be given to how much heat the wires build up and depth of insulation. A qualified electrician can advise you on this.