


This customer review and walkthrough was certainly a delight to receive, while I will try and do this well thought out structure justice in this blog. All credit goes to Mr M for this detailed walkthrough of his installation of the Clockhouse Log Cabin.
Mr M writes as follows:
This blog is intended for information purposes only and should not be used for formal instruction or standards in anyway. I’ve produced this blog to capture and share some of my ideas in building the Clock House log cabin from Tuin. I am not a qualified builder, electrician, carpenter or any other trade, nor am I an expert in log cabins; this is my first build. I love making things and I consider myself to be a “reasonably competent” DIY’er.
Our requirements
We are a family of four, my wife and I and our two teenage boys, living in a reasonable sized house. We wanted to extend the house to give us more room and some breathing space, but lockdown happened and things changed. My wife and I are fortunate that our jobs remained, but the two of us working from the dining room table is not a viable option in the long term. The house extension was unaffordable for us and too high risk in these uncertain times, so we decided on a garden building of some description.
Some friends recommended Tuin so we made some investigations and sketched out what we wanted. Basically, we had three requirements;
1) Home office for me permanently and a second desk for Elaine and the boys to use
2) Chill out/TV/gaming area
3) Home pub/bar area for socialising
Tuin offer a massive range of options so we sketched out a few layouts and matched these to some Tuin designs. We settled on the Clock House as it was the right size, and looked attractive. We really didn’t want a “box” in the garden.
With the dimensioned plans of the Clock House on the Tuin website, I sketched out a layout as shown below. For reference I use Microsoft Visio for these sort of sketches.
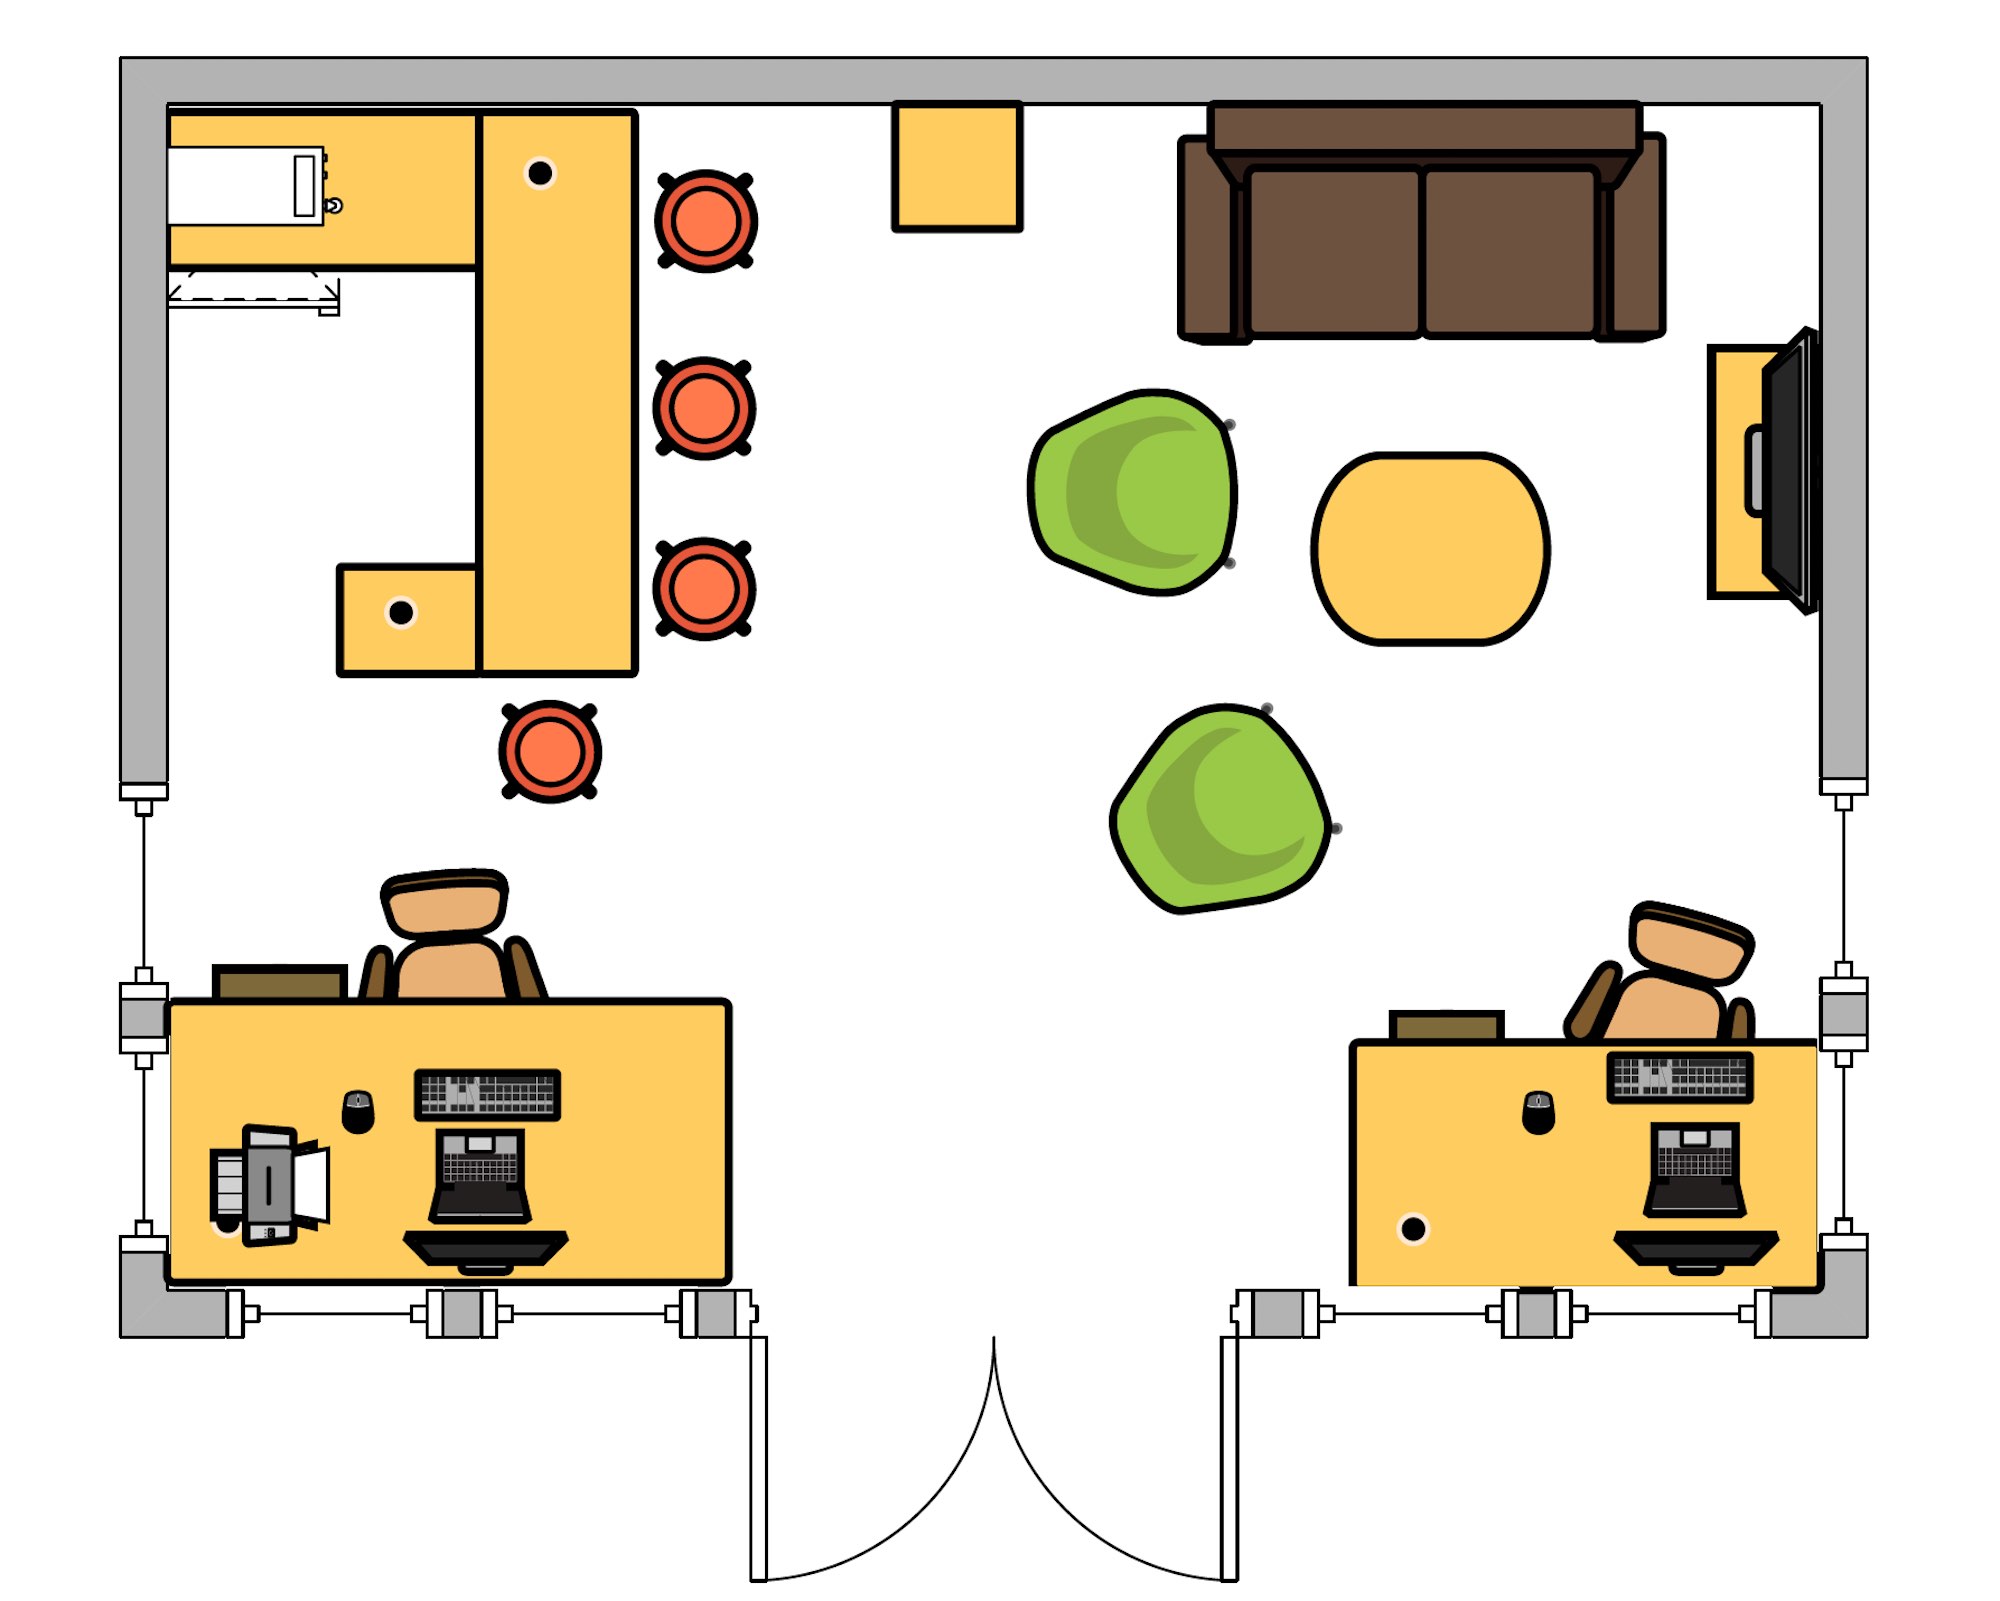
Layout of Clock House showing plenty of room for home office, pub/bar and chill out spaces
With this settled we then researched all the various options for the project, the main ones detailed below:
A. The base
There is some excellent information on the Tuin website regarding the base options. For me, this is the most important aspect. Get this wrong and you’ll struggle with the build and longevity of the cabin. I decided on a concrete base for three reasons (i) we have a slope in the garden which can be easily dealt with by a bit of digging; (2) I believe concrete is a great way of dealing with damp by the application of damp proof course and damp proof membrane, and (3) I am an old school engineer and wanted a solid structure to build my cabin on!
B. The roof
Easy one this for me. Clock House a nice pitched roof so the shingles option was a no brainer. We opted for the free shingles offer from Tuin.
C. The floor
Lots on information on the website regarding the floor, but fundamentally this choice boils down to affordability and intended use. I plan to use the cabin all year round as my home office. It’s a large structure so, in my mind, the floor should be substantial. I also want to do it once only and have it last for the life of the cabin. I therefore decided the floor options from Tuin were best for us. After a little googling I calculated you can’t buy that quality wood for those prices from a timber merchant, so again the Tuin option was a no brainer. I ended up going for the 25mm floor. Probably overkill for our needs but for an extra few hundred I felt this was worth the peace of mind.
D. Insulation
As we intend to use the cabin all year this was a necessity. Once again the Tuin website provided great information. I decided on 50mm insulation boards for the floor and roof, a damp proof course to go under the foundation beams and a damp proof membrane to lay on top of the concrete base.
Constructing the base of the Clockhouse
I’m not going into the details of laying a concrete base as I am in no way qualified to do so. There is lots of stuff on the internet on how to do this. My biggest challenge was how to get the base perfectly flat and level as it is quite large at 5.5m x 4m.
Timber Shuttering
I had a load of old decking boards laying around so I selected the straightest and flattest and used these to construct the shuttering. A couple of day’s hard graft digging by hand and laying the shuttering got me to a good position.
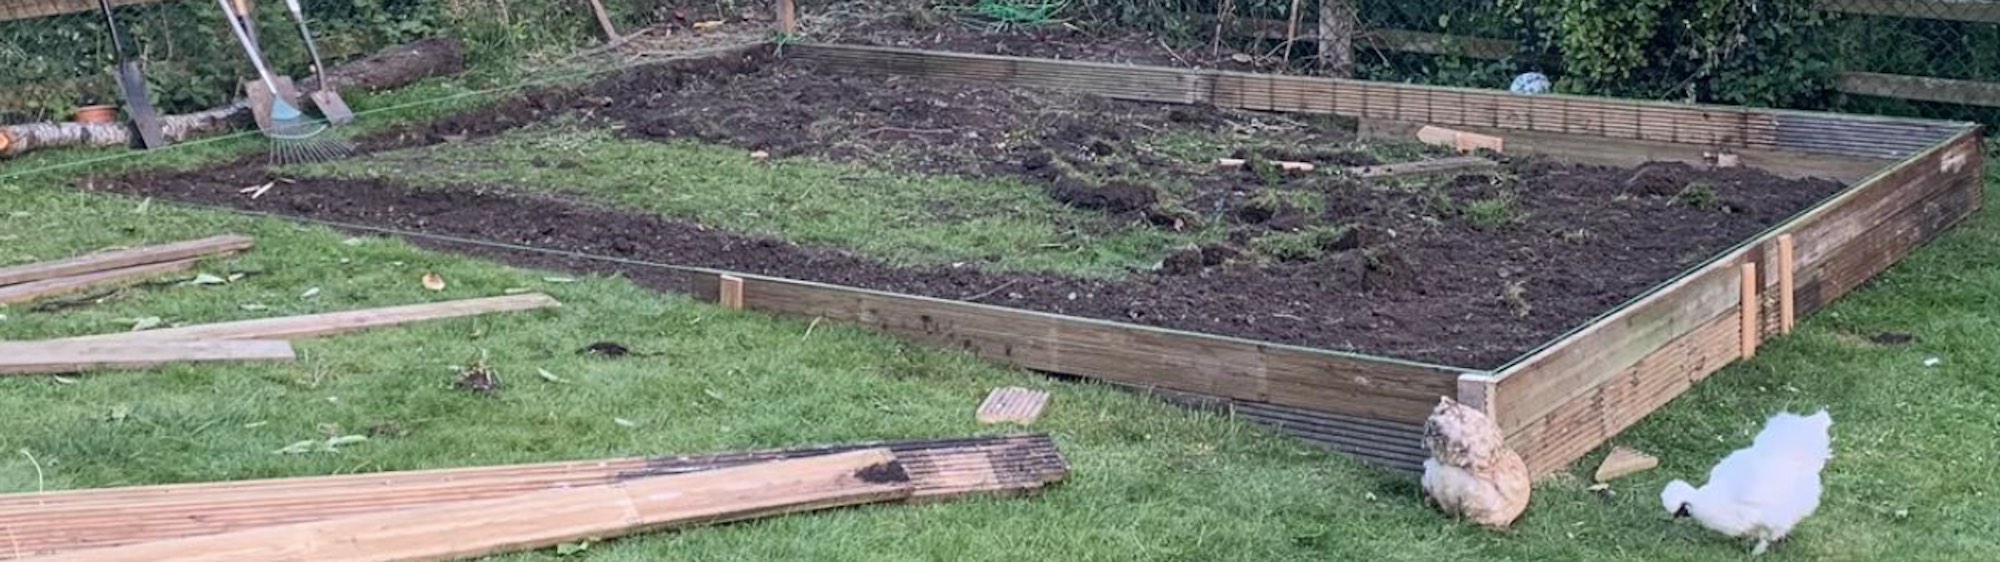
Preparing the base. All done with lots of old wood, some decent hand tools, a long spirit level and plenty of string. Chickens are optional!
It’s really wise to use string as the basis to work out your levels. If you look closely at the picture you can see how I’ve used it. The shuttering is held in place by wooden stakes. Once I was happy with the level I screwed it all together using battens to ensure it wouldn’t move. Next, in went some hard-core. Again I had some old blockwork and patio slabs so I smashed these up and used them as the bottom foundation layer.
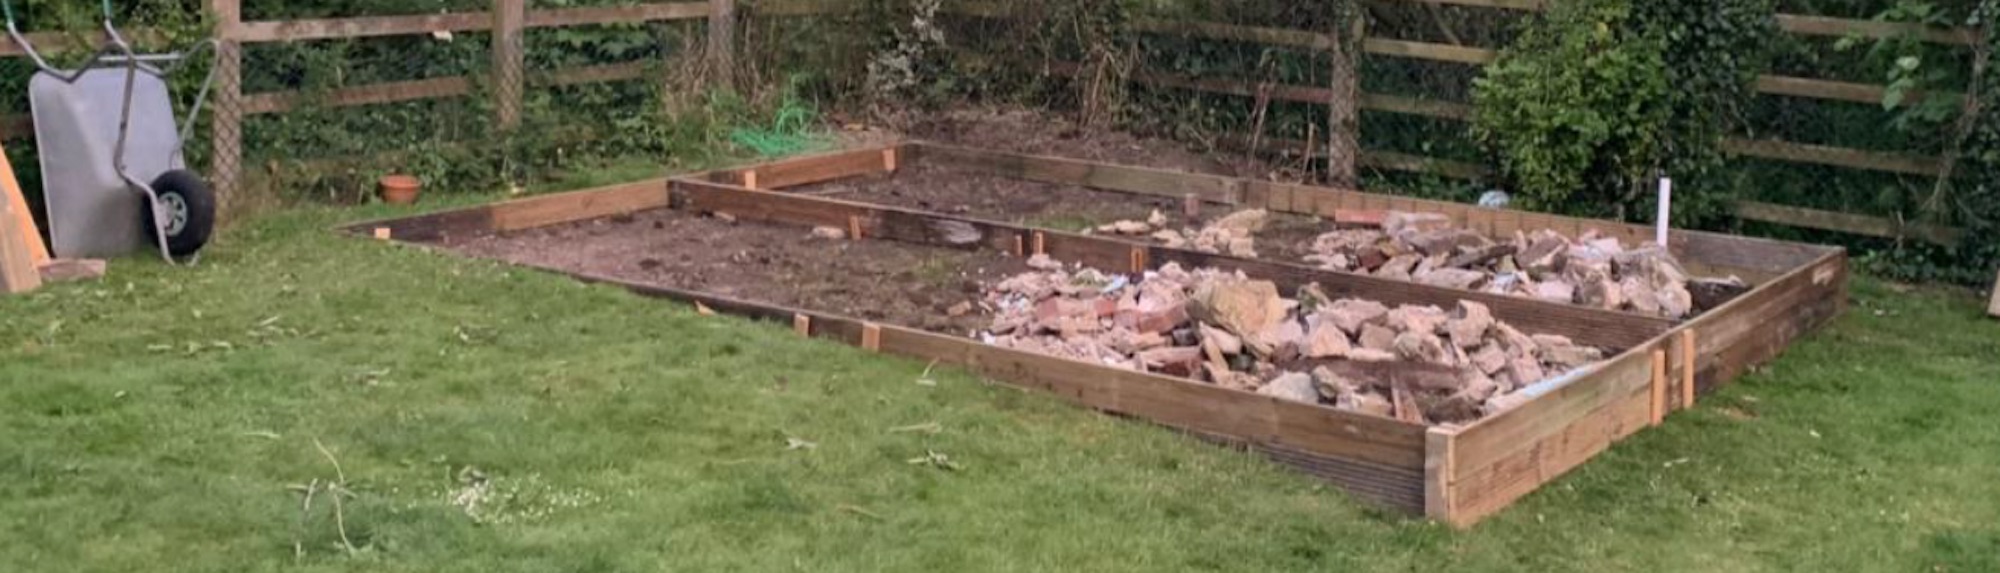
Hard core going in. Be careful not to move the shuttering
Scalpings
Finally, in went the scalpings. I needed approximately 1.5m3 so I ordered 2x1m3 bags. Many wheelbarrows later and lots of tamping by hand with a tamper from Screwfix the base was prepped for the concrete.
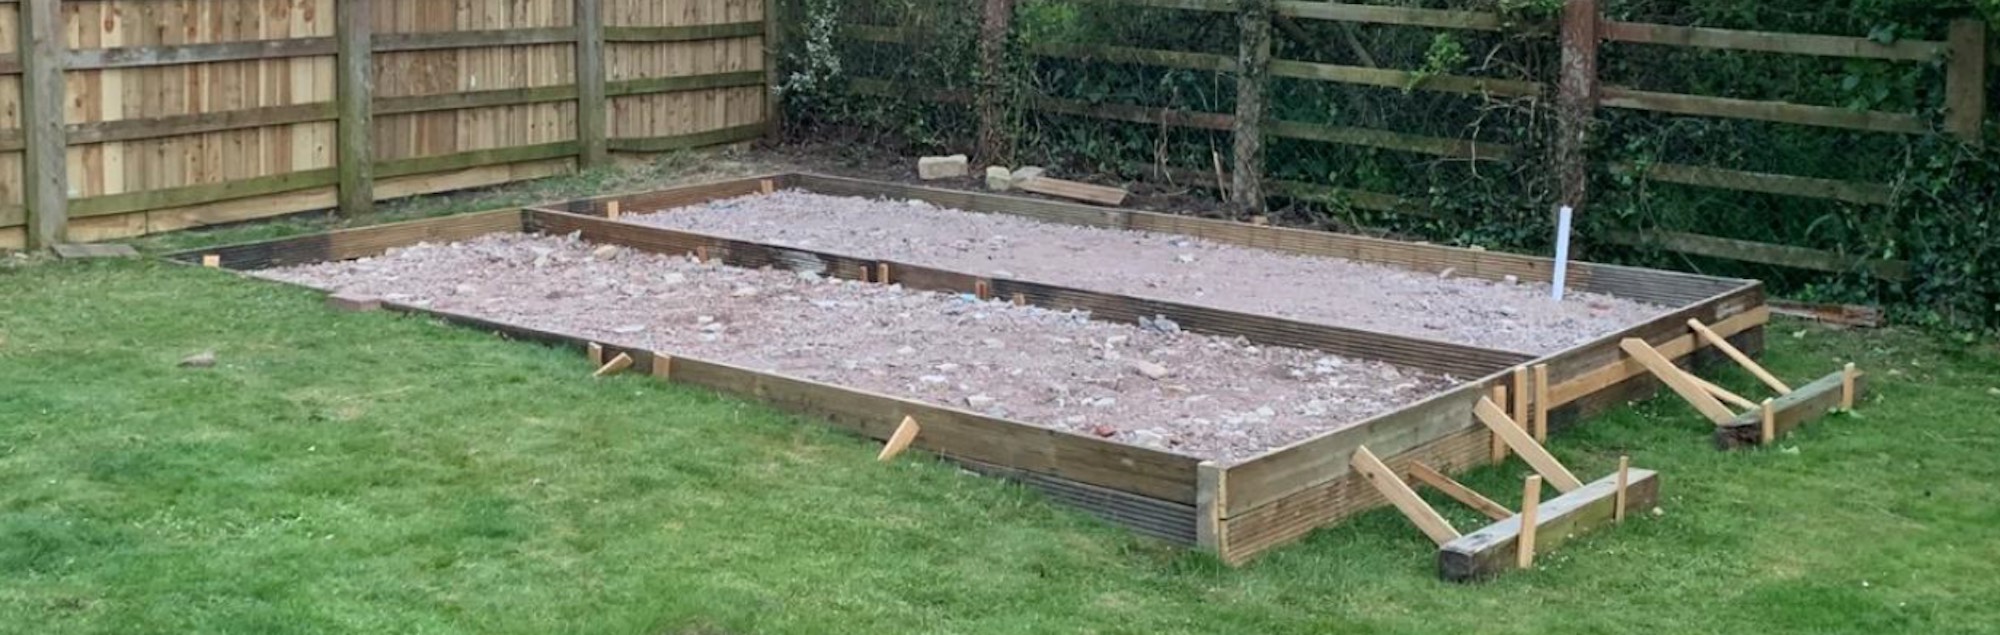
Scalping’s in and tamped down hard and flat. Note the re-enforcements to the shuttering I added to ensure no movement when the concrete was poured.
Finally a week later I had the readymix concrete delivered. 3.5m3 all to be borrowed in manually. With the help of two friends and #1 son we did this in approximately 45mins. The next hour was spent levelling and tamping down to a flat smooth surface.
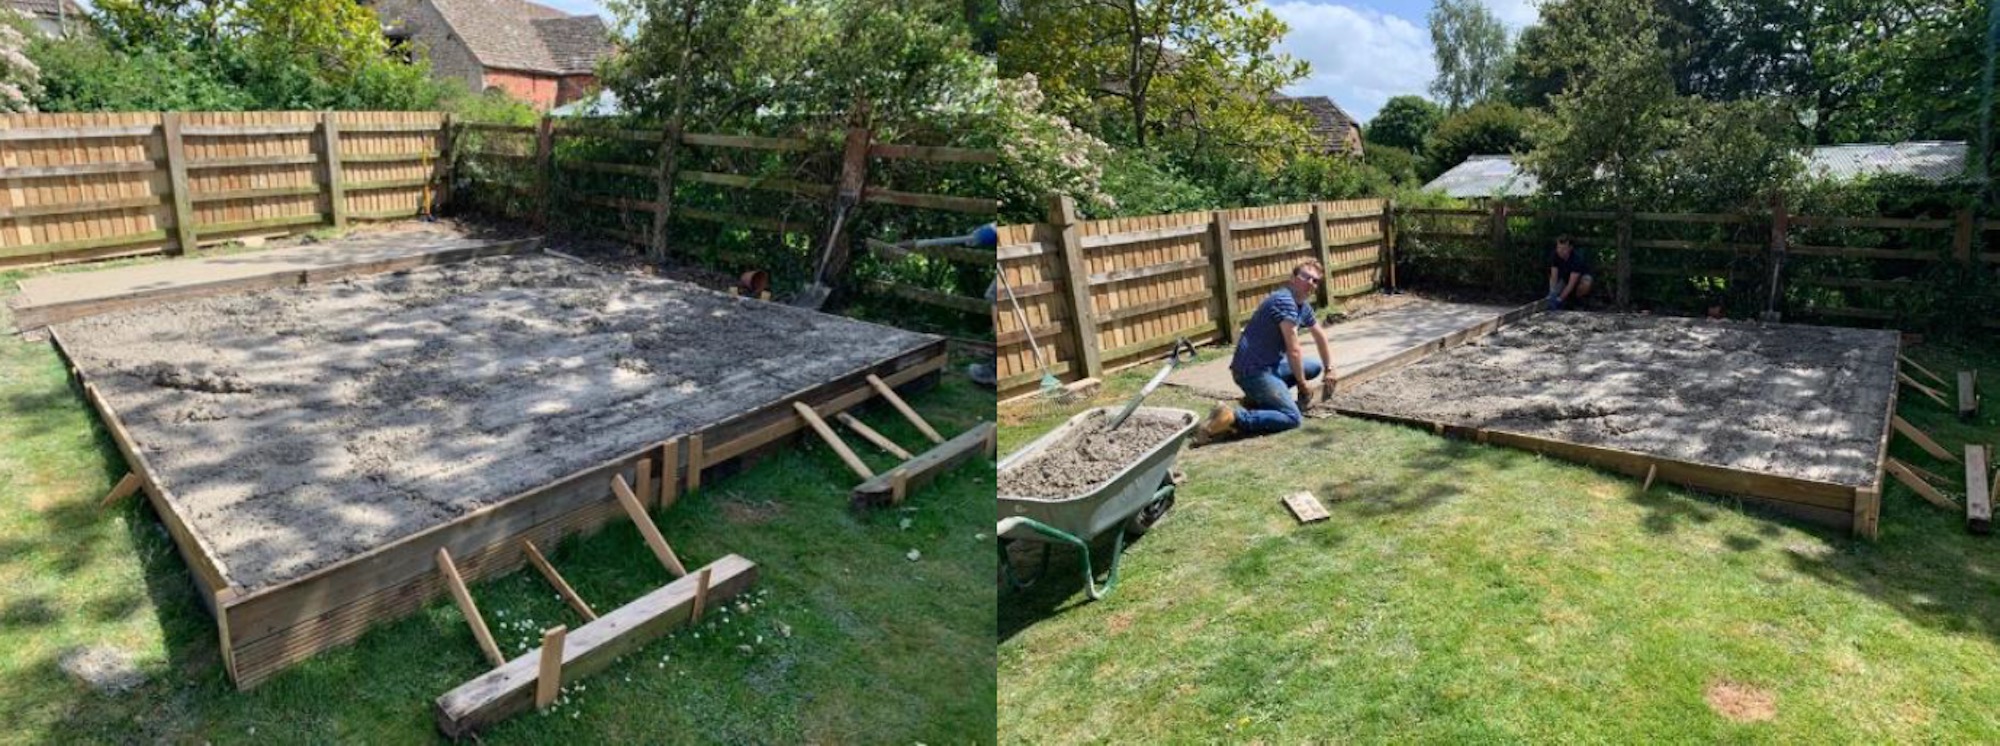
Pouring, levelling and tamping. Take your time, get it right. There is no going back from here!
Taking Delivery of the Clockhouse
One week later the log cabin was due for delivery. Slight hitch from the hauliers in they they were a day late. No biggie, just a little frustrating although perfectly understandable during lockdown. The huge articulated lorry arrived. We are lucky in that we live on a quiet road and we have room in our front garden for the drop off of the pallets. They are massive and a little daunting if I’m honest.
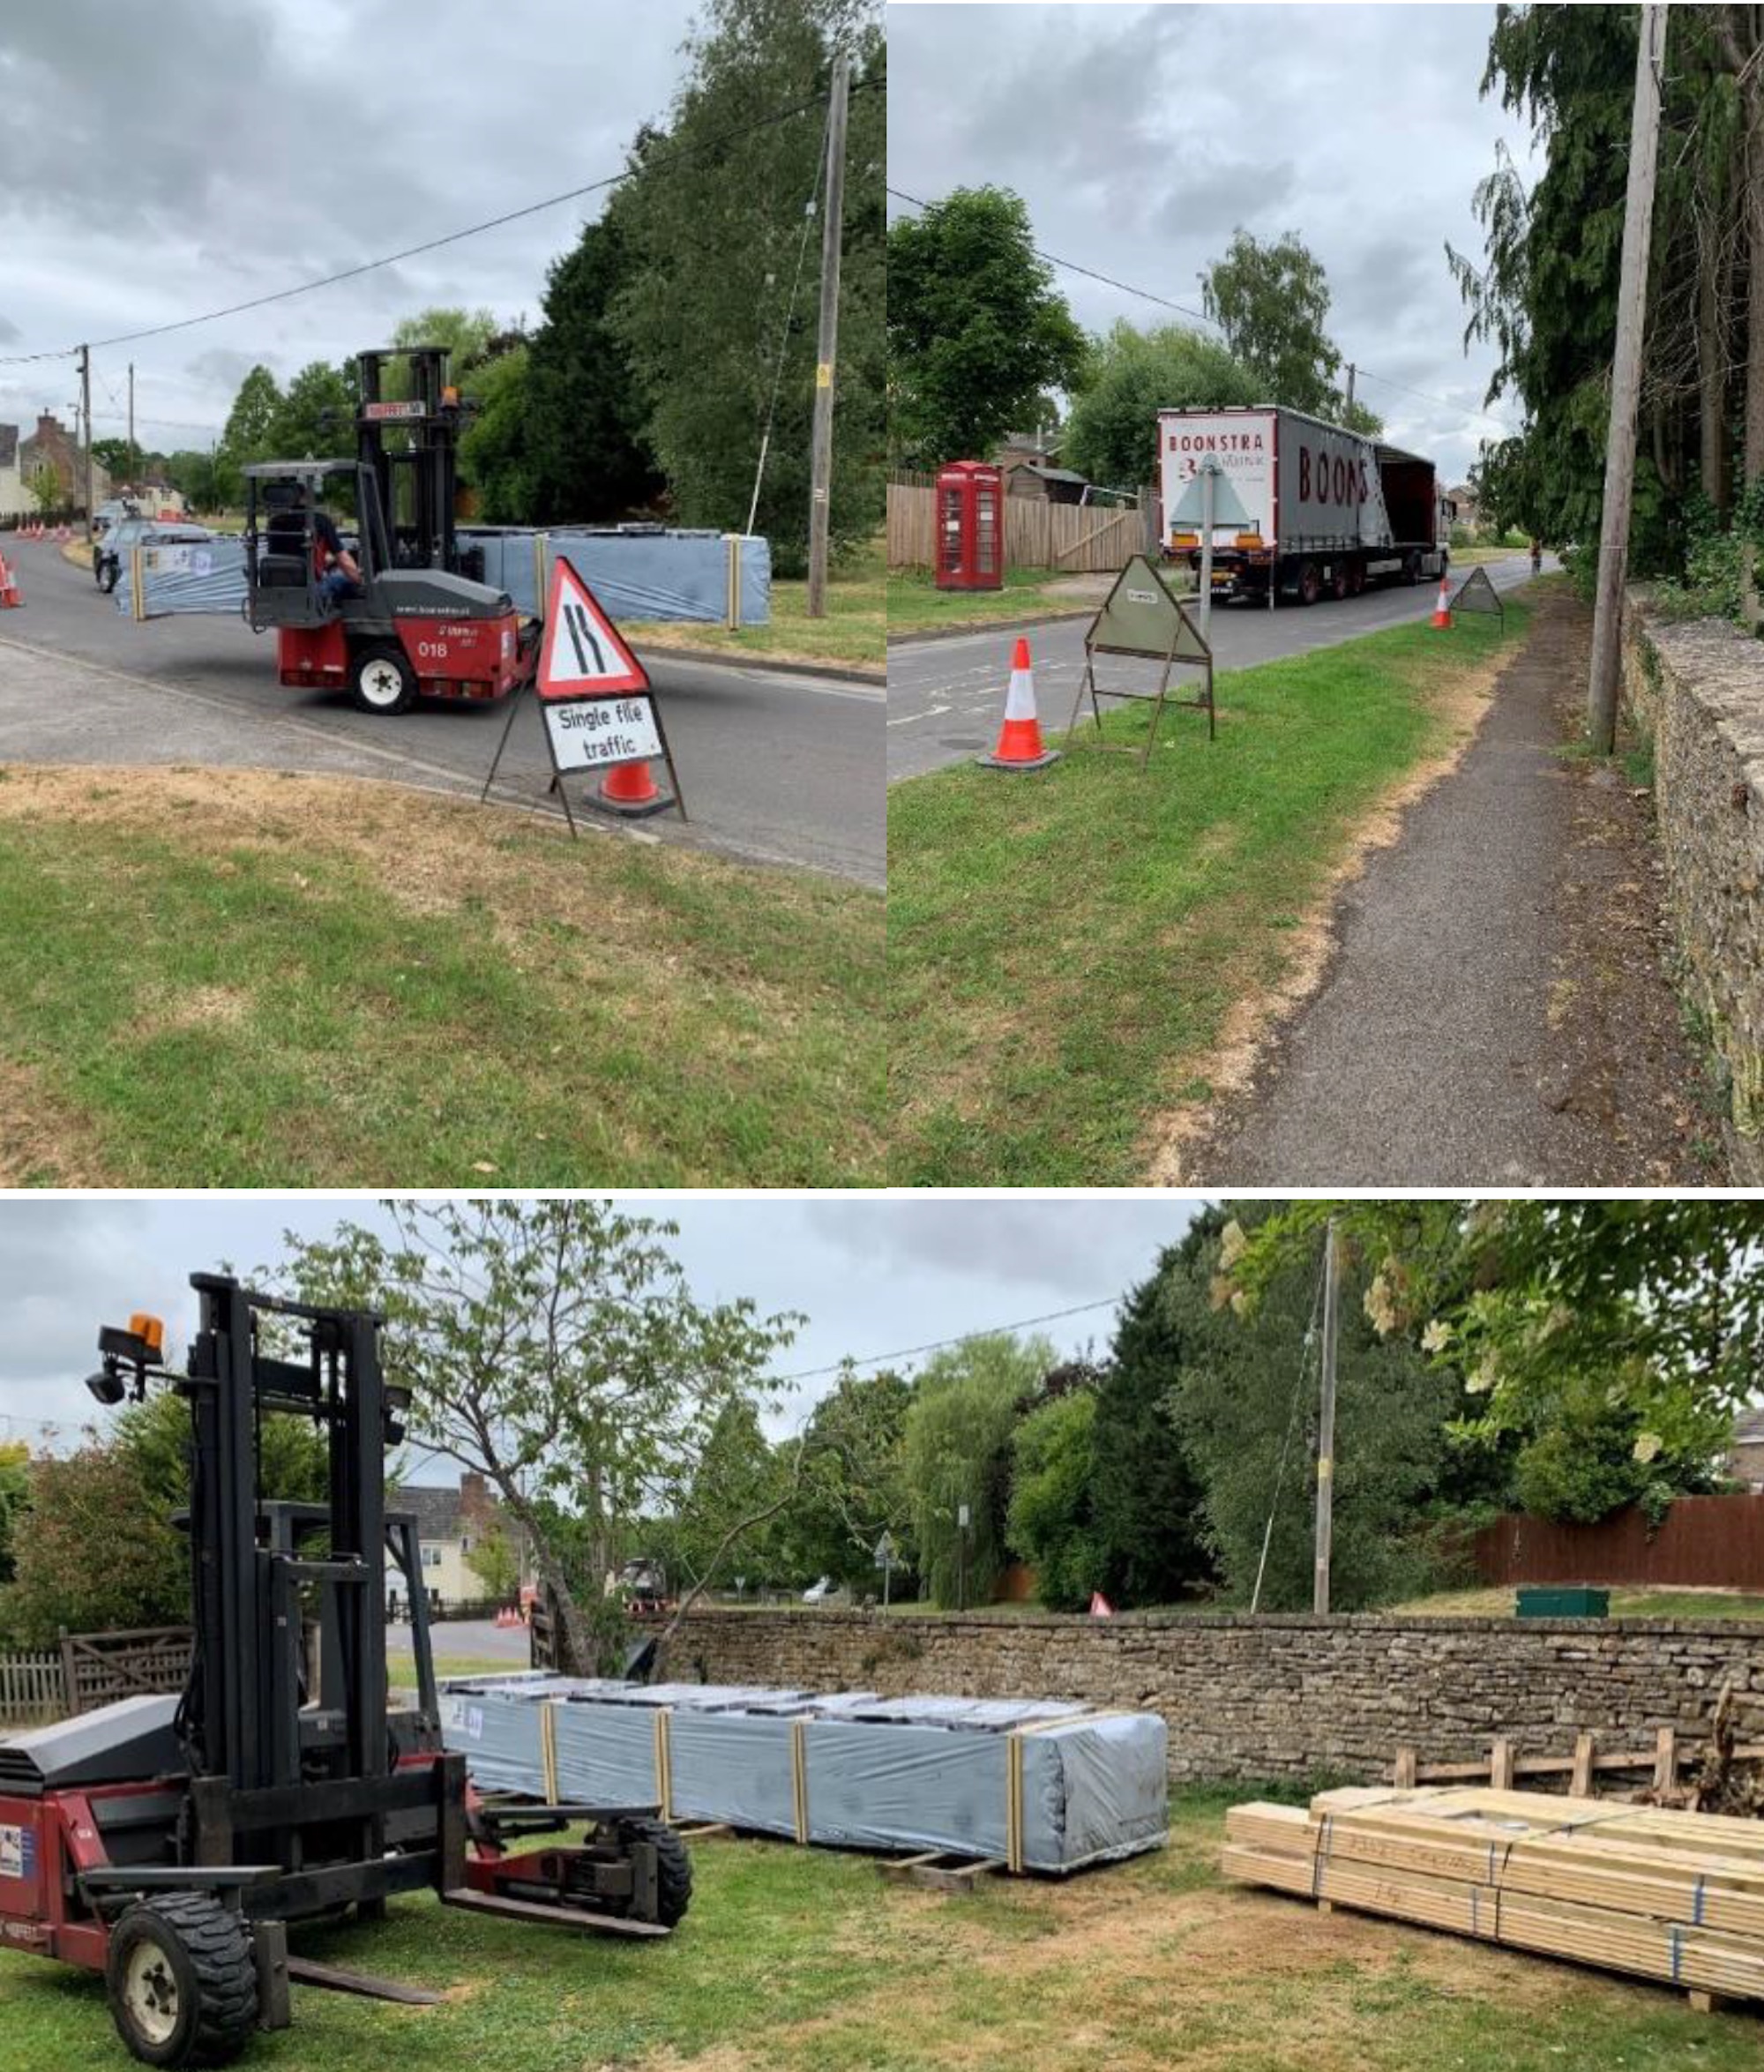
I checked over the pallets for damage and found a few scrapes and minor splits in a few logs. I took photos just in case but they turned out to be very minor and did not affect the build in any way.
The next task was unpacking and carrying the logs to the back garden. I was staggered at the volume of wood. It took 2 hours to unpack and lay out but by doing this properly it certainly helped the construction. I tried to lay the logs by size and shape, and the order they would be assembled.

Erecting the main structure of the Clockhouse
Several reads through of the instructions and lots of YouTube videos later I was ready for the build. To be honest, the instructions were not great. I am mechanically minded so I managed to understand them, but I did wonder how non-technically minded folk would fare with this build.
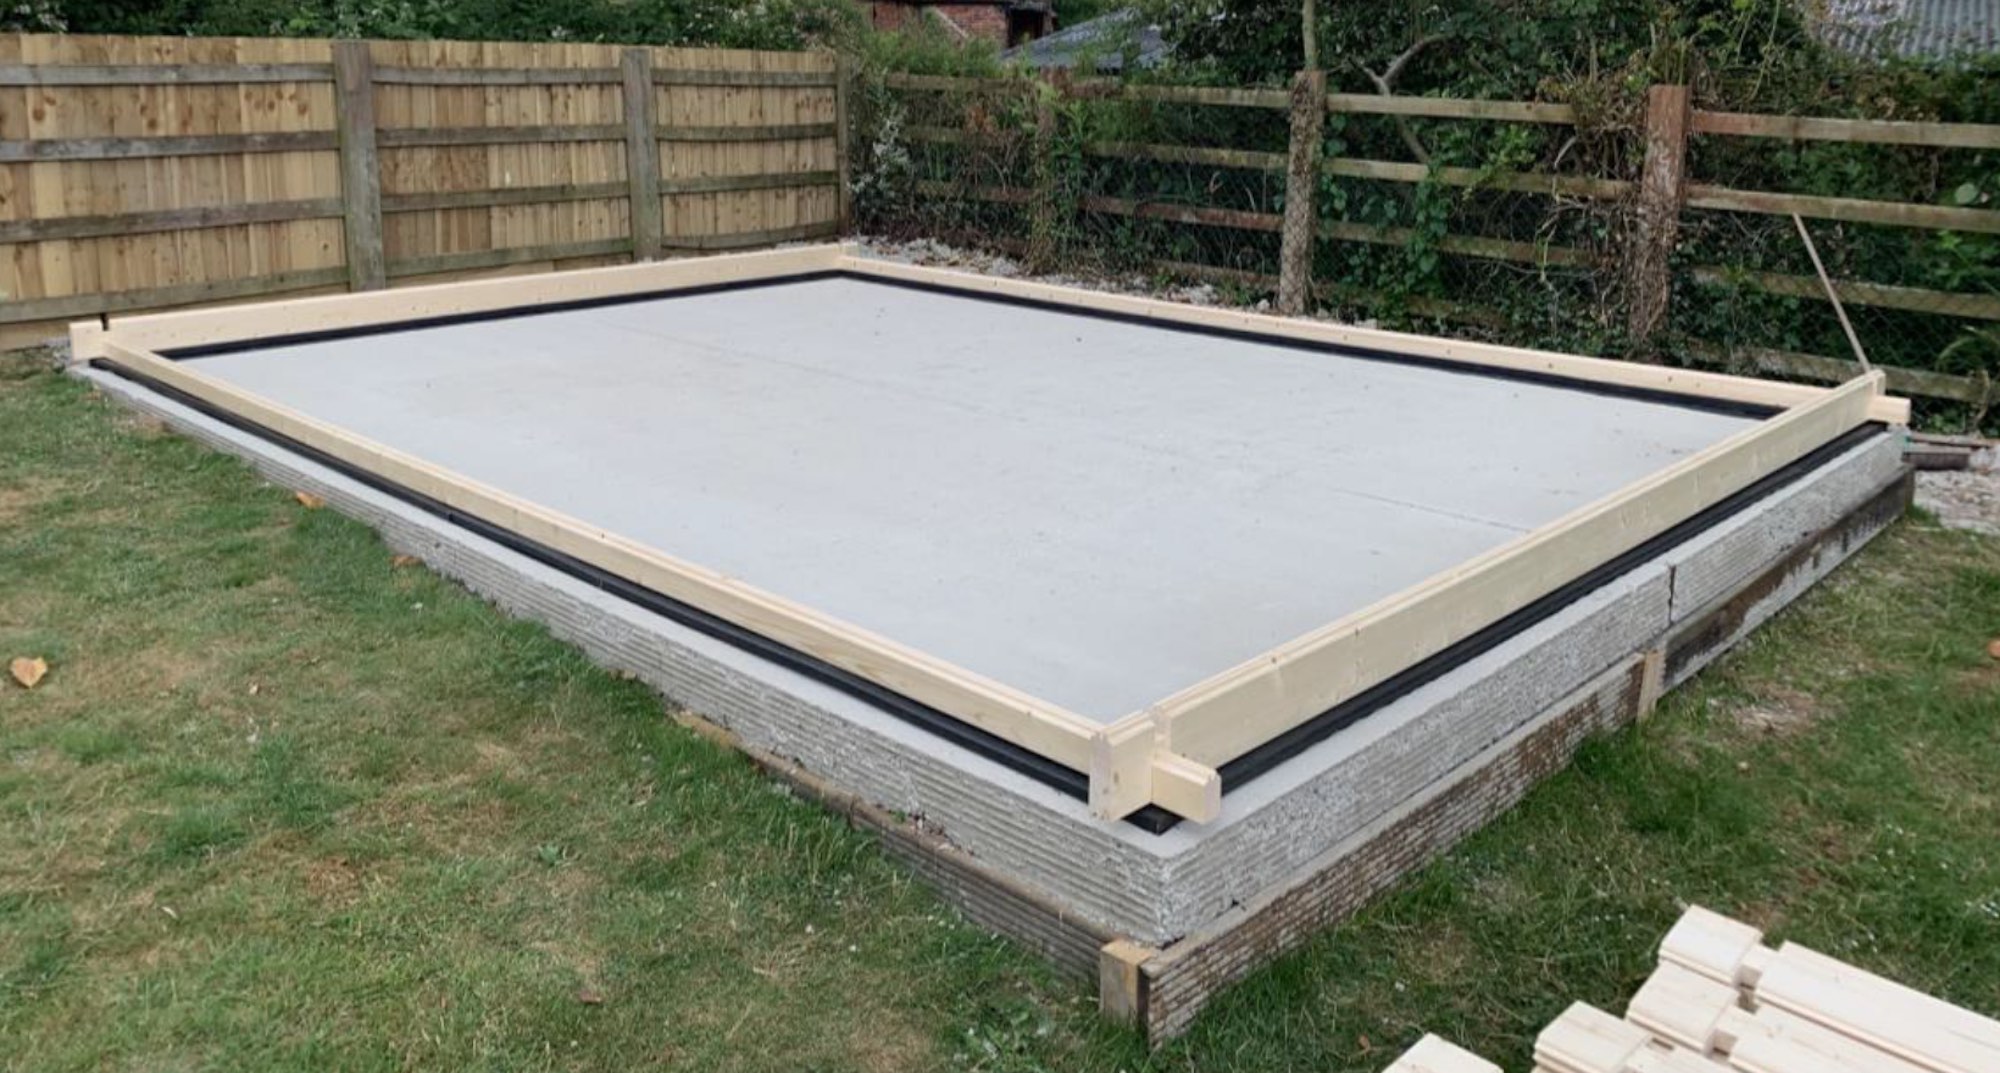
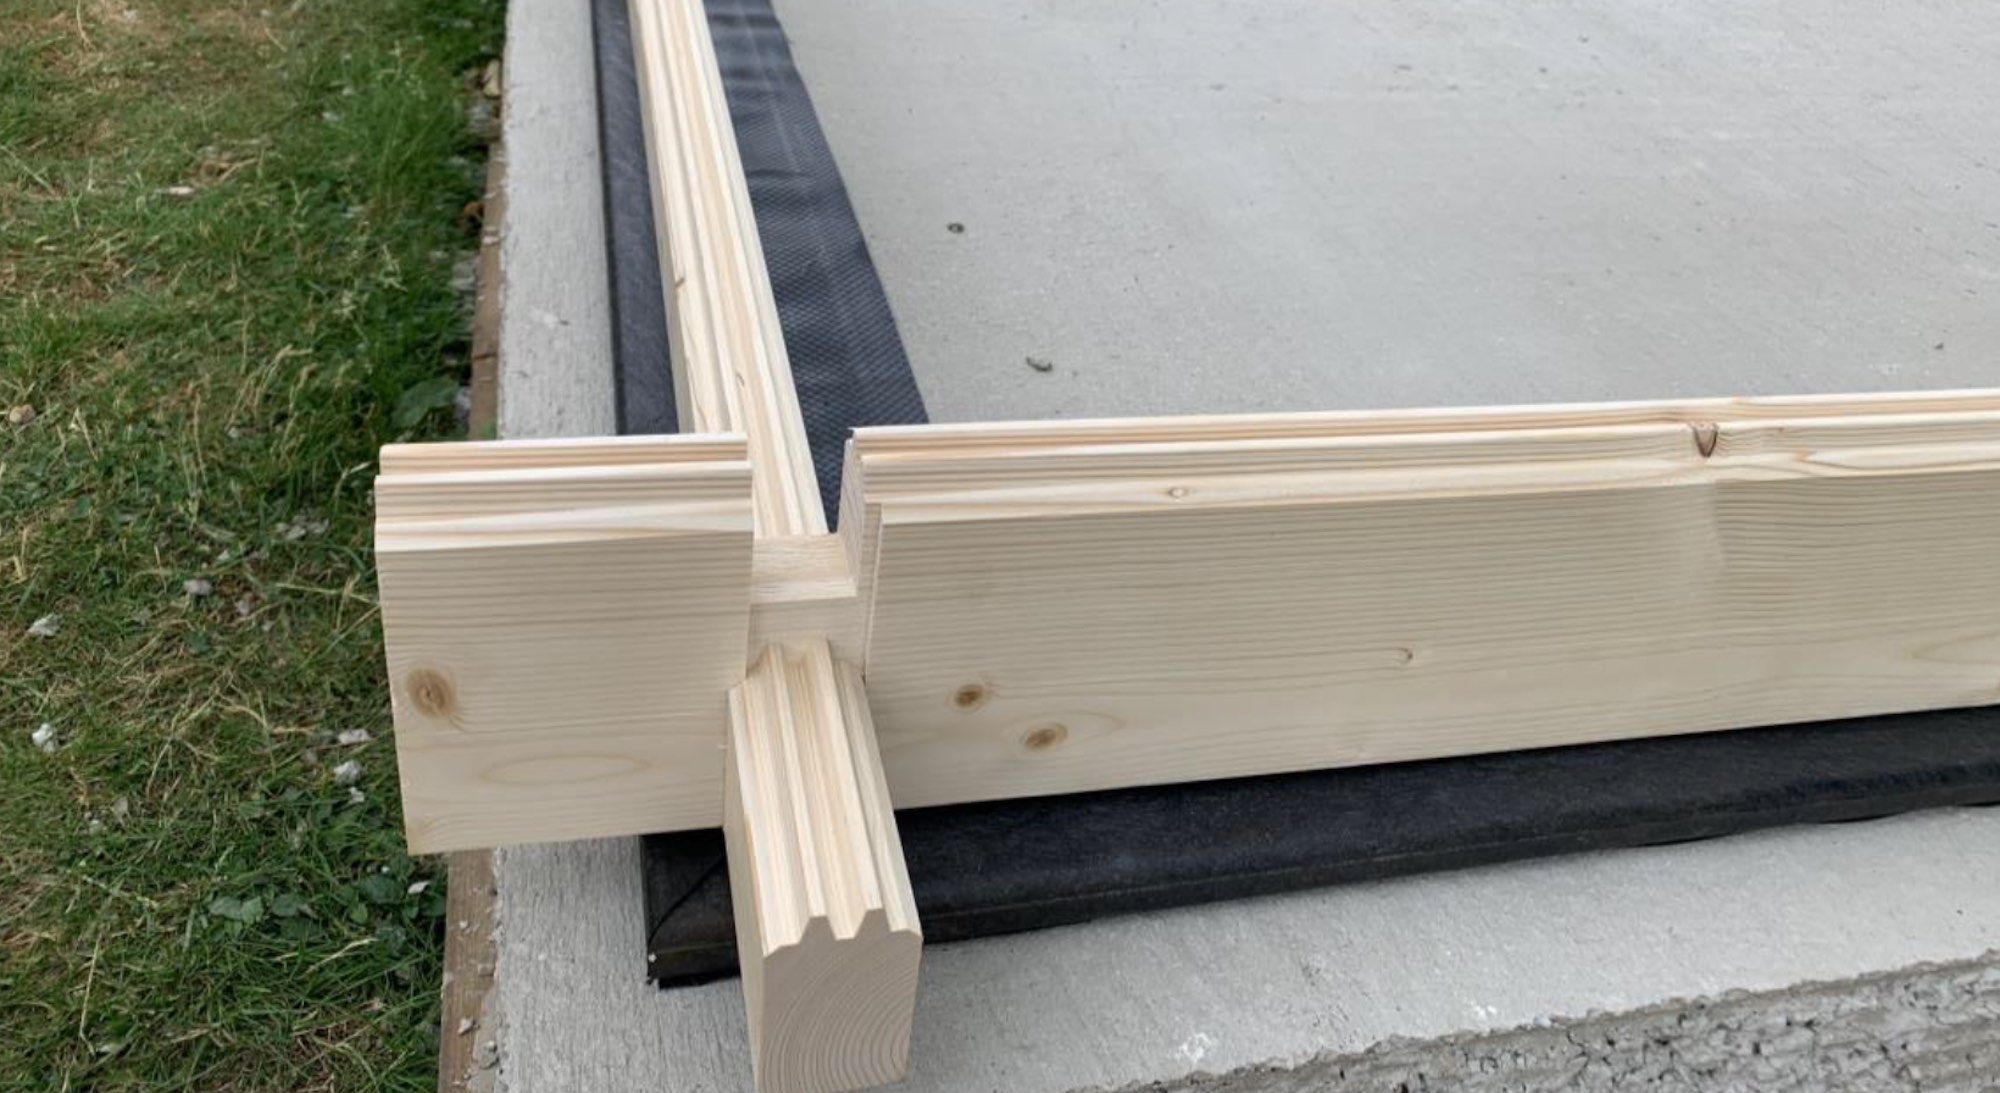
Foundation Beams
First job was the foundation beams. I’d opted for the black composite beams as opposed to wood. They’ll last forever and they actually look really nice. They were actually quite twisted and bent due to how they were strapped to the pallets but once they were laid out they were easy to straighten with a little pressure.
I spent a good hour positioning the foundation beams the base, measuring the diagonals to ensure they were square then cutting to length. As soon as they are properly positioned, I laid down the first log row. Once happy I carefully lifted them to place the damp proof course underneath. One final measure and I was ready to build.
Building Up the Logs, Fitting WIndows & Doors
Happy with the foundation beams I started the main structure. With the help of #1 son we were up to the final logs within a couple of hours and ready for the gable ends and purlins. So far this was very straightforward. One tip is make sure you install the windows with the way they open in mind as they are left and right handed.
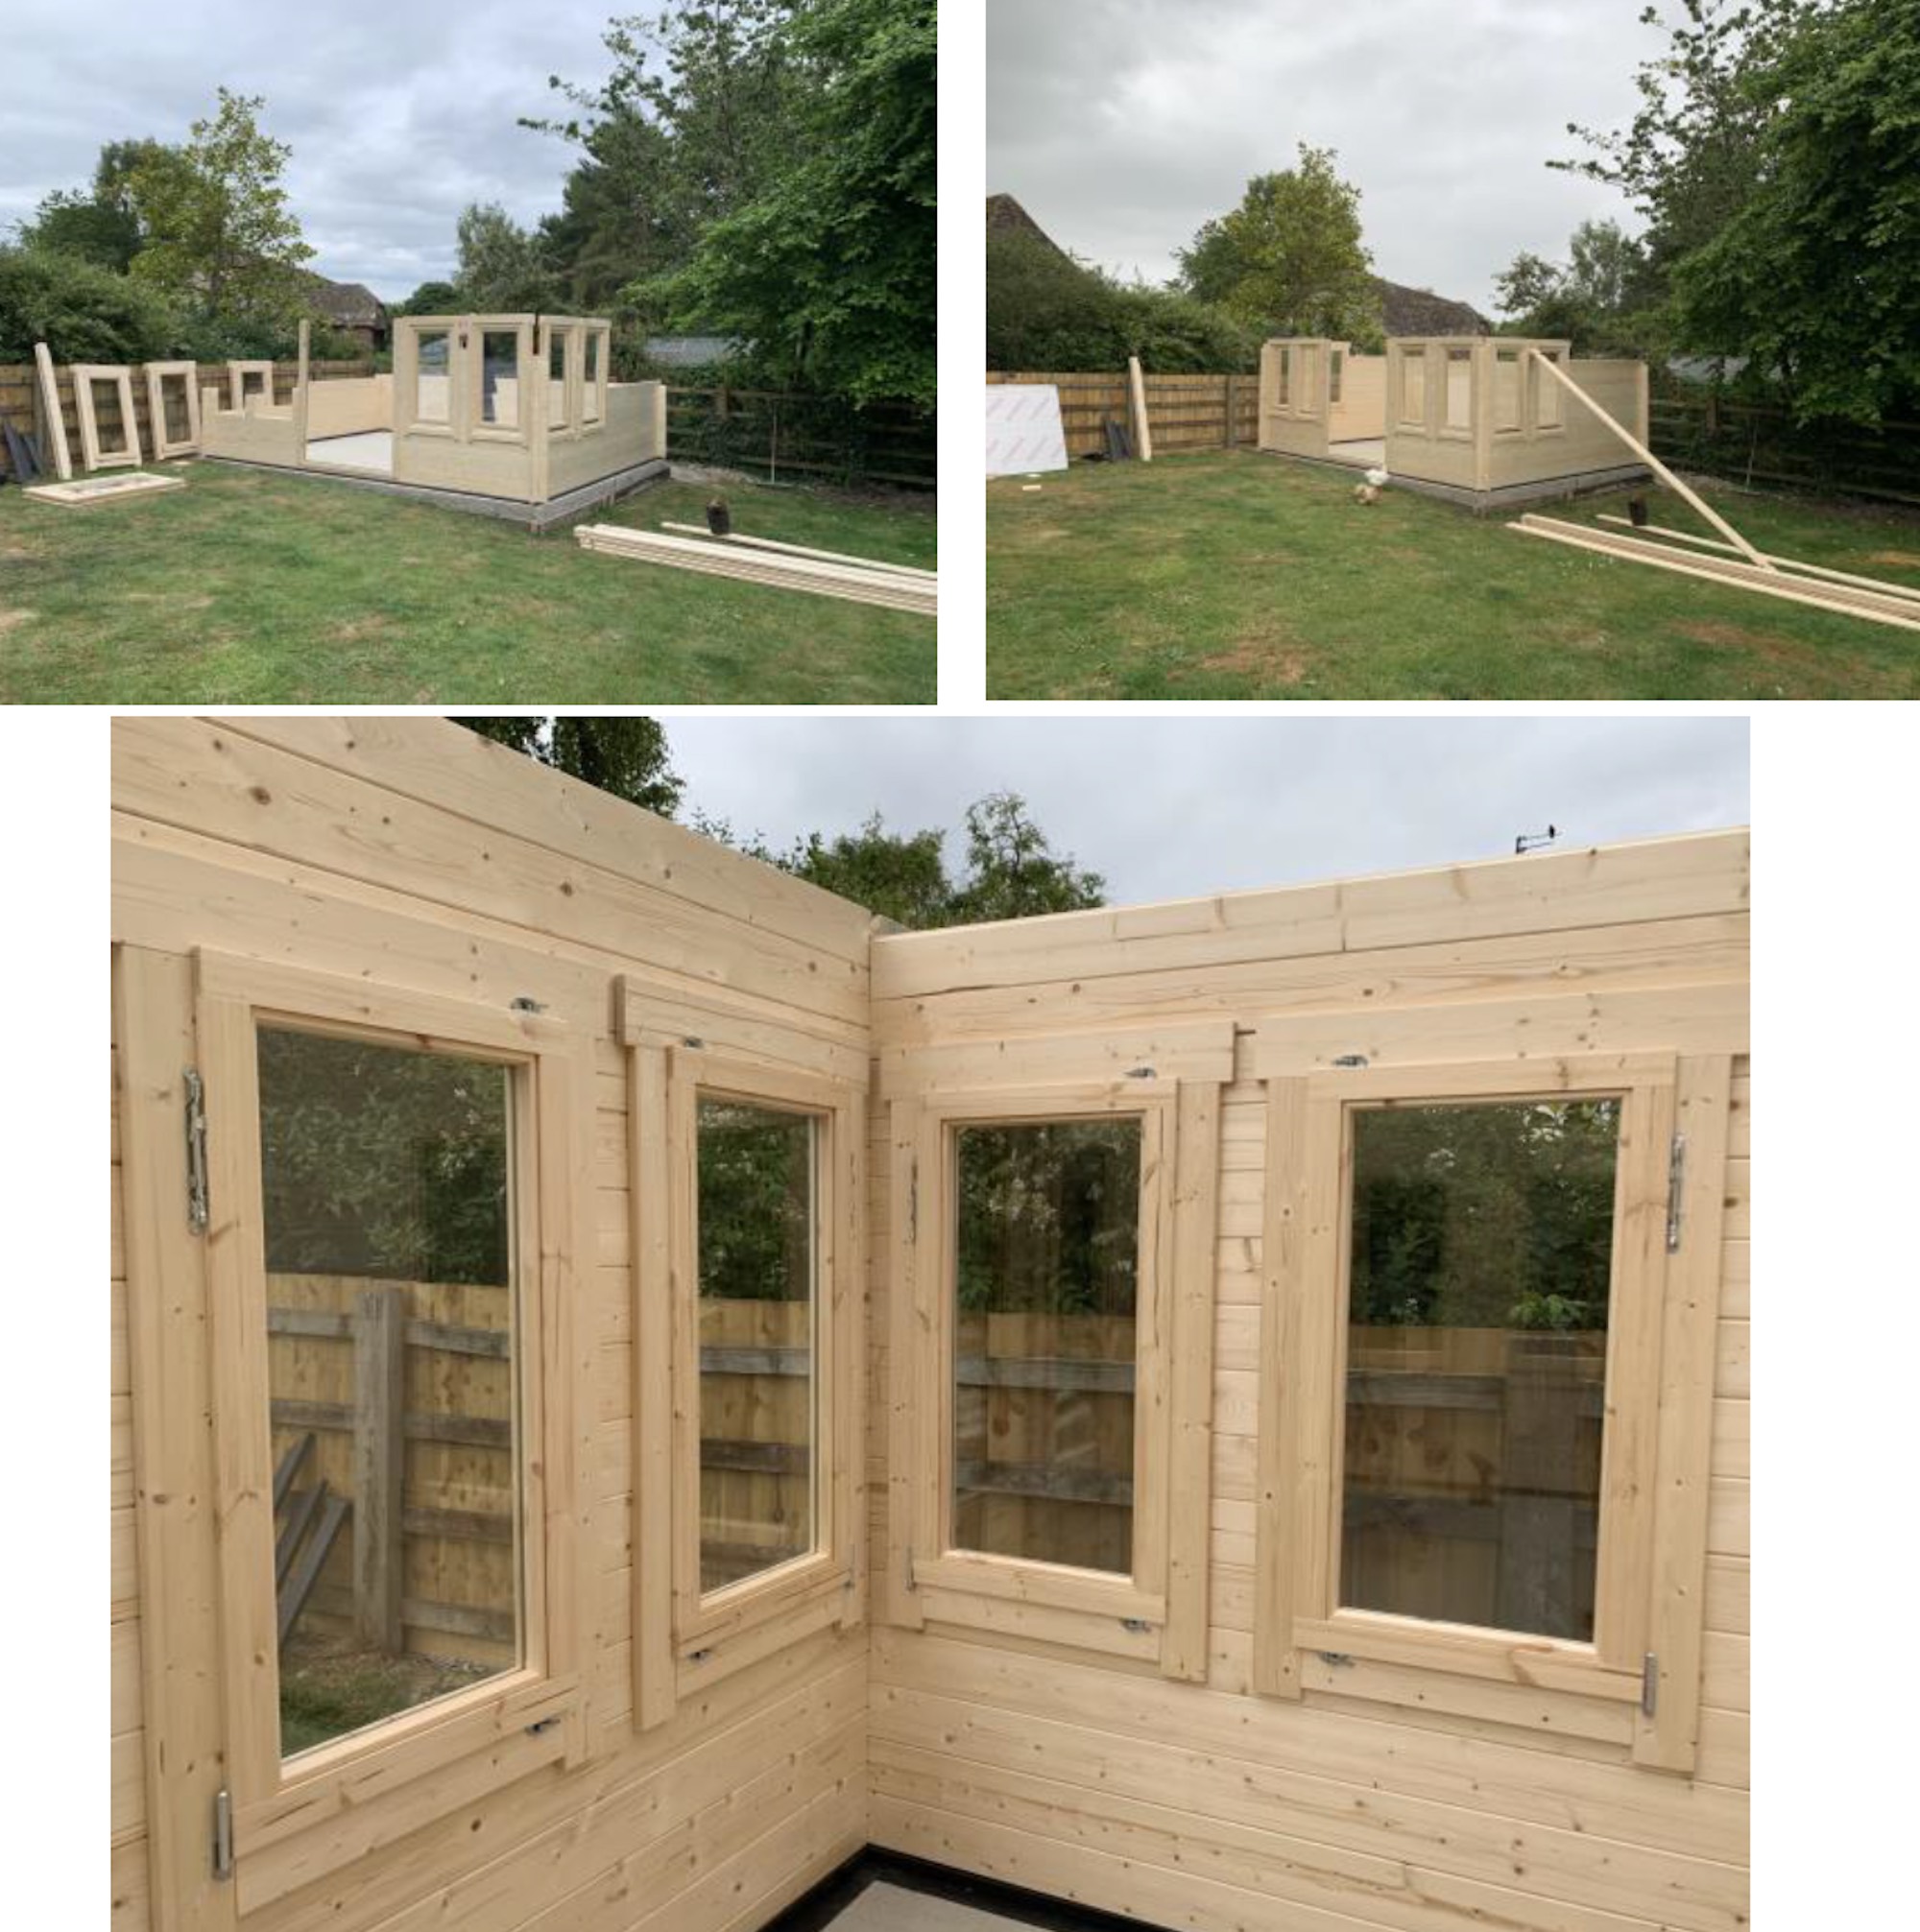
Purlins
Up to now, I was really happy. All straightforward and simple and safe to erect. The gable ends and purlins were a different proposition though. With hindsight, I should have borrowed/rented some scaffold of some description. Doing this with ladders was a real challenge and I found it extremely difficult to stop the gable end logs from moving. In the end I used a nail at each to pin them together which helped a lot but was not ideal. The purlins were also slightly twisted which made it even more difficult. On reflection I wonder if the whole gable end structure should have been assembled with screws then installed as one unit?
With all the purlins now in, we were done for the day. No matter how hard I tried I could not get a perfectly straight row of gable end logs. The picture below shows the run out. With some careful persuasion I did rectify it to a degree but I could not get it perfect.
Gable end run out which I did improve but only slightly. Main structure all completed. Very pleased!
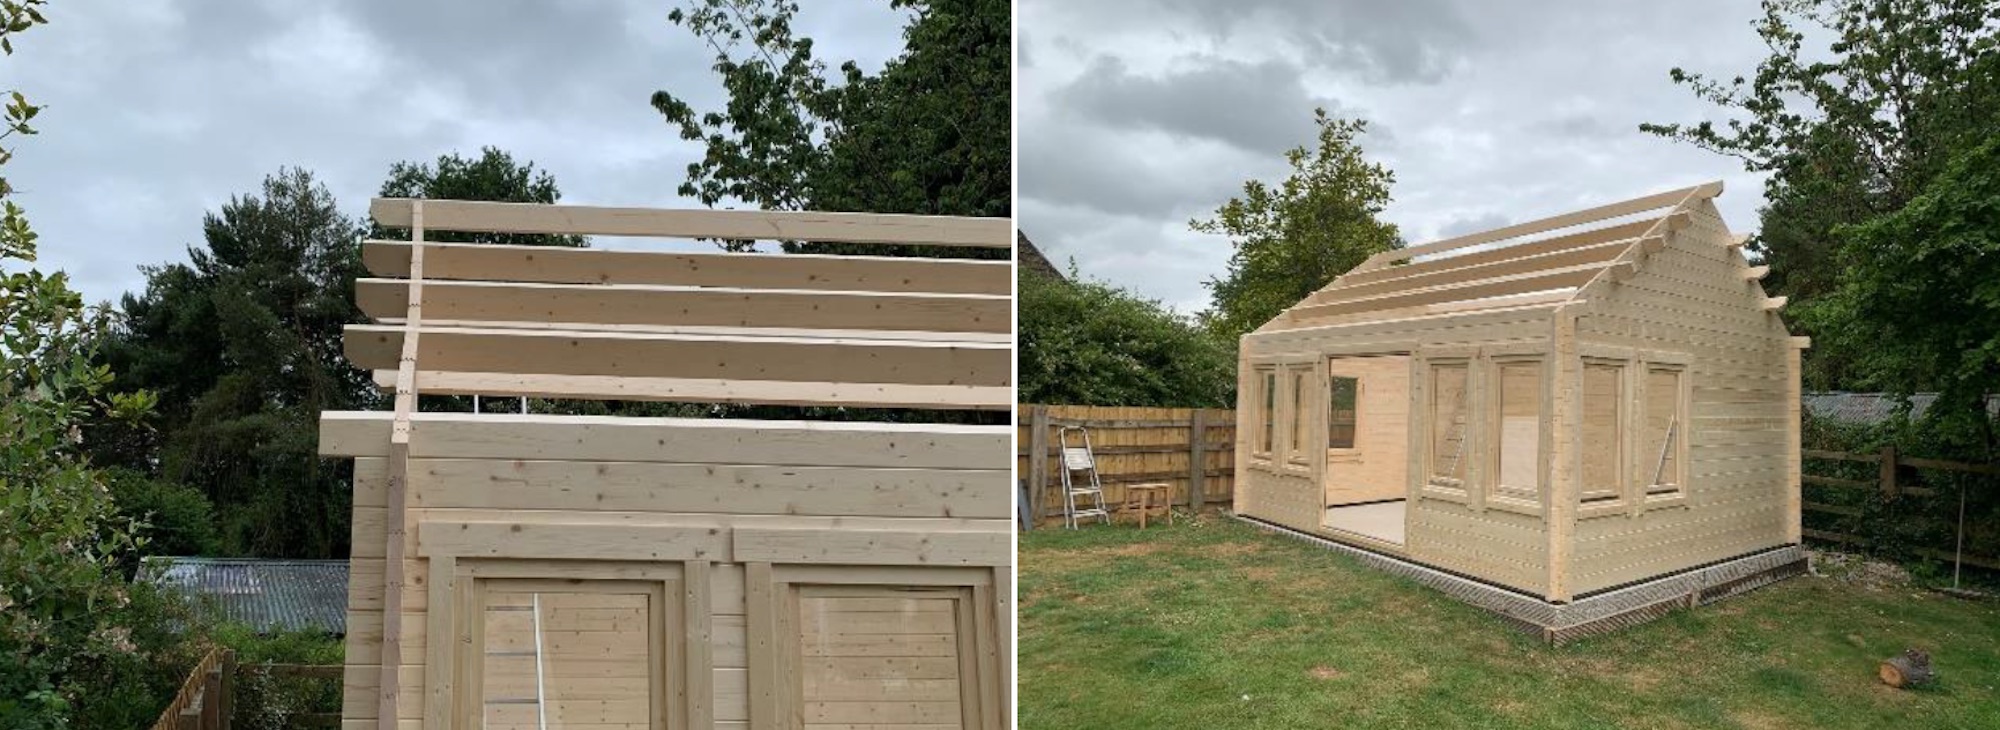
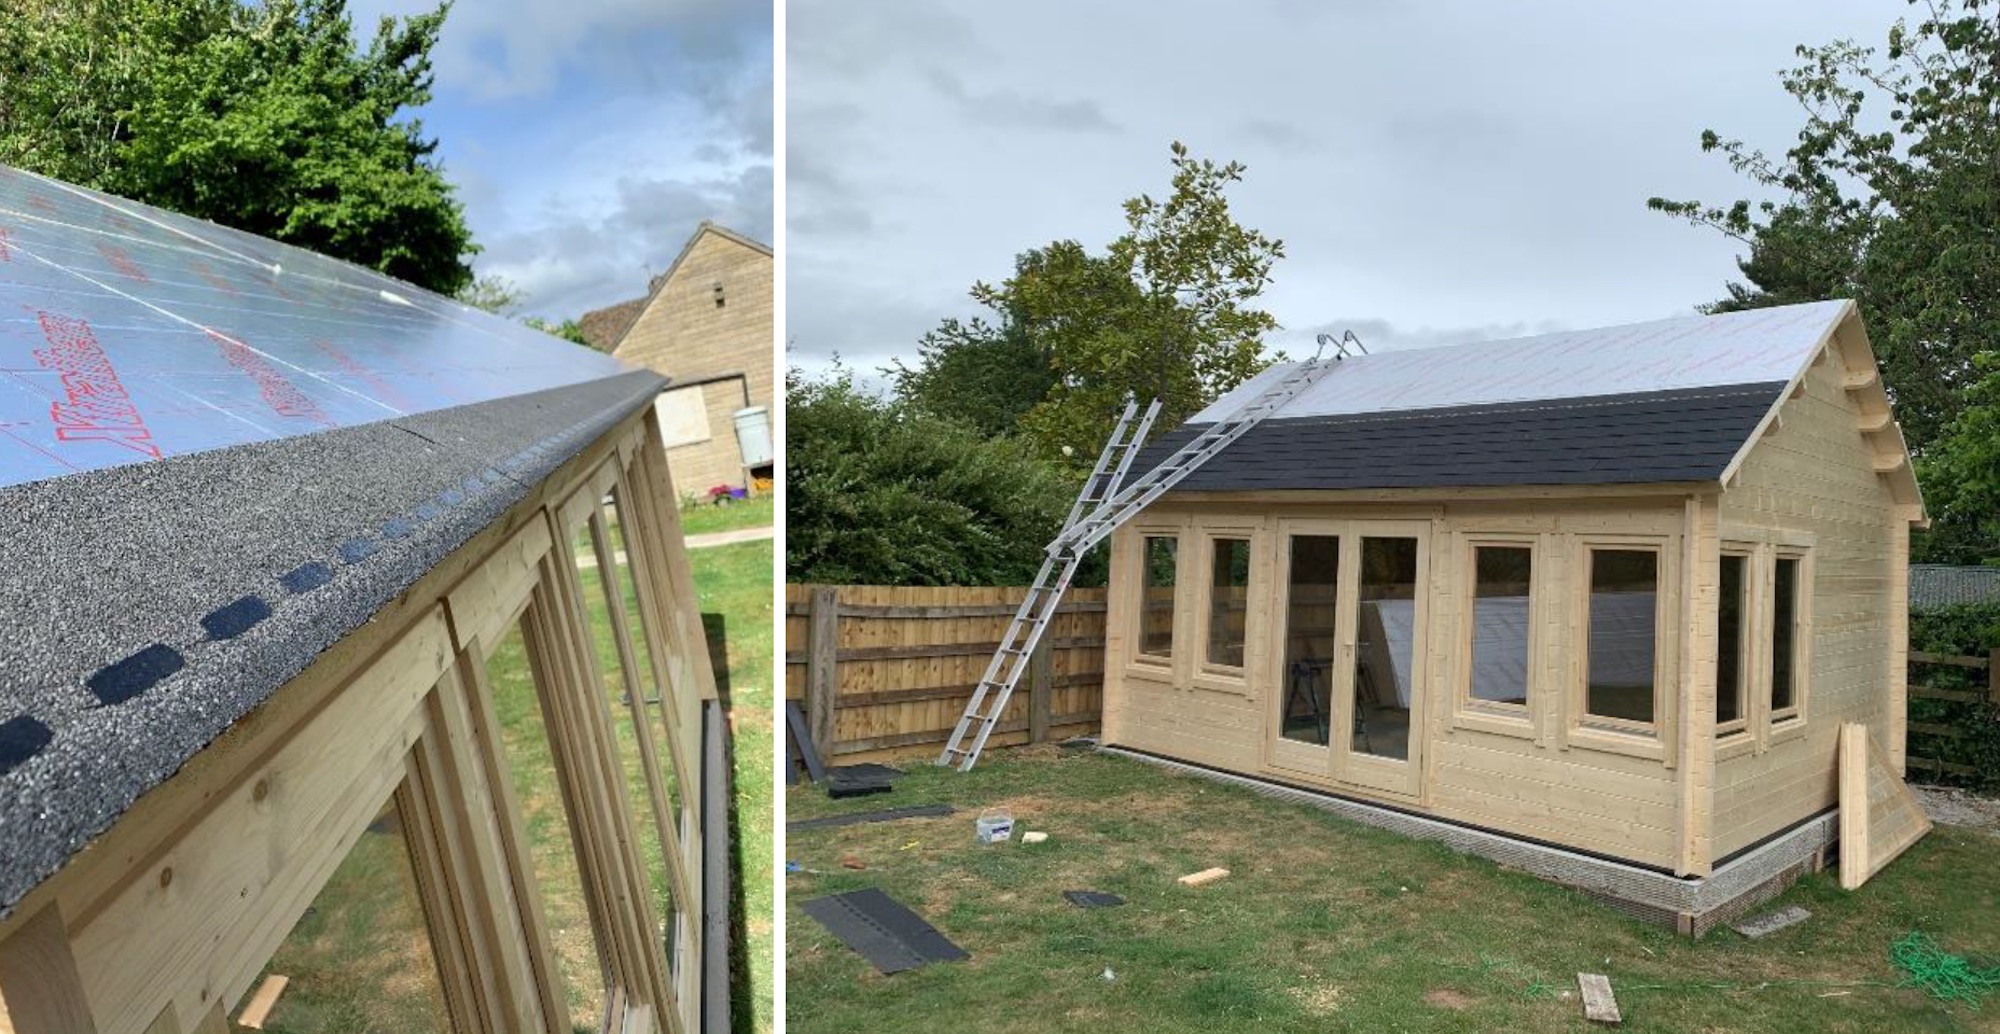
The Roof of the Clockhouse
What’s the best way to describe installing the roof? Real hard graft! Simple as that. The Clock House has approximately 120 roof boards. I put 2 nails in each purlin per board. That’s 1200 nails! If you are not used to this sort of work, and I am not anymore, it’s just hard going and very laborious. I had a ladder with a roof hook which was ok but I’ve lost count of the number of times I went up and down that, even with help from #1 son! I did consider hiring a nail gun, but decided not to as that would add an element of rushing to the job, hence more likely to make a mistake. It eventually took a full day to complete nailing the roof boards.
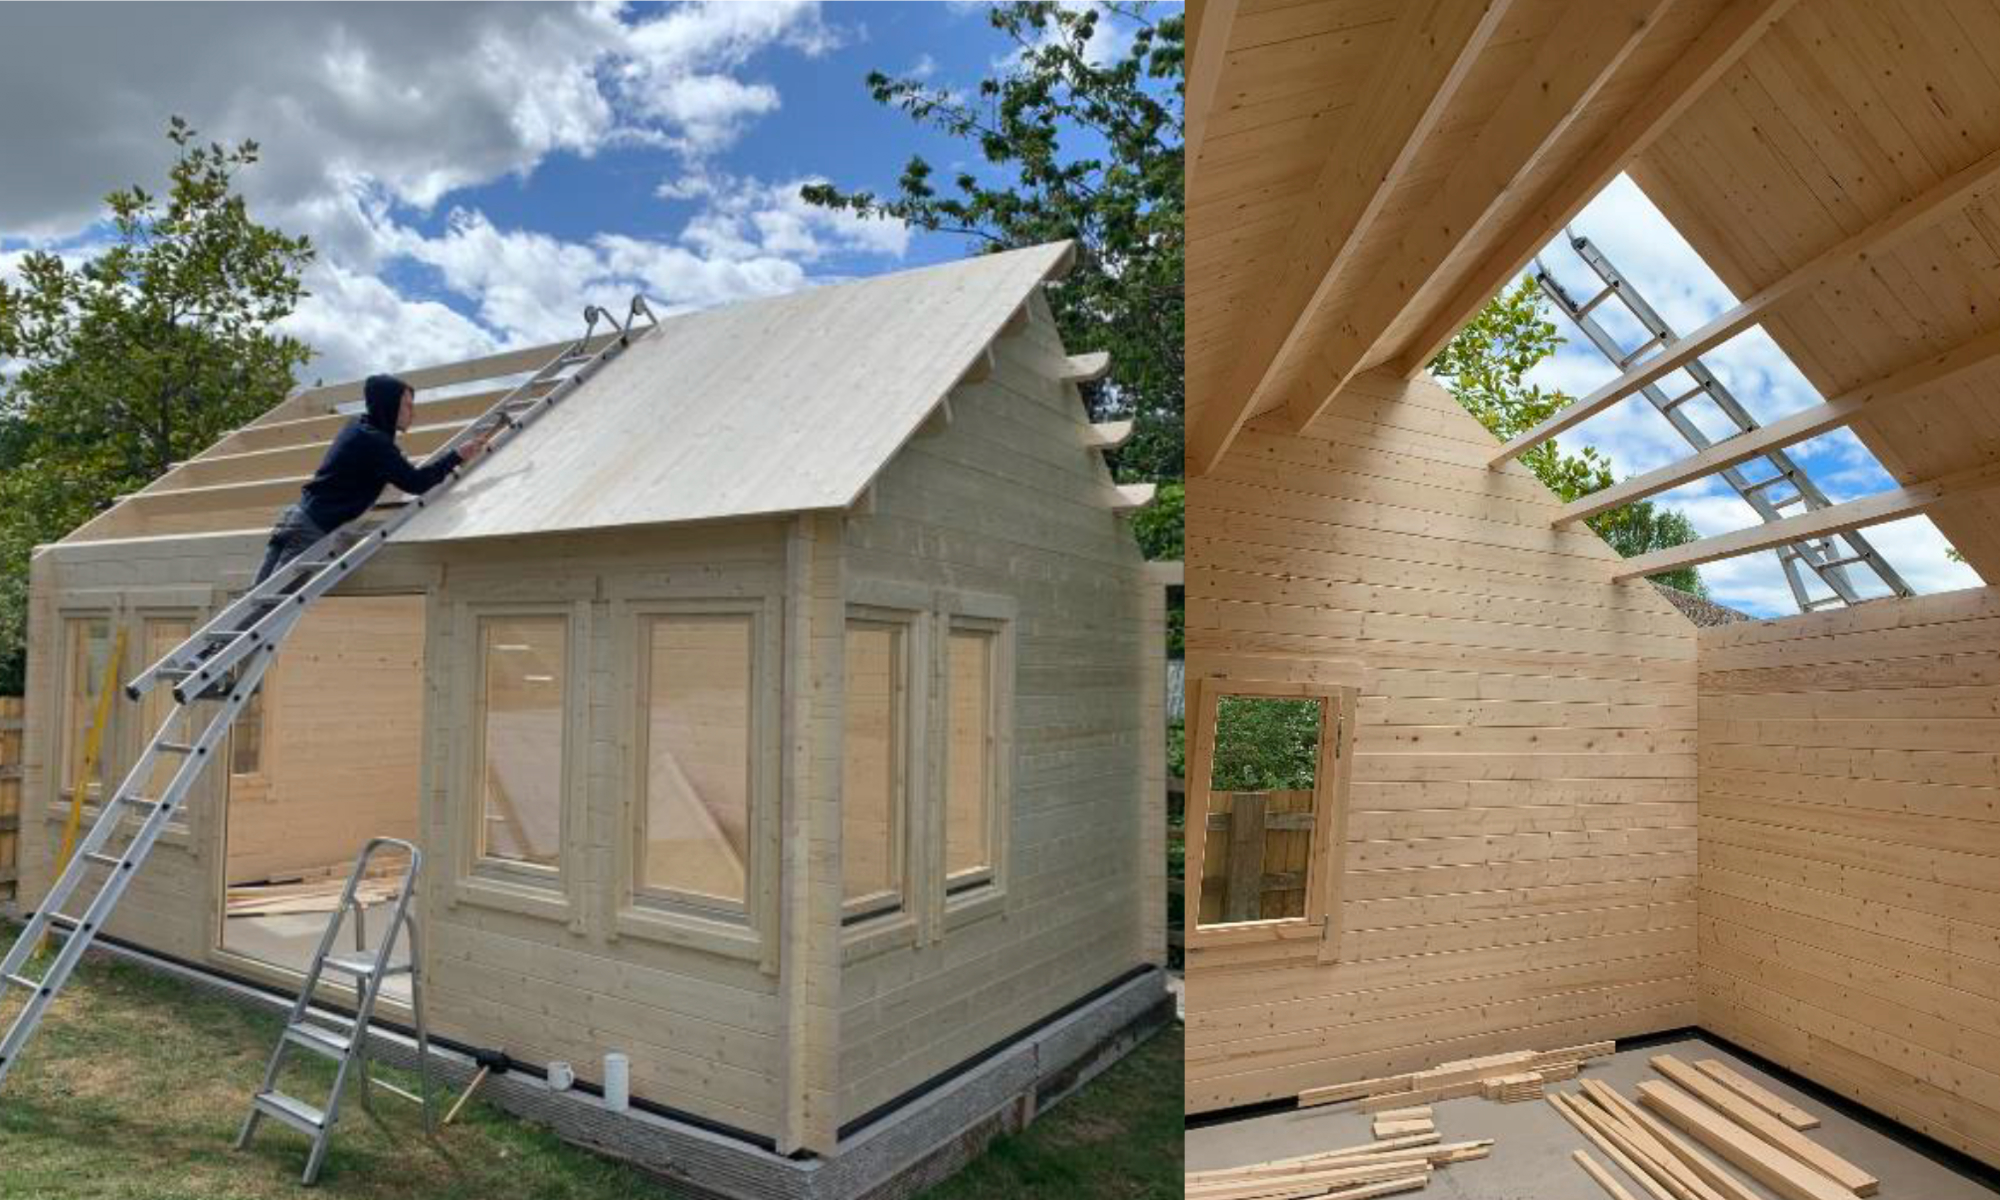
#1 Son giving me a break nailing the roof boards. The ladder angle looks awful! I think that’s just a photographic effect!
Insulation Boards
Now for the insulation board and the shingles. This was the most worrying part of the job for me. I’d never laid shingles before and was a little anxious that it would look horrible and I’d be stuck with it for the next 10 years. Lots of internet research that evening and I felt prepared.
First up was the insulation boards. 50mm boards from BuildBase as recommended by my builder friend. Easy job. I purchased 5kg of 65mm clout nails also from BuildBase. To help retain and conceal the boards I used the long planks that made up the pallets the cabin was delivered on! A trim up and a light sanding and they were perfect. My overall plan was that everything other than the main construction and essentials was to be re-cycled so this was a great start!
Insulation boards up and nailed in place. 1 on each corner and 1 in the centre of each board. Note the pallet plank sits nicely to retain the insulation boards.
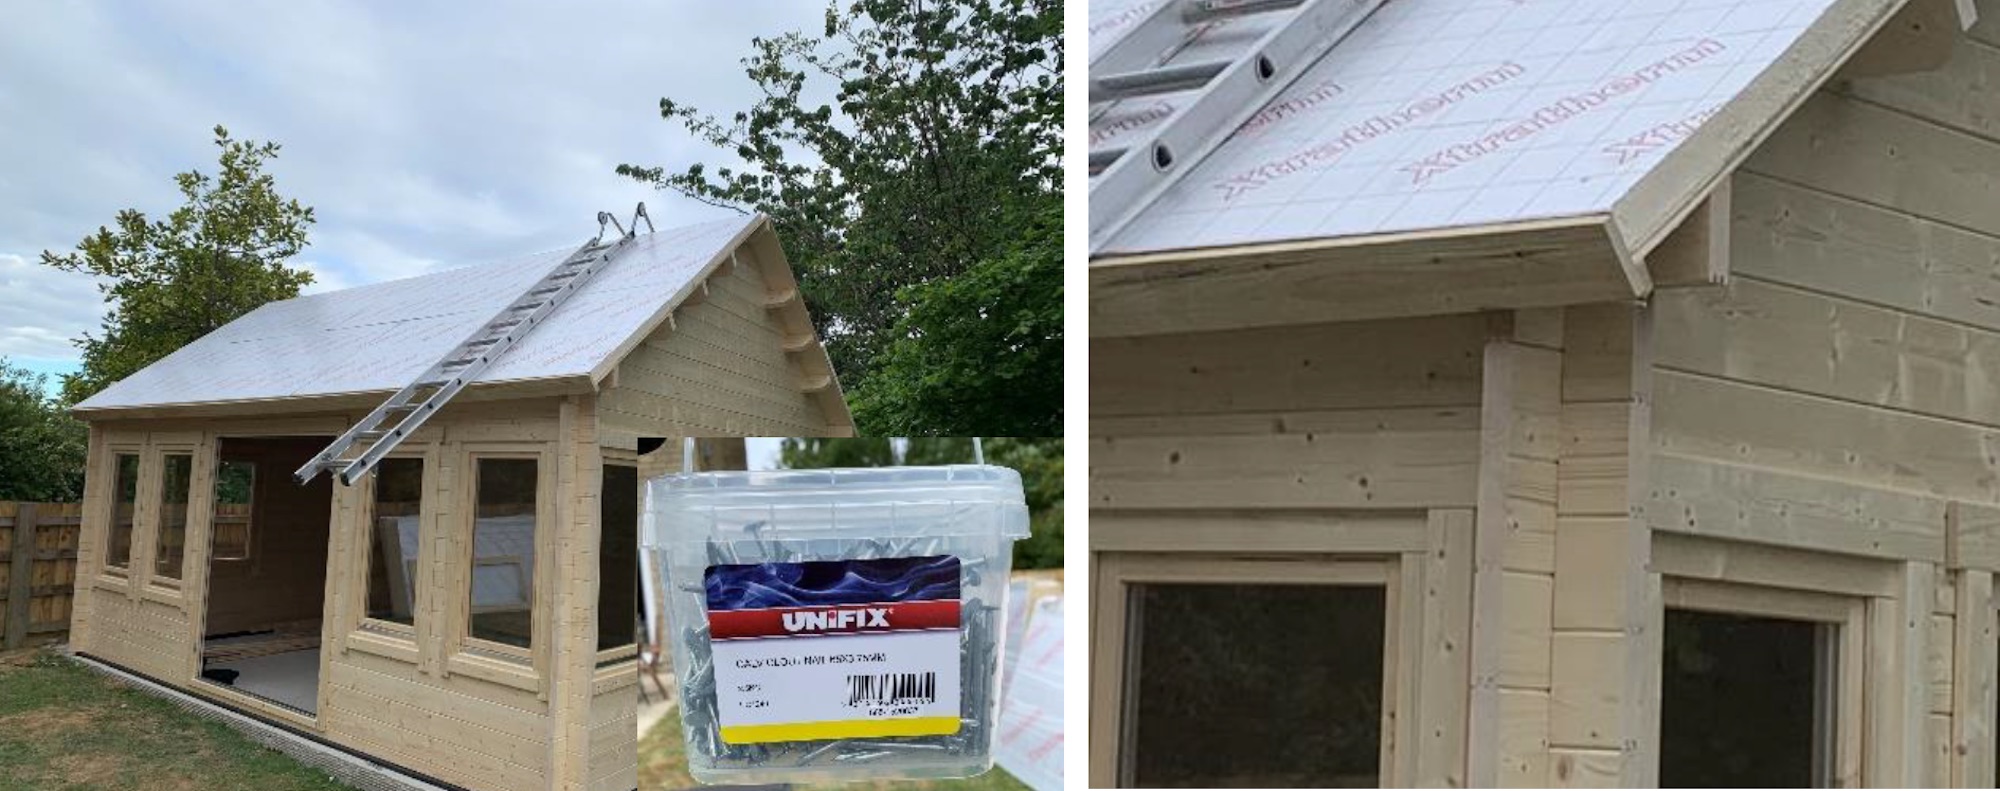
Shingles
Now for the shingles. First job was to mark a line for the first row. I used a string line and spent time getting it spot on. The first row went up and looked really good. I found a really good YouTube video from IKO which showed it done really nicely. From there on, it was just a matter of taking my time over each one.
Once all the shingles were up I decided on a capping run to really finish it off. Again lots on YouTube here. I looked at lots of pics on the Tuin website and noticed that very few had done this. I think it looks great as once finished you cannot see any nails on the whole roof. Very pro!
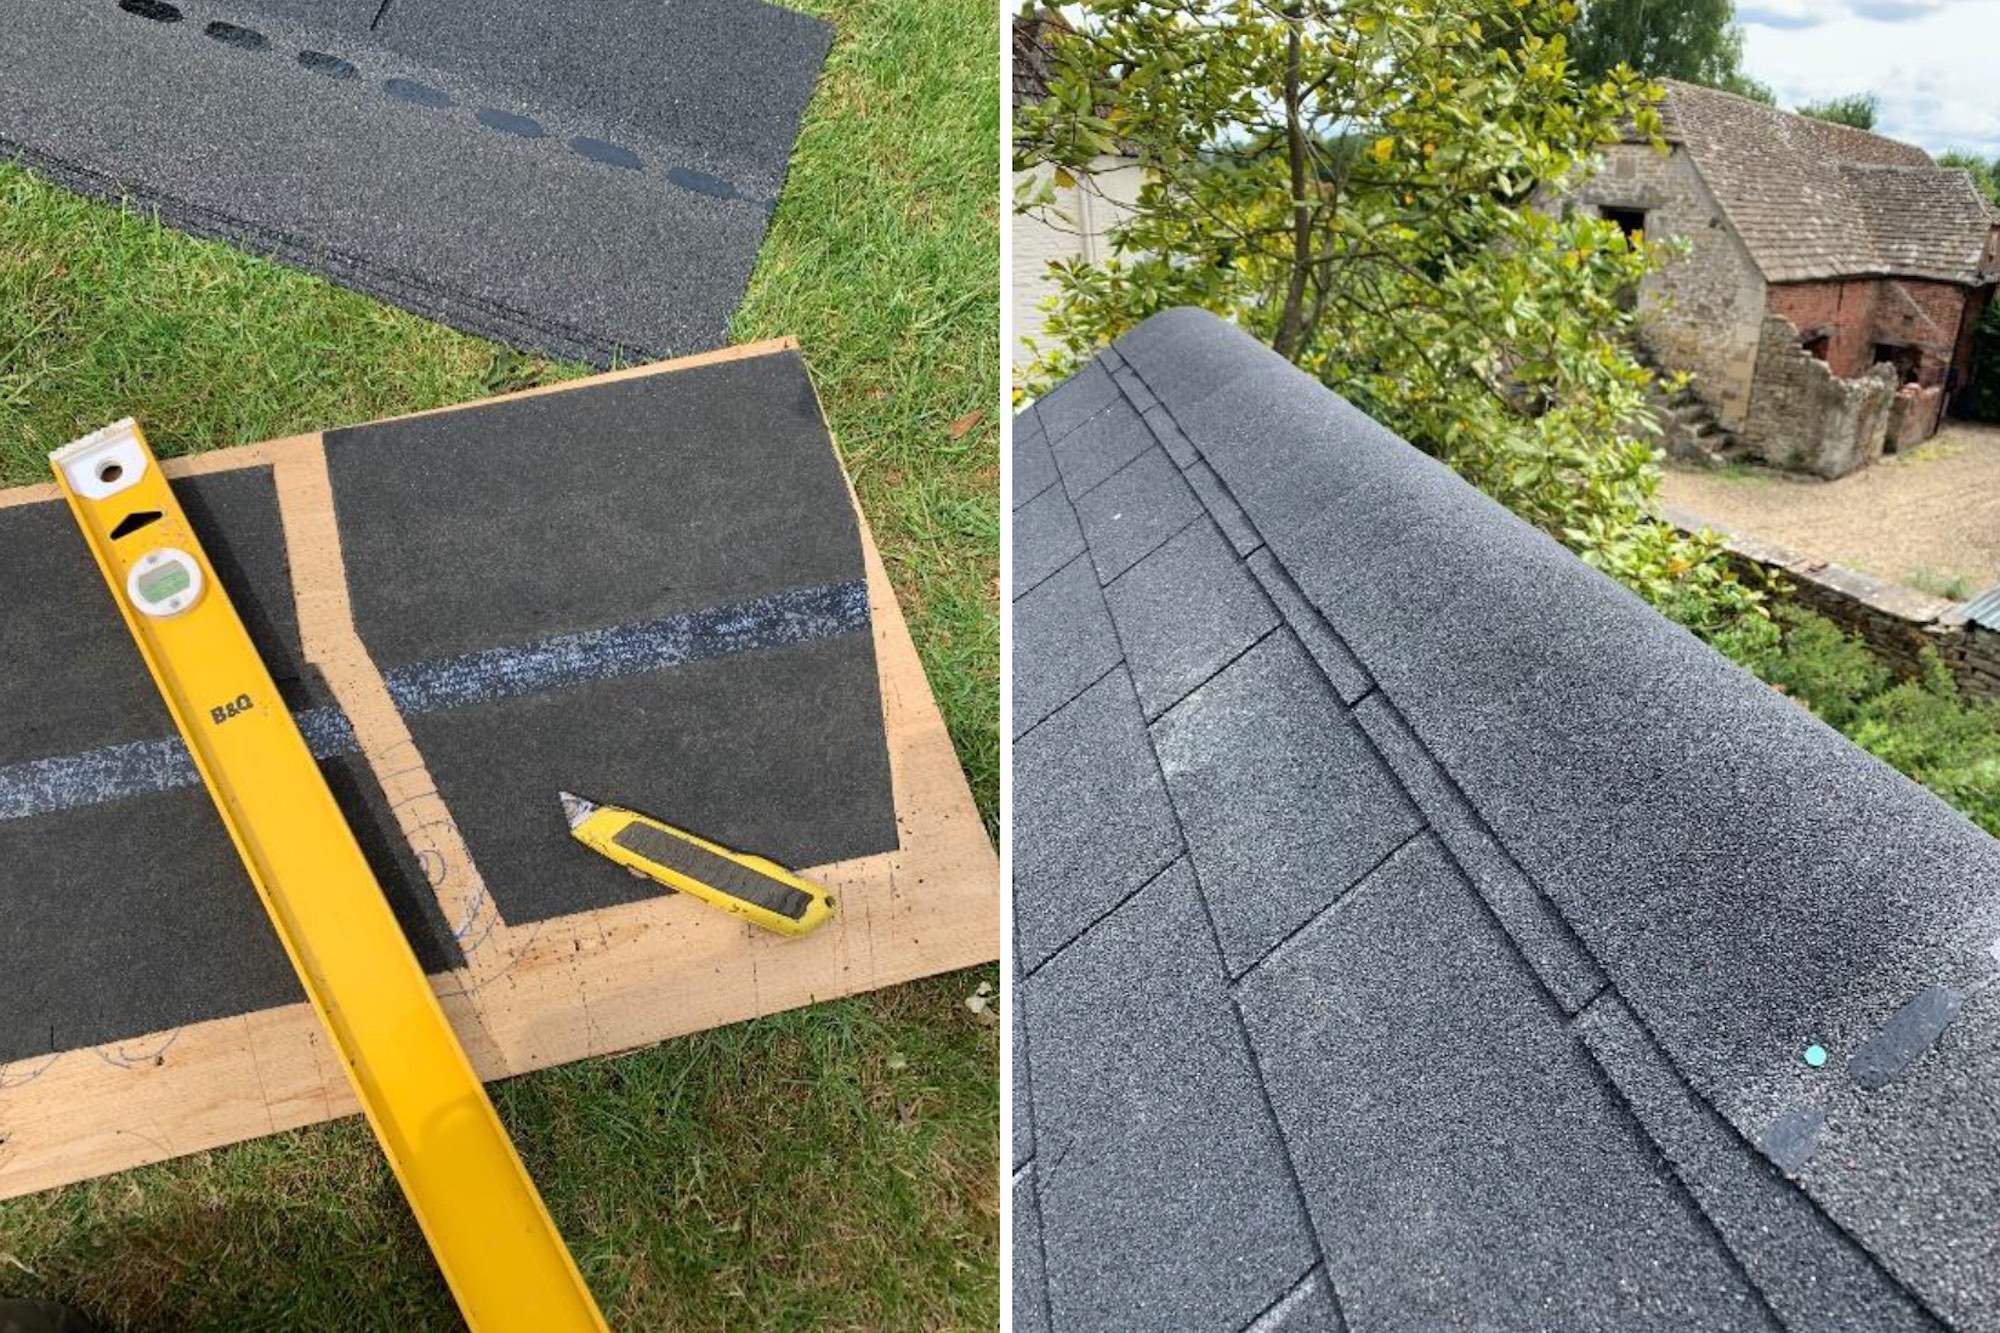
Cutting the capping shingles was very straightforward. The finished product looks really neat and adds additional protection.
It took me a full 1 ½ days to complete shingles; 2 ½ days for the roof in total. The main challenge was the pitch of the roof is at such an angle that I couldn’t stack anything up there easily. Hard graft and time consuming but I was delighted with the finish.
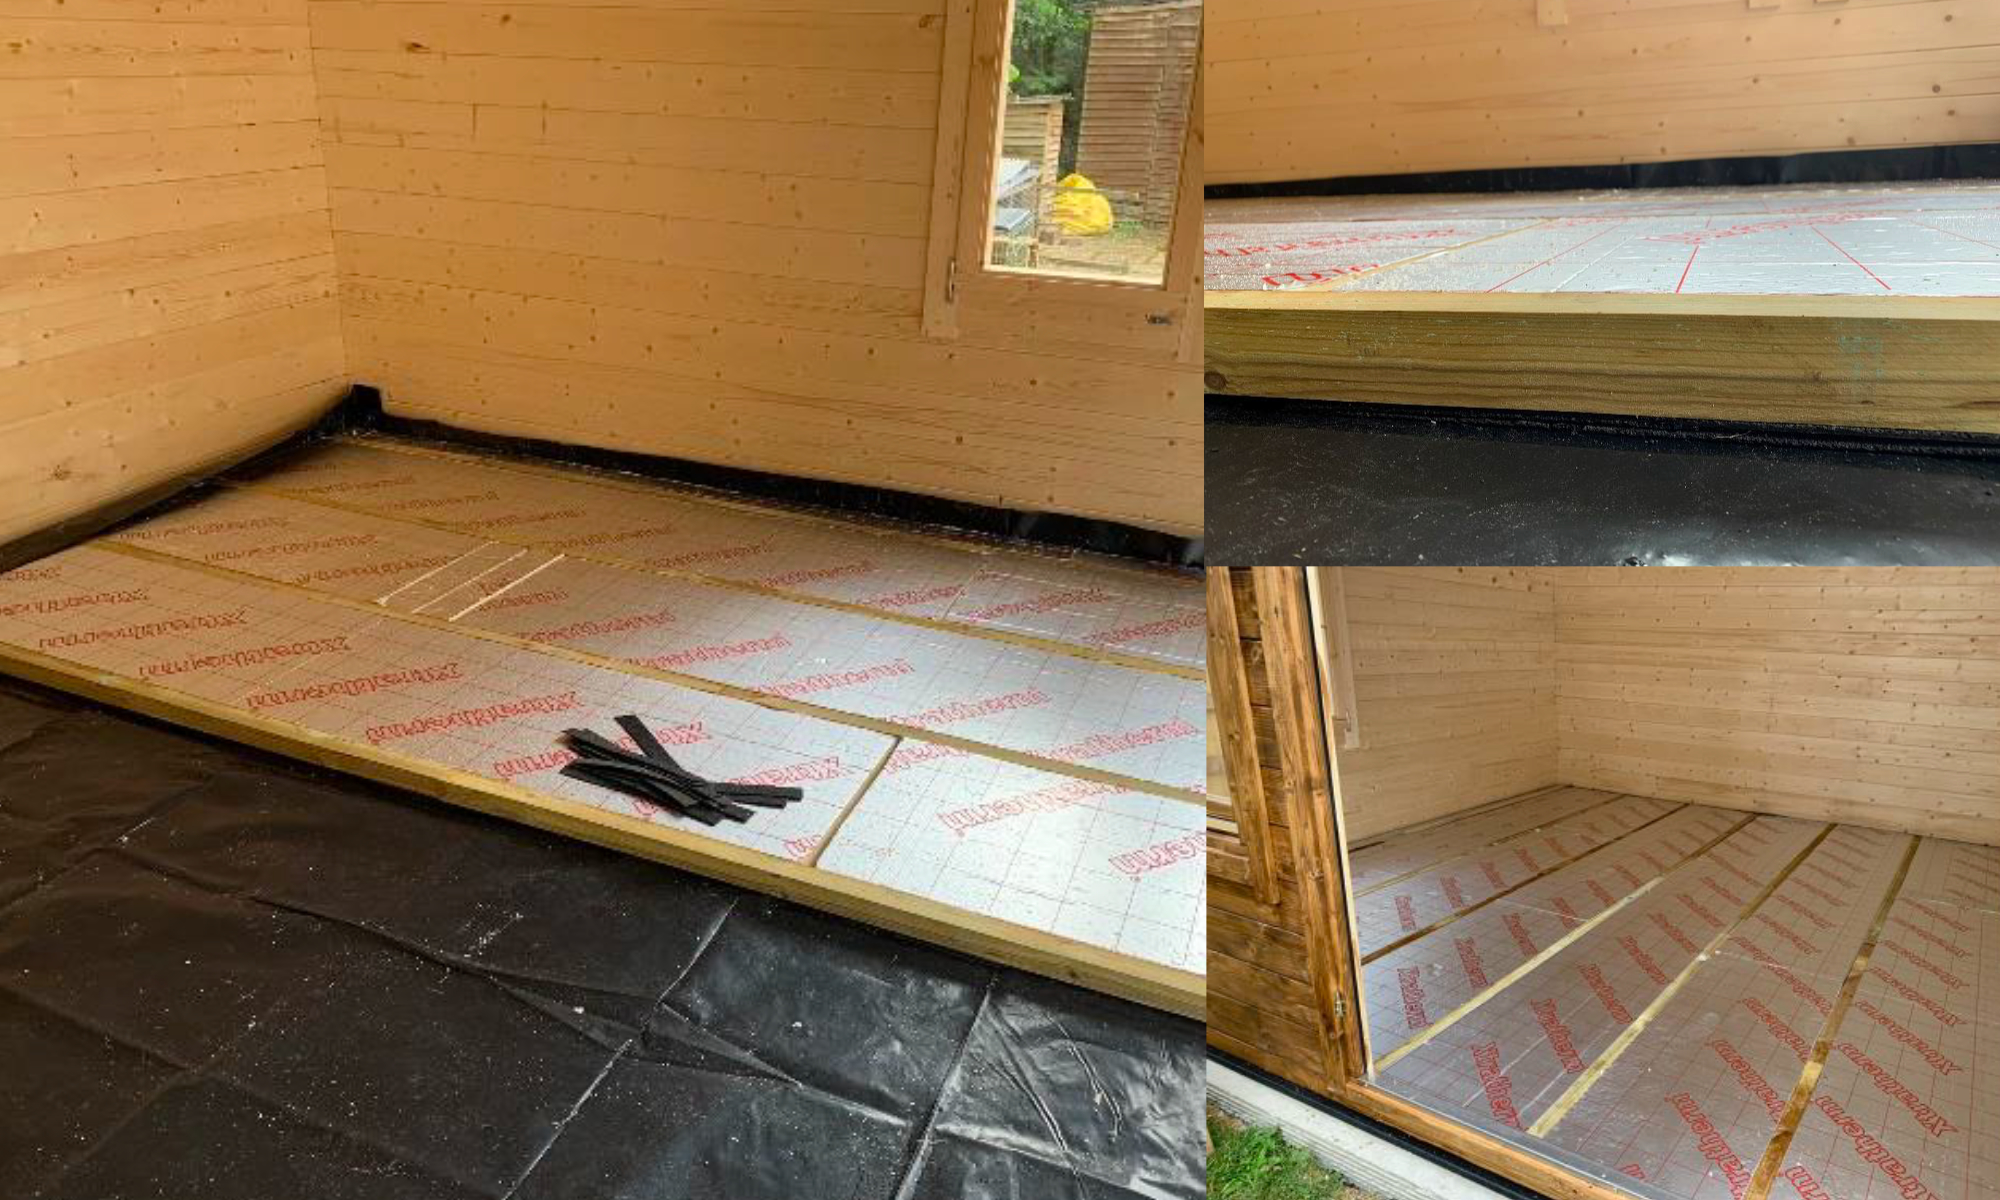
The Floor of the Clockhouse
Another nailing epic begins! At least I was not working at height. First job was to lay out the floor joists and cut the insulation to fit. This is where the nice flat concrete base was beginning to pay dividends. I’d ordered the 26mm thick flooring from Tuin and for some reason (I think I saw it on a blog somewhere) I was expecting the floor joists to be 70mm. It turned up with the standard joists at 45mm so I had a small problem to overcome as my insulation boards were 50mm thick. To over come this and in the spirit of recycling I decided to cut shims from the shingle offcuts to raise the joists by the required amount. Perfect.
DPM – Damp Proof Membrane, Floor Joists & Insulation
First the damp proof membrane went down. A few quick calculations and I worked out that by running the joists front to back at 500mm spacing’s I’d get a perfectly symmetrical layout with efficient use of the insulation boards. Although Tuin recommend 400mm minimum, in my opinion 500mm is ample for 25mm thick floorboards.
Floor Boards
Final calculation for the floor was the length of the boards. I wanted a nice symmetrical look so I calculated 3 lengths to align with the joist spacing and leave 10mm clearance around the perimeter. This resulted in the joists being symmetrical to the building when laid staggered. I’ve tried to show this in the following pics. The cuts align beautifully with the door opening to give a really nice finish. I really took my time nailing the boards, aligning the nails to add to the finish. I was well pleased with the result!
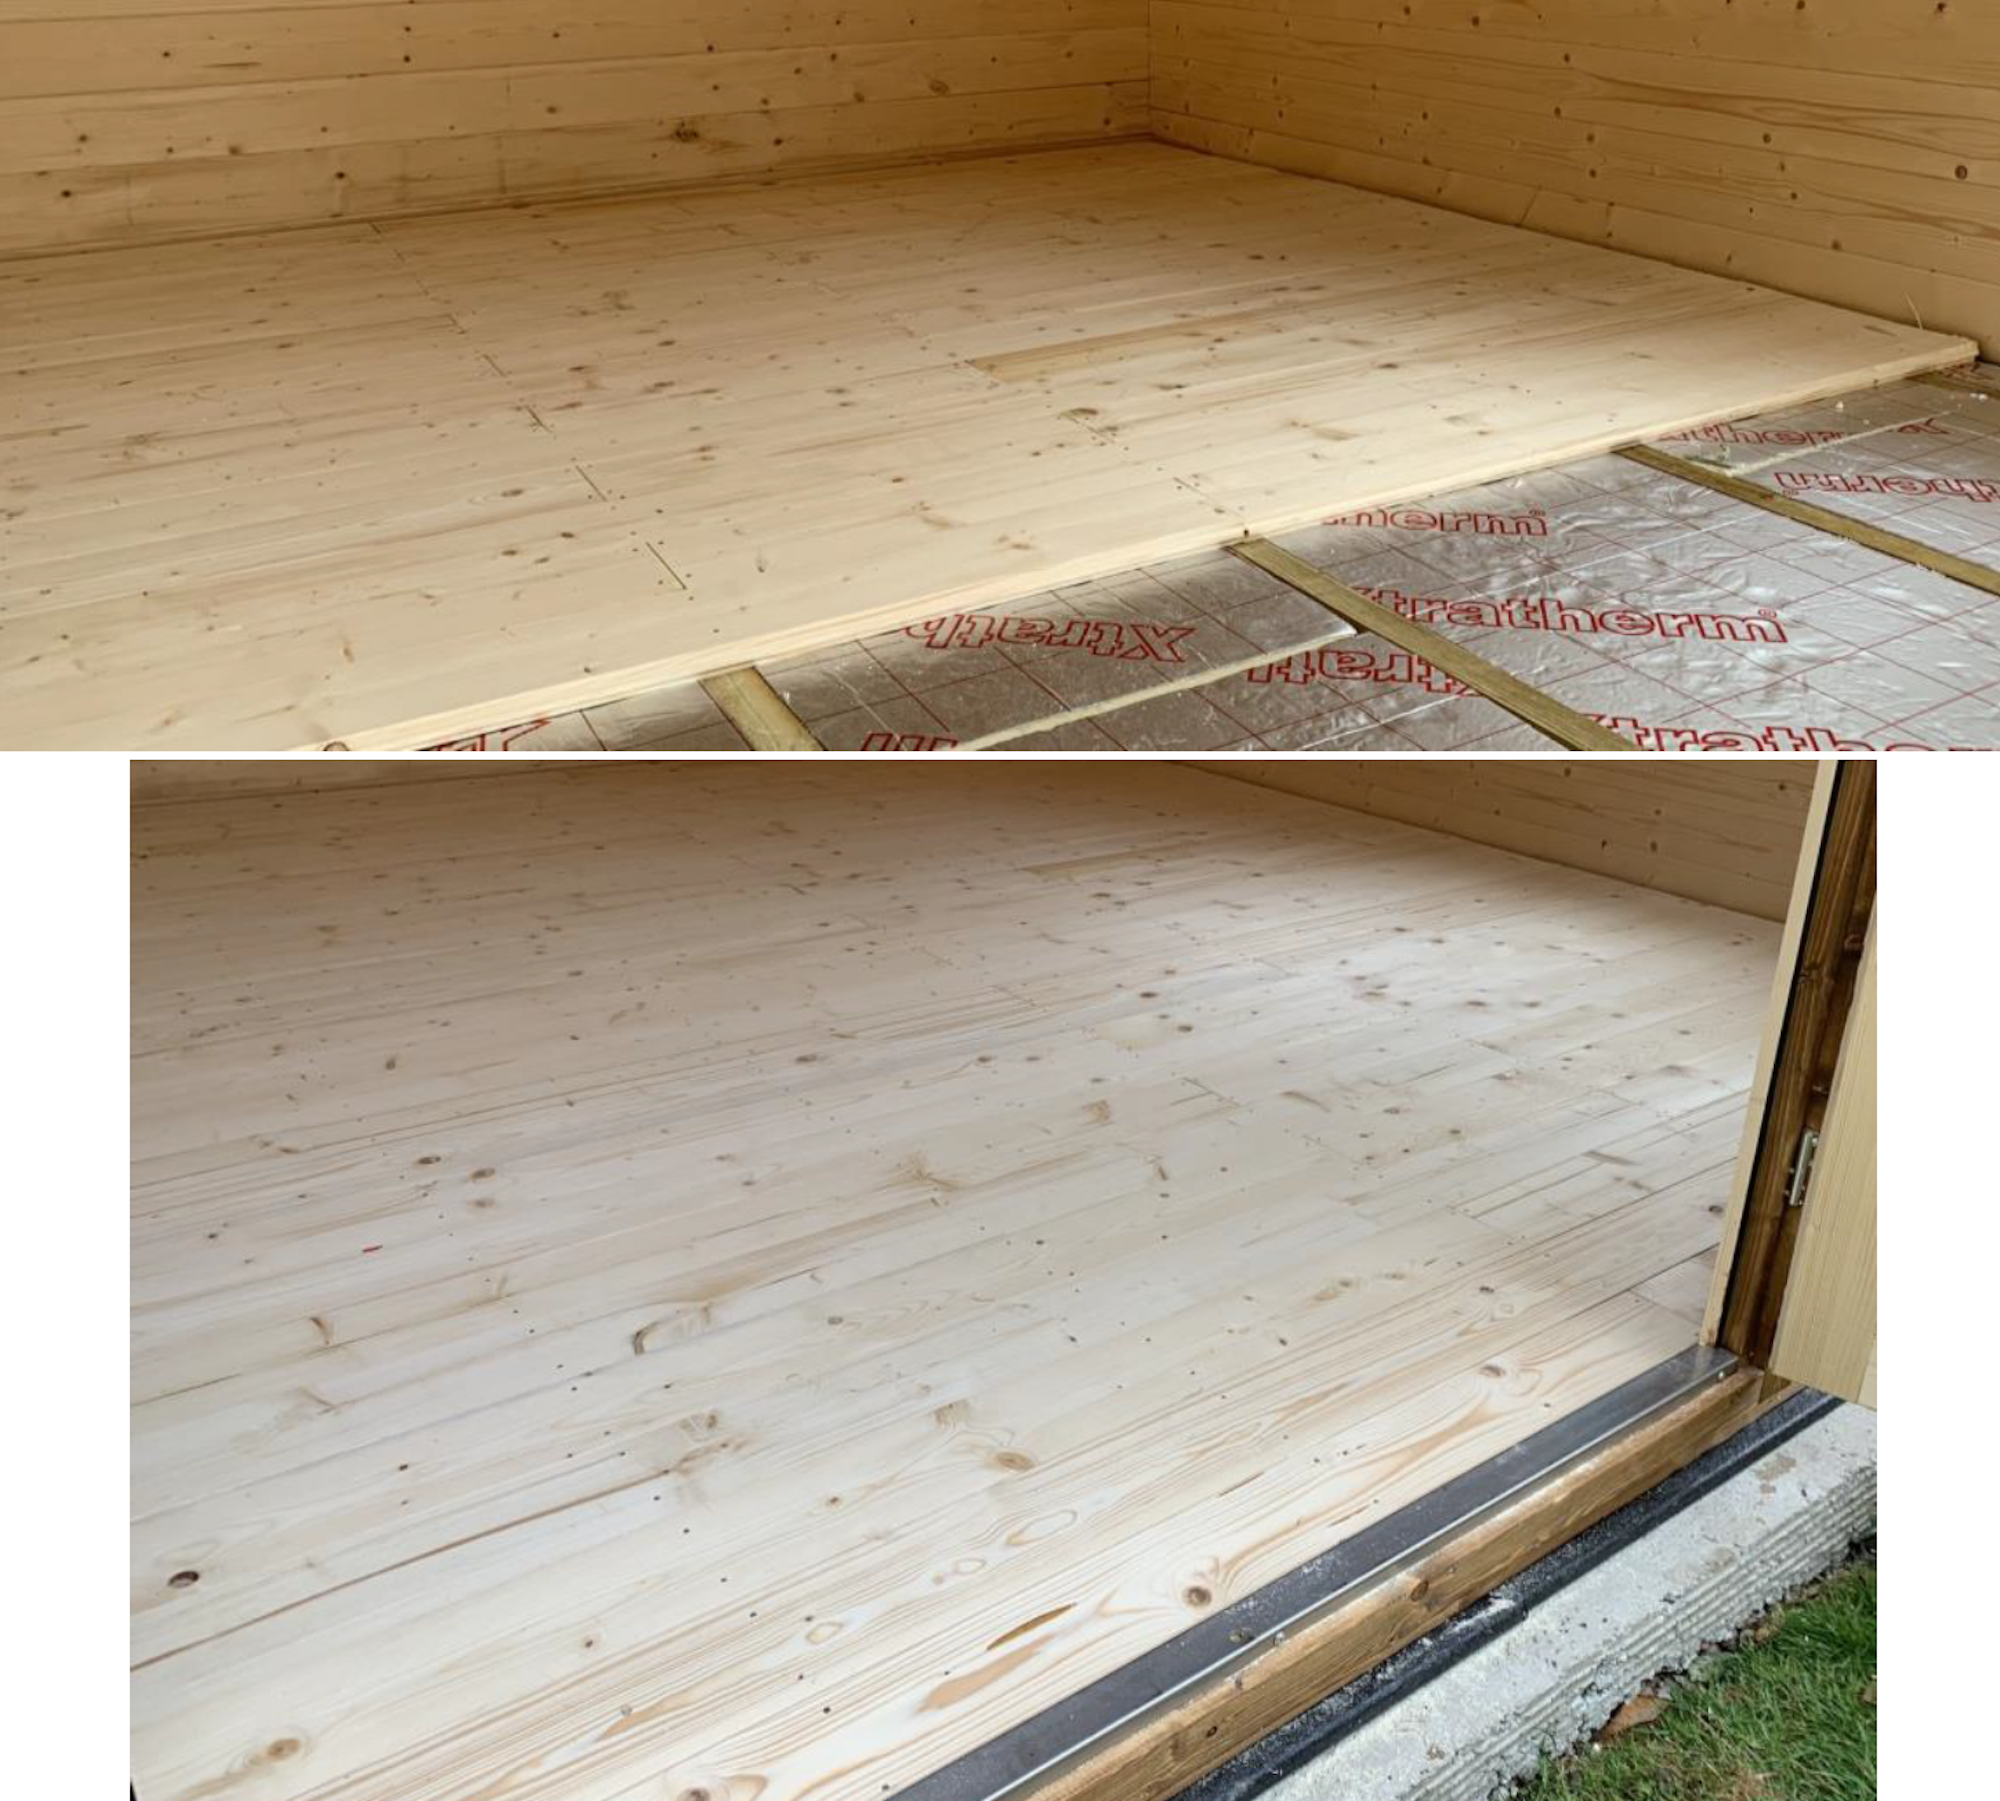
After pinning the beading around the edges, I was done. I decided to lay the beading flat and used a mitre joint. The floor in total took 1 complete day.
Final task was to seal between the base and the foundation beams as added protection.
The electrics and network
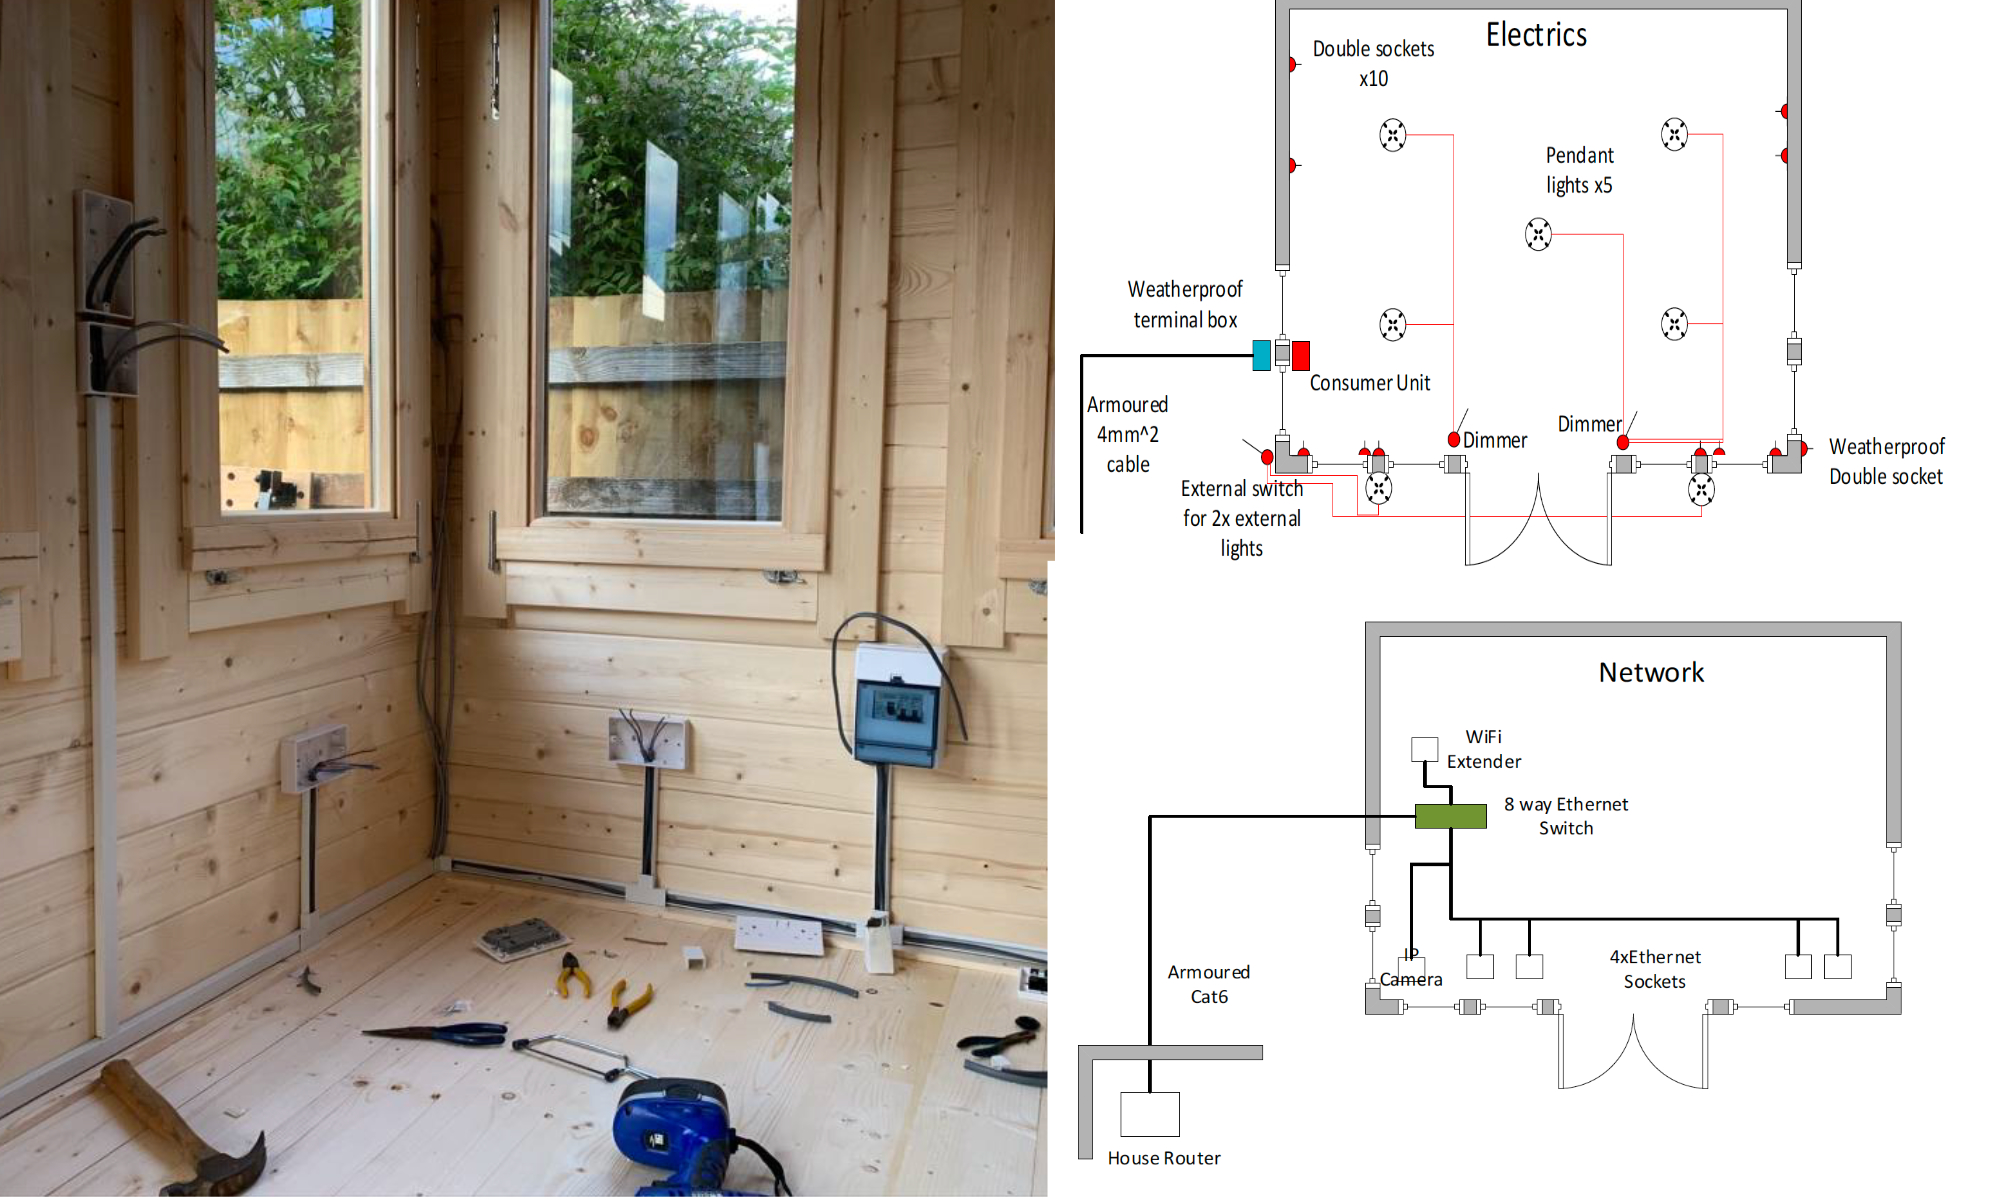
Now I was structurally sound and waterproof I could begin the electrics and internet network. I sketched out my plans and had ordered the components so was ready to go. It’s really important to plan this layout carefully.
Finishing off
The last few jobs before kitting out and furnishing were treatment of the wood and fitting the Clock House feature. Regarding the treatment, we opted for the Embadecor in Walnut. Three coats on the outside. Looks lovely as you can see.
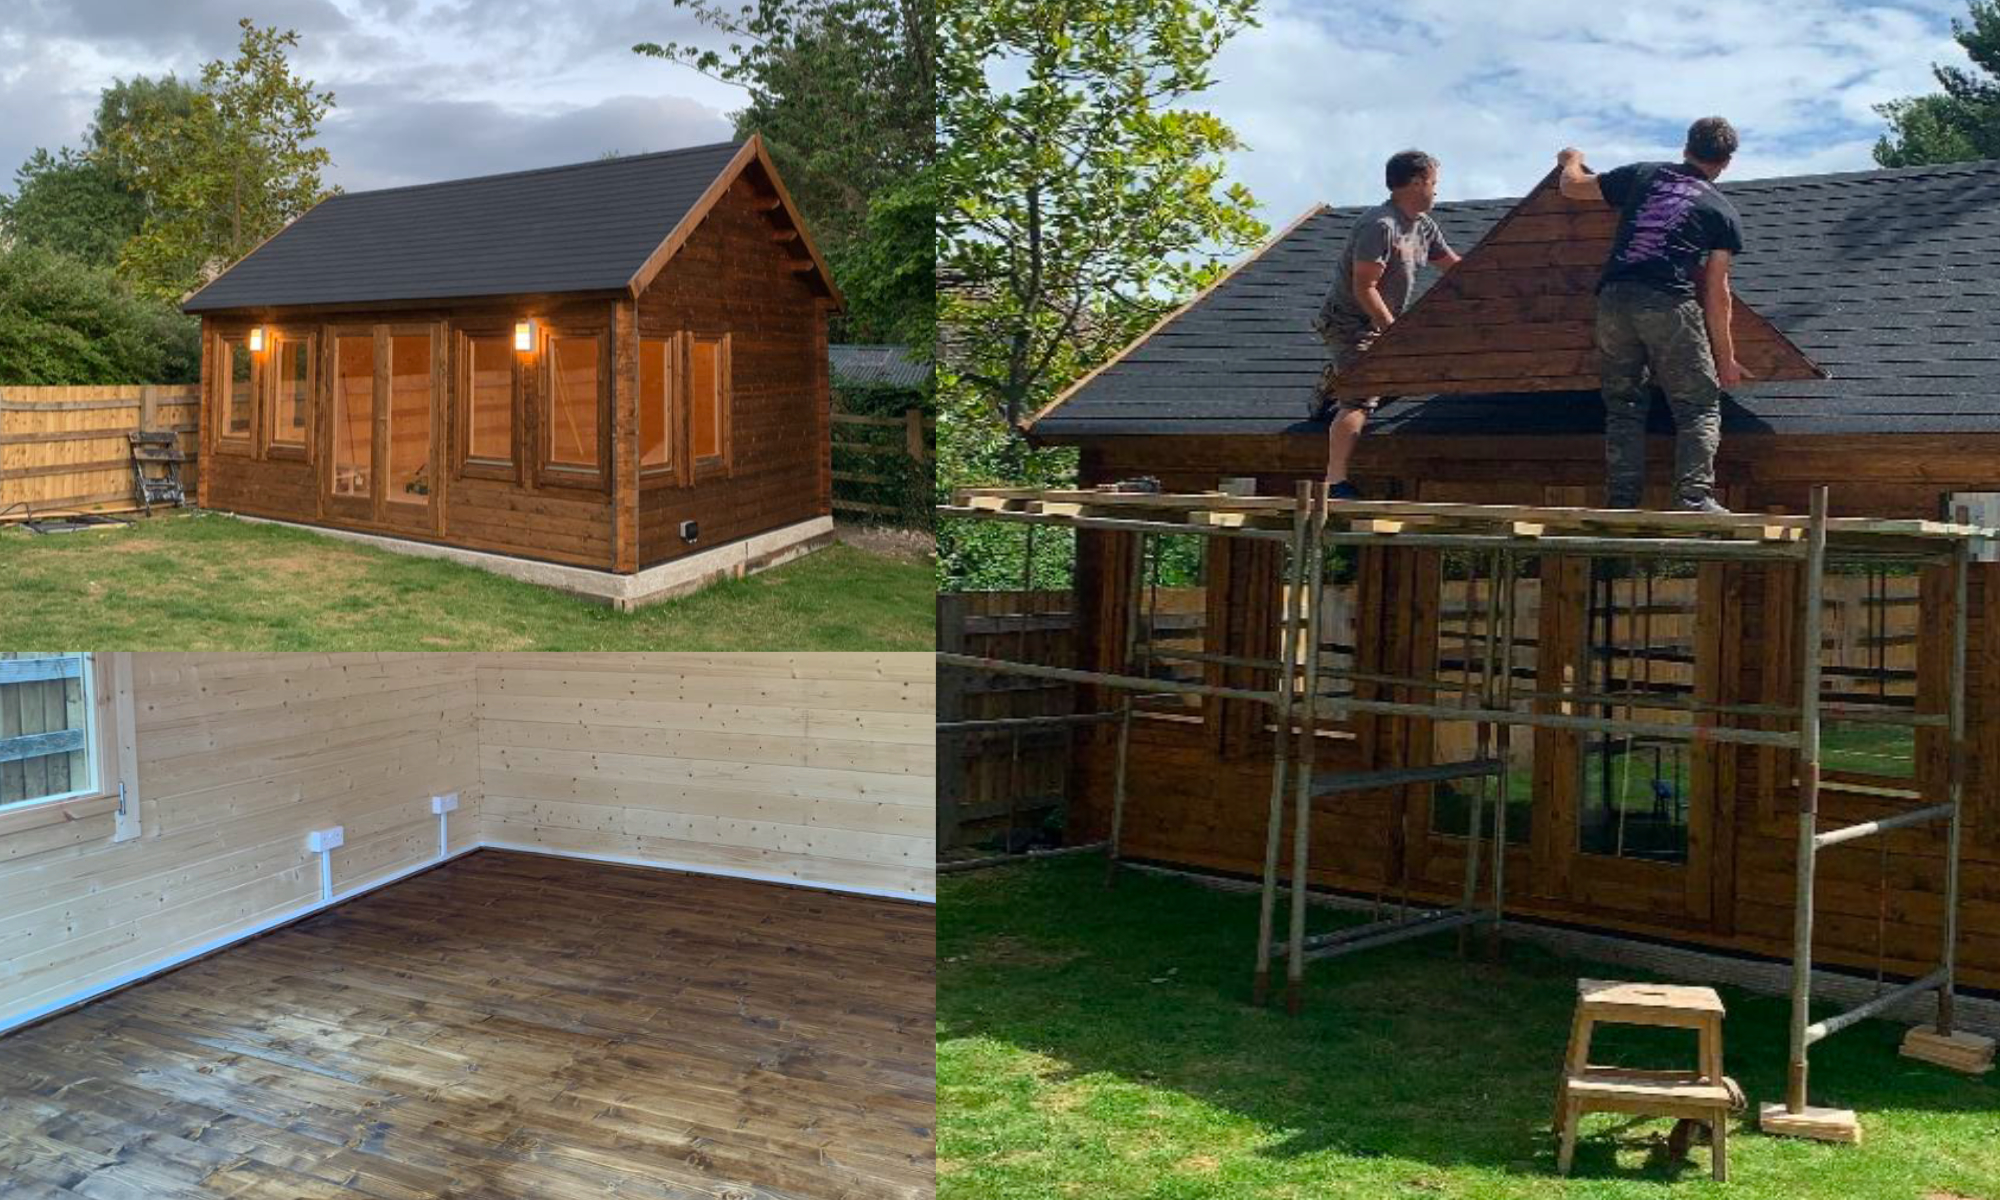
Scaffold is essential to install the Clock House feature. I borrowed one from my local builder friend.
Finally the Clock House feature. As there were no instructions for this, I assembled it on the ground and installed it using scaffolding. Far too heavy for ladders! We fixed it with 3 x 100mm screws at the front just under the eaves on the outside of the cabin, and 1x100m screw at the pack point from the inside of the cabin. This is a really tricky task requiring very careful placement and measurement.
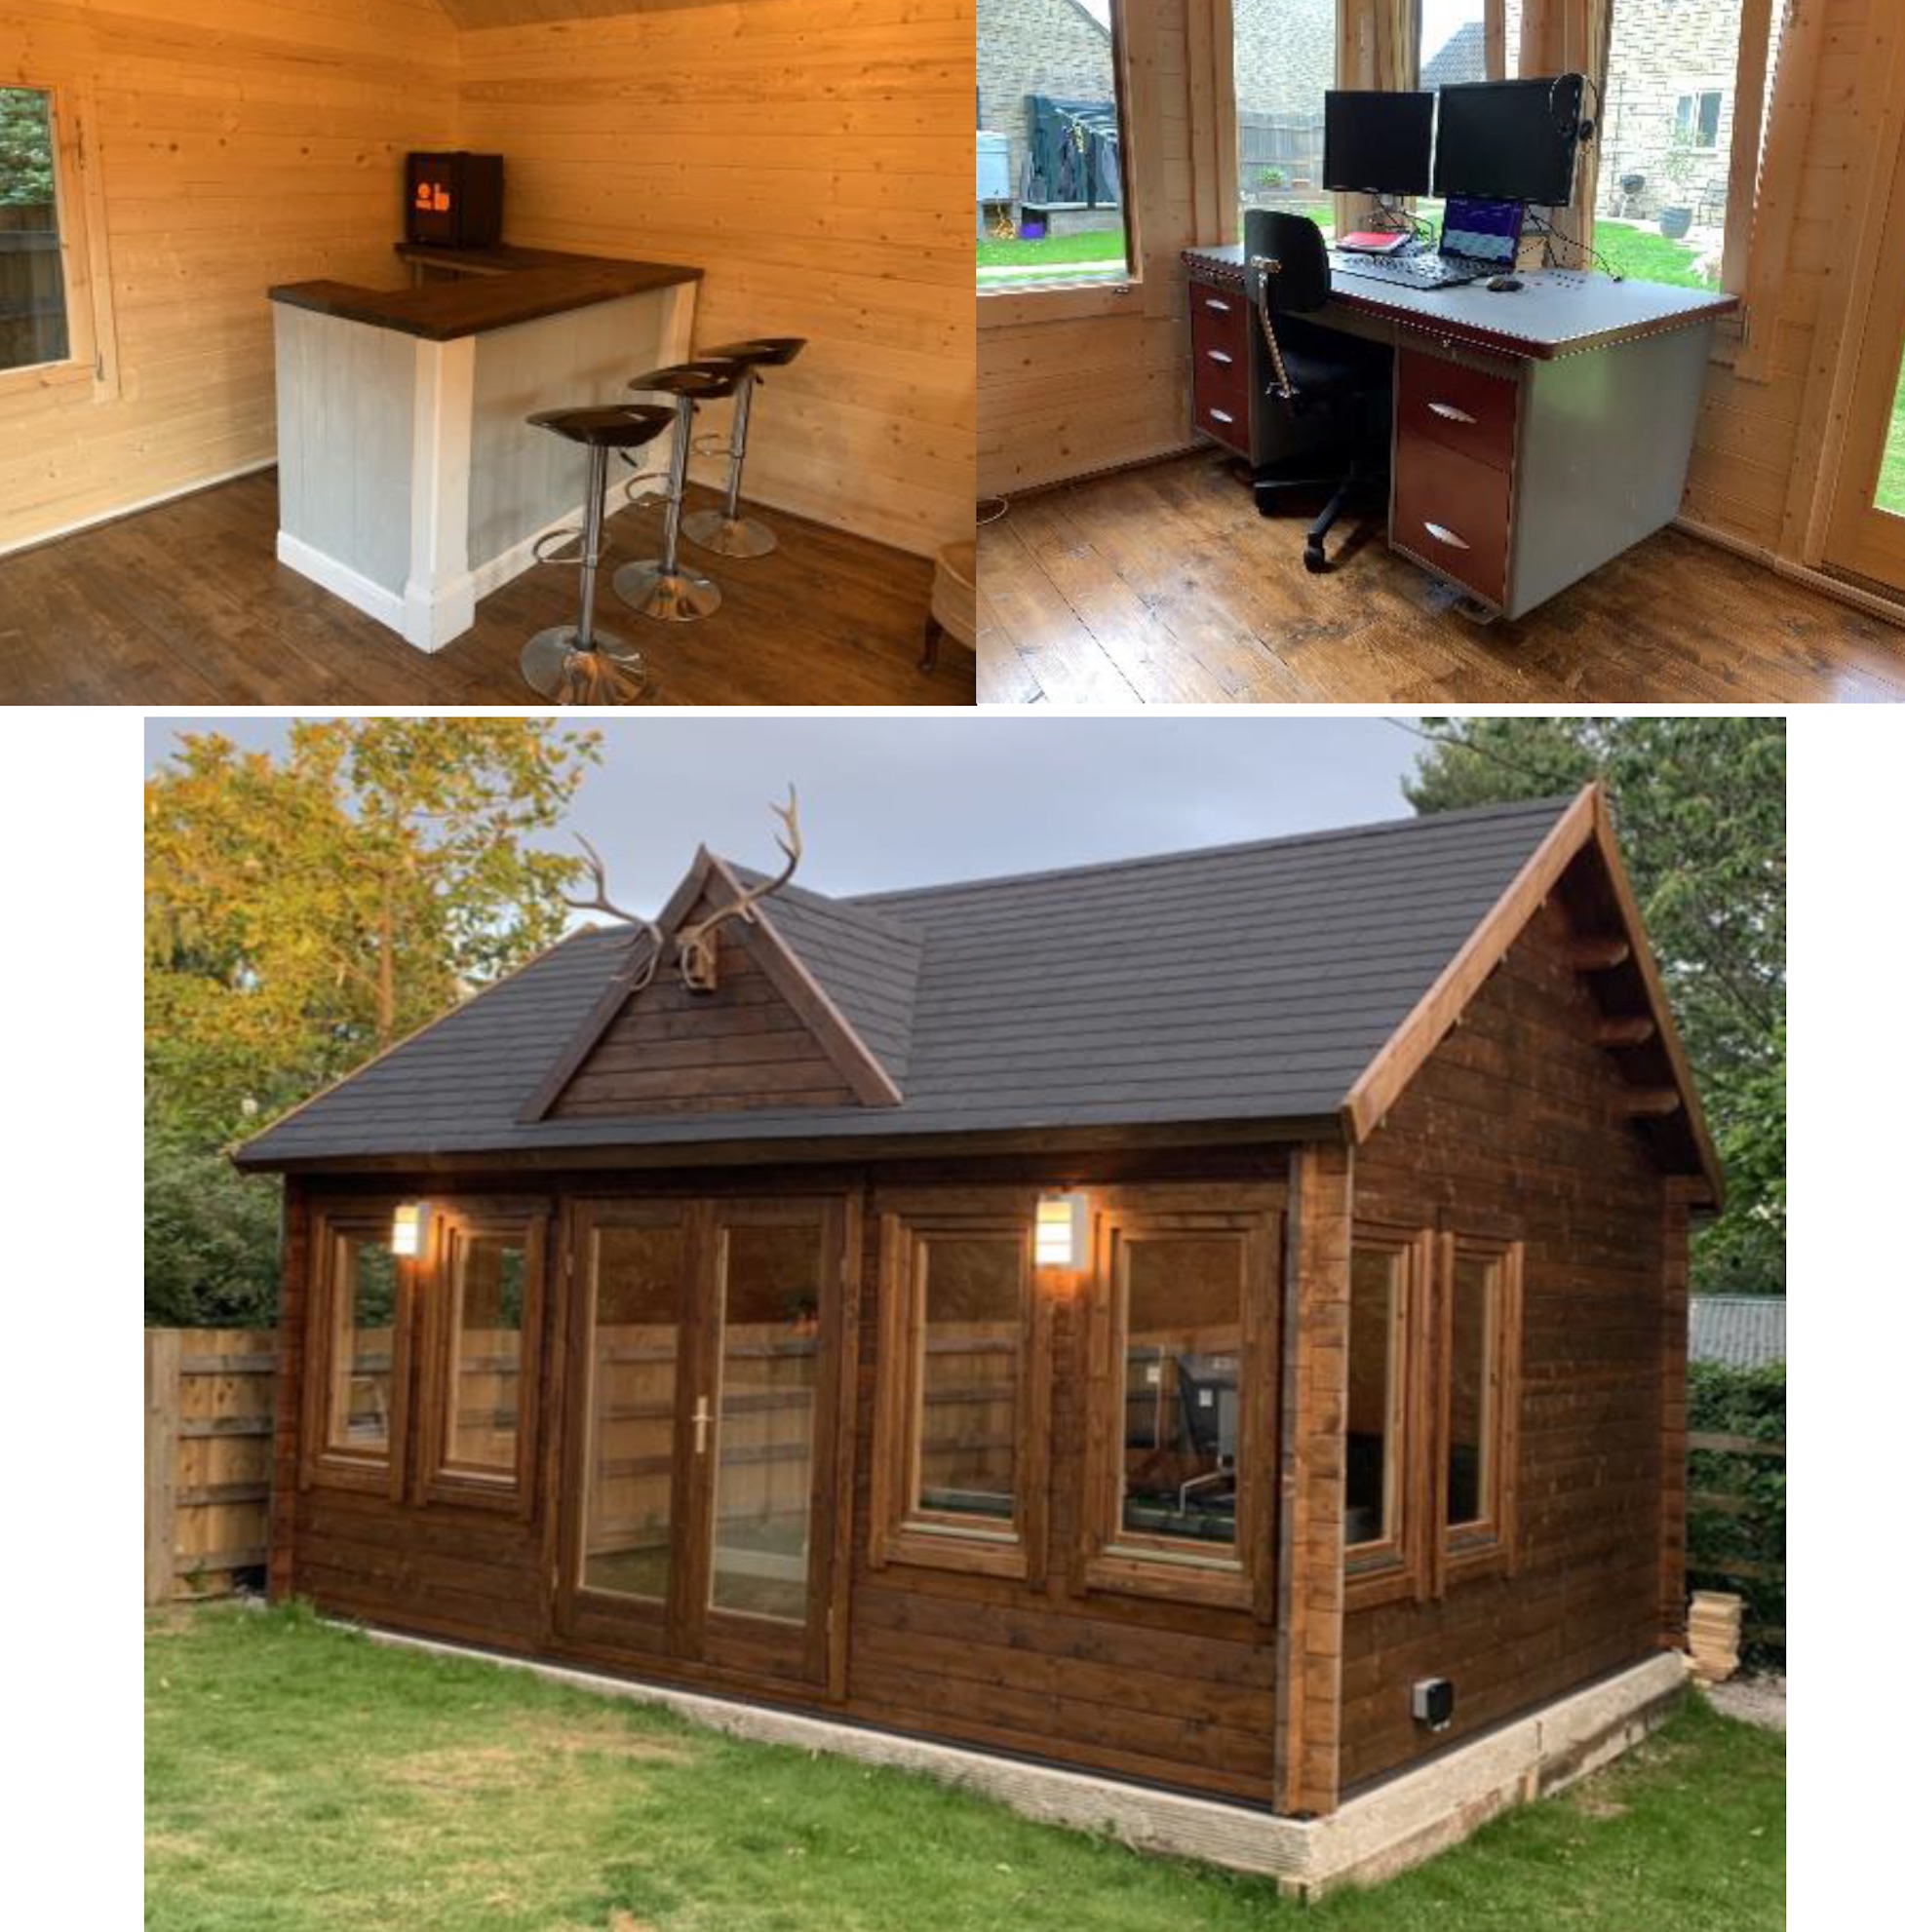
At the time of writing I’m 3 weeks in to the project. I’ve been working from home in the cabin for a whole week now and it’s brilliant. I’ve spent every spare hour on this project but it’s worth it. My first desk is in and I’m constructing the bar from left over floor joists, the delivery pallets and some wood I salved from a recycling yard. A second desk, a sofa, TV and a few pictures and we’re there! But before all that we are going to paint the interior with Embalan timber paint which Tuin kindly swapped for us for the two tins of walnut stain we didn’t use.
Conclusions
The quality of the Tuin product is exceptional, as is the customer service. I would thoroughly recommend them.
The Clock House is quite a complicated build. The roof and Clock House feature do add additional levels of complexity so you might wish to consider this if you are self-building. That said, I managed it by careful planning and taking my time.
The layout plans I drew up were invaluable. Although I tweaked the ideas as the build progressed, it’s vital you have a basis to start from.
For me, the concrete base is a must for a cabin of this size. Every day I look at it I’m glad I went down this route. I personally could not imagine this log cabin in a similar setting on any other base type.
Overall, I don’t think you can beat this project for value for money. The utility and space it has provided the family is fantastic.
Thank you so much to Mr M for this extremely in depth overview of the installation process for his Clockhouse Log Cabin. A real transformation providing multiple uses within this Log Cabin, certainly sounds like a hit for all members of the family!
Interested in more reviews like Mr M’s? You can find more with a range of cabins at: Tuin Pictorial Customer Reviews.