


Introduction
I had a complaint recently about a warped log at the start of a customers log cabin build. I was sent these two pictures and a complaint email:
-
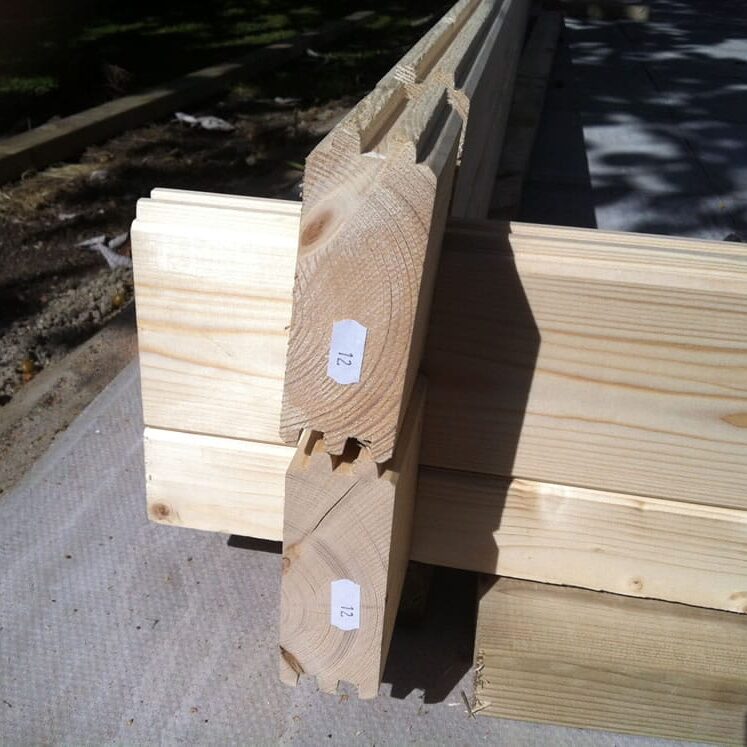
- A wall log had twisted slightly.
-
- Warp in a log cabin wall log which caused the lower log to lift up when unsecured.
His main complaint were the warped logs. I tried explaining that wood does twist sometimes, it cannot be helped by its very nature. This can sometimes happen especially when a cabin has been unpacked and then left for a while before install. It also happens just by the sun’s heat, making the wood dry and lose moisture quickly on one side. Rarely though is it a problem and it is very easy to overcome.
His second complaint was that the joints were too tight and that he didn’t have a hammer to hit the logs in. I explained that, yes, the joints are tight, that is part of why you would buy a log cabin from us: Please see Moisture Content in Log Cabins and also: Wind and watertight connections
I’m normally very good at talking through fit problems with customers but on this occasion I failed. So my colleague also spoke to him and failed. We sent pictures on how to overcome his issues but this didn’t quell the problem for him.
We also found out that the customer did not have the necessary tools to actually carry out the install. He also explained he was not aware of the requirements for installing a log cabin. That we should have let him know…
All my blogs have been in vain!
None of it was referred to and I thought I had done so well in giving as much information as possible.
I really don’t like complaints, especially when there’s absolutely nothing wrong. It’s also very costly for us as well and I needed to understand why a customer does not understand the install and thus raises complaints. I realised that no amount of explaining or pictures or email was going to solve this so I arranged a site visit with Mr B.
Responding to the Customer
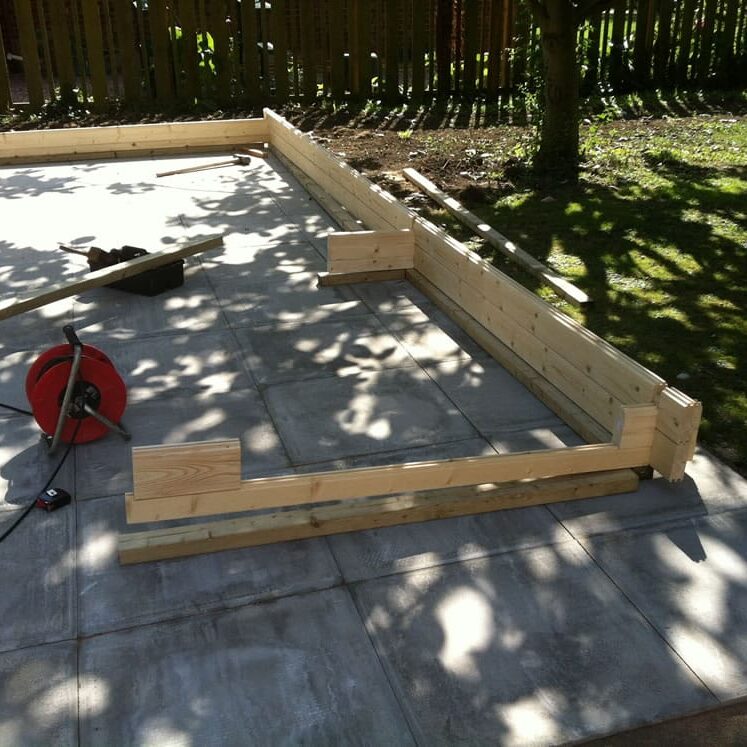
On meeting Mr B I was able to spend a long time with him asking about his impressions. It came across that we’re not getting the information out there or fast enough on the product pages or post purchase emails. Mr B explained that he thought it would just slot together and would worry about installation when the cabin arrived. With the two warped logs and the fact that the logs do not simply fall into each other the whole task became too daunting and he simply said he couldn’t / wouldn’t do it and it was a complaint, defective, fault etc.
Armed with this information we are going to have a little redesign of the site and will try to make information quicker to access. Mr B explained that he is very visual, pictures not words are needed. The only option is full videos. This is what I am now doing and will be doing all over the winter to try and help more, covering as much of the product range as I can.
With my sparkly new video camera I have tried to address all of Mr B’s problems and concerns which I hope will help future customers with the same problems
We took the partial log cabin installation apart and reset everything and started again from scratch.
These are the videos that arose from our conversations and his install of a ‘faulty’ warped log cabin, these are going to form the basis of a whole series on log cabins and their installation of several different types we supply.
Tools needed for a Log Cabin Install
Installation of a Log Cabin – Full Install Overview
One of the biggest things that came out of our conversation were joints. Mr B had not expected the joints to be tight or that it would require any force to go together. He said he had ‘Expected a little resistance’. Some suppliers cabin will fall together with no effort at all, it might be a good thing when you’re installing but a pain when it rains hard a few months later.
This log cabin install video is pretty long at 20 minutes but I needed to address every aspect of the install as Mr B wants everything spelt out. I have tried to do this for this particular cabin. Much of this applies to any of our apex log cabins and the same principles apply to our hipped roof log cabins.
A lot of customers will complain about instructions as well. However, most of a log cabin install is a practical ability and an ability to simply read a set of plans. An understanding of timber and it’s foibles does of course also help. I hope this video gets across exactly what is required. I like to think that if Mr B had seen these then we’d avoid the complaint.
Other customers buildings posts and thoughts that may interest you:
- Inside a log cabin – selection of pictures inside customers log cabins
- Petit log cabin review
- Onyx Log Cabin Review from Mrs G
- Wolfgang log cabin review and how long it took
- Lukas log cabin review – Mr W
- Mr B’s twisted log complaint – Heino log cabin
- Shepherd Hut review by ME
- Asmund log cabin review – Mr F
- Log Cabin delivery – Mr S
- Mr T log cabin in the woods – Edelweis – A great timber framed base
In Mr B’s twisted Log complaint section you mention various issues and how to correct them, and you say the twisted log is easy to correct but don’t actually address this in the video. I can’t find it but do you have a video that deals with this issue just in case it arises when I assembly mine.
I have see a similar issue when constructing the wooden base and they corrected it by using a ratchet strap to pull in the beam before fixing but they are using screws to do this along the length whereas on the long length of a cabin you are relying only on the slots at the end to fix the timer in place and the tongue/grove connect along its length.
Also with the hitting of the tongues with the mallet can this sometimes damage the tongue.
P.
We’ve collated a page with lots of advice and tips to aid construction, this also has a very quick video showing how to remove a twist, it’s about two thirds down the page: Log Cabin Construction Advice
If you use timber from the pallet as sacrificial you can use this to protect the tongue as you tap them down.
Didn’t see a large framing square in that short tools video, that would be a handy inclusion .
You’re correct as these can be quite expensive. We do show in our log cabin installation advice page that you can either square the log cabin using corner to corner measurements or create a large right angle using the 3,4,5 Rule which can be made out of anything. Some fitters do though have the big fold up squares for quickness and ease but we didn’t want to suggest anyone goes out and buys a set just for one install.
True, although they are so easy and great fun to use, a person can never have enough tools though .
hahaha …… very true!