


This is our customers account of the Superior Gazebo, some is good, some not so but it’s a good story and worth a read of Mr P-K’s story, it also helps us greatly. It is not often we get a detailed review on one of our gazebos and the review below is very much appreciated.
Regards,
Mike P-K
First Impressions
After a slightly problematic delivery, I laid everything out as advised by Richard’s excellent blog.
(The carrier refused to even attempt my narrow lane and off-loaded three-quarters of a mile from my house. That then meant 4 trips up the lane with my trailer to transfer it all here)
I was impressed by the obviously generous coating of Tanalising material present. What was also impressive was the general straightness and solidity of the timber. I was less impressed however with the post holders that I had ordered as an extra. These were not only a poor fit, 120mm square for down posts that measured 112mm square, but also quite thin at 2mm and only tack welded.
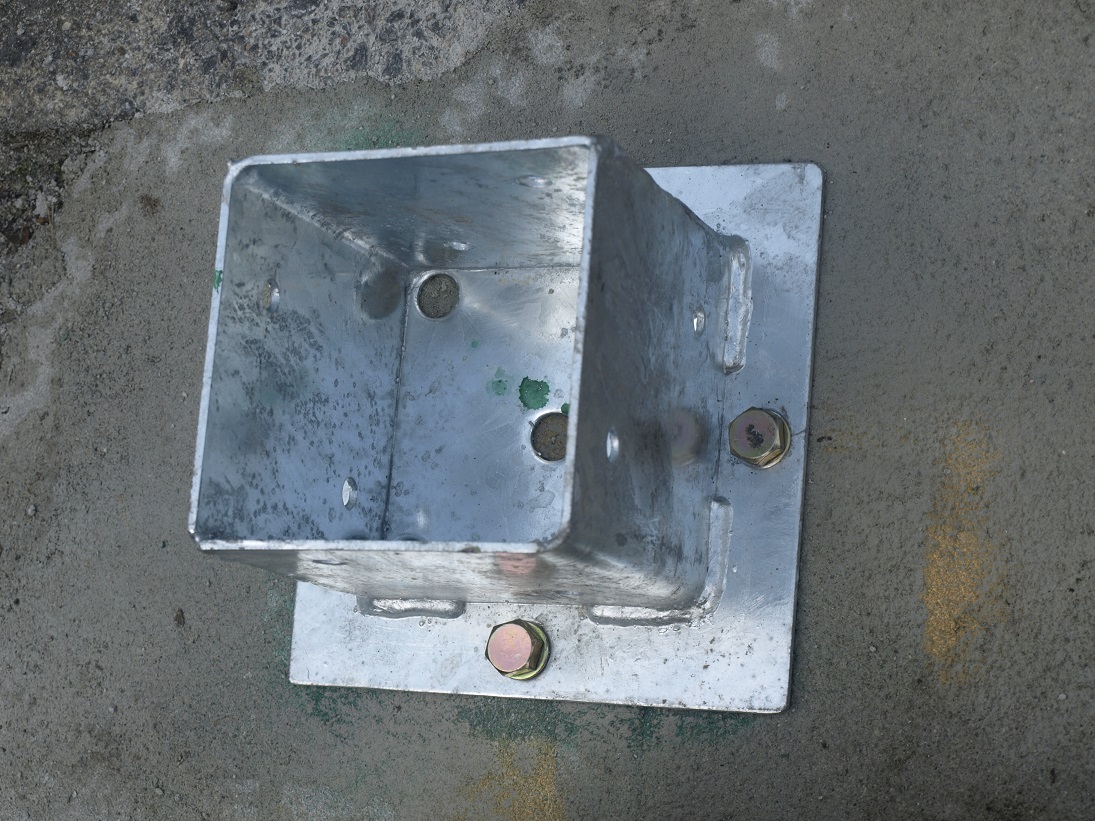
I voiced my doubts to Tuin who immediately arranged their collection and refund with no deductions for carriage. Likewise, I would be unable to start the construction for at least 4 weeks. So I stacked everything under cover in the way suggested by Richard in his blog.
Laying out the Site
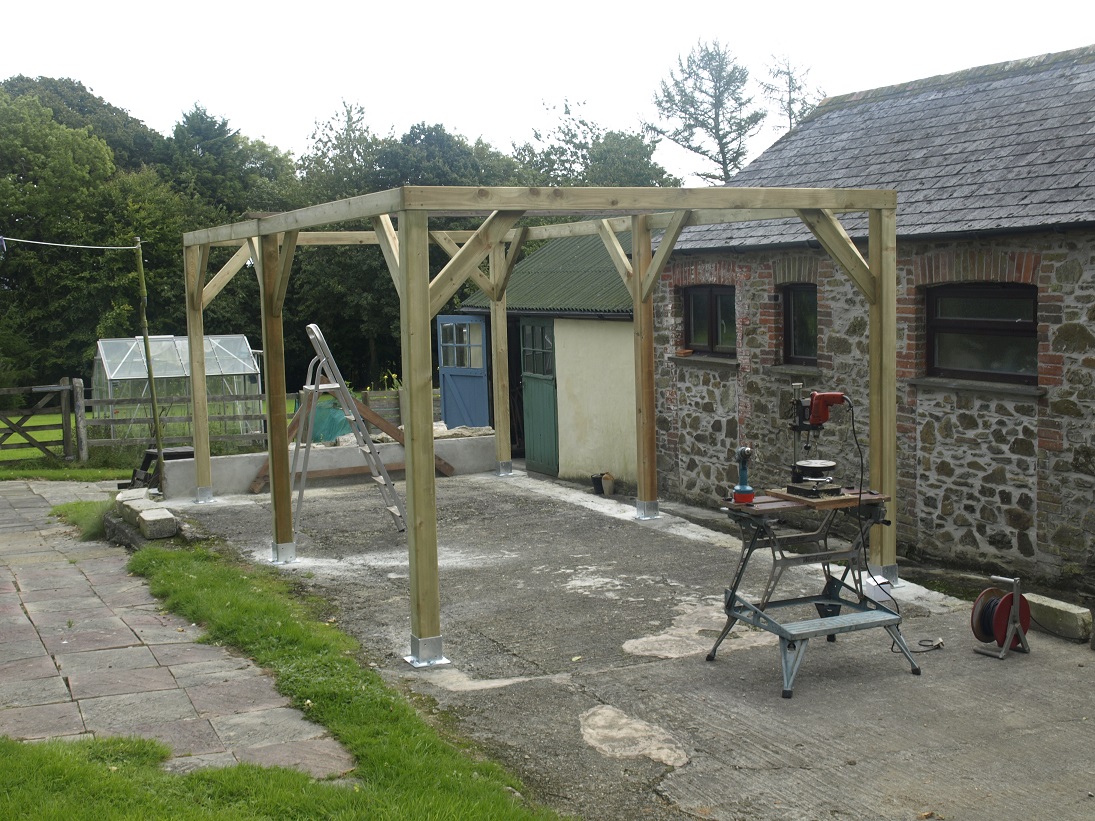
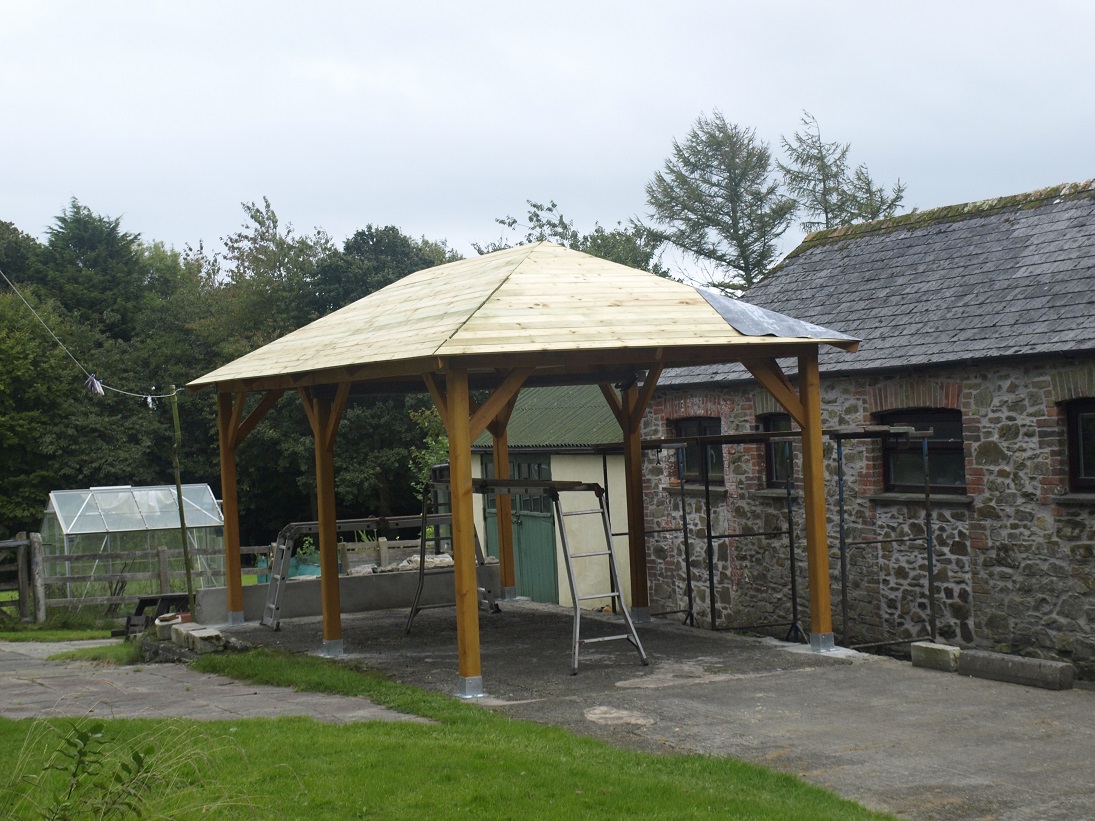
Starting the Superior Gazebo
Putting up the 6 posts was child’s-play. My post holders easily held the posts upright while I attached the six ring beam pieces and twelve bracing struts. Again, I made good use of my 3-4-5 triangle to ensure everything was true and square. Sometimes, I clamped this triangle in place before screwing in the braces.

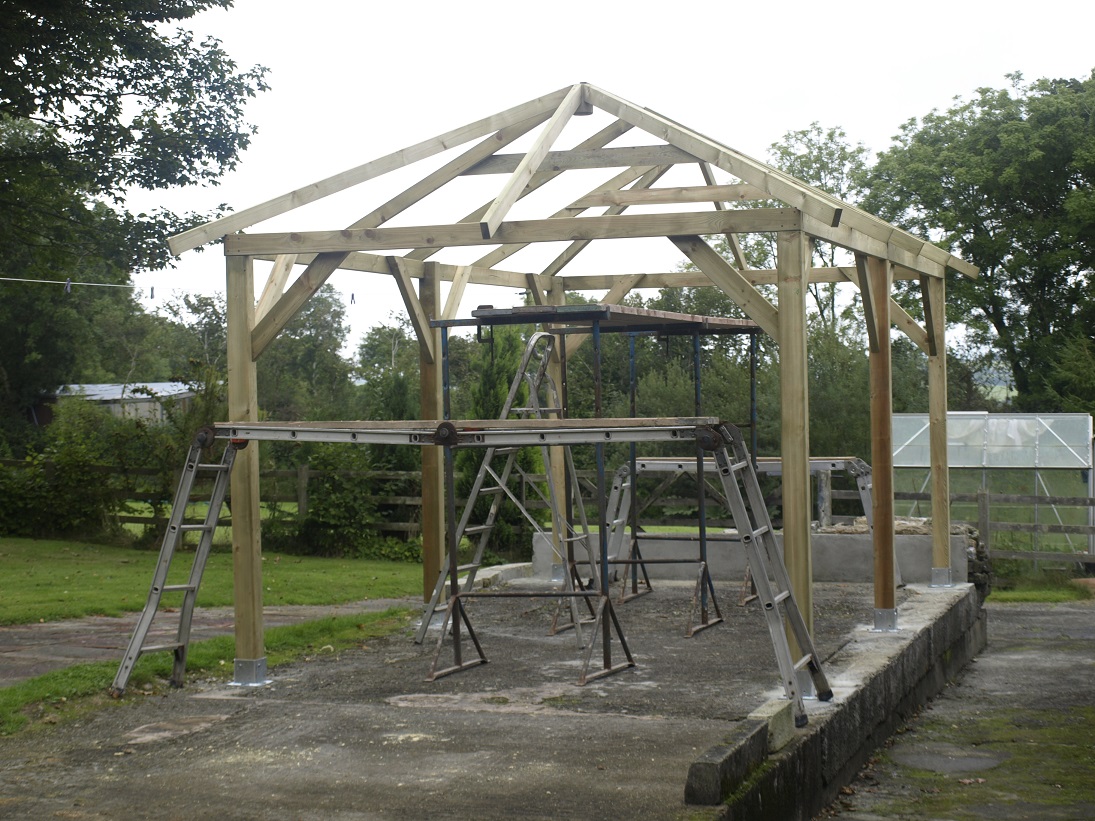
So far I had carried out all the work single handed. However, for fitting the corner rafters, king pins and ridge beam I needed the help of my wife. I could not have held the ridge beam in place on my own while I fixed the rafters in position.
Once this was done I reverted to working on my own again, fixing the roof boarding in place.
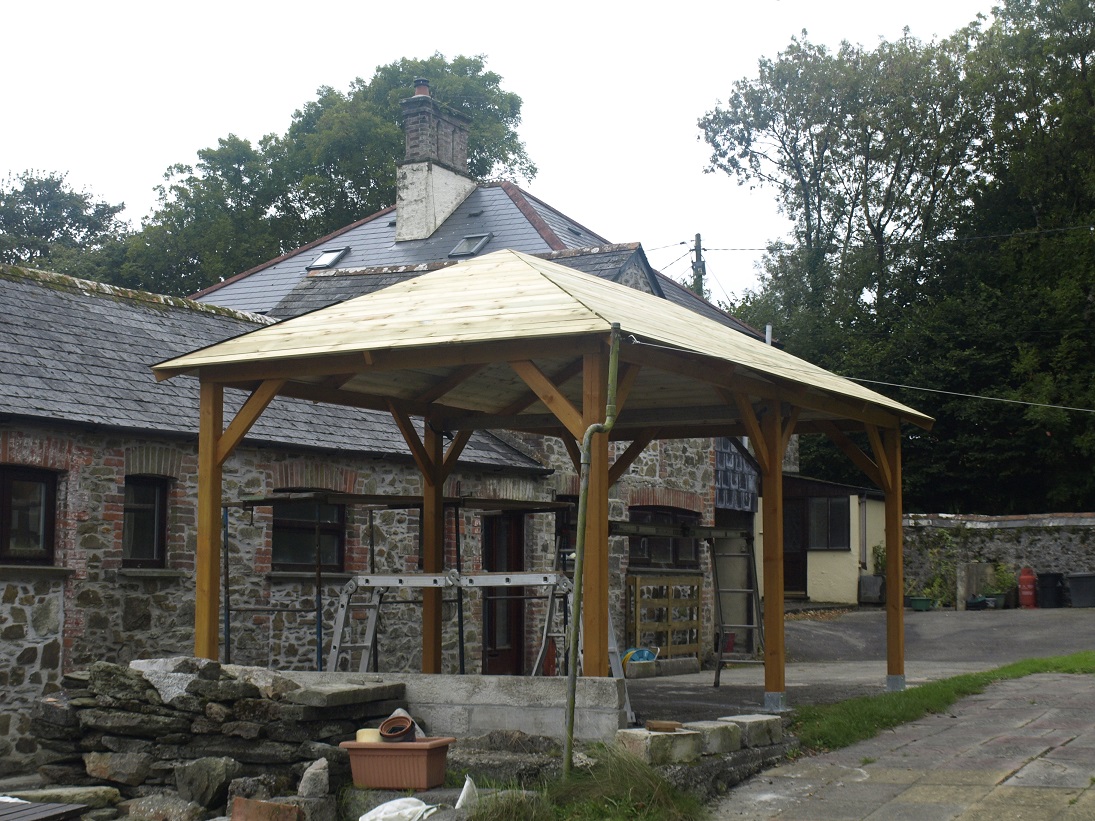
Finishing Construction
At this point I was glad I had spent so much time getting the basic frame square, as the roof boards required minimum cutting. I differed from Richard’s recommended procedure here. Because of the site I had chosen for my gazebo, setting up trestles outside the structure was difficult. Though I did manage to do so later on in the build. I set up my trestles inside the building and worked from the eaves upwards and the ridge downwards. I did this for as long as there was room for me to get my body between the two areas of boarding.
This left me with a narrow strip in the middle to fill in, which I did using one of the many extra boards supplied by Tuin, working off a ladder.
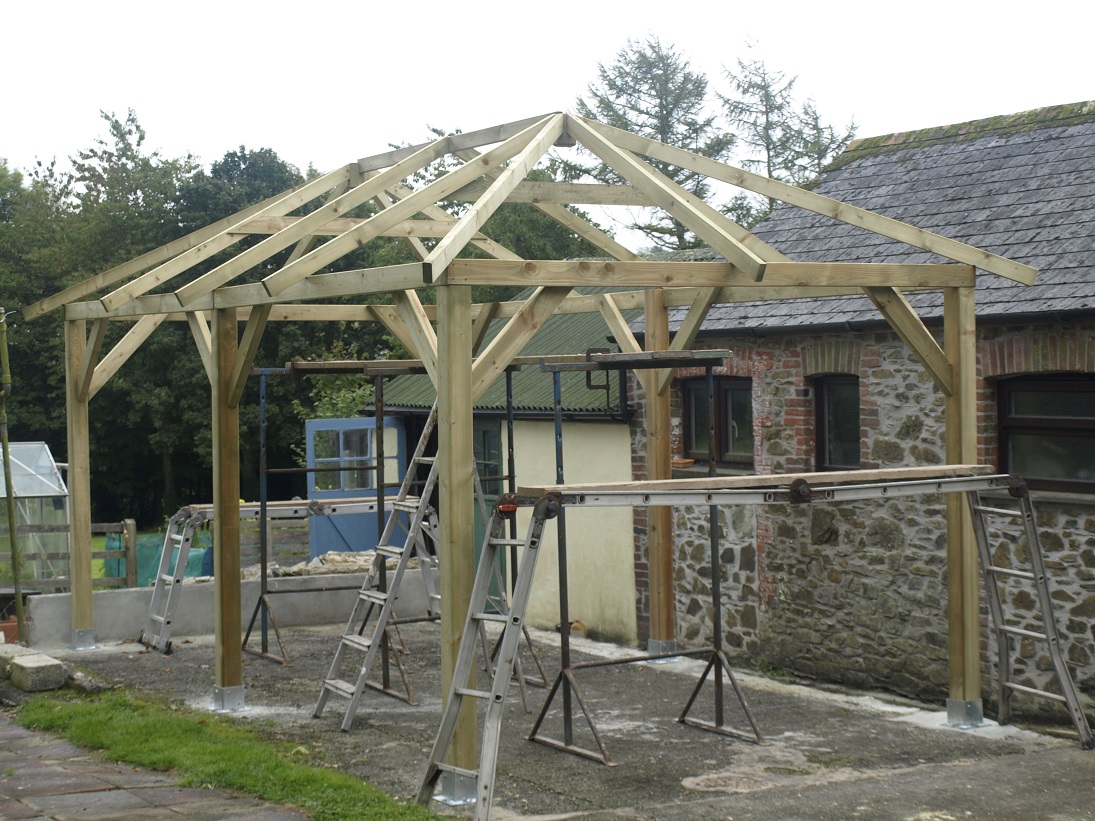
Boarding the Roof
For me, this was the most difficult bit! Indeed, to be honest if it had not been for the encouragement and physical help provided by my very able wife, I might have given up and called in professional help. Obviously I could no longer work from within the building, so I had to put up my trestles and boards outside as well as I could. Neither myself nor my wife are very keen on heights, which didn’t help. (neither did managing to fall off a ladder at one point, definitely not recommended for one in their late sixties).
Nevertheless, we managed to rig up a tolerably safe system and set to fastening the waterproof membrane in place. I used an electric staple gun for this, which by and large worked quite well, except for hitting the occasional knot, which resisted the staple.
Tiling the Roof
Finally, we started the tiling, which proved a slow and tedious business. The first few rows were easy enough as I could fix them from the comparative safety of the scaffold boards alongside. However, as I got towards the ridge I obviously had to work off a roof ladder with my wife passing up things.
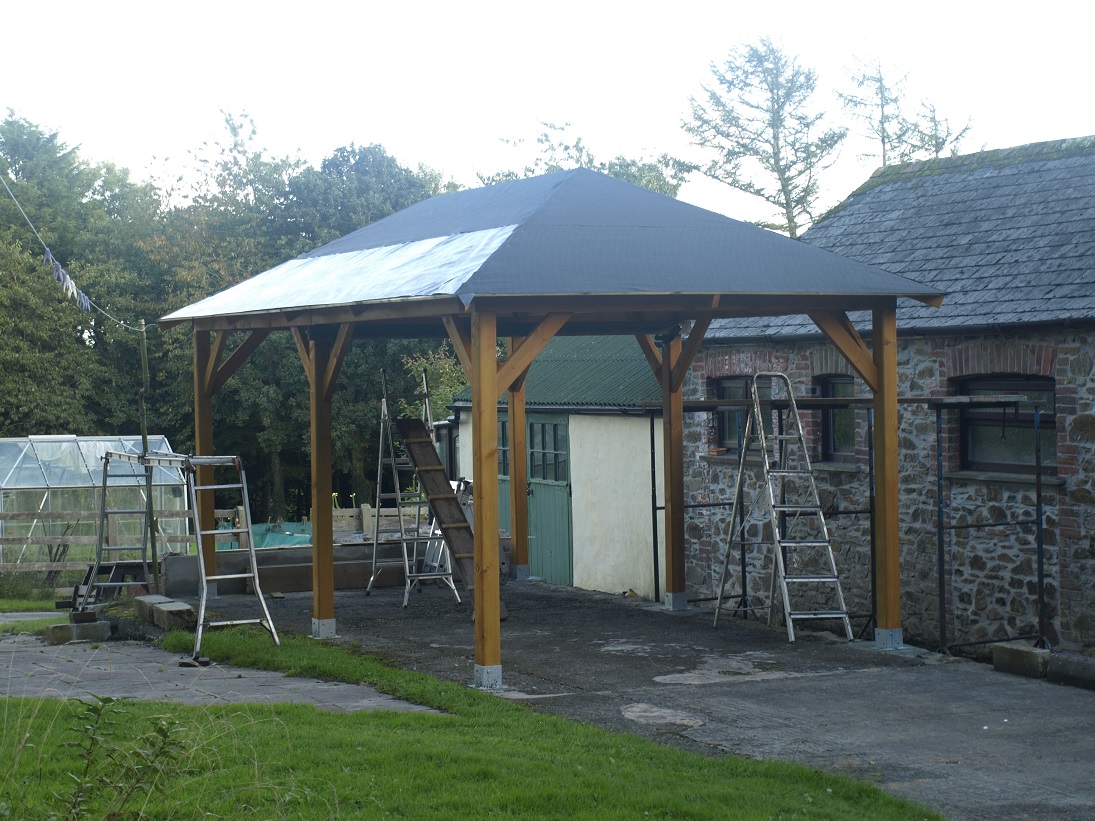
At this point I experience my first slight disappointment in the design of the gazebo. Because there are only 12 rafters in total, the span is sometimes as much as 4 feet, which is just too much for nailing into such thin (15mm) roof boards. Bounce is inevitable, making it very difficult to accurately nail the galvanised clouts that hold the tiles in place.
Finishing the Roof
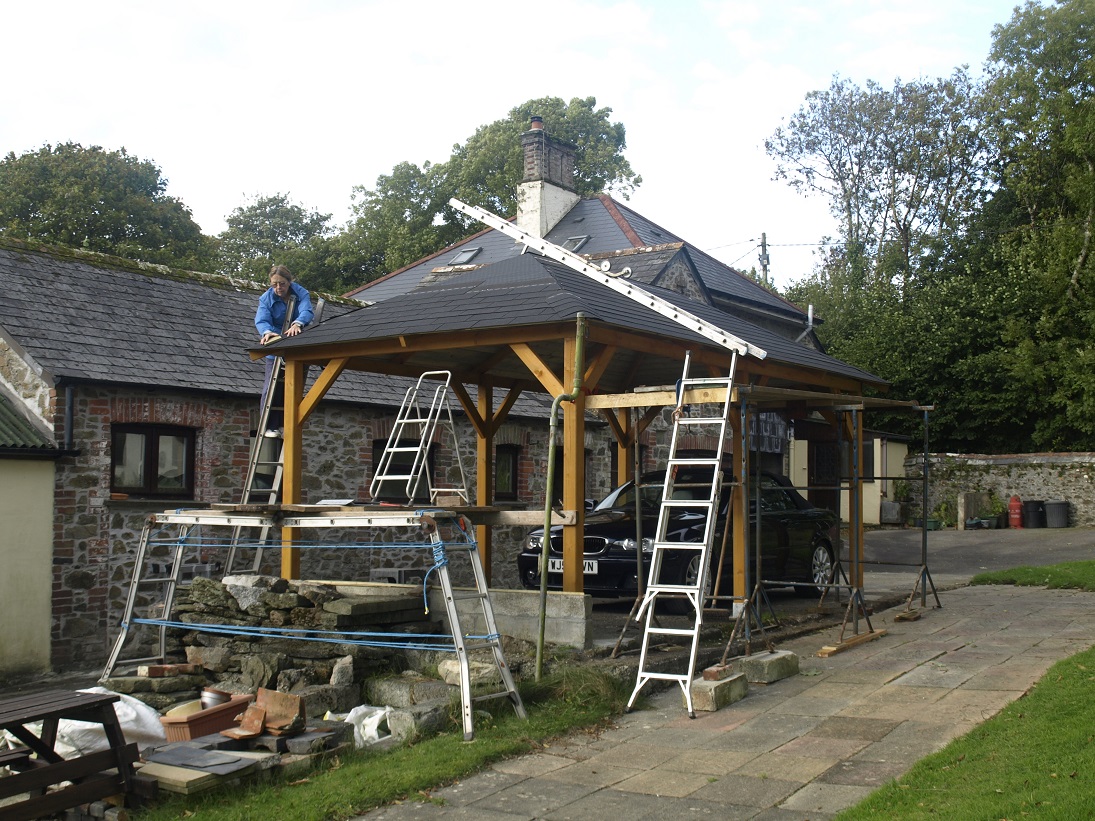
It took us almost a week to complete the tiling, Mind you, we were not working full days on it, a few hours at a time was enough! I was fairly liberal with the tile adhesive as I knew there would not be much warm sun about in October to melt the glue strip on the back of the tiles. I was unsure as to how exactly to finish the ridge line and the hips, but a call to the very helpful advice line provided by Tuin soon sorted us out.
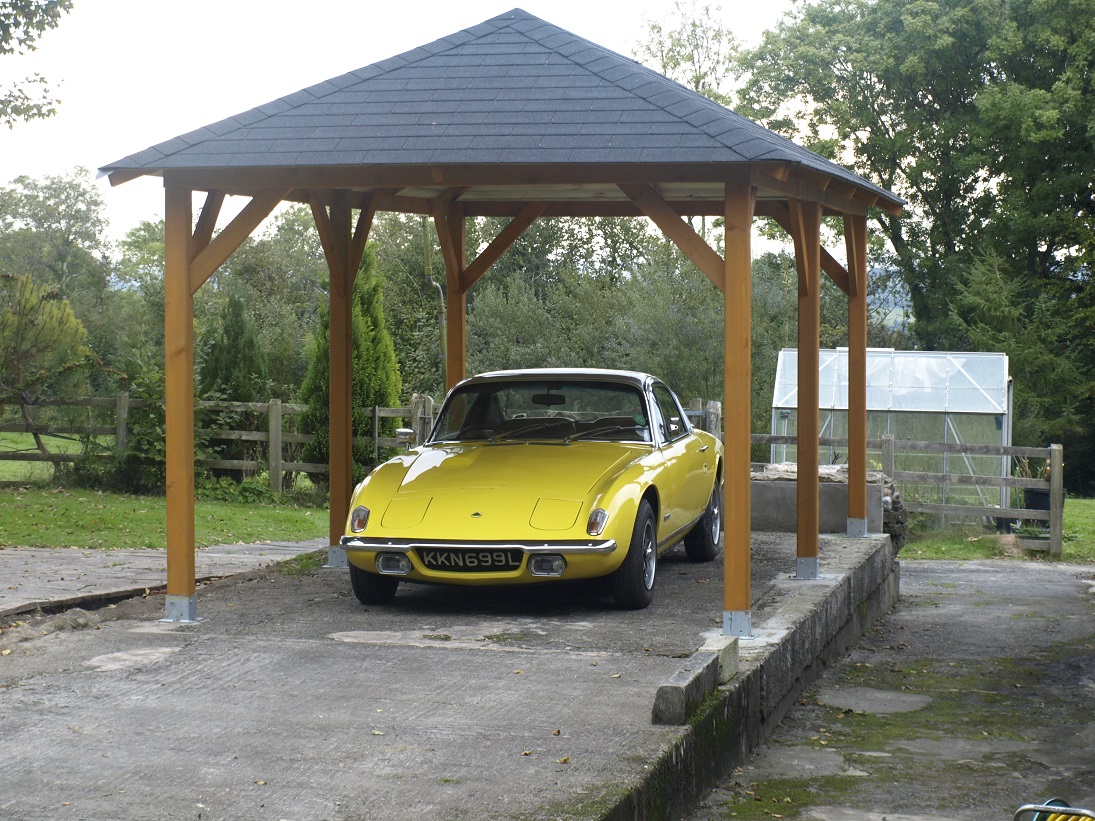
The Finished Superior Gazebo
Ikea Flat-Pack it’s Not! (neither, thankfully, is the quality – no MDF here and not a comb-joint in sight!)
At times the task did seem a bit daunting. However providing you have at least a modicum of DIY skill and a healthy dose of common sense there is nothing really too difficult here. The whole thing took us just over three weeks to complete, but most days we only worked 4 or 5 hours, regularly knocking off for a visit to the gym or one of our Pilates lessons (Yes, they really do work, I’m sure I couldn’t have done this if I was not already reasonably fit!)
Conclusion
A week after completion I celebrated my 70th birthday, which gave be a considerable sense of satisfaction.
Thank you Mr P-K for sending us this report. It is so helpful for us and other customers! We also hope you enjoy the present we sent you, thank you again.
Other customer experiences, build and ideas can be enjoyed here: Pictorial Tuin Reviews