


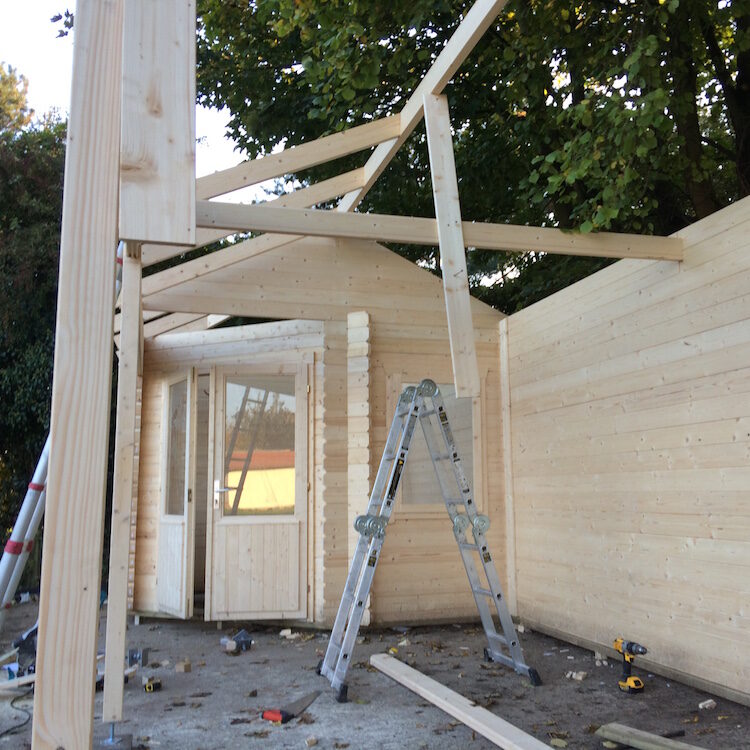
This post follows on from the Gazebo Installation Advice post. It will feature mainly pictures of the gazebo roof but the method is highly relevant with pyramid roof installation advice.
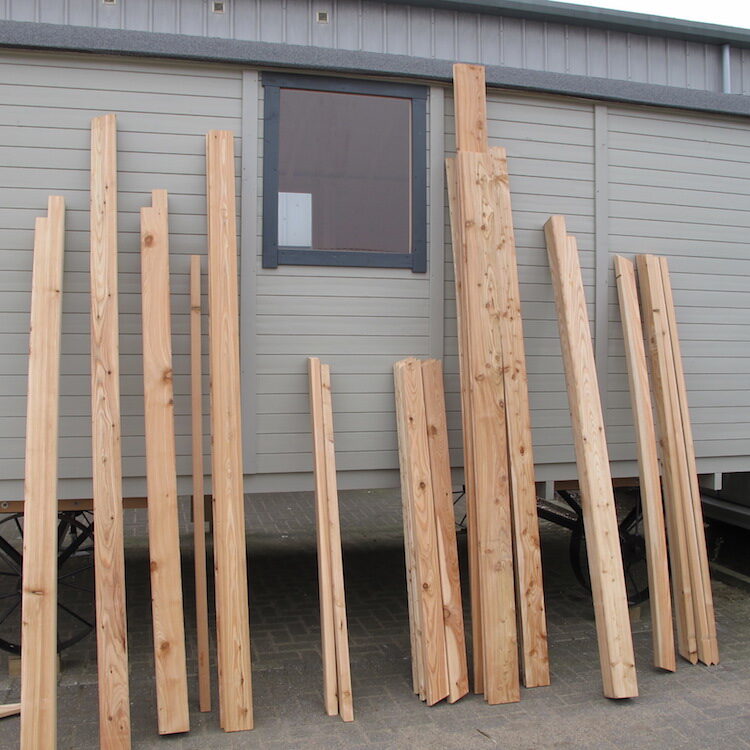
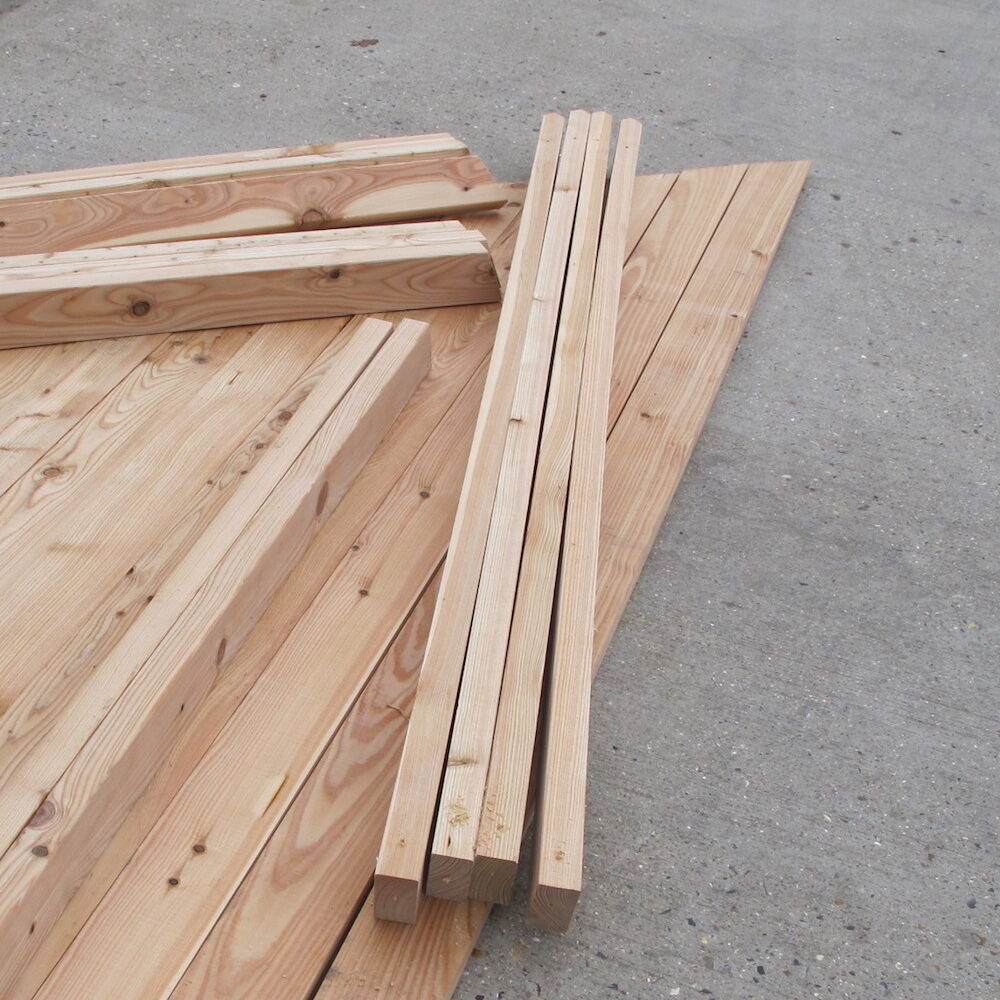
Storage of the Pyramid Roof Parts
Wood is a bugger and you really need to think about this when you are unpacking. You always install the roof parts last. While you are mucking about with the walls of your Log Cabin, the roof parts will be lying around doing all sorts of things behind your back. We failed to follow our own advice during the install and had a bit of a problem.
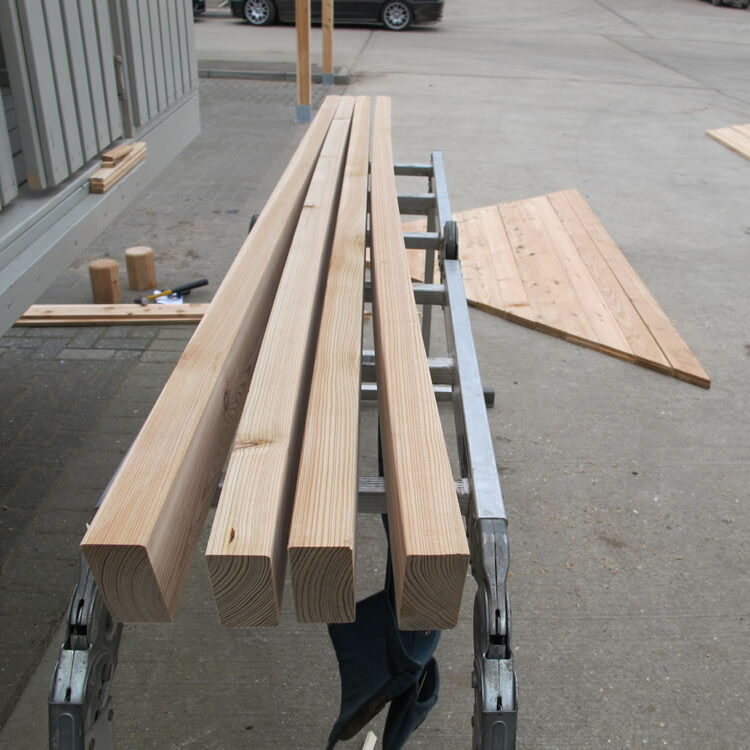
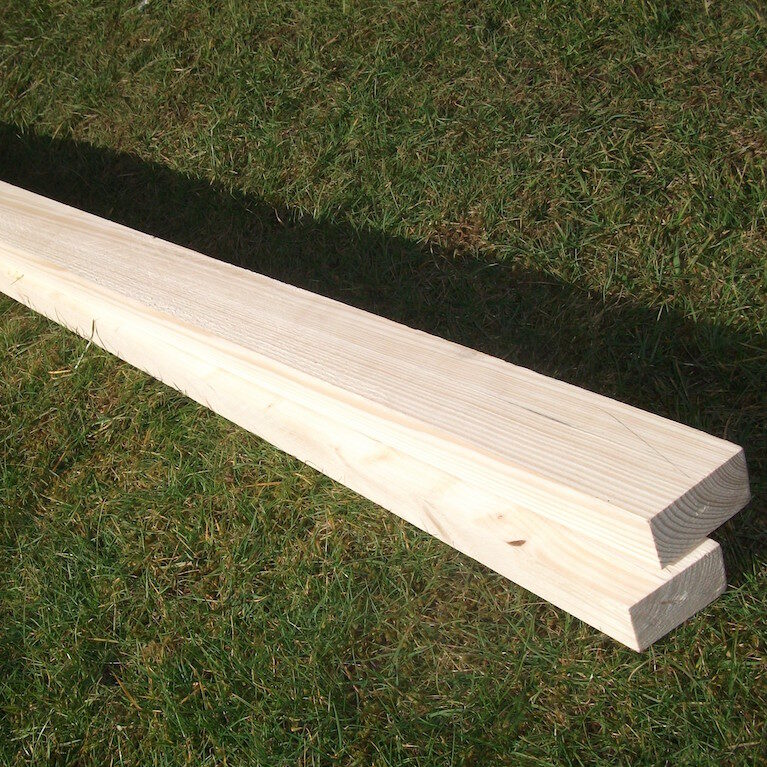
Rafters were perfect when we unpacked!
When we unpacked the pallet everything was perfect. Come the afternoon when it was time to install, we found the roof rafters bowed out of shape. If we had stored them flat, out of the sun etc they would have remained straight. One was a cracking banana shape!
Please note that this happen with wood. We can’t help this, especially when unsupported. This will happen in a matter of half an hour so please watch out for it and follow our advice like we didn’t!
Here’s an example from a log cabin roof. These could adjust a bit more as I’ll show later in this post, or, look after them properly so it doesn’t happen at all.
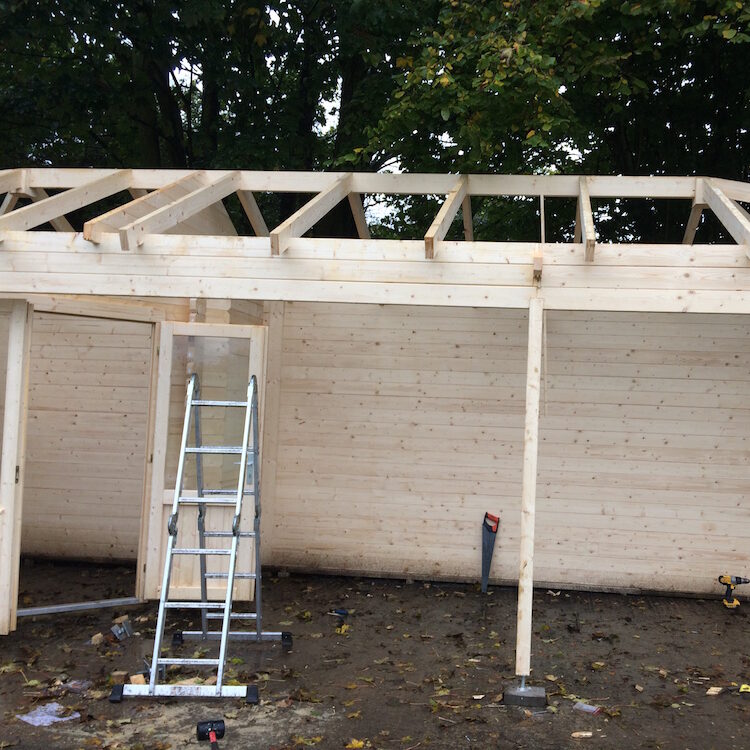
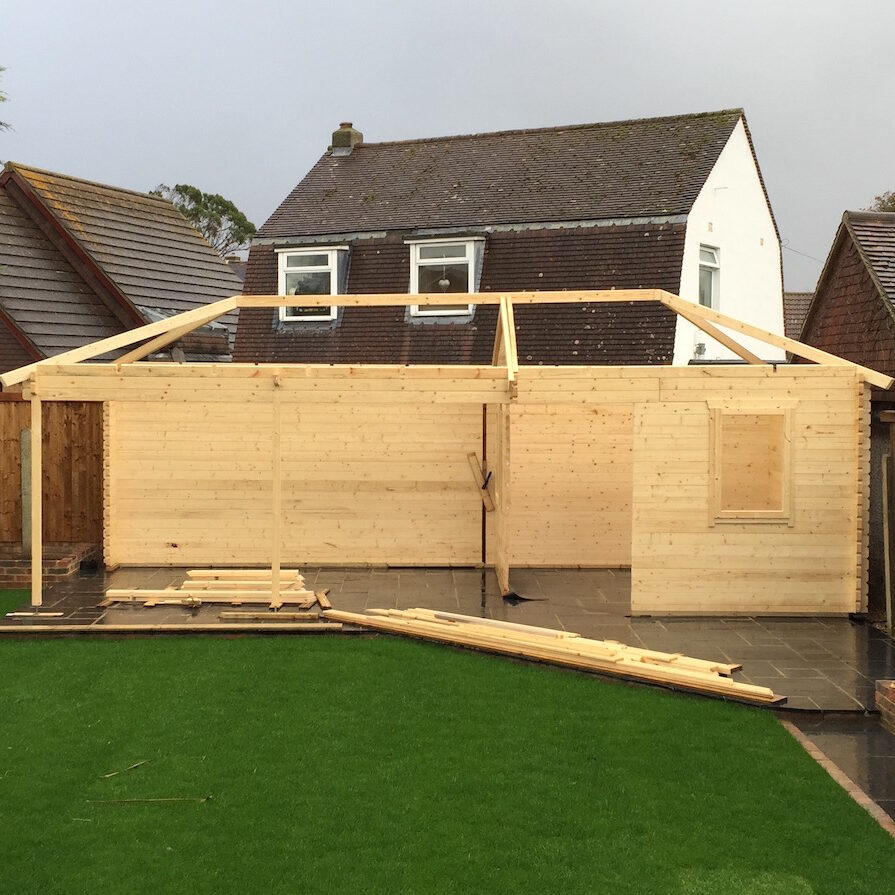
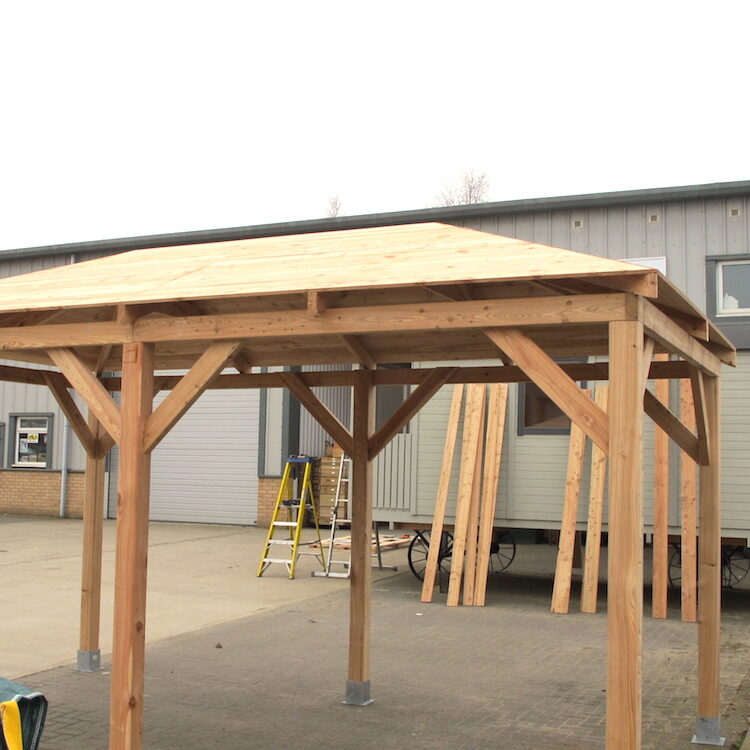
Base and Support
It’s always important to have a 100% level base and to make sure the building is 100%. With normal apex roofs you can get away with it a little if it’s not but with a pyramid roof it is REALLY important. If you are not 100% level and square you will pay for it when installing the roof. So please check this!
Please see this page for more advice on bases.
Pyramid Roof Installation
Other people will do it differently but this is the way I prefer to make a pyramid roof. The secret with a roof like this is:
- 100% square and level.
- Be methodical and have a system.
- Preparation – batch piloting holes
- Don’t worry about it. Sometimes things don’t look right but it will all come together, you can spend a lot of time worrying about it.
- Realise that wood is wood. It isn’t precise by nature, but we can work with it.
- Keep an eye on your safety as you will be working from stepladders. You may also want to consider using a scaffold tower.
- Make sure you identify all the parts correctly using a tape measure and the plans.
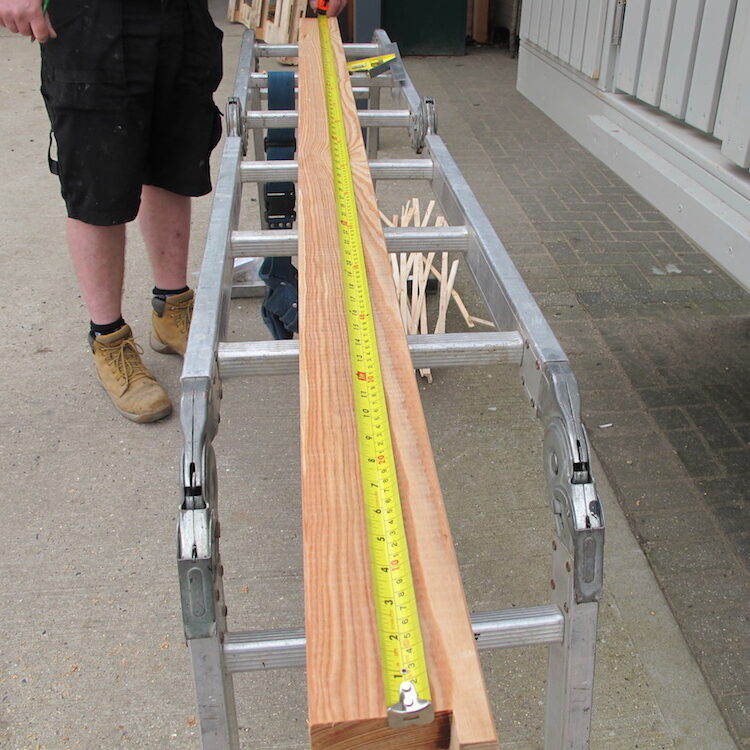
Before you start it’s a good idea to run a tape measure over the various parts and compare the parts to the plans. Some log cabins, mainly when there is a dividing wall or a gazebo to the side, will have a few subtle different sizes of rafters, identify all the parts first and be sure of their positioning from the plans.
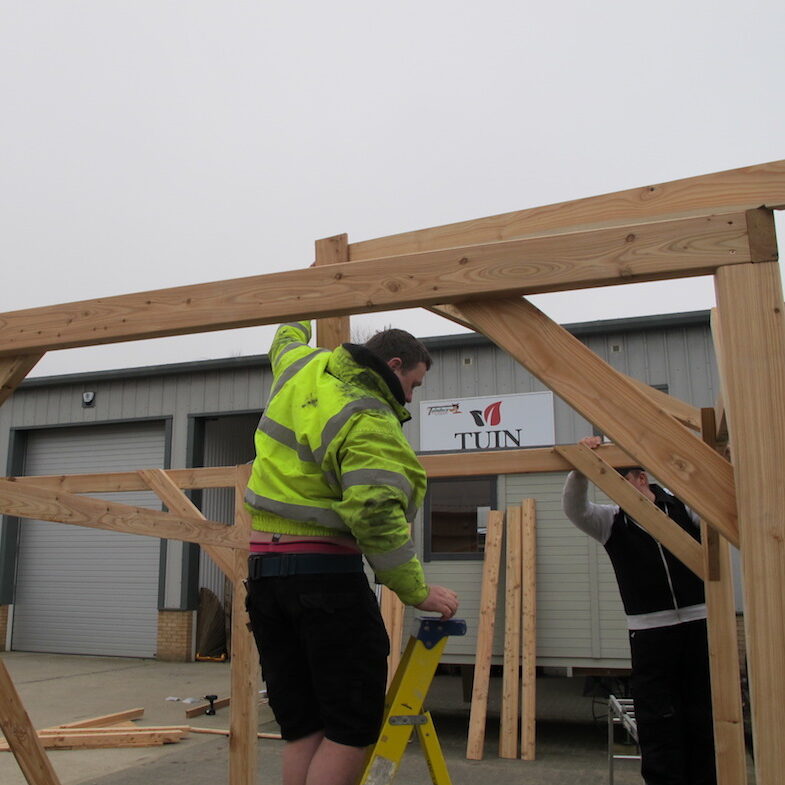
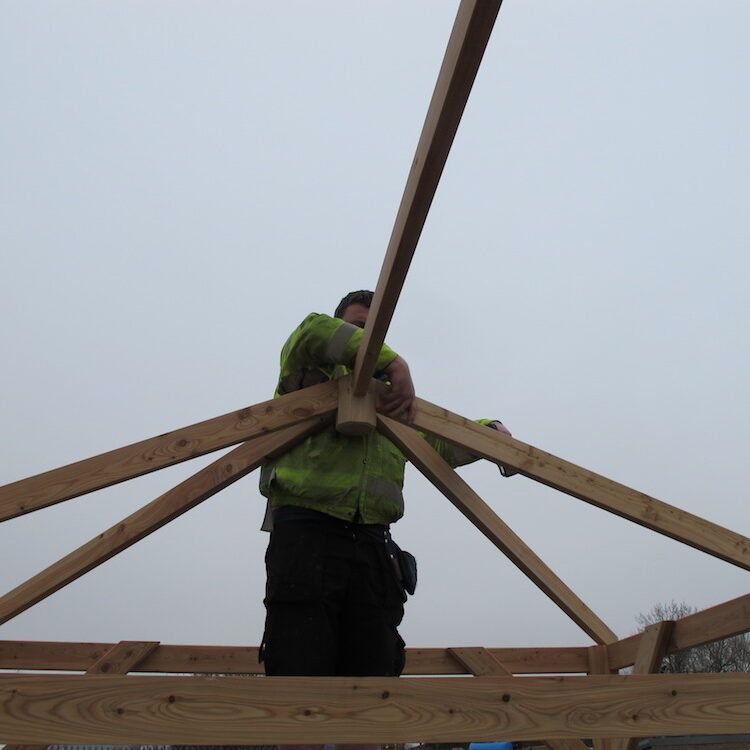
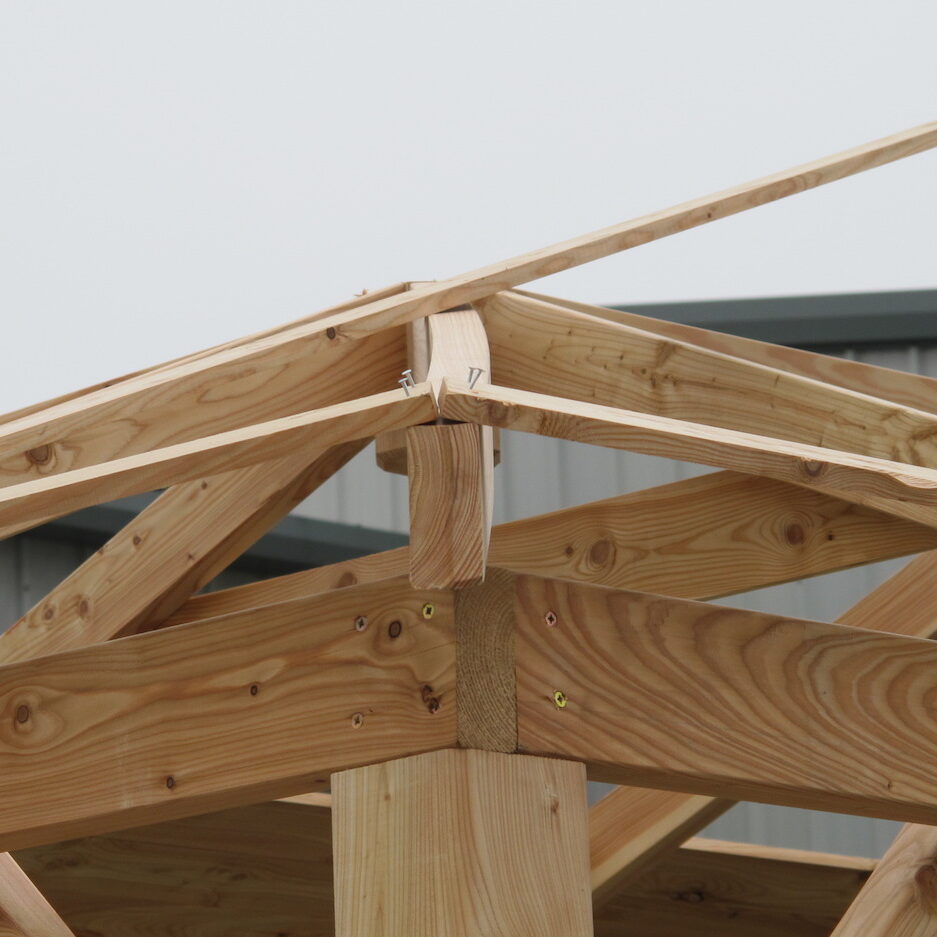
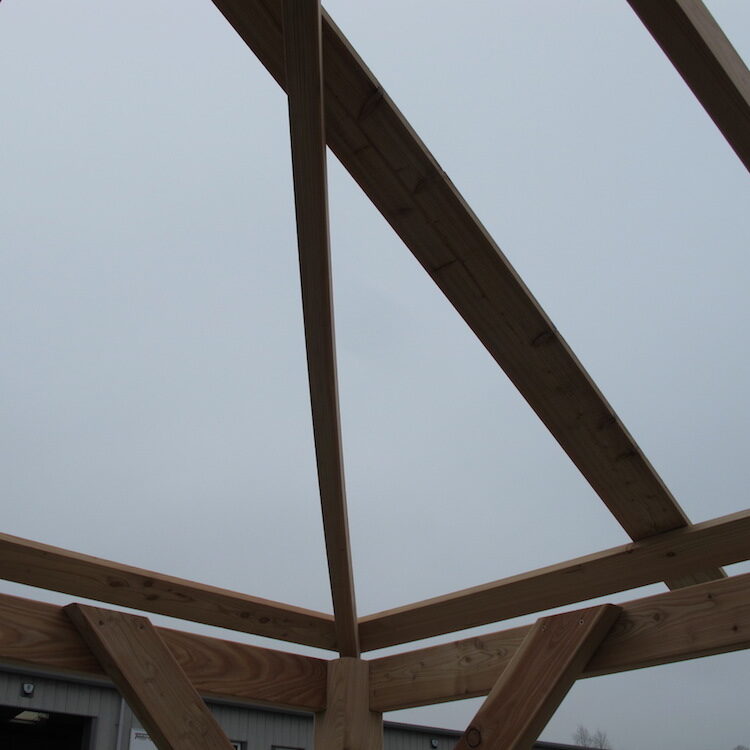
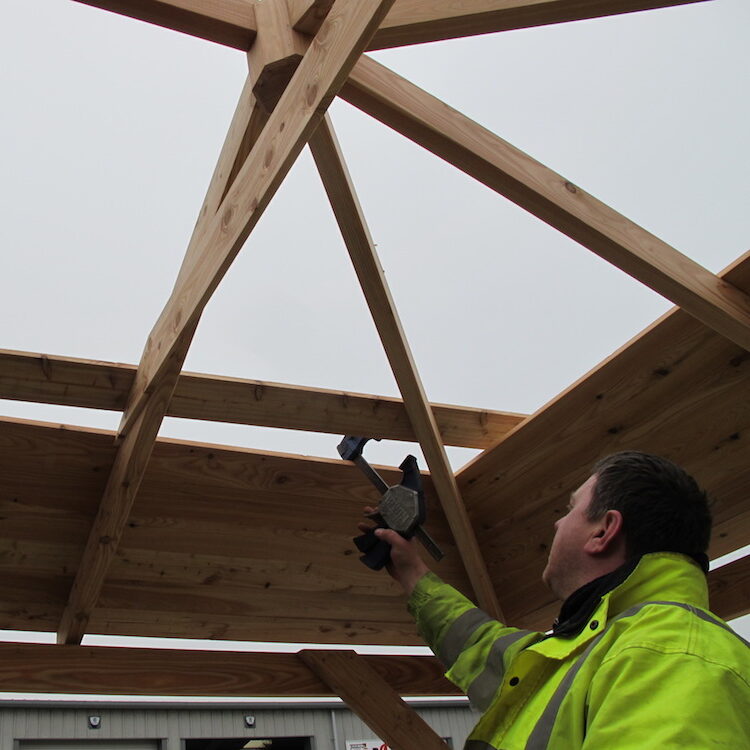
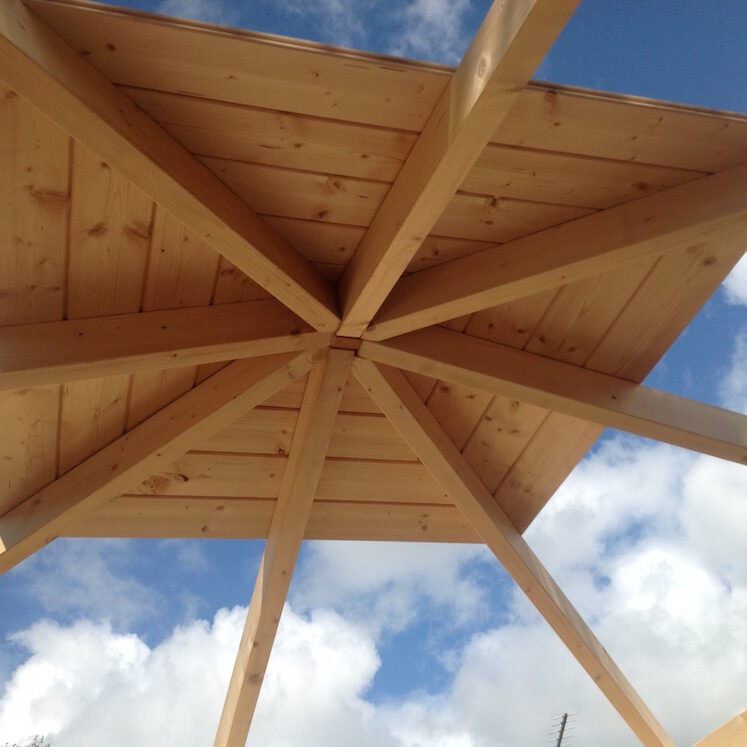
King Pin and Corner Rafters
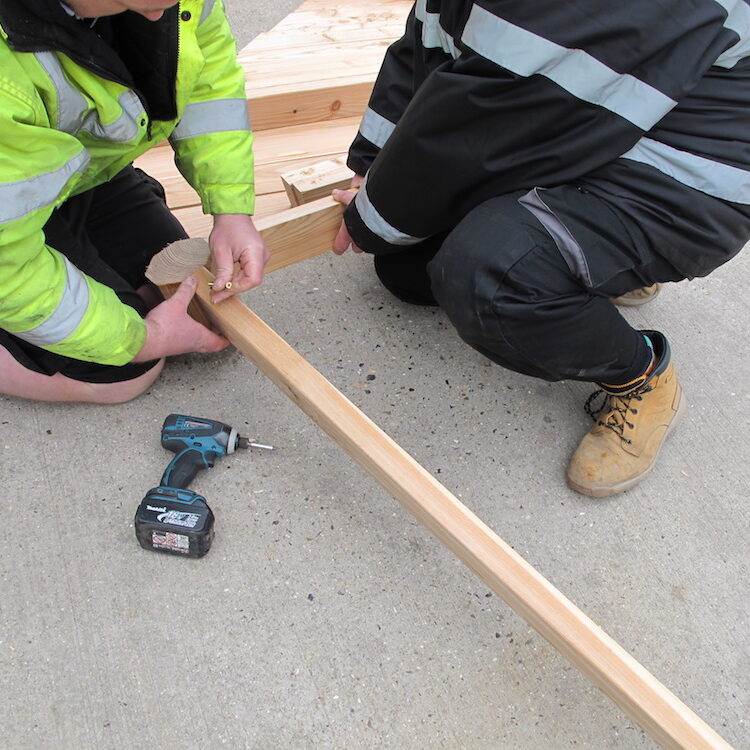
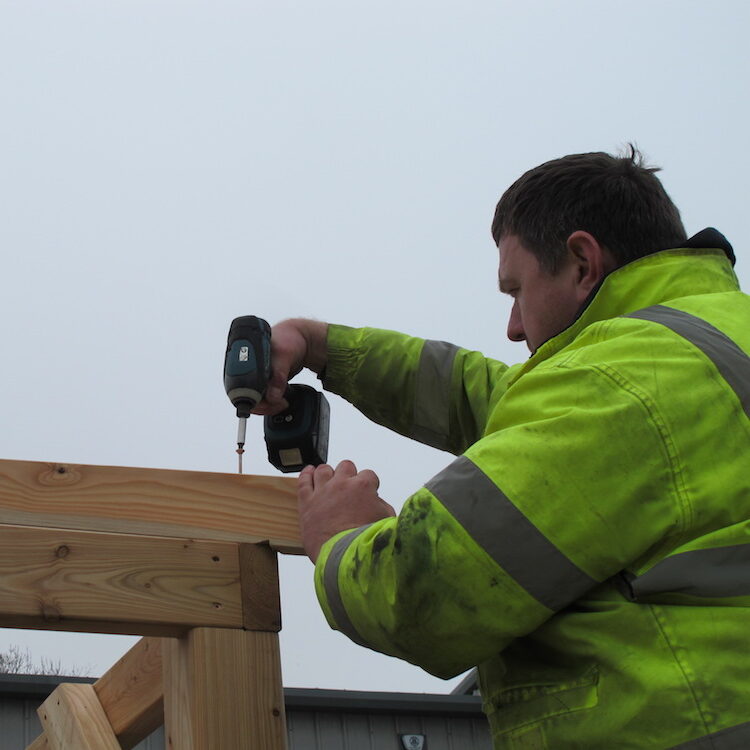
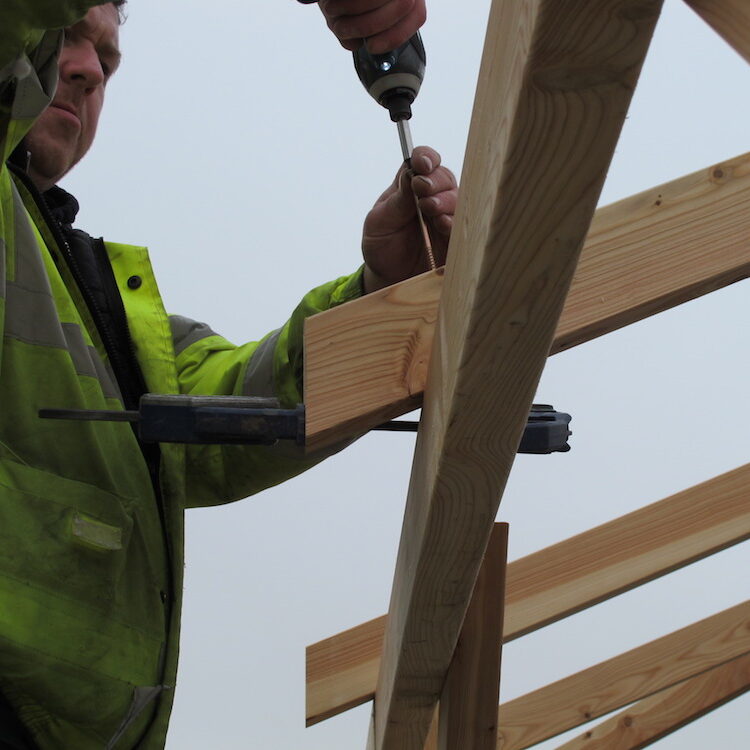
In this example the rectangular gazebo has a king pin that joins the end rafters to the ridge. ALWAYS use pilot holes before screwing. It’s a good idea to pilot everything that you’re screwing into the top of the roof first as a batch. DO NOT pilot the bottom ones yet!
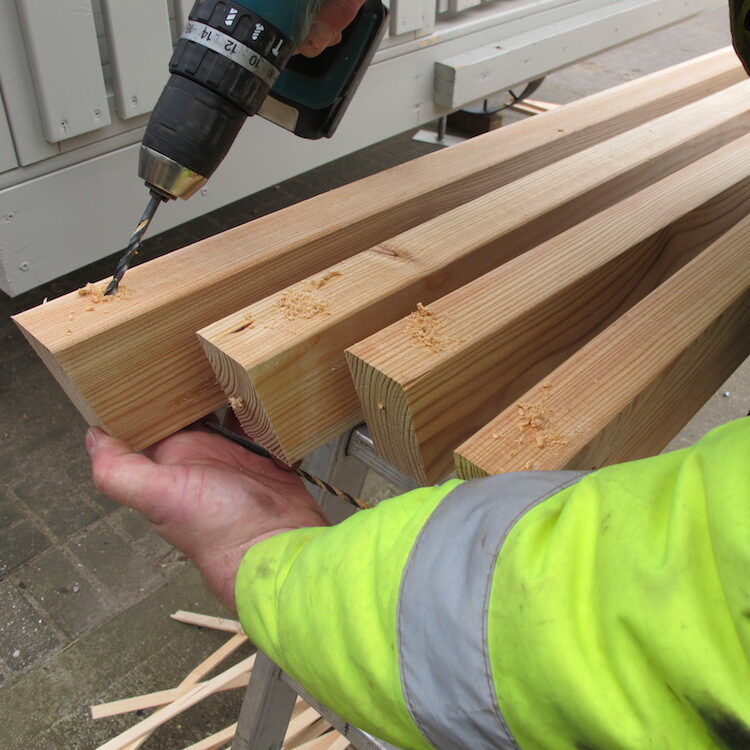
Always use pilot holes before using screws.
Preparation is key to this, I also like to find the center point of the ridge beam, if it’s a longer roof there maybe more marking needed, it’s easier to do it on the ground rather than a head of a ladder.
-
- Find and mark the ridge beam according to how many rafters that will be against it.
-
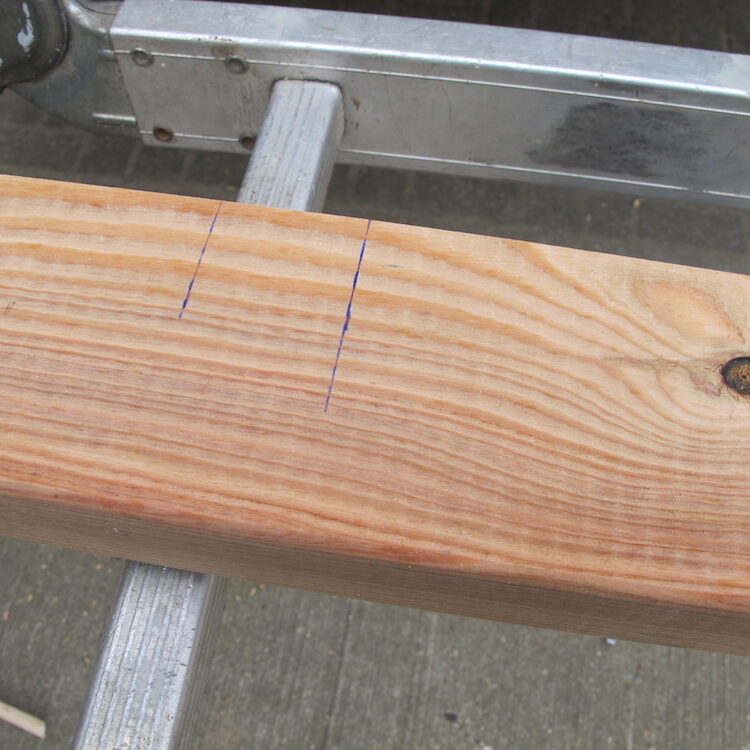
- In this gazebo my center rafter will be here.
-
- For bigger roofs you can also mark the ridge beam for the exact positioning of the side rafters.
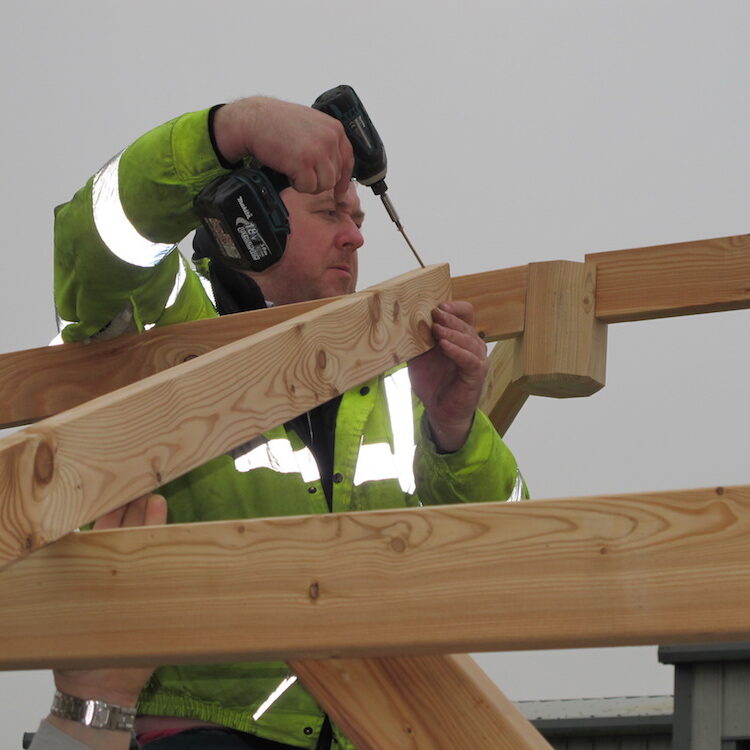
Fix the corner rafters to the king pin if applicable to your build. Some will be larger than others but the principle is the same when supplied with a pin.
Screwing the corner rafters together. he rafters will normally sit to the top of the pin. If there is a chamfer on the pin it can go either way but looks nice facing down.
Use a prop of whatever material you like to get the rough roof height, this helps greatly in your build. I tend to tack the corners of the rafters into the ring beam until I am certain they are in the correct position.
-
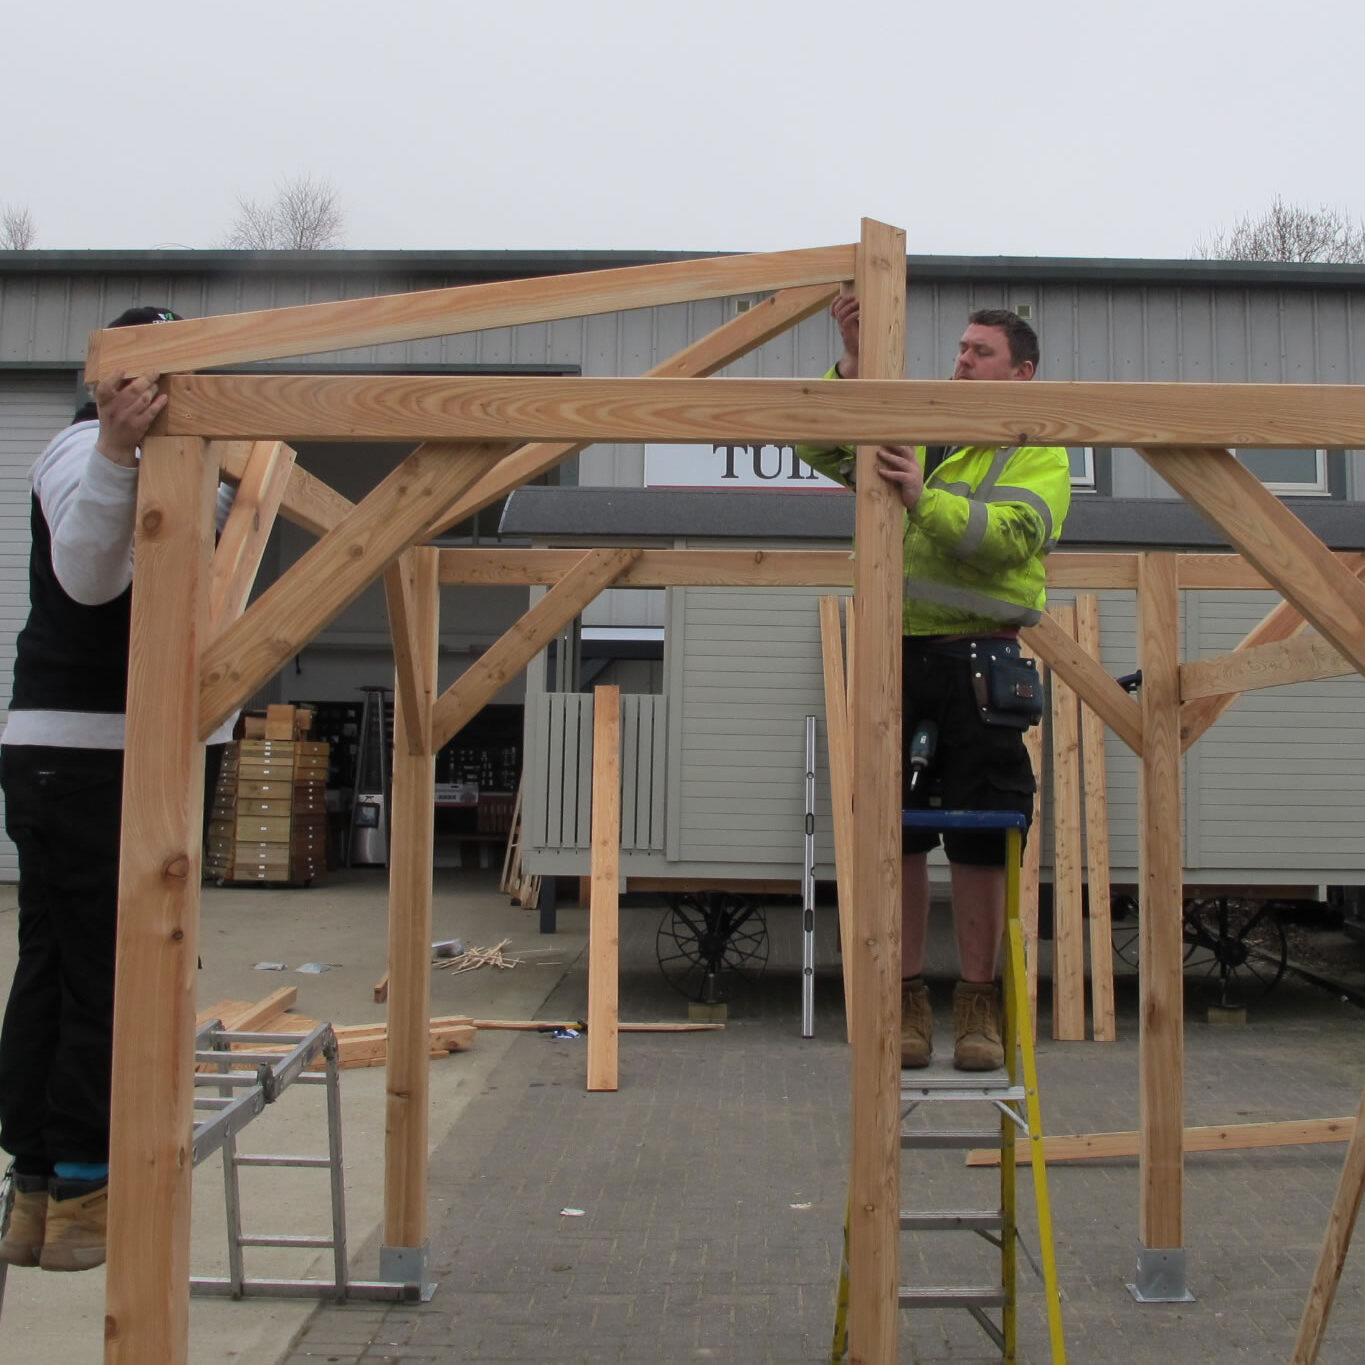
- Corner rafters lightly fixed with the kingpin being supported with a prop.
-
- Another example of using a prop. A customers ingenuity with his step ladder.
-
- Another example of a prop being used, it really does help your install.
Now go to the other end of the building and again using a prop fit the corner rafters.
-
- The opposite end of the gazebo fitting the second set of corner rafters. Again we are using a prop.
-
- Both sets completed and stable.
-
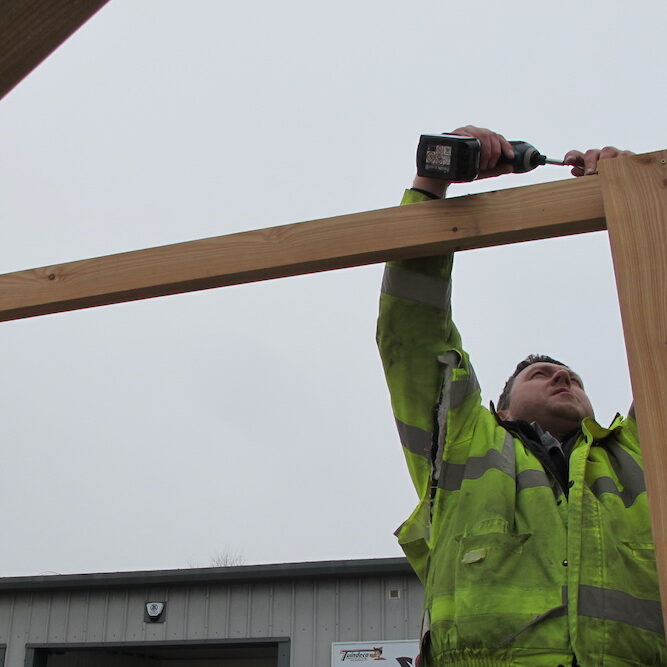
- Fix the ridge beam which you will have piloted beforehand.

Don’t worry at this point that it isn’t level or straight. If the measurements of the parts were correct according to the plan and you are sure you have used the correct parts then this will come good when you add the remaining rafters, at this point you can spend a lot of time worrying, please don’t.
Log cabin corner rafters in place. It can often look wrong and not level but don’t worry about this at the moment.
Wood and roofs can play tricks with you!
You’ll notice that we’re using the wonky banana parts we accidentally made at the beginning by not following our own advice. We’re still not worried about them either as it will all work out.
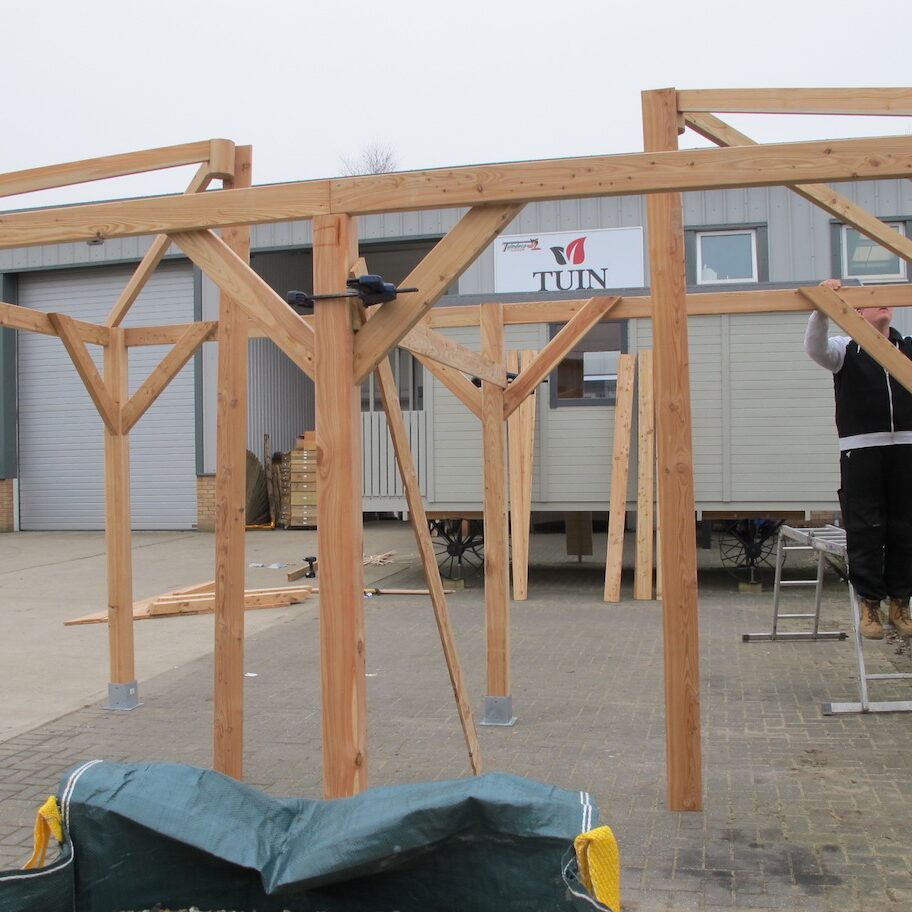
Pyramid Roof Side Rafters
Now you can start to add the side rafters into the king pin if applicable. I only fix the top ones first, don’t fix them to the walls or ring beam yet. At this point, the corner fixings may need checking as they’re in the right position.
Fixing the corner rafters as we are happy with its position, it’s roughly level and has been spanned without a problem. Note, regarding the gazebo we are installing here we are using the longest screws through the rafter into the ring beam. For log cabins I also recommend screwing all rafters into the ring beam. It is strictly not necessary but I prefer to do it for extra strength.
Log cabins will have notches created by the ring beam of the cabin and there is only one way to locate it. Technically you don’t need to screw through the rafter into the ring beam but I always do this. Weighing just short of 16 stone, I like to make sure the roof is as strong as possible when I get on it to shingle.
-
- Log cabins will have notches in the main ring beam so location is easier. You don’t have to but I recommend you source some longer screws and fix all the rafters into the top log.
-
- The side rafters screw to the king pin, level with the top of it.
-
- Fitting the side rafters into the kingpin
-
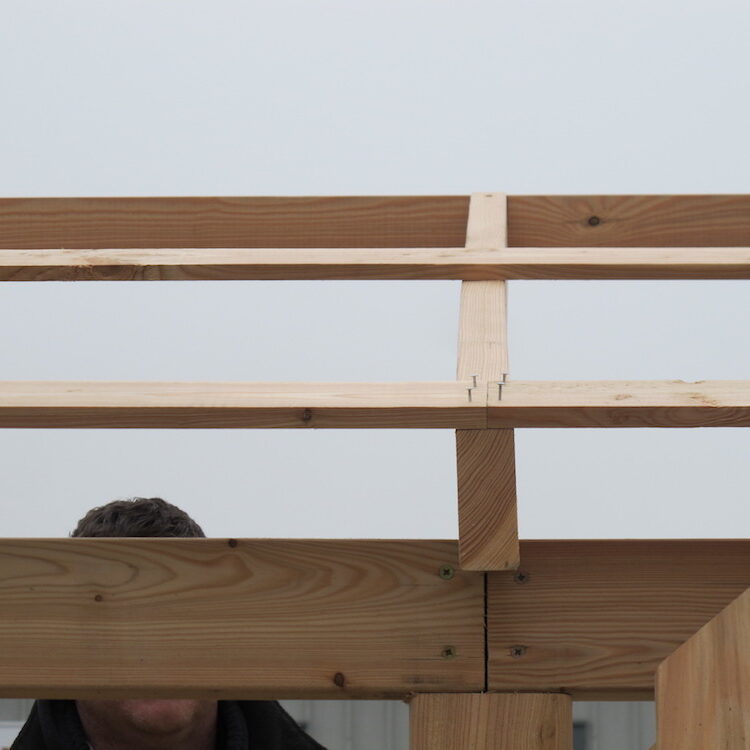
- The following side rafters can now be added. We have already marked the location of them on the ridge beam so we don’t have to try measuring from the ladder.
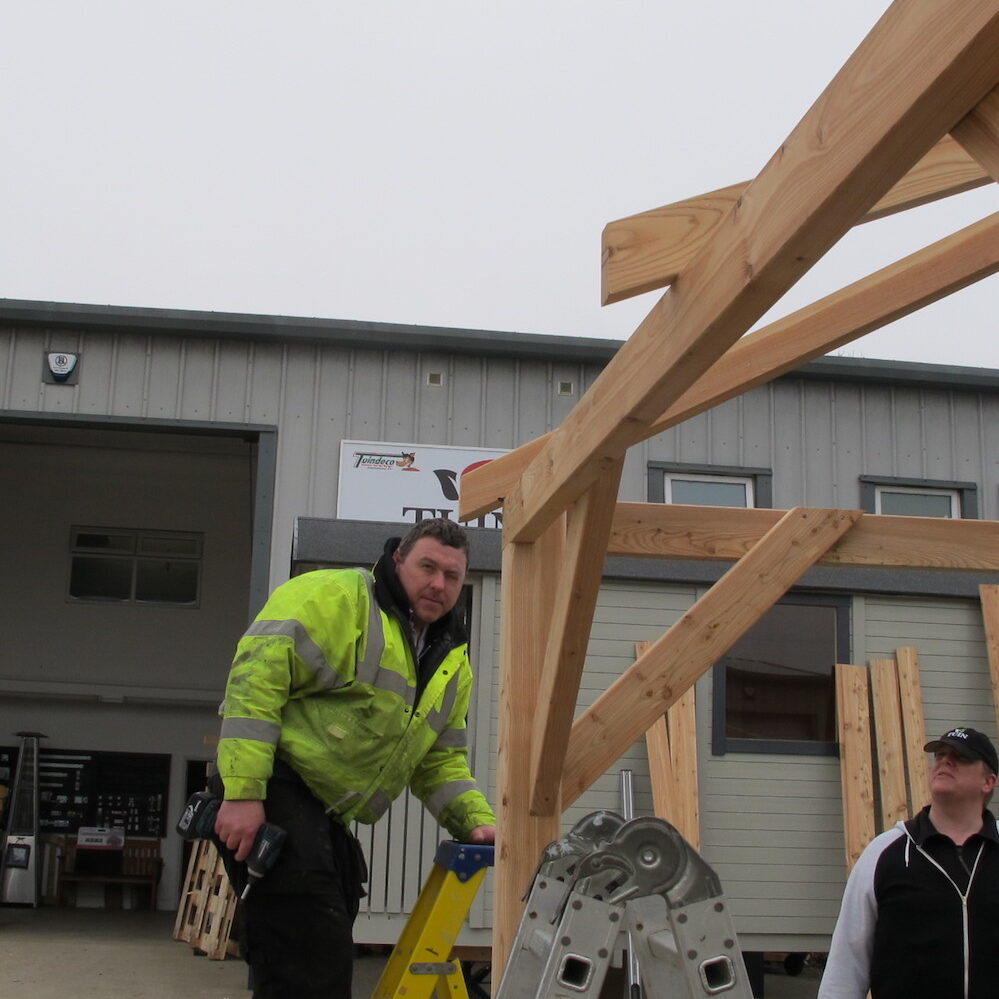
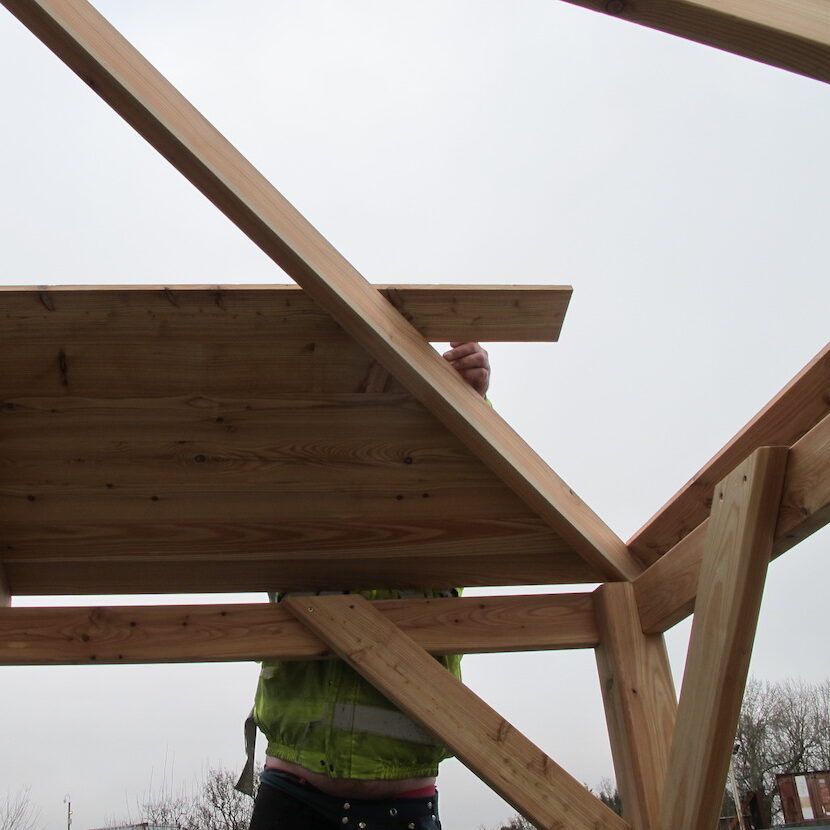
Installing the Lower Edge Rafters
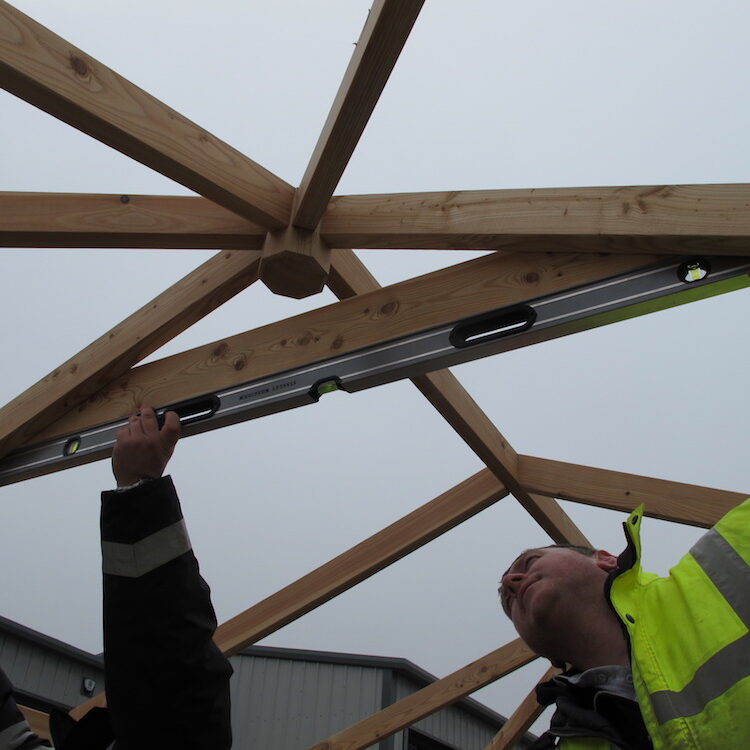
We now start to make a few adjustments and there is a little bit of mucking about at this point. It’s best to be methodical and work with the building getting the ridge straight. It can take some adjustment, it may also be necessary to release the corner rafters again to get everything perfect. Take a slow and steady, thoughtful approach to this.
Remember these pictures are of a gazebo, a log cabin generally has notches in the main ring beam for locating the rafters. Some pushing and pulling maybe necessary to locate them. See my advice above regarding screwing the rafters into the top log.
Back to the gazebo install. As we are confident with the well-positioned corner rafters, we measure the overhang either side of the center rafter taking our cue from the corner rafter overhang.
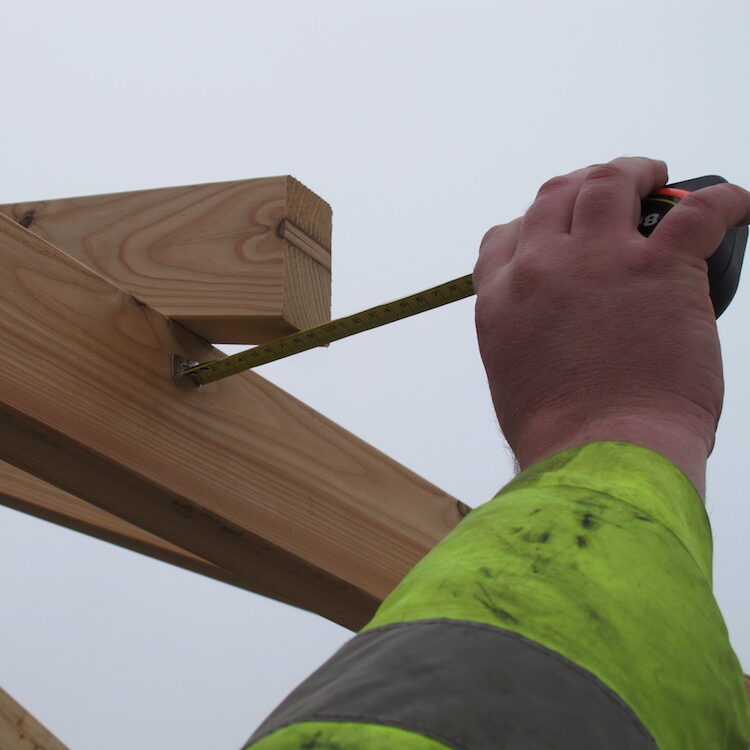
Measure the center rafter. We want them to be the same either side.
Also check that nothing has gone wrong with the top wall or ring beam, a quick eye to check it is still straight. Bracing normally keeps things nice and straight. Log cabins will be easier as you will have numerous logs keeping it straight but please still check for straightness.
Check by eye that the ring beam or top wall is nice and straight before fixing the lower rafters.
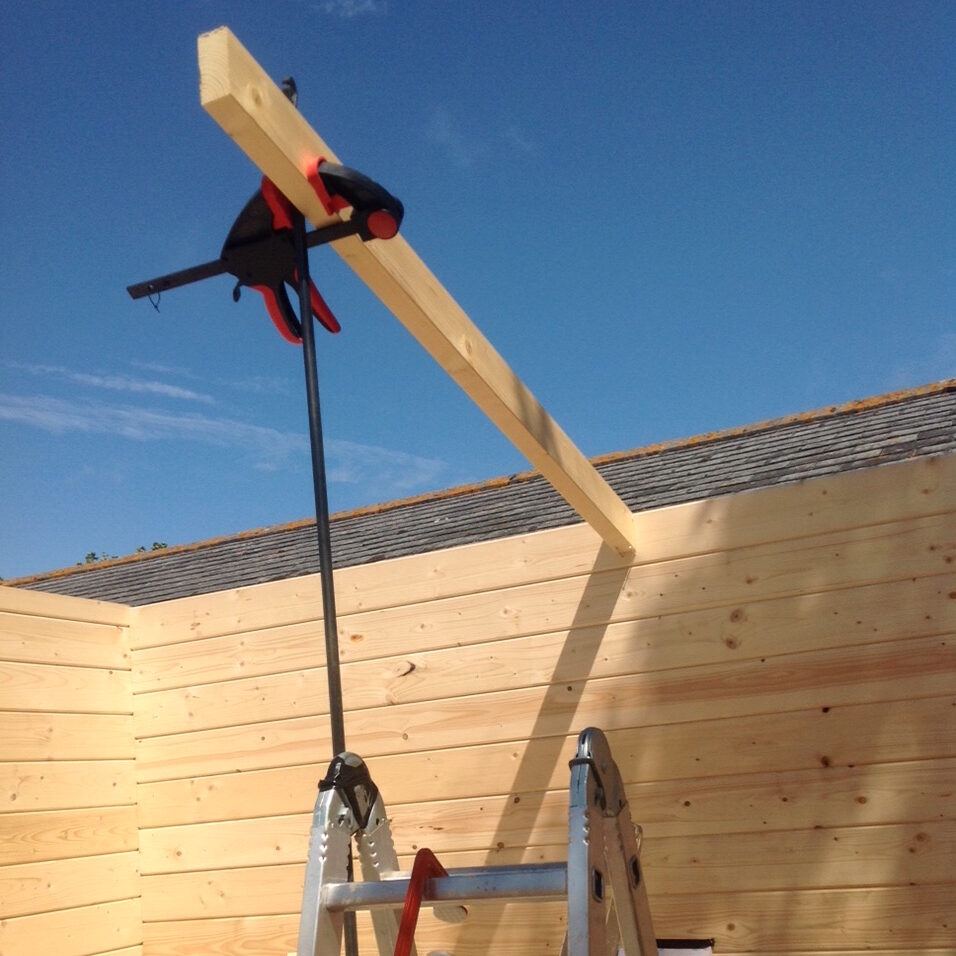
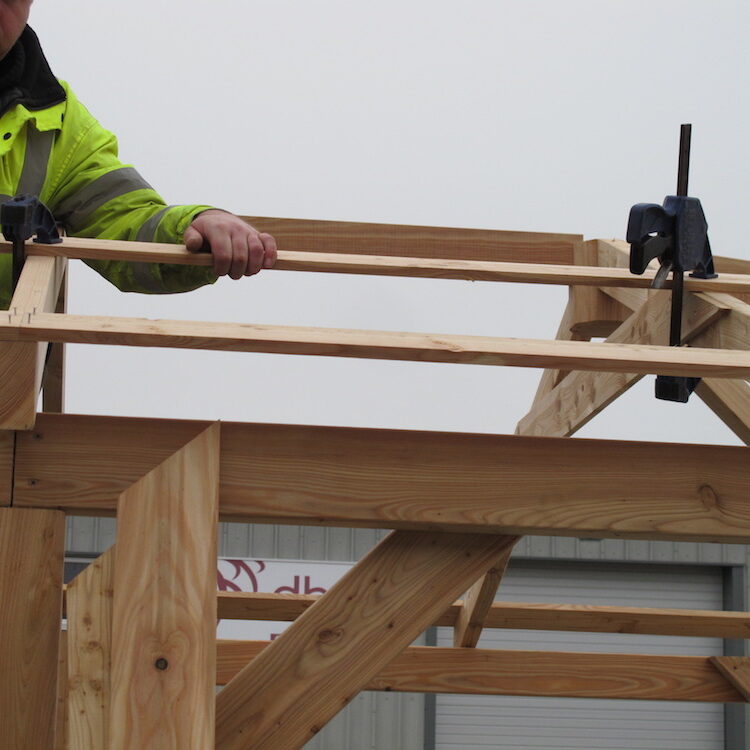
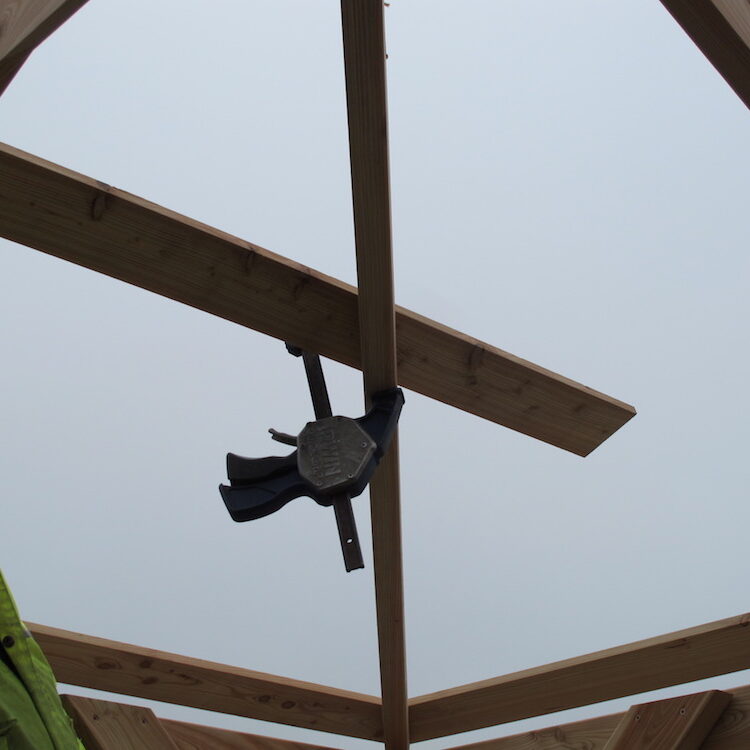
Methodically work around the rafters getting the alignment just right or as near as damn it. Remember our banana rafters will be throwing things out slightly. If you need to push a rafter in slightly the clamp is very handy.
We’re using the clamp to put some pressure on a rafter to push it in further. There was a slight bow in the ridge beam so with a little push we can take the bow out. Don’t forget to use pilot holes before screwing!
Sometimes it goes really smoothly, other times it can take some playing with. Please expect this as part of the building process with any pyramid roof on a log cabin or gazebo.
This particular gazebo has some additional bracing.
-
- Additional bracing being fitted in the rectangular gazebo. Of the three size of screws we had in the fitting kit we’re using the smallest ones.
-
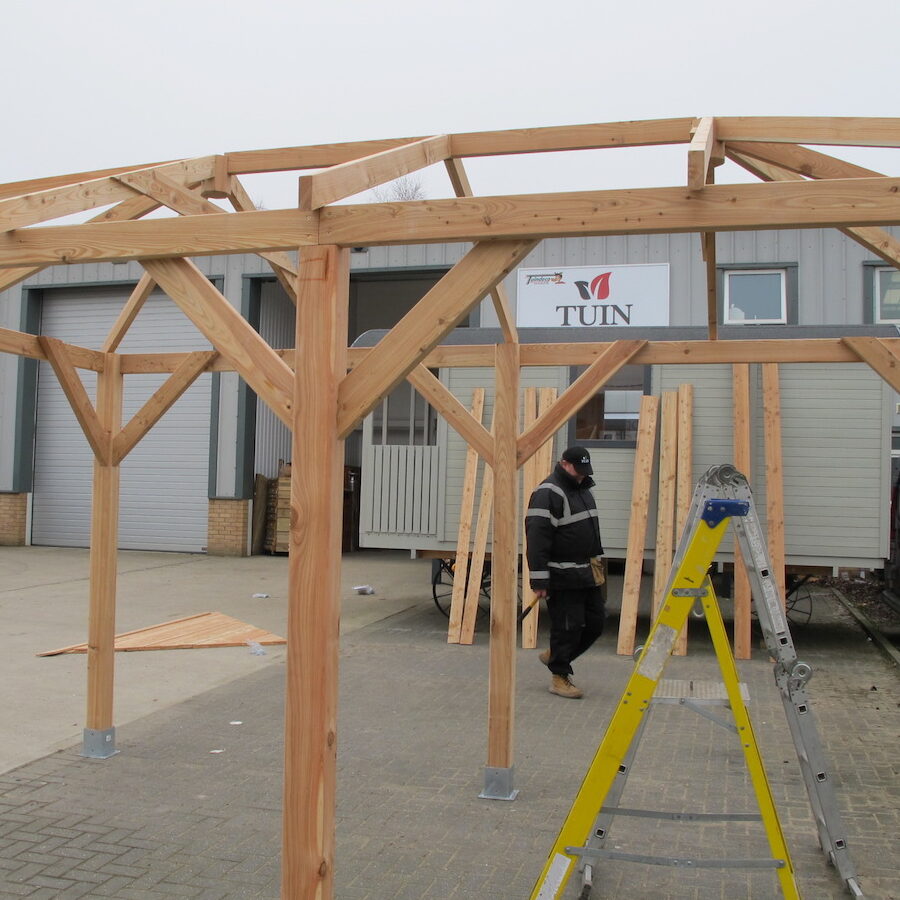
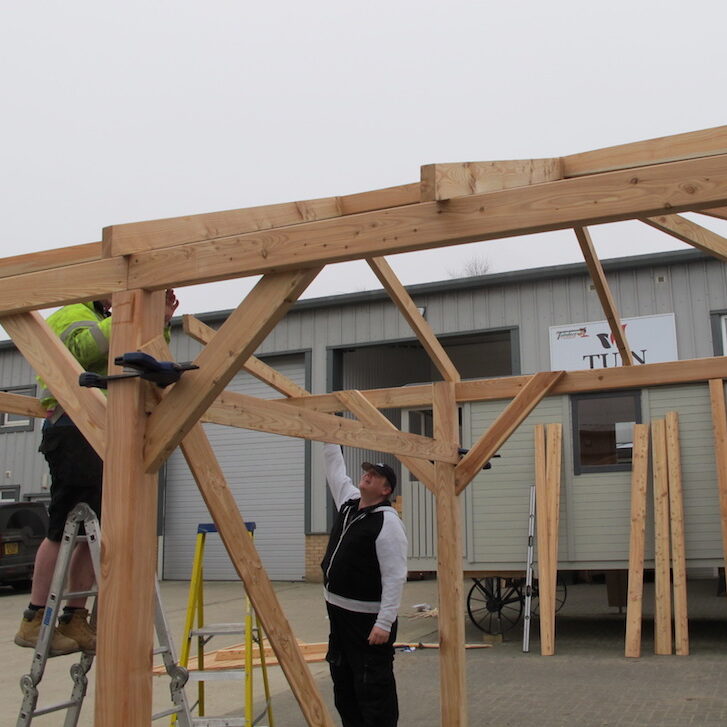
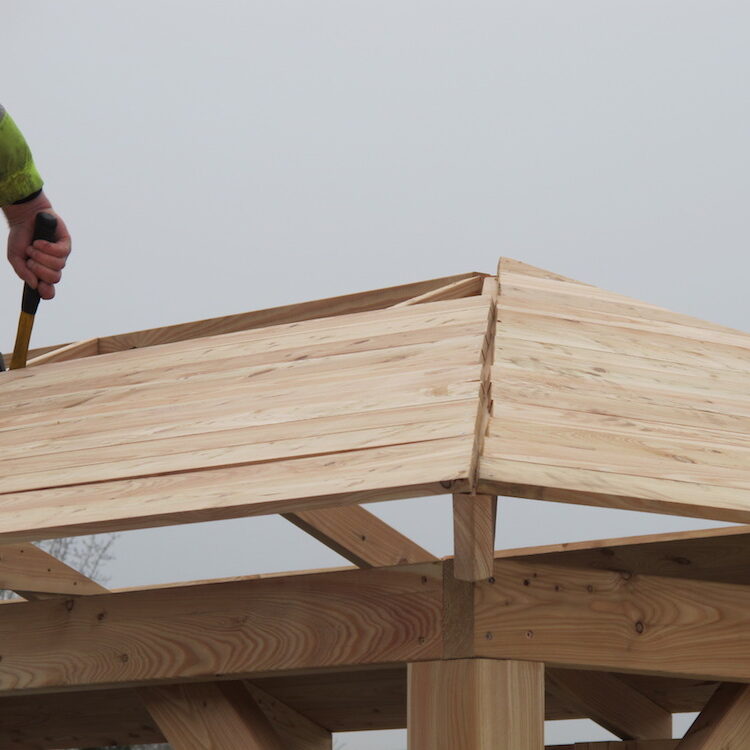
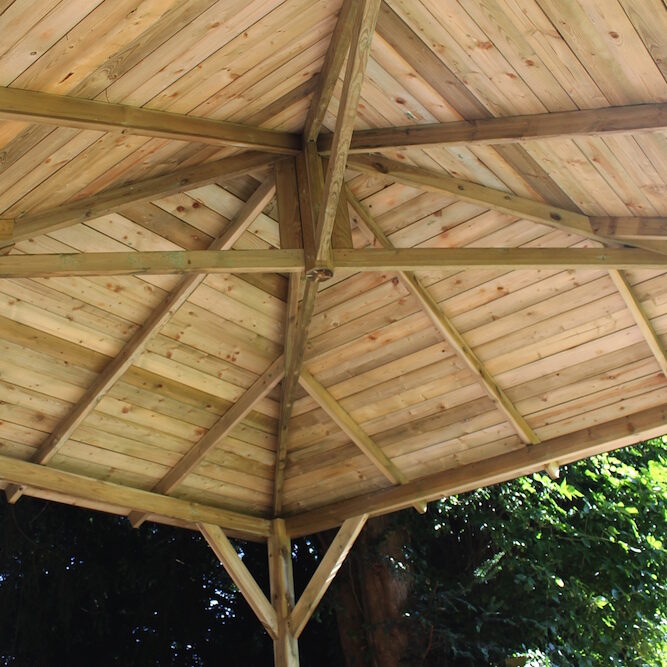
- Roof structure completed ready to accept the roof boards.
-
- A log cabin roof complete and ready for the roof boards.
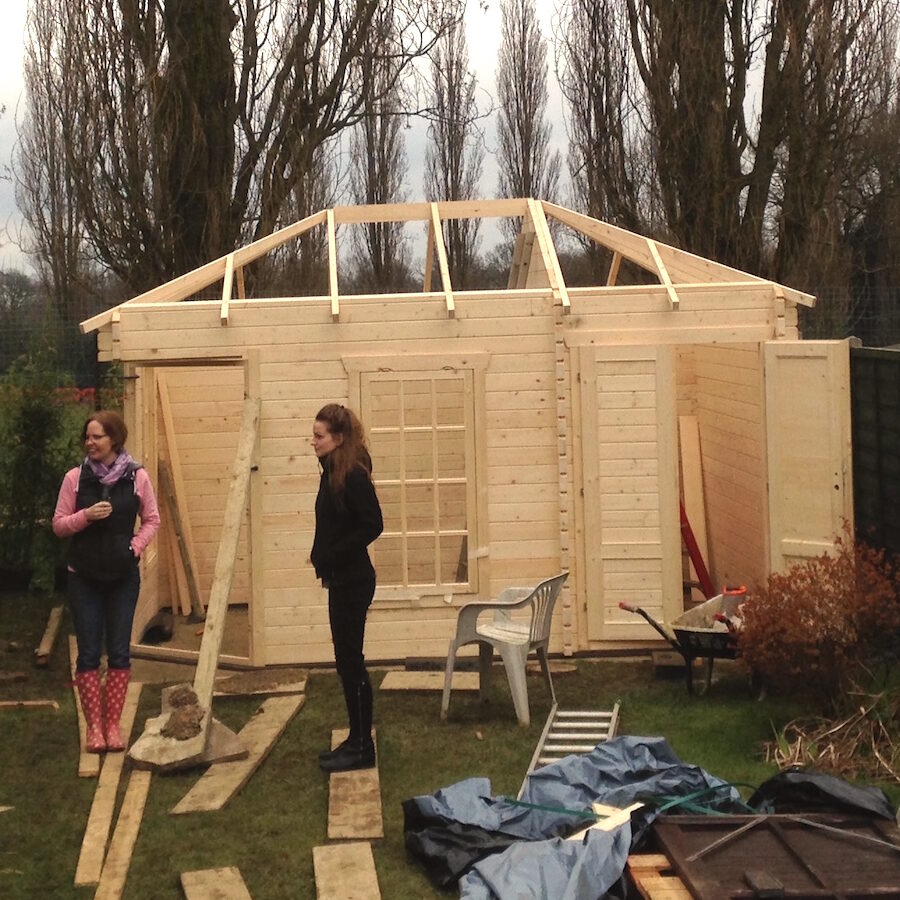
With that, the roof structure is complete, time to put on the roof boards.
Pyramid Roof Boards and Banana Rafters
We’ve still got a problem with the bowed wood. We did decide to ring the office and make a serious complaint, we even demanded someone comes and rectifies it for us. Unfortunately we were met with laughter by the sales team so we’ll crack on.
Does this look like a real problem though to you, some fitters may worry over this?
This is the worst bowed rafter on one corner. It’s a cracking example of a common problem. We can overcome it though.
We don’t want to start with this yet until we have the building stabilised, pushing on this to straighten it without strength elsewhere would not work so we’ll come back to worrying about this a little later.
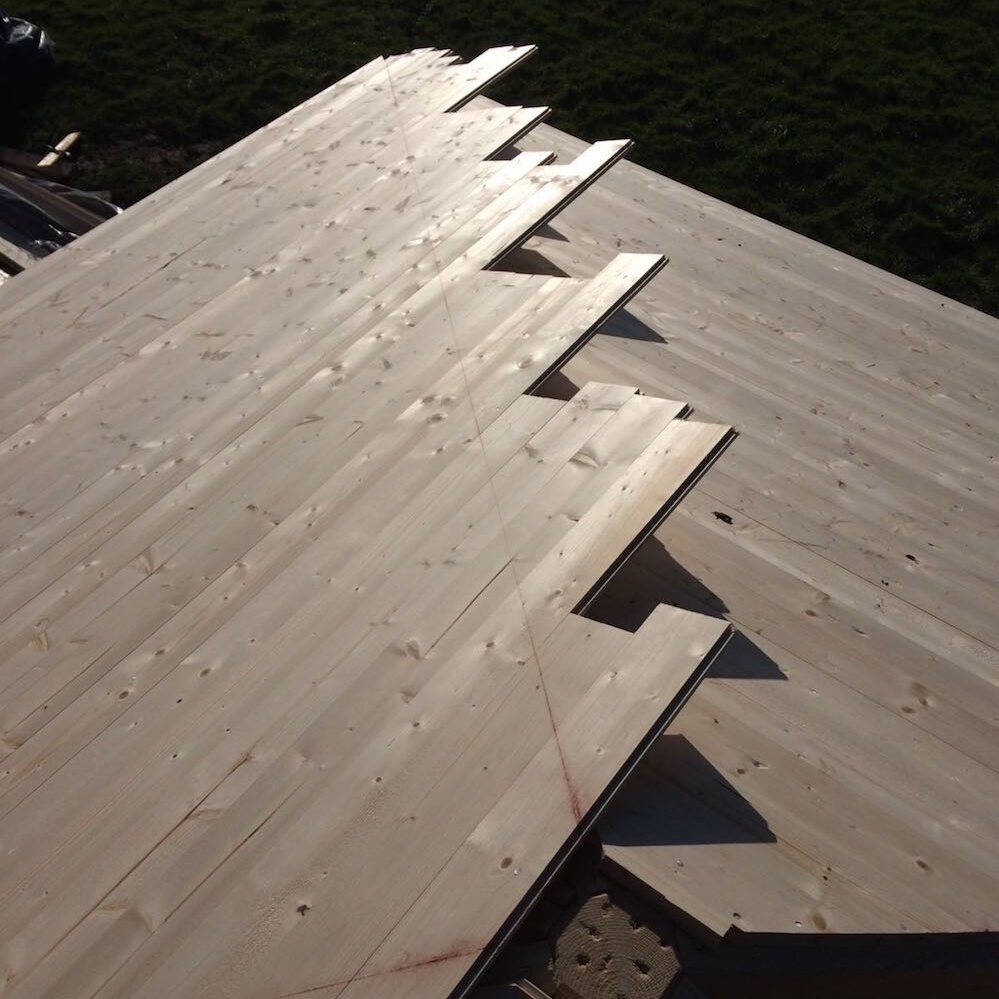
We’ve already sorted out our roofs into the triangle sections, this makes it so much easier and quicker and you can easily see how they are going to go together without confusion. Please note with the gazebos you will also have spare straight end cut boards should you need them, don’t let them confuse you and put them to one side in case you need a spare due to a split or knot you don’t like.
-
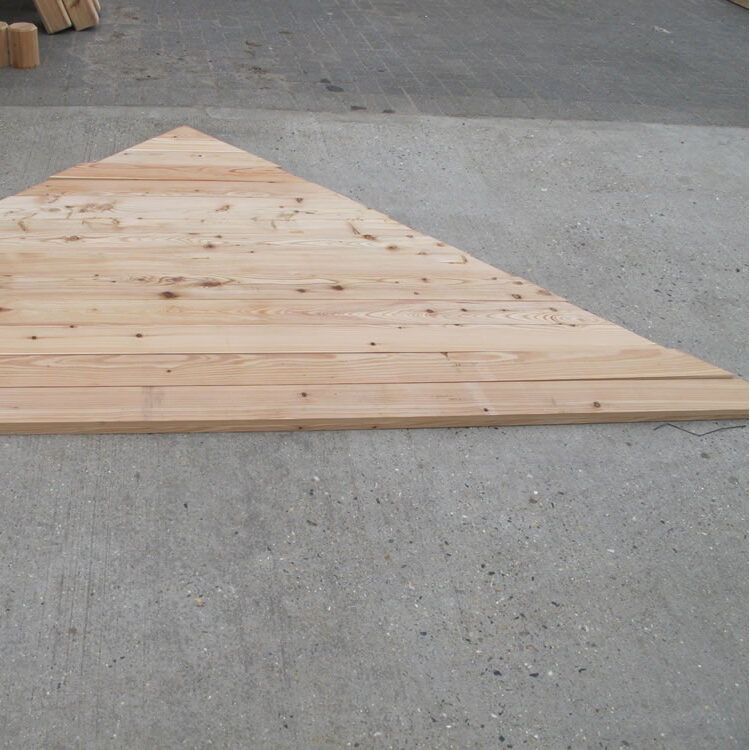
- Roof section already laid out. This is the two ends of a rectangular pyramid roof
-
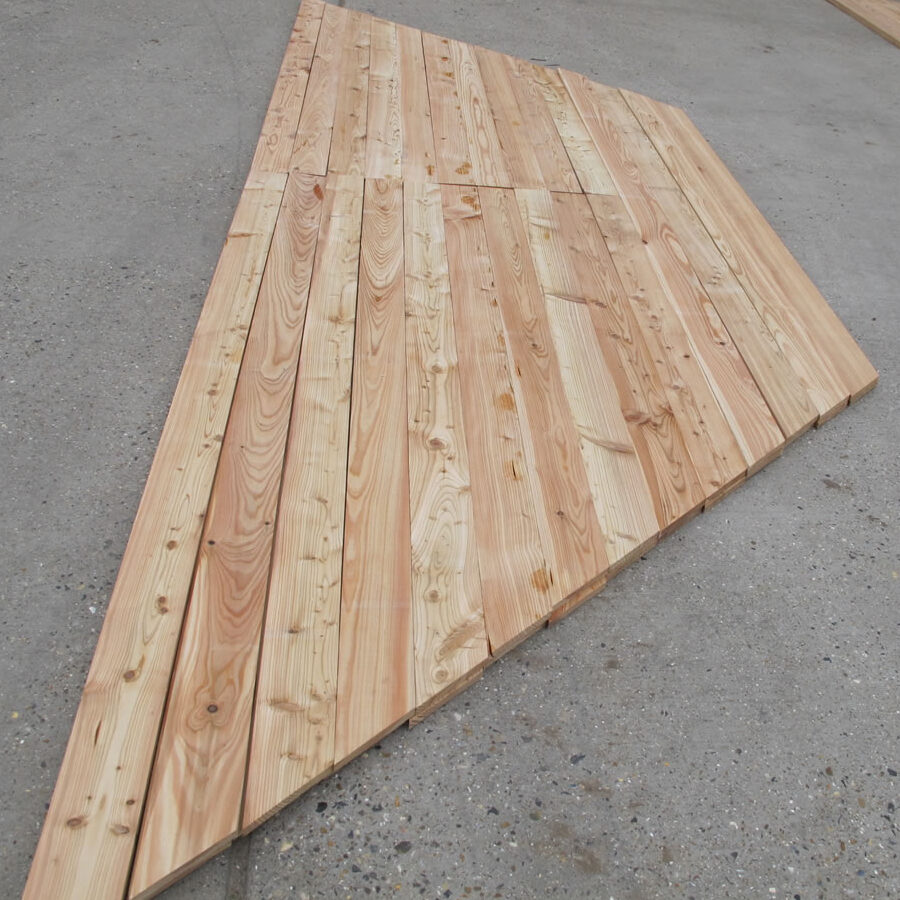
- Extended triangle laid out, two sets for both sides.
We had some discussions on the best way to do the roof boards and the best way to advise you. Both Wayne and I differed on how we did it and you may have a different idea as well, there really is no right or wrong way of doing this.
I like to test a triangle section first so I will tack the first board and then lay in all the others. Tacking every few boards. This then tells me if the triangle is going to fit and whether I need to cut any boards, as I’ve only tacked it I can remove the boards and adjust easily.
To minimise trimming I can raise or lower the triangle and perhaps only trim the leading edge board at the bottom. Once I’m sure it will work I then fix fully and use this as a template for the rest of the boards.
This isn’t the way we have done it on this building example though. This is Wayne’s (Tuin UK Service Manager) method and seems to work very well. He’s fitted a few more buildings than me so I’m bowing to his experience on this one. You may well have a better method.
Regardless though expect to have to trim roof boards for a perfect fit! Wood is wood and we are only human, it is very rare that you will get the perfect situation intended by the factories design computer for a perfect fit without adjustment, a few millimeters out here and there will affect the fit of the boards, it’s impossible to get the roof structure 100% perfect. If you have to trim a few you have made a near perfect roof. If you have to trim a lot you are quite a bit out somewhere but as long as it looks good at the end it is all that matters
Tacking a roof board, all around on the first layer flush with the bottom of the rafter.
Tack your first roof board and carry on around the whole building first, this will tell you the alignment is correct, it should be sitting roughly to the center of the rafter. Don’t worry if they don’t meet together perfectly, if you’re happy with the alignment then nail home fully.

One roof board all the way around on the leading edge flush with the bottom of the rafter.
After again assessing the building and our self created bananas we decide to start at the place that is the best, this is the furthest away from the really bad bow. There’s other smaller ones we created by our dodgy storage the we want to remove as well. Using a plank and our trusty clamps we remove the bows as we go around the building.
Using clamps we can brace off other rafters and push or pull the bows out as we fit the roof boards.
Don’t try a nail gun when you’re doing the roof, please use the nails we provide. Two nails in each board across every rafter. Note the gazebo roof boards are flat edged, all the log cabin roof boards are interlocking Tongue and Groove.

We now come to the worst bowed rafter we looked at earlier. As we have now boarded all the other sections of roof we have stabilised the building more and given it a lot more strength to brace against taking the bow out is now no problem at all.
What bowed rafters? There’s no bananas here!
This is what I love about wood. By working with it and thinking about it most things can be overcome. Wood is very flexible and can be moved, pushed and cajoled into working with us.
We can carry on laying the rest of the boards on this gazebo, do not worry if it’s not particularly neat where it joins. As long as you nail it on the rafter, it is fine as the roof covering hides it.
Don’t worry too much about the join at the corners or other rafters, all this will be covered.
When you come to the small triangle pieces at the top of the roof it’s a good idea to pilot hole them or you will break them guaranteed.
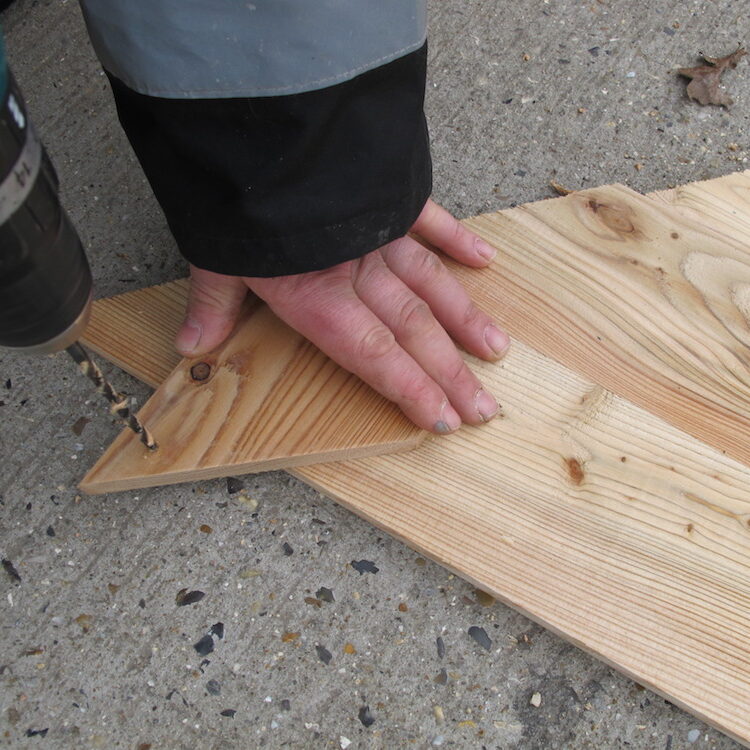
Always pilot hole the small pieces at the top of the roof to stop them splitting.
As I said there is always adjustment and cutting to do with any roof and this was where we needed to trim on this particular roof.
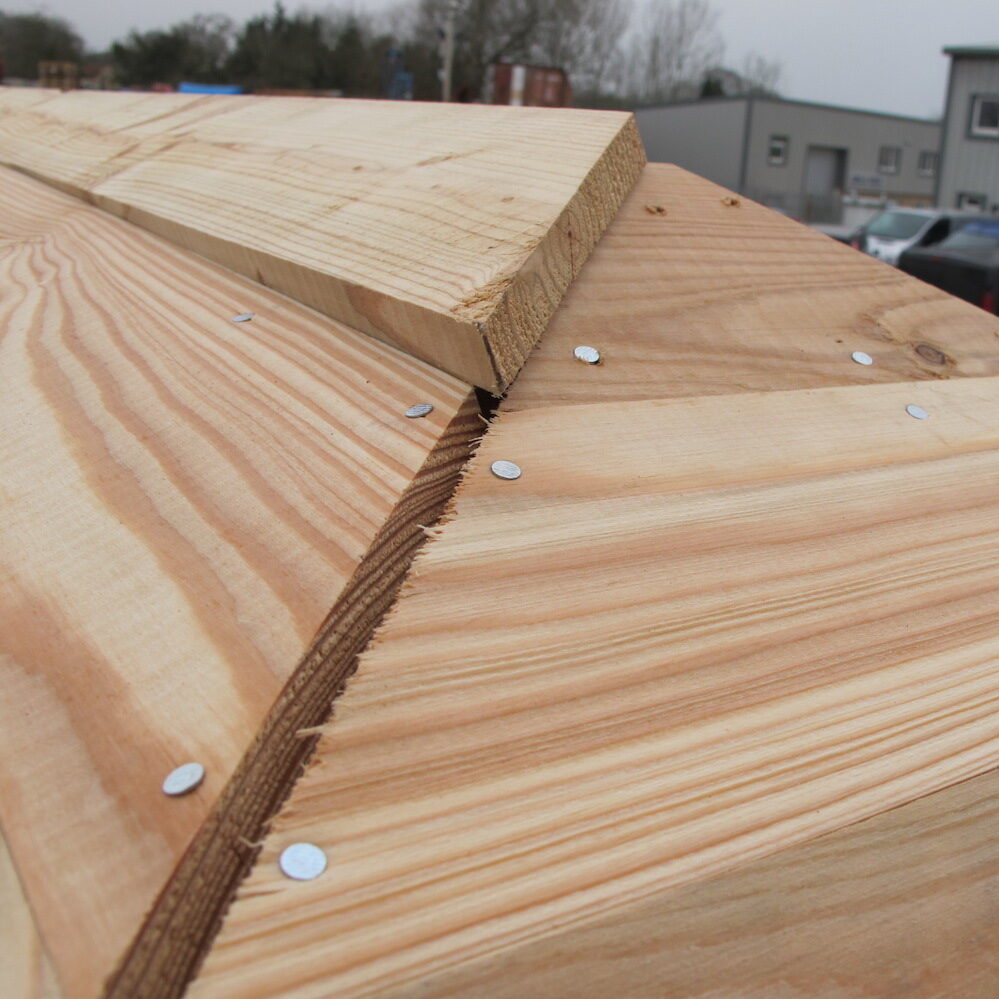
The last two final boards needed trimming to fit. As expected and normally you would have to do more. Not bad considering we had big bows as well.
Completed Roof and Notes
With the roof structures and boards on we can add the final roof covering. You have the choice of Roofing Felt or Roof Felt Shingles. The latter looks for nicer and lasts forever. If you are fitting roof shingles please see the advice and videos on the shingle page linked above.
For flat roofs you have a choice of either EPDM or Easy Roof Membrane. You could also use the ERM on apex roofs as an alternative to felt.
Notes
The square, pyramid roof construction of a log cabin is pretty much the same as the rectangular roof described above. For the square roof gazebos it is a little different and uses a truss system making it easy to do and a lot less complicated. This looks good in a gazebo but I wouldn’t want this system in a log cabin.
-

- Square roof truss system of making a roof on a smaller gazebo
-
- Square gazebo roof construction using truss type beams
Some buildings will have additional corner rafters as the above and below pictures show (the ones in the corner). I will fit these after I have put on some of the roof boards as you can then push it up into the roof boards for a perfect fit. For a log cabin you will need to put them in the notch before the roof boards go on.
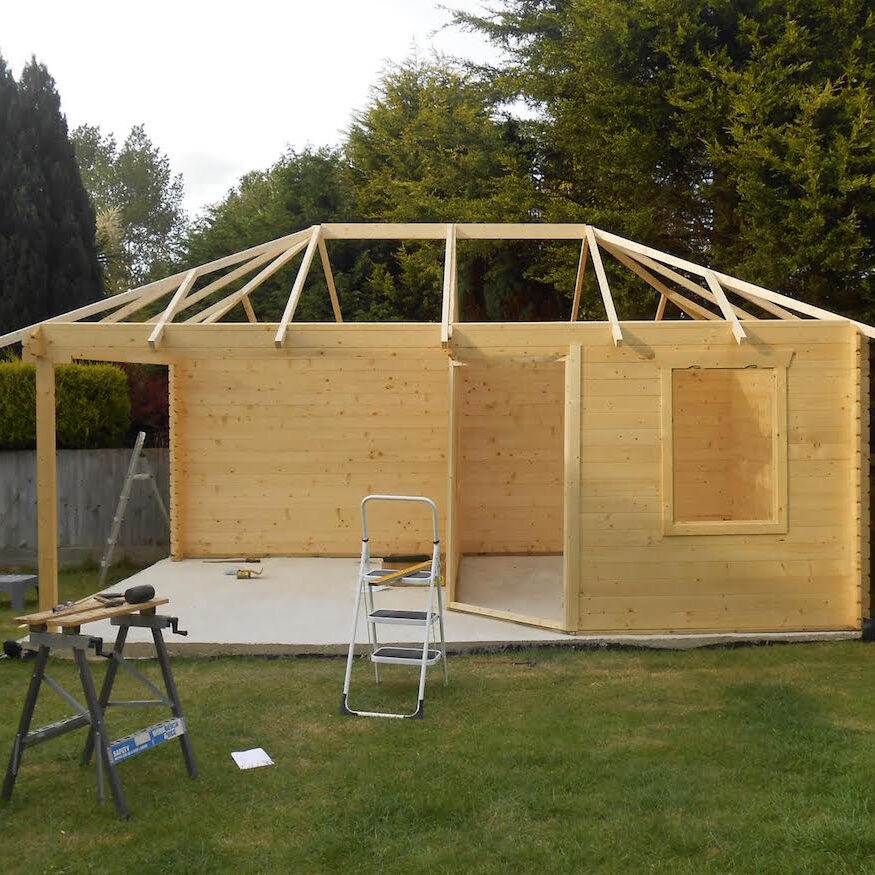
Corner bracing coming from the corner rafters could be fitted after a few roof boards have been put on, you can then push the rafter up to them for a 100% perfect fit.
There are different ways of doing things. You could also start from the top of the roof as shown here. There really is no right or wrong method and all fitters will chose their own. This page is only my advice and you may have a better idea to accomplish your install quickly and easily.
I have come across one or two buildings non-pre-angled roof boards. Actually, I prefer this as you simply nail them in, mark with a chalk line and cut down the line. To a certain extent, it saves a lot of mucking about..
I prefer roof boards like this, they can just be nailed on and cut down to get a perfect joint on site.
Finally please only use nails in your roof boards, a great deal of the overall strength of any building comes from the roof. Two nails in every board across every rafter. And please, NEVER use staples in the roof like this customer did.
Staples used in the roof construction made a VERY weak building and it didn’t fare will in a huge storm with the roof boards lifting in places.
I am currently building the Tourist Open Gazebo (3.4 x 3.4m) & would welcome your advice on positioning the facia boards to the ends of the rafters. Should the top of the facia boards be just below the top of the rafter ends with the first roof plank overlapping the facia boards?
This part of the assembly does not appear to be mentioned in any of the blogs. All the other information has been extremely helpful with my assembly so far with the posts, ring beam, corner braces & the roof rafters. Very many thanks.
Hi Ewan
Happy to help with your question regarding the tourist gazebo,
The Roof Facia’s are normally placed flush and level with the top of the roof planks, Which then create a off-axis L shape pointing back towards the inside of the building. The shingles then patroud past and beyond the front end to form the drip
Happy to help more if needed, For quicker replies please also consider emailing us on info@tuin.co.uk
I constructed a Nilsson corner cabin, as you unpack pay particular attention to the bottom timbers of the pack, all the rubbish wood is on the bottom layer (one amazing piece had 31 separate seeping resin filled pockets (these will ooze for years to come)) but by the time I found it I was on end stage of build and had to use it, you don’t, check it all before you start
I studied second hand cabins before buying and they always seem to fail at the lower wall joints so I painted each joint with preserver before assembling.
To make a stronger cabin you really need to use screws on sacrificial base to first logs, on rafters to top log and rafters to central apex log. These are not provided nor are sizes and numbers advised. This can either stop your build whilst you go in search or cause you to nail (a weaker fixing). Here’s what I used base a mixture of 5.0 x 90mm and 5.0 x 150mm, for rafters to top wall logs 5.0 x 90mm, for rafter to rafter 5.0 x 50mm, for rafter to apex log 5.0 x 75mm.
I attached one rafter to apex log using plaster board jacks and a bungy cord as I was building solo. The plaster board jacks were like an extra set of hands e.g. hold that in position whilst I screw it.
I found big jawed wood work clamps handy to squeeze logs together on the roof projection over porch as hitting with a mallet does nothing, also handy for squeezing rafters into place when slightly out of position.
Great advice and clear instructions. My one question: Once the roof boards are on (I think I’ve figured a way of remaining on ladders) What is the safety advice regarding fitting roof shingles? Presumably you have to crawl on the roof, which I’m sure is load bearing, but with the apex of our gazebo over 3 metres up in the air how do you lower the risk of people slipping off?
Strictly speaking you should be using scaffolding, harnesses, crash mats, crane etc. But I used to fimly screw thick timber onto the roof boards all the way across to act as a foot hold. This can be on top of the shingles as well. In this day and age I’m not advocating it of course.
Hi I will have to take my Gazebo off the pallet when it is delivered because my drive is shorter than 4m. can you advise on how to store it properly without the risk of bowing ? My base isn’t constructed yet and it may be stowed for sometime.
Ideally as it arrives on the pallet, all of the wood flat and supported along its length is perfect. If you can apply weight to the top of it as well that helps.
A few comments from my experience of putting a Syros up over the last few weeks.
It was supplied with a big and chunky king pin and pre-built diagonal trusses. I could not have assembled these in mid air. Instead I assembled the pin and trusses completely on the ground and then removed one truss, leaving a T shape. I had two people to assist me in lifting the assembly and keeping the joints straight. We moved the assembly square with the ring beam and progressively hooked the trusses over it. We then shuffled it round to the diagonal. It was then quite easy to reattach the fourth truss.
The side rafters were a pain as there was no obvious position for them. I used little blocks of wood to position them on the ring beam. I thought later that I could have put the side boards on and used those.
I put the roof boards on from the inside using a ladder, which meant that I didn’t have to risk falling off the sloped roof. I put the shingles on at the same time, and was able to do three complete sides with two edges. I then hired a scaffolding tower for the last side and two edges. Given that professional roofers won’t work without scaffolding these days it is essential for an amateur.
All in all a long and lonely job, but worth it is the end !
Can you screw he roof boards to the rafters rather than nail as once in a nail can be difficult to remove ?
Yes, no problem, we often advise this if you are planning on taking the building down at some point.
Very detailed and helpful advice. Looking forward to building my cabin later this month. It is recommended not to use a nail gun. Is there any particular reason for this as it makes construction easier and nails can be of a corrosion resistant nature.
Please bear in mind this is only my personal recommendation. When you use a nail gun make sure it is adjusted properly. The main problem I have seen is where the nail is fired through far too far. Also if you want to take the building apart again it is nearly impossible to save the roof boards if a nail gun has been used. Personally I also found them heavy to work with while on the roof and find it far quicker with a hammer. Of course though it is upto you and your preference but please make sure the nail head is level with the top of the roof board when complete and not sent it too far.