


Tuindeco have a new Metal Shed range for this year and this will join many other brands of metal sheds on the market. I gained a lot of experience in previous work with these types of building, selling all of the brands available. I was almost at the beginning of metal sheds in the UK. At one point, I was with the largest retailer of them.
It annoyed me slightly though that there was not enough information for the customers. Not to mention, a ‘metal shed’ as a product can be quite misleading if uninformed. I remember a few customers were disappointed with the shed as it was not what they expected.
With this in mind, before promoting this new range of metal sheds, I’m writing this post to make you a little more informed and offer you some all-round advice.
Towards the end of the post I will then walk through the installation of one of Tuindeco’s metal sheds. It has some nice features setting it apart from others.
You can apply this advice to many other similar metal sheds, armed with a little more information than is currently available online. My installation guide will also give you a reasonable overview on what’s expected when you install yourself.
Benefits of Metal Sheds
Anyone selling metal sheds tends to offer a list of all the benefits of this type of shed:
- Maintenance Free
- Rot, Rodent, Insect Proof
- Fire Retardant
- Will not crack, split or warp
So, a good number of benefits here and reason enough to look at metal sheds as a solution to your own requirements.
Security and Cost of Metal Sheds
Cost and Security are two major factors with metal sheds. You must realise that not all metal sheds are secure just because they are made of metal.
In the marketplace you will find one or two companies that list these sheds as security sheds. I’ve found, in my experience they are. In fact, the office has a parcel drop box made by one of those companies, very secure and very strong.
But, these are expensive sheds, rightly so with the material that is in them. Often they are over 1mm in thickness and have special security locks.
If security is your motivation then you need to look at these companies and perhaps do not need to read any further…
As a rule of thumb in your research for a metal shed; look at a 6′ x 4′ shed and if it is over £600 then you are heading for a shed designed for security. If the cost is less than this then it is a simple storage and budget shed.
Do not think for one moment that a shed at this size under £600 is secure. Despite what the seller tells you, do not believe it. Metal sheds with a low cost are not meant for security.
If you’re set on a metal shed then very clearly decide on security or budget.
If simple storage and cost is your requirement then there a lots of sheds on the market including ours.
Budget Metal Sheds For Storage
Ok, security is not a huge consideration for you. You just want a cheap, no hassle, no maintenance shed… In which case there is loads to choose from. As a result, this is where the confusion will start on which one you should buy as you look through the myriad of choices online and in the catalogues.
Here’s the standard features of virtually all budget metal storage sheds which all retailers will boast about:
- Hot dipped Galvanised Steel – all metal sheds should feature this.
- Extensive guarantee – 10/15/20 years depending on where you buy from. Note the small print though, this will invariably be a ‘anti perforation’ warranty.
- Several coats of paint finish – regardless all of these will scratch.
- Entry and Exit ramp at the door way.
Most metal sheds are bought online or from a catalogue these days. Likewise, companies are quite limited with the information they provide for several reasons.
Within the industry metal sheds are regarded as a high volume product and a retailer expects to sell high volumes. The prices between various companies, for a 6′ x 4 will invariably be pretty close together, you’ll see difference of £20 – £60 depending on the manufacture.
This isn’t just a competitiveness between them. There are genuine reasons why one ‘budget metal shed’ is going to be cheaper or more expensive than another.
Don’t just base your decision on the price. Understand that there are differences not immediately obvious of which I will try to explain a little more.
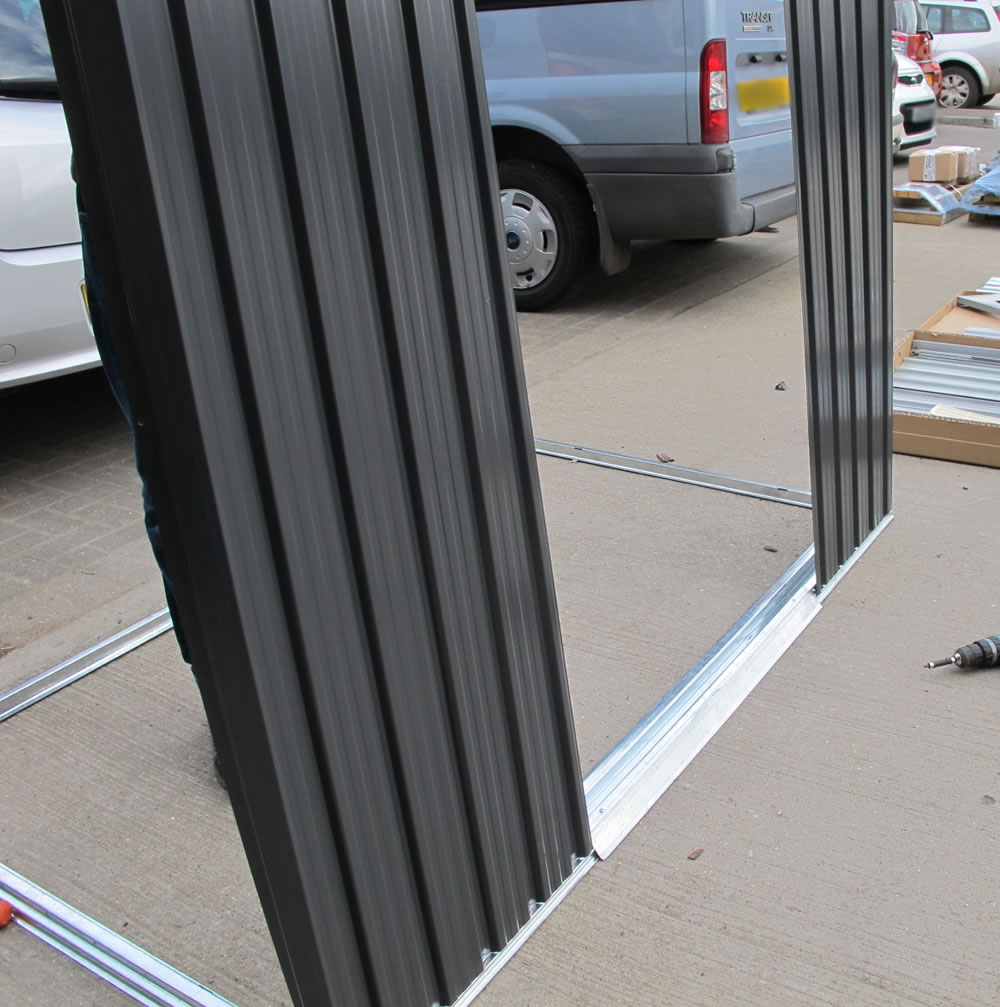
Metal Shed Panels – Folds
All metal sheds designed for storage and budget use the similar thickness metal sheet. Ours have a thickness of 0.25mm which is actually thicker than a lot of metal sheds. Tuindeco specified a thicker metal than usual but it still seems pretty thin, doesn’t it?
Have a look at what other suppliers list as the thickness. Most of the time a gauge will not be listed but they will say something like “High tensile Steel”. If you can find out the thickness of the steel this will help some of your decision process. However… the difference you’re also looking for when deciding who to buy from is the folds in the metal.
The folds are what increases the strength of the panel and its rigidity. Here’s some examples:


So, when you’re looking for a metal shed scrutinise the pictures from the supplier or ask the retailer about the folds in the steel panels.
Metal Shed Fittings
All metal sheds will be fixed using a combination of nuts and bolts and self tapping screws. I personally prefer self tapping screws used the most as it makes installation a lot easier and more secure with less likelihood of nuts coming loose.
It’s worth asking the retailer what the screws are made of, most will be galvanised steel which may rust as below:
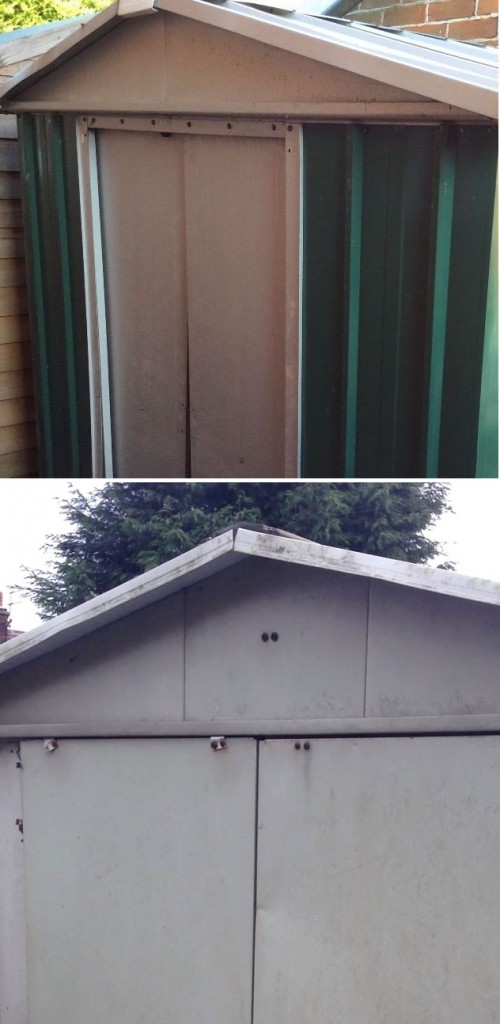
If you can, try to find a metal shed that is supplied with Stainless steel screws and bolts. It makes a big difference in months and years to come. Also it is good to ask if they come with washers or if you have to silicon each one.
All Tuindeco metal sheds have stainless steels screws and bolts and plastic washer packs:
Metal Shed Roof
A very important area that differs quite widely with metal sheds is the strength of roof support. You will find that Tuindeco specify a roof loading strength of 90 km/m.sq. This is hugely unusual as I have rarely seen a retailer even mention this and it should be a consideration. I remember in my previous job complaints over a heavy winter of collapsed roofs, it’s not at all uncommon.
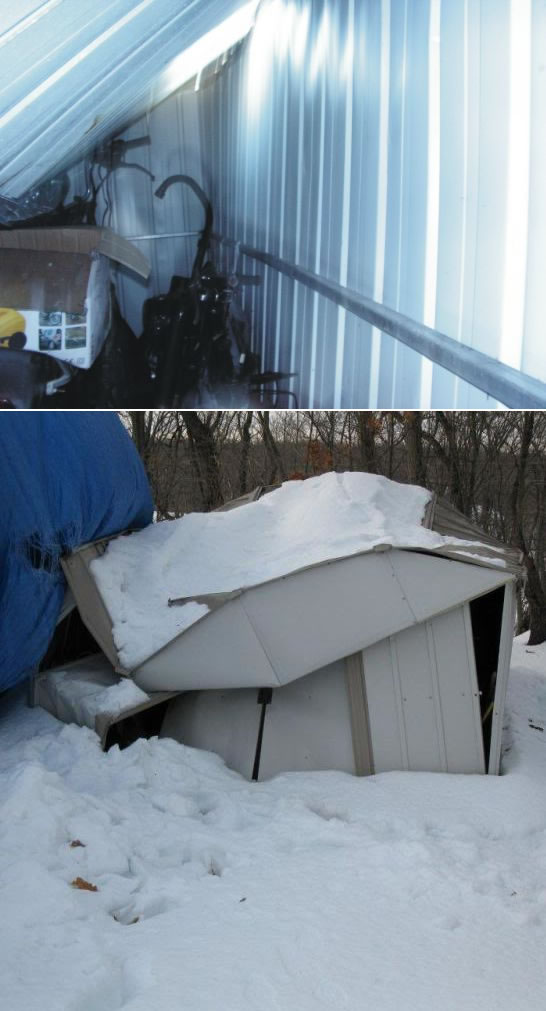
If a roof is specified for strength you would hope to find features such as the picture below. This is the new Tuindeco metal shed I installed and I was very impressed with the roof structure. I haven’t seen this much support or depth of rafters in any other metal shed I have installed in my time.
Many metal sheds will only have a single center support so it maybe worth checking the strength of the roof before committing to a purchase.
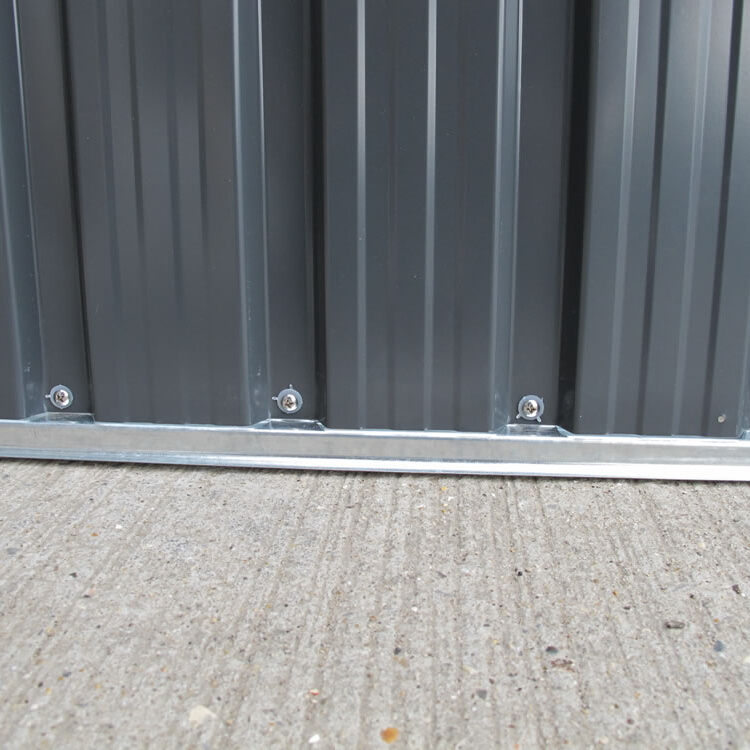
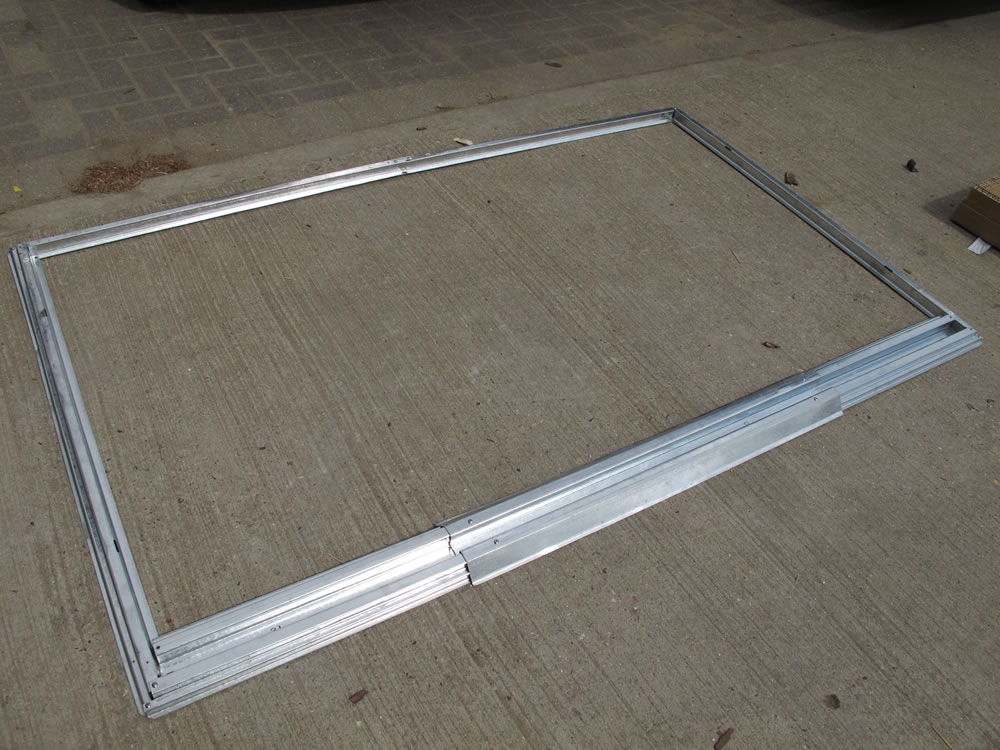
Metal Shed Foundation Kit and Floor
Like our log cabins, A Tuindeco metal shed is first built on the metal base rail that runs around the perimeter of the shed. This can be secured onto any flat and firm base.
Complete with the shed is a metal ‘foundation kit’ which can also be used and flooded with concrete. Timber can be added on top of the metal frame to create a floor. This kit comes with all our metal sheds as standard.
In your research you are very likely to find that other companies will have this as an option and charge extra for it.
Metal sheds have the advantage that they can be fitted to any surface so long as it is flat and a floor put in afterwards. Please be aware that they are quite light and will need to be fixed to the base if you are not using a foundation kit flooded with concrete.
Fitting of a Metal Shed
Across the internet and catalogues you will see the statement: “Easy to install”!
To a certain point I will agree with this but they fail to mention it’s bloomin’ fidley, there’s a lot of screws and metal sheds bite back – plus they can be frustrating at times in the build!
This can be said for every metal shed I’ve installed and I’ve done pretty much every make there is. They’re all a pain, sometimes frustrating and they’re all fiddly due to the small length screws and bolts. It requires some patience throughout the fit.
Also, if you haven’t done one before or are not experienced with plan reading, sometimes the instructions can leave you scratching your head for a while until you have figured out a particular point.
Protection
No matter which suppliers shed you choose the metal panels will ALL have sharp edges and they will cut you!
Where possible during assembly wear gloves and cover your arms. Watch what you’re doing and watch out for sharp edges when installing. In addition until you add the plastic protective tips (supplied with a Tuindeco Metal Shed) there will be screw tips showing inside and these are also sharp until covered (if supplied). The problem comes that the screws and bolts are small so you do need to remove your gloves sometimes but keep in mind always they can bite!
Weather conditions
Don’t try to install in a wind, I did with this build and it made it considerably harder with a greater risk of bending panels while it is unsupported.
I’ve seen most metal sheds advertised at 2 – 3 hours build time, in fact Tuindeco’s instructions say this as well. I will not agree with this and I would advise you leave at least 6 hours installation time for an 8′ x 6′ shed or below. A larger shed will possibly take longer.
Don’t fit it alone
You will need two people to install it easily. If you are installing a larger shed which is going to run into two days make sure you support all the panels fully before leaving them overnight. I did receive a complaint years ago of a collapsed building overnight during a storm. They are quite unstable until built properly.
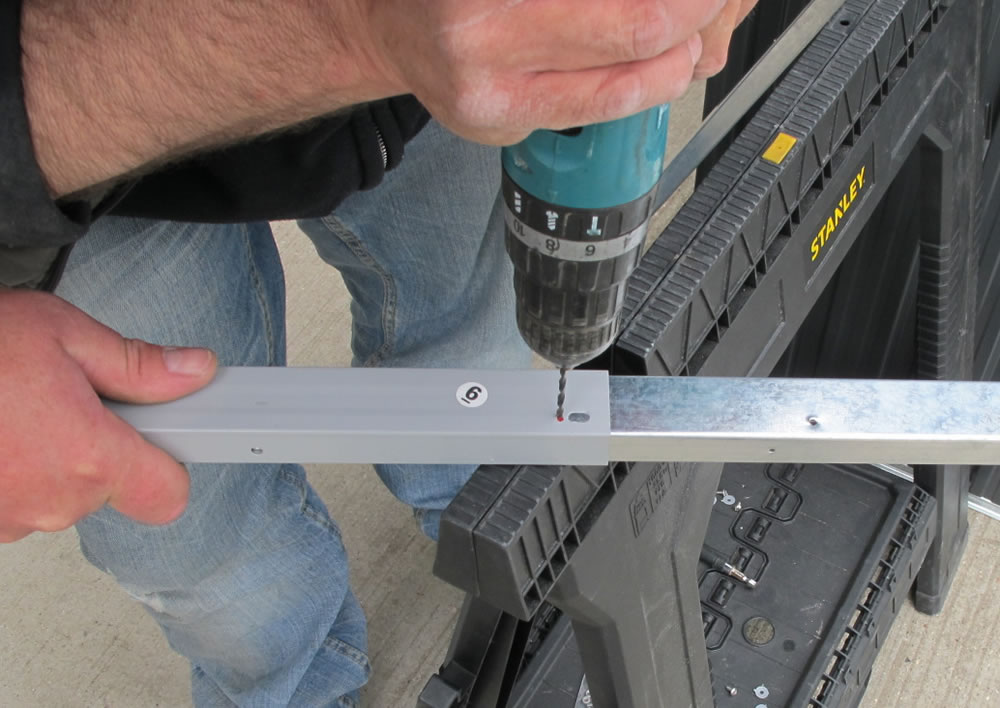
Tools need to fit a Metal Shed
This is pretty much the same as installing a log cabin or a timber shed but with a metal one there are a lot of screws to fix. You need a battery powered drill, ideally with an extra battery to get it done in one go.
You will also need step ladders, a hop-up is useful and it’s a good idea to have a couple of 3mm HSS drill bits handy just incase something doesn’t line up perfectly and you need to drill the odd holes – Some models on the market will need a lot of holes drilling – a common complaint in metal sheds.
A square is handy as is a spirit level.
Did I mention patience? You will need a moderate portion of this at times throughout the install.
Tuindeco Metal Shed Installation Walkthrough
I don’t like selling anything that I haven’t got experience of so I can help customers if needed. Also, I need to make sure the product I am selling is a good quality or if a customer experiences it as less in their opinion I can at least defend it based on my experience of the comparable products available.
I admit to being sceptical as metal sheds are tricky things but I really do think this is a good shed when compared to everything else I have been involved in over the years.
Below is a walkthrough and my experience of installing a Tuindeco Metal Shed. All metal sheds will be similar and this may be helpful for you even if you have not bought one of ours.
Opening the Contents


One thing that pleased me was how well everything was numbered and straightforward to identify, other sheds I have installed took a little longer as parts need to be identified solely from the drawings. Clear labelling did make this easier as there are quite a few bits.
A major complaint with some metal sheds is the hole alignment. This was one of my biggest concerns with these new sheds and one of the reasons why I wanted to put one together myself before we promote them. If you look across the internet for reviews you will see it time and again: “holes didn’t line up!” This is a regular complaint and not one we wanted.
I was very pleased though, for the majority of the build, it all lined up nicely, you do sometimes have to pull the panels a little or send a screw through slightly at an angle but it all worked very well, I was pretty smug with the shed and enjoying the build, so far so good!
Erecting the Shed Panels
Stupidly I had picked a windy day to do this, I should have known! Once committed though I wanted to get it done. At this point I chose to ignore the instructions and worked around the building as I could stabile it better.


Up to this point everything had worked well, the holes had lined up but as I mentioned sometimes you have to pull the panel, handling the screws is also very fiddly. Watch for sharp edges!
Making Amendments
Then, a slight disappointment I did find two holes that were not correct this was the only time on the whole of the build and was the fascia strip that covers the front sliding rail. It was only out by a few mm but nevertheless I did have to drill a new 3mm hole. As it was on the fascia though, another panel covers it, so not a huge deal. I had hoped though to have a 100% record of lining up properly but sadly now only 99%. Still, pretty bloomin’ good though when compared to the other products I have experience of.
Fixing The Railings


The Roof Panels


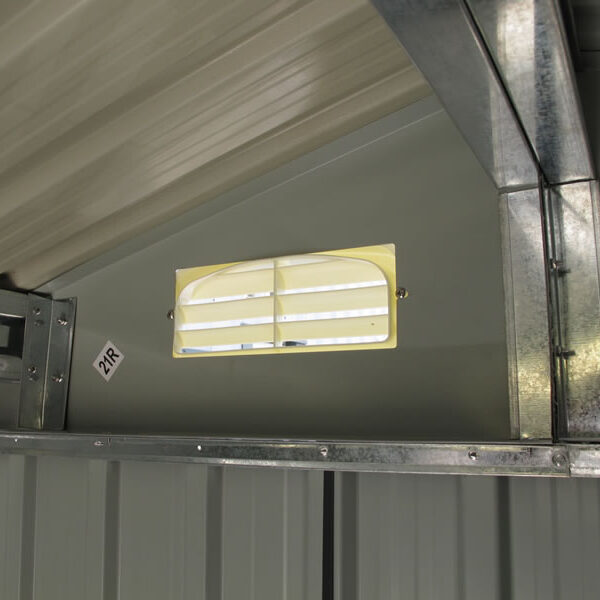
The Door and Ventilation


The Finished Shed
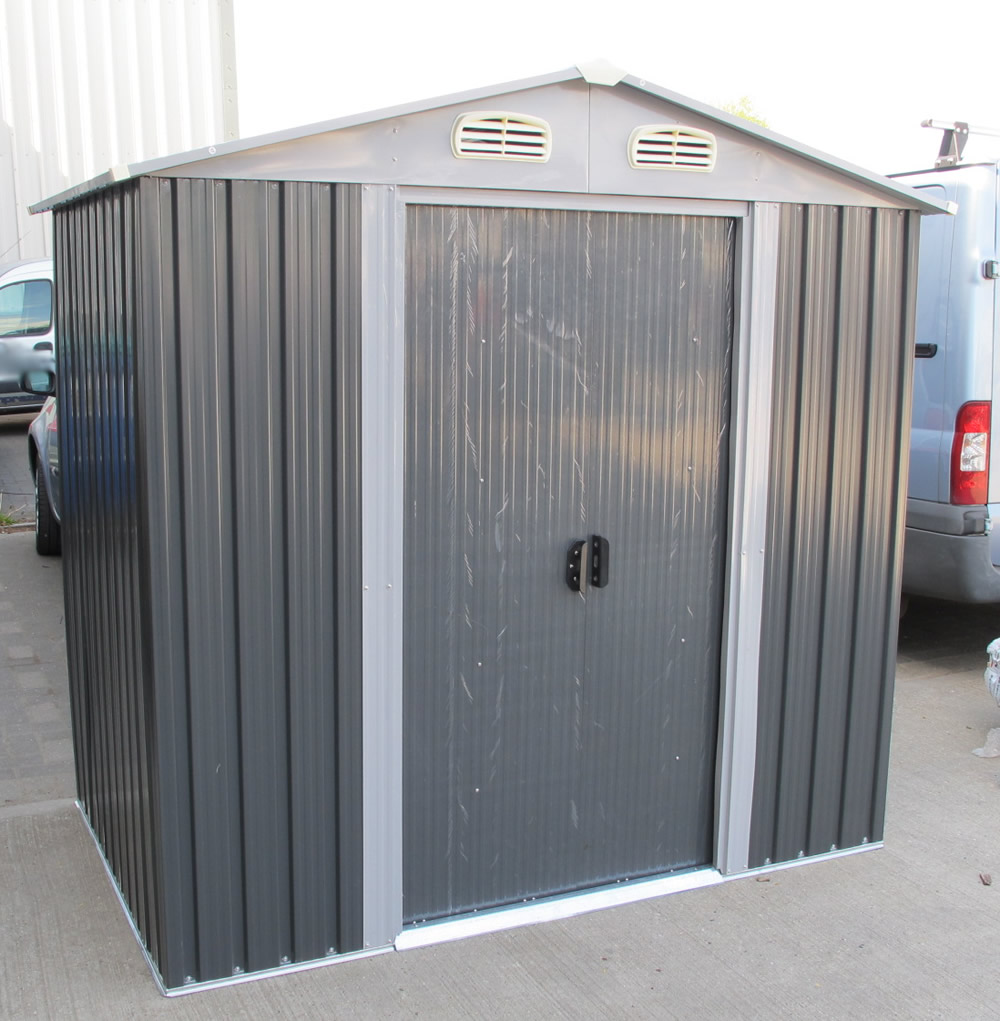
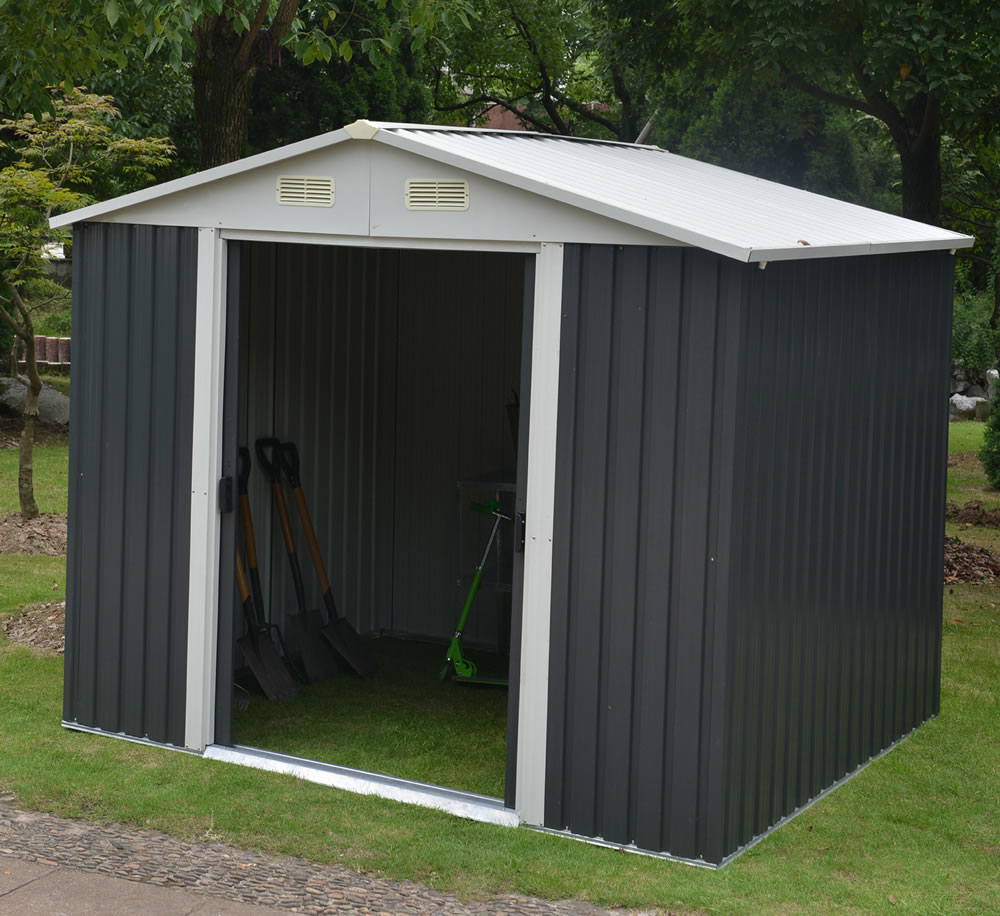
Finally, after cursing, smattering of frustrations and cuts on my hand, I finished the metal shed. I liked the colour as well, it blends in nicely and I can see it quite unobtrusive in the garden. Other sheds are green or blue or any myriad of colours and combination but this does hide itself well. Do you really want a bright coloured lump of metal in your garden?
One small thing to note is that several of the panels has a protective plastic film on them. I left most of it on during the install thinking this would be a good thing and help to protect it from me scratching it.
In hindsight this was wrong as it’s a real bugger to get off when all screwed together. I would now recommend removing this as you go!
Limitations of a Metal Shed
If you choosing a metal shed for simple storage on a budget you can’t go too wrong with them. Certainly ours I think is very good value for money with features that takes it above what others are offering. But it still has limitations, as do its competitors:
- NOT a security shed – despite being made of metal, do not buy this type of shed thinking it has more security over a wooden one. It’s an easy break-in.
- Condensation – Metal sheds can suffer from a condensation problem. You can limit this with the use of a damp proof membrane on installation and making sure you buy a shed with ventilated gables. Other factors influence this though, so I will follow up on this is another post.
FAQs
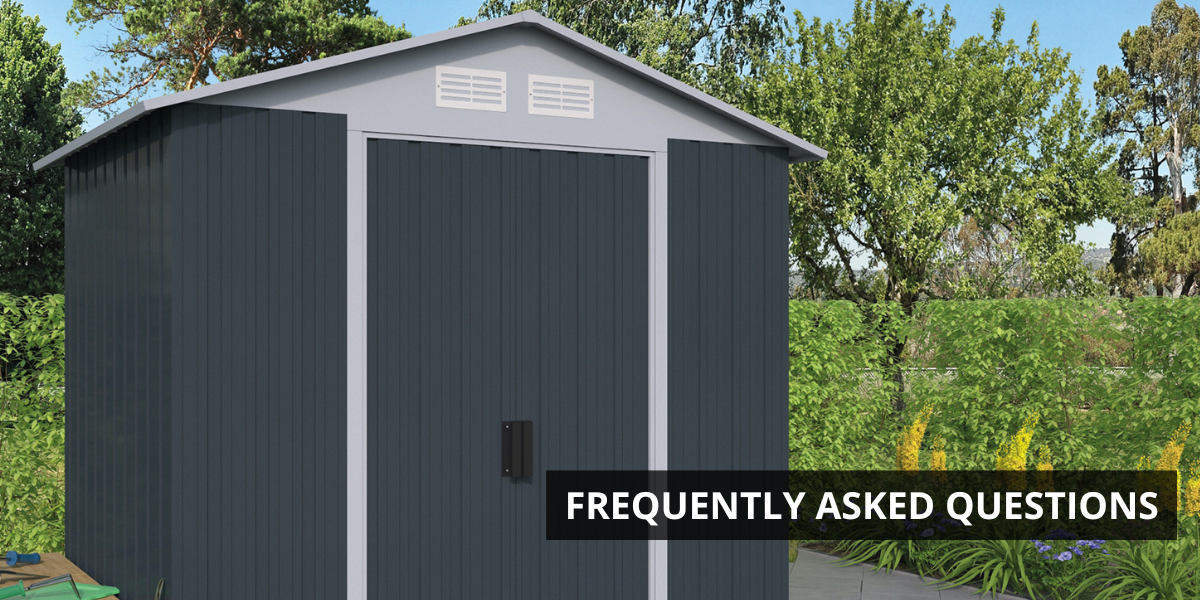
Before we wrap up, I’ll answer a couple questions I’m sure I’ll be asked:
Do metal sheds come with a floor?
No, our Metal Sheds range do not come with any flooring packs. It does however have a ‘foundation kit’ that can be filled with concrete to make a floor-like space.
Do you need a floor kit for a metal shed?
A separate floor kit is not necessary for you Metal Shed.
What can I put under a metal shed?
A Metal Shed can be build under any flat, solid surface.
What floor to use for metal shed?
If you want to add a floor for your Metal Shed, you can either fill the foundation space with concrete, or lay timber on top.
Summary on Metal Sheds
I hope this has been of some use to you. Have a look what others are doing and can offer but keep in mind:
- Height of doorway
- Height of roof
- Material used in the fittings – Stainless or galvanised
- Number of folds in the panels – the more folds the better
- Thickness of sheet metal – Thicker the better
- Type of packaging – to ensure it arrives safely and you can store it until ready to install
- Roof Strength – this is quite important and worth questioning.
Also, don’t believe the ‘easy to fit’ it’s frustrating and fiddly but worth it in the end for a very cheap maintenance free garden shed. See here for more information on Tuindeco Metal Sheds
Very us full guide
Fantastic write up , I have just purchased this in the 10 x 8 format and have invested 8 hours so far building the main structure..rain has stopped play so just the roof panels and sliding door left to fit ….im going to check my outside roof supports beams now as im sure mine are installed inside the support brackets not on the outside as yours look in the picture.
Also the head clearance is much lower than i expected therefore im going to mount the shed upon a course of breeze blocks and build a ramp access up to the sliding door entry
One of the most important parts of shed construction has to be the base.
A few years ago, I decided to buy a metal shed, it was not the cheapest, but a good make. The base I did was compacted limestone and then new railway sleepers sat on dpc. The floor base frame and bracings were 4×2 tanalised timber. I left a 2 inch gap between the sleepers. To allow air to circulate The base frame was then fixed to the sleepers. The floor is 15mm sterling board. I had to replace the sterling board last summer because of the rain that run off the pitched roof penetrated through to the inside of the shed. I have now fixed miniflo guttering and a down pipe to the shed. The rain water is now stored in a water butt. I would recommend using guttering if the shed is placed close to a lawned area.
Thank you for your contribution, I’m sure readers here will find this useful.