


It’s lovely when customers pass on their findings with their experience with their Log Cabin, as it helps other customers so much in understanding what they are letting themselves in for!
It also gives them ideas and thoughts on how best to complete their project and with what product. It’s also good for us to know if there have been any niggles or problems and to try address them for future customers.
Mr M was kind enough to send us a factual presentation of his building in a PowerPoint presentation, I have copied it below, it is for his new Derby 58mm Double Glazed Log Cabin
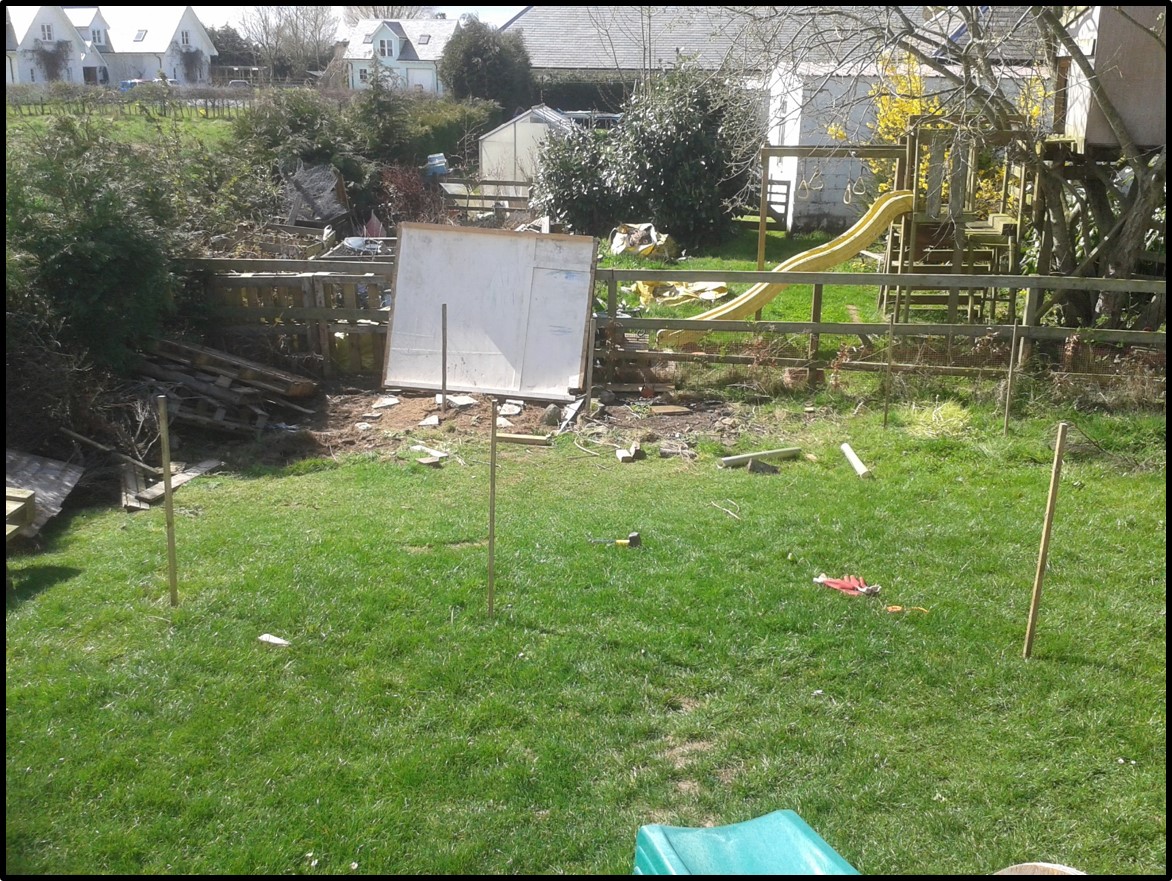
The Site
The following pages show the construction of our log cabin. The whole process took about 6 weeks, although it could all have been done much more quickly if I hadn’t been limited to weekends and holidays. The foundations took a week; putting up the walls (with windows and doors) took a day; the wooden roof (with insulation covered by shingles) took a couple of days; then lots of evenings painting, sanding, waxing, etc…
The log cabin was to stand in the corner of the garden, on sloping ground. The ground slopes away towards the fence at the back and there’s a height difference of about 18” from front to back. I first marked out the footprint of the cabin and cleared the turf.
Foundations
I built a timber frame for the cabin to sit on.
The perimeter consists of 2”x6” timber (laminated together to form a base 4” wide to support the log cabin walls). The floor joists (2”x4” are at 30cm centres and the whole thing sits on 4” posts concreted into the ground. (This took ages – I hadn’t finished them all when this photo was taken – the joists aren’t fixed here…)
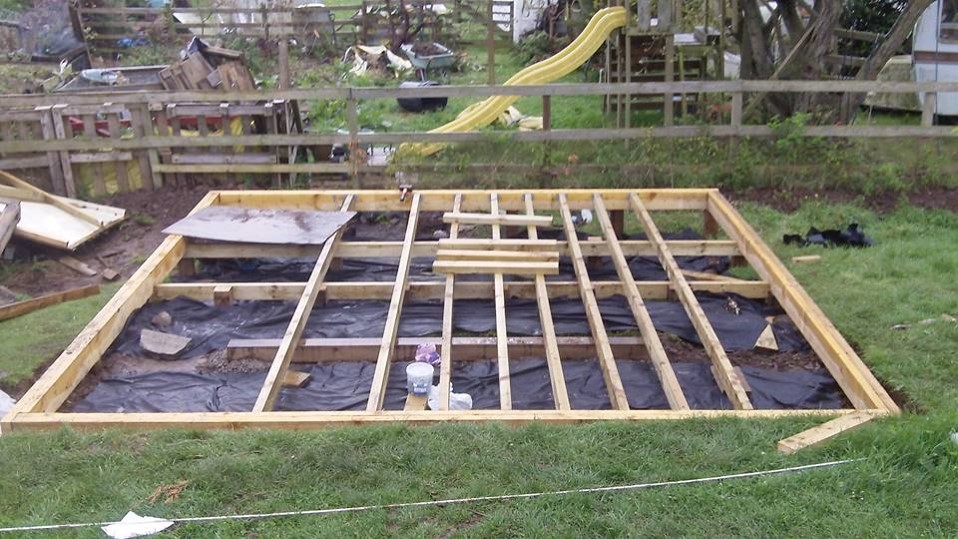
The foundations for the log cabin
This photo shows the height difference between the front and back of the cabin. Getting the posts level and square was a difficult (but important!) part of the build.
The joists are supported on joist hangers at the perimeter and on lengths
of 2”x4” that run across the foundations (attached to wooden posts). Two of these are visible in the picture – I put in another one before fixing the joists.
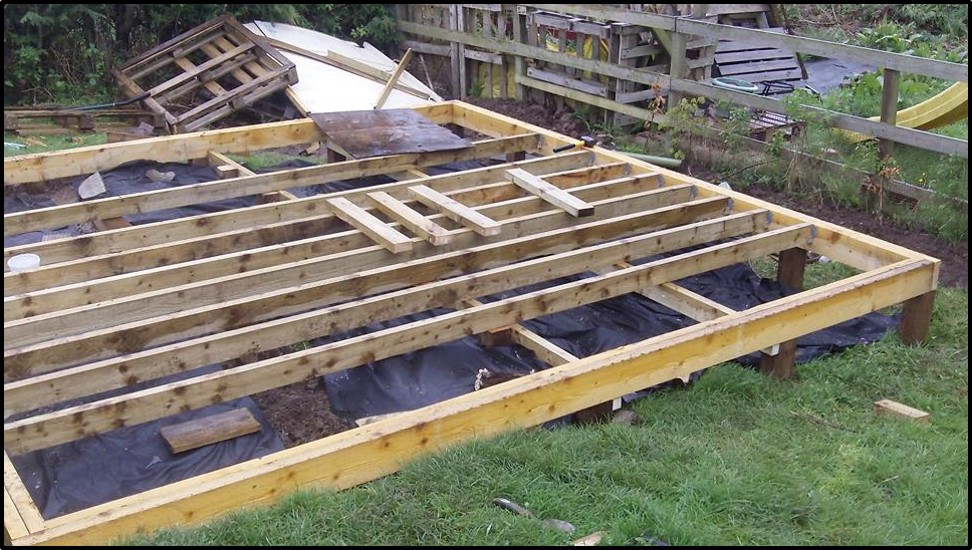
Timber frame base for the log cabin
The Flat Pack Arrives!
The cabin arrived and was unloaded from the lorry with a forklift.
It’s a pretty impressive flat-pack!
I unpacked all the parts and separated them by length/type. This is best done by two people – most parts can be lifted by one person but the doors/windows and some of the longest logs need two people.
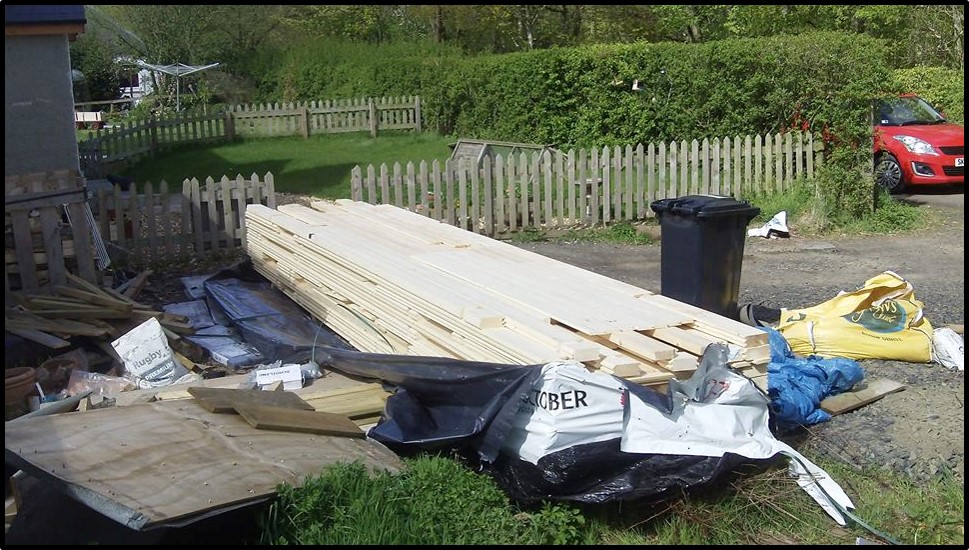
The log cabin arrives
Walls Going Up
The walls went up very quickly. Once the first few layers are in place (and square), it’s an easy job.
The windows and doors are a little trickier. With the doors, I made one mistake – I didn’t put the door sill in-between the two side panels. I managed to fix this later. (The door sill wasn’t shown on the instructions but it’s obvious where it goes once you know what it is!)
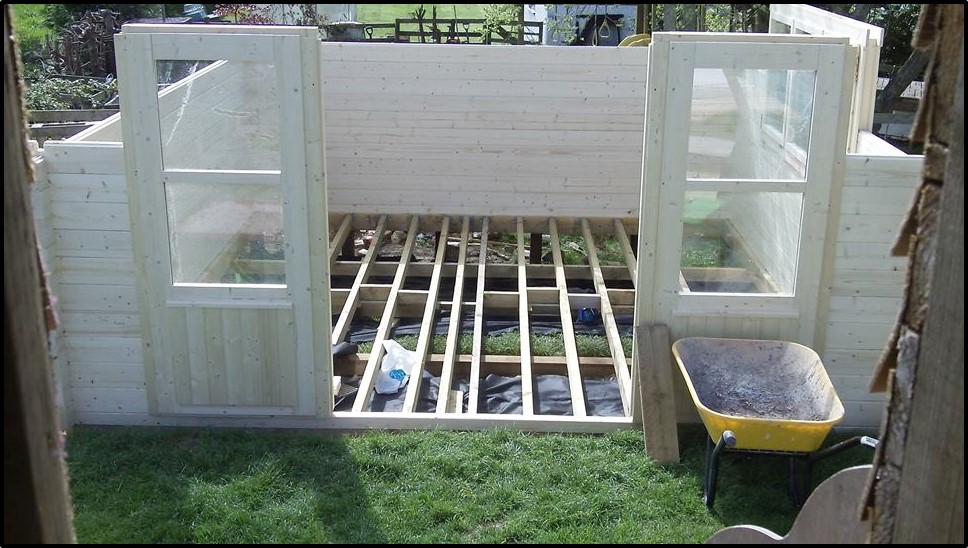
Log cabin walls going up
Nearly There
Up to this point took perhaps 6 hours.
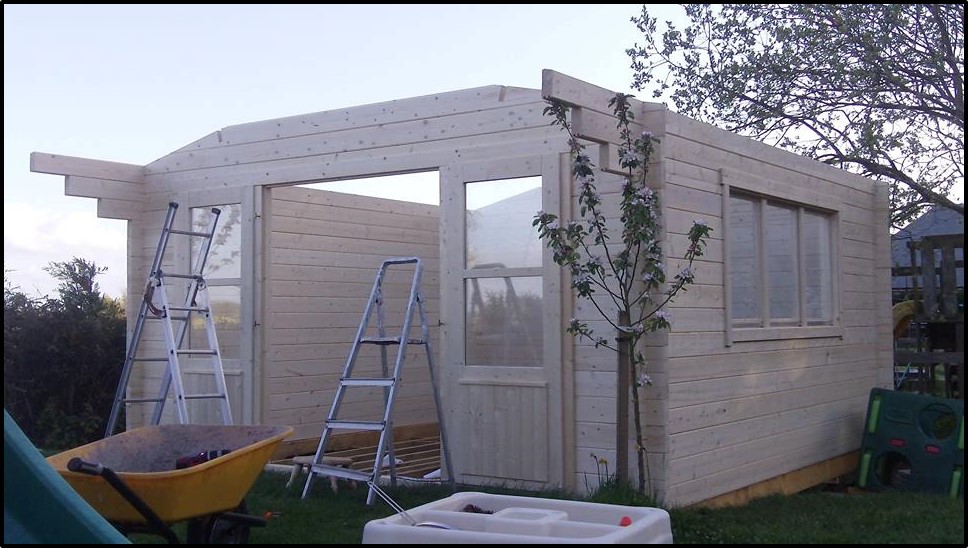
Nearly there in the build
Doors
Getting the doors to meet in the middle was a bit of a challenge – not helped by the fact that I hadn’t noticed the door sill (see the silvery thing in the picture below!)
It probably took a couple of hours to get the doors hung properly – lots of adjustment of the hinges, which wasn’t difficult to do.
The door handle and lock were easy to fit.
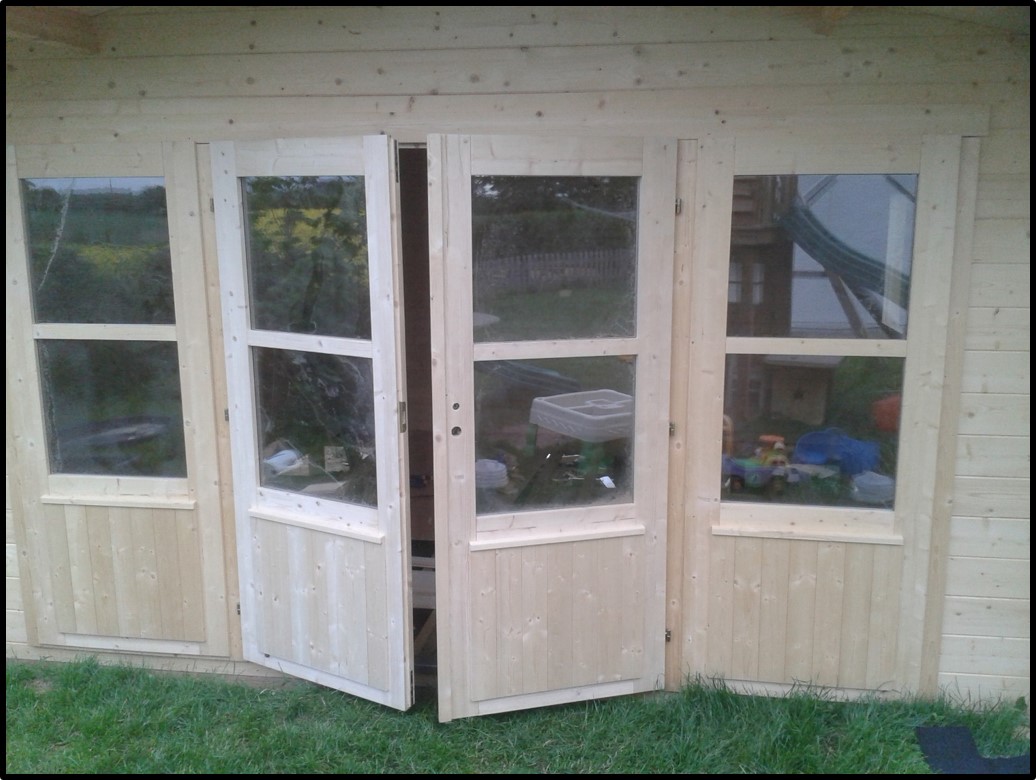
Log cabin doors
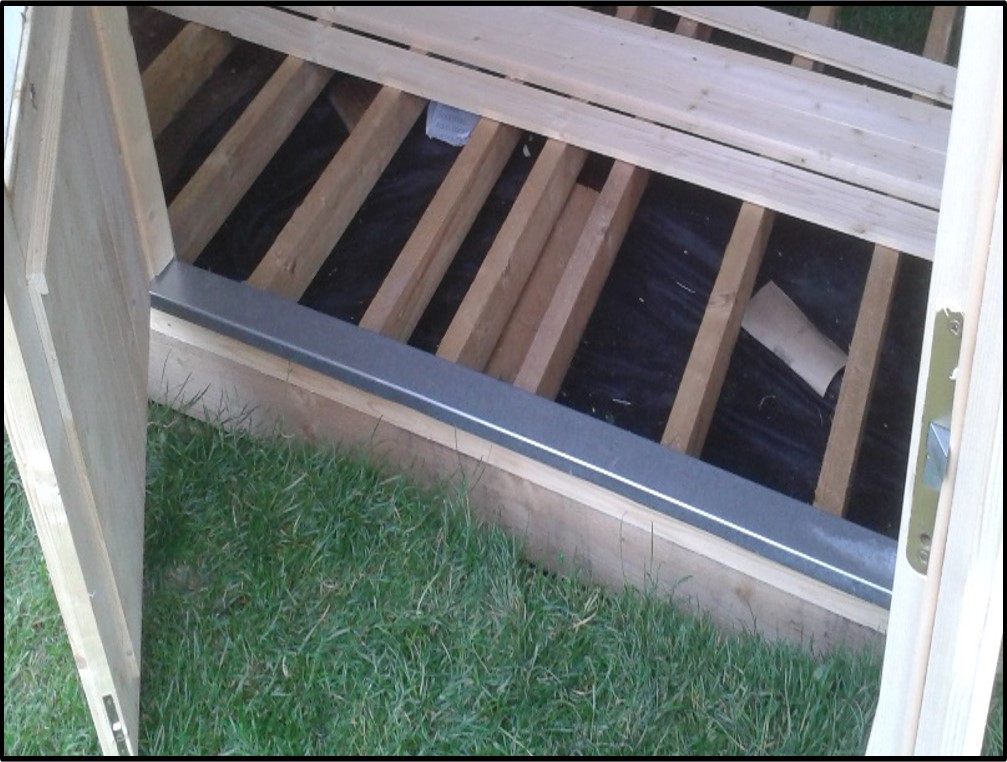
Silvery thing – The door threshold
Roof
The roof is made of more than 120 wooden slats, nailed to the purlins and the walls. Because we want to use the cabin in winter, I added 70mm thick insulation on top of the slats, with shingles nailed to the wood through the insulation. You can see the insulation in the picture below.
I had never used shingles before – they are great! They overlap to create a double layer and they look an awful lot better than shed felt.
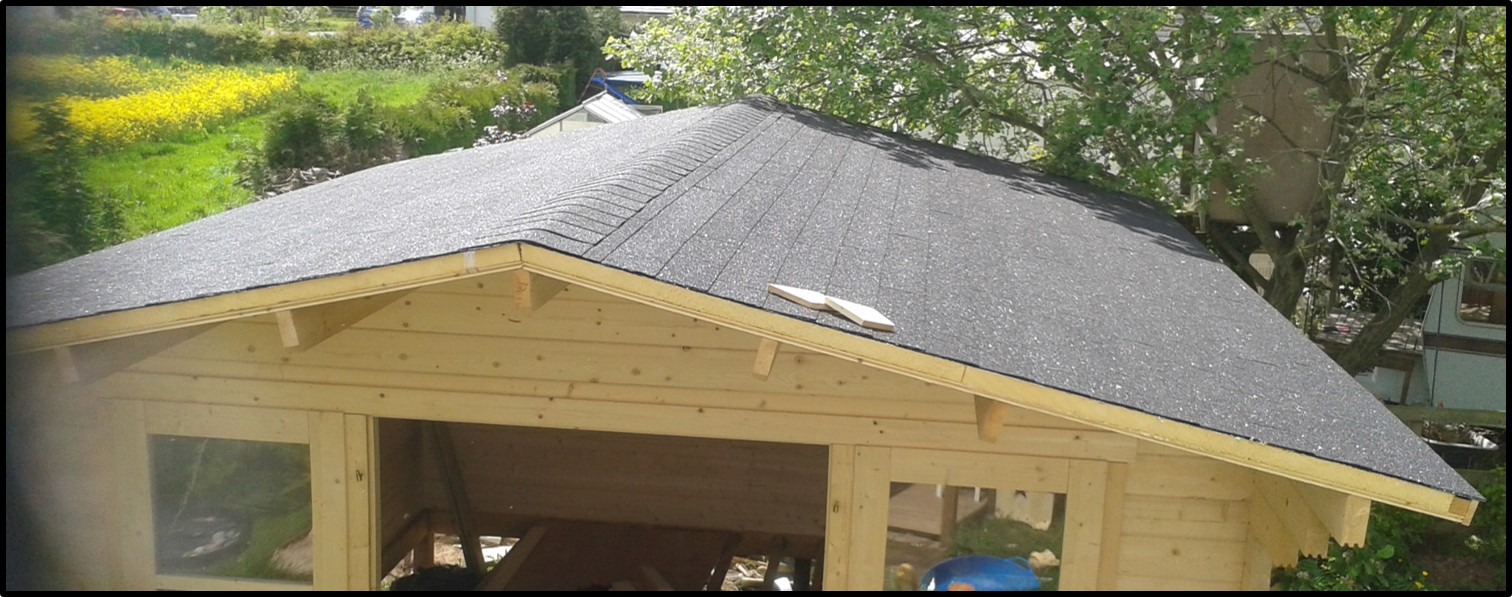
Log cabin roof
Floor
Once the roof was finished, I put in the wooden floor, nailed to the joists. There’s a layer of 100mm insulation under the floor, fitted snugly between the floor joists.
After this photo was taken, I used a nail punch to make sure the nails all sat a few millimetres below the surface; I then sanded the floor. Then applied a sealing oil and finishing wax.
Log cabin floor
Fireplace
We wanted to put a wood burning stove in the cabin so I built a constructional hearth from concrete blocks. (I left a space 90cm x 90cm in the floor for this, i.e. the hearth foundations are on the ground, not on the timber frame).
Behind the stove, I fixed a layer of fire-proof board to the walls using batons. The photo shows the channels for the screws, which should allow the wall logs to expand and contract.
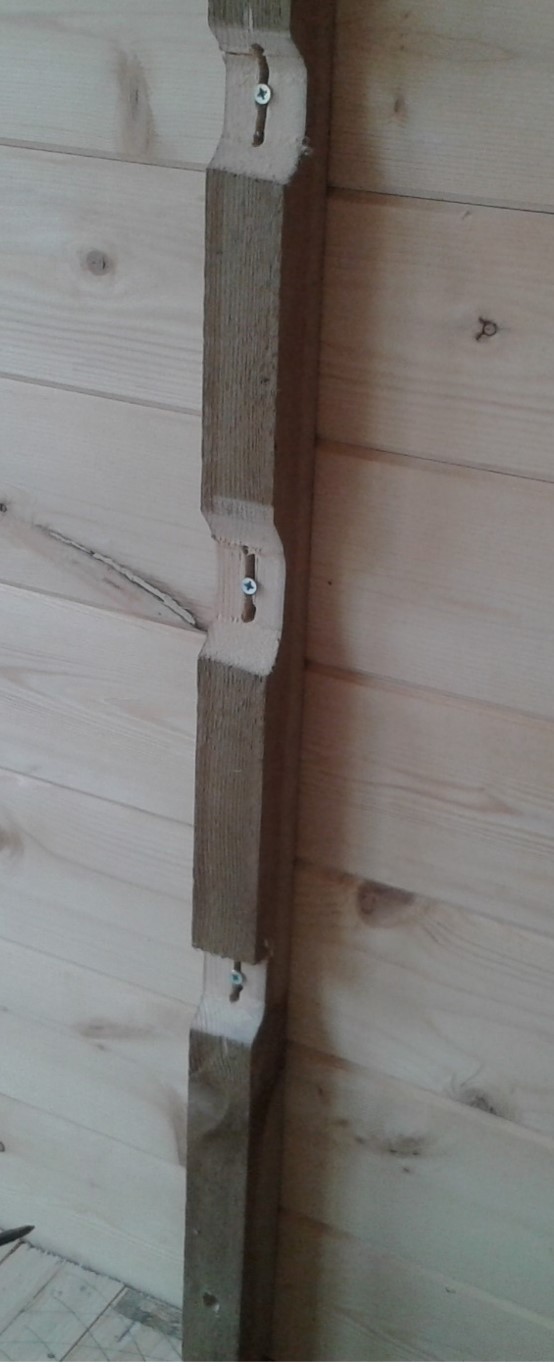
Allowance for expansion
The hearth is finished with 2 slate slabs.
Behind the stove, the fire-proof board is tiled with stone tiles and the mantelpiece and wooden surround are made from off-cuts of fence posts! They are held together with Velcro(!) and the wood can be removed easily to allow access to the screws that fix the batons to the wall.
The stove was fitted by a HETAS approved engineer. The twin-skin flue goes straight up through the wooden roof.
Different stoves have different clearances to combustible materials – this one sits safely about 30cm in front of the wall.

Woodburning stove in a log cabin
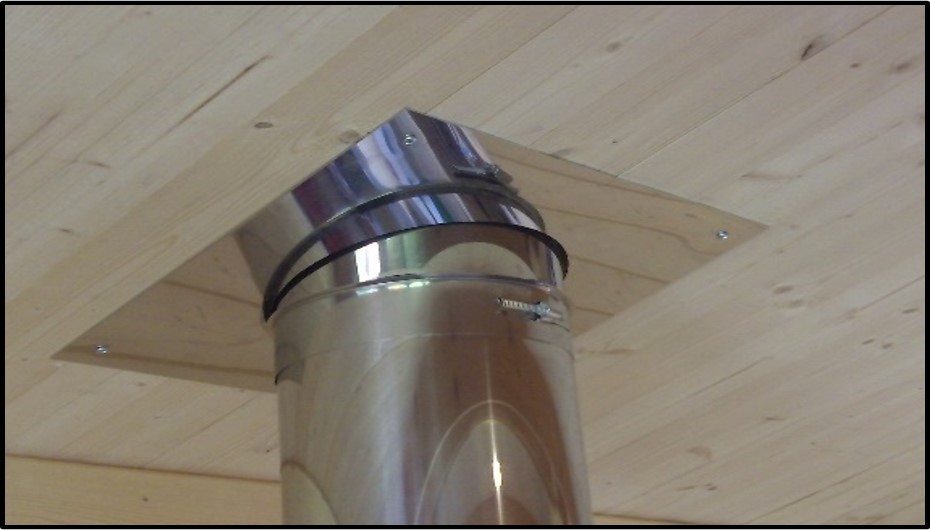
Chimney flue
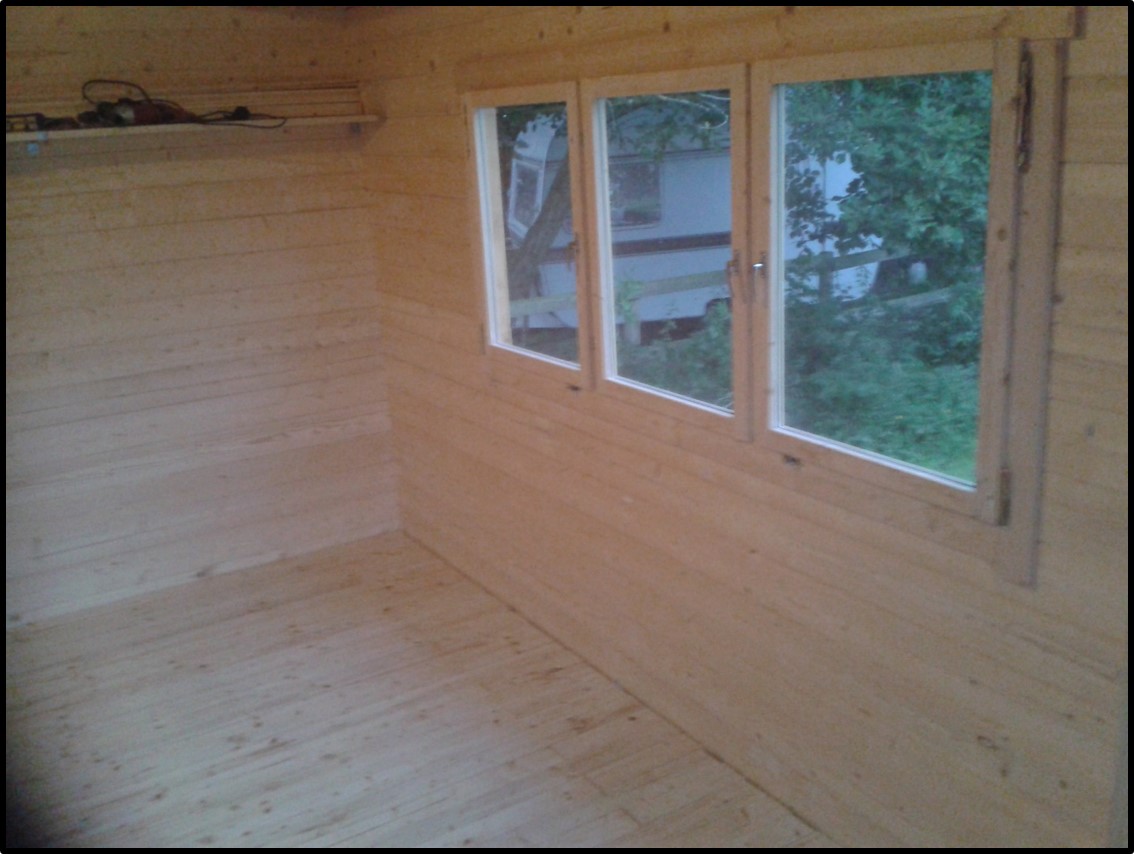
Light
I installed a solar-powered light.
This was very fiddly! A solar panel on the roof charges a battery (which is stored in a ventilated box in the corner). There is a light switch by the door (not visible in the photo).
The light is great in the evenings – the single bulb is perfectly adequate for a cabin this size (roughly 4m square internally).
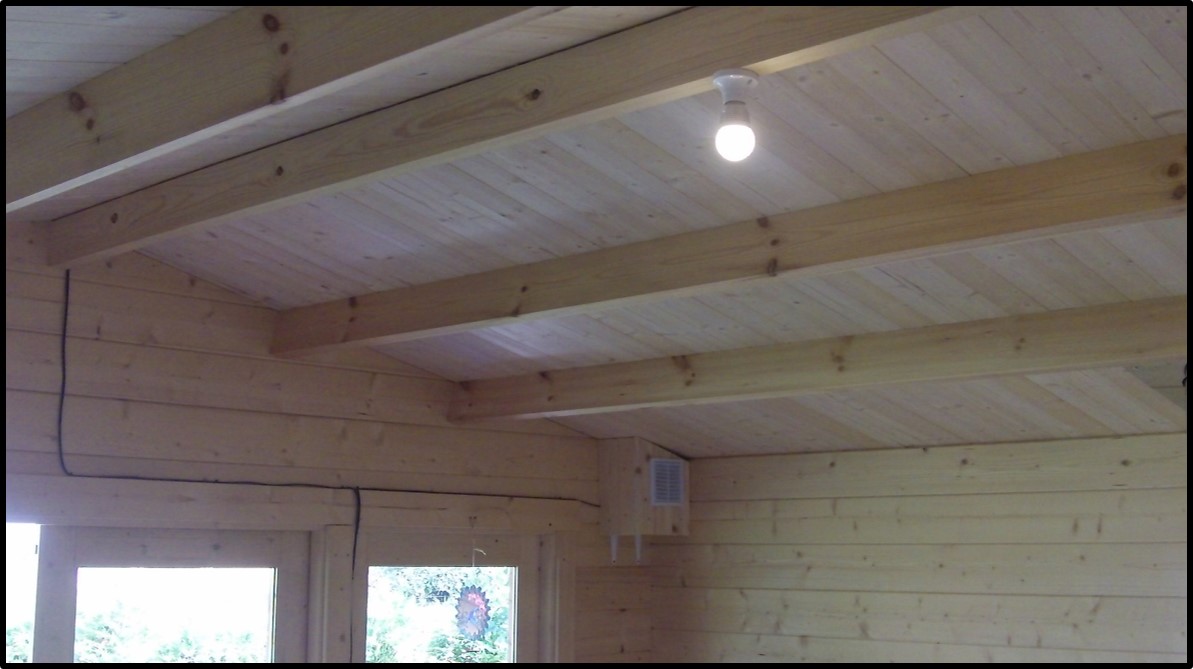
solar light
Finally
The outside of the cabin was painted with three layers of Sadolin.
I built a wooden deck in front of the doors.
The stove flue protrudes almost two metres above the roof to make sure there is sufficient up-draught.
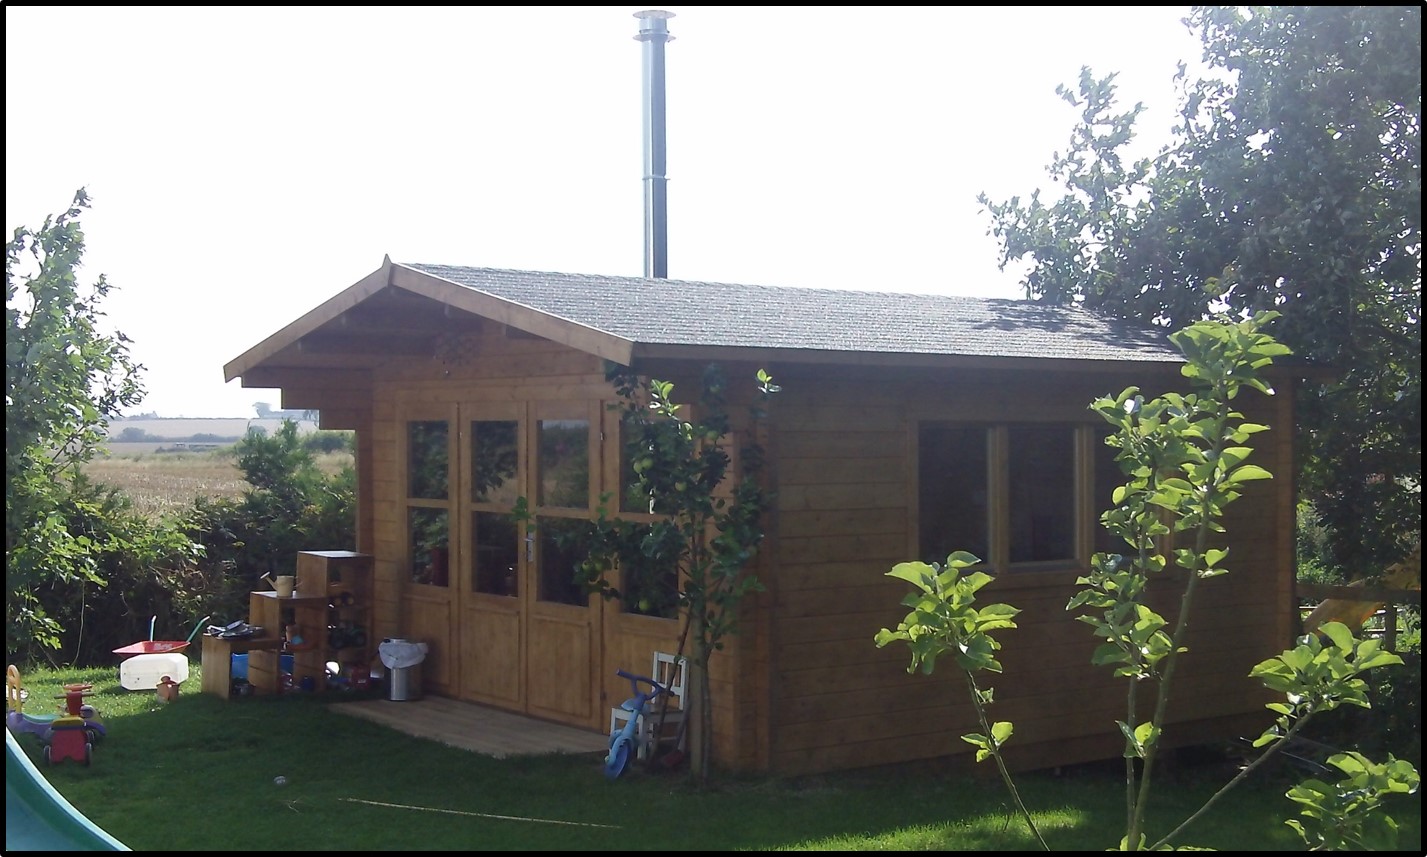
Derby Log Cabin
Now that the cabin is built, we’re using it as an outdoor playroom.
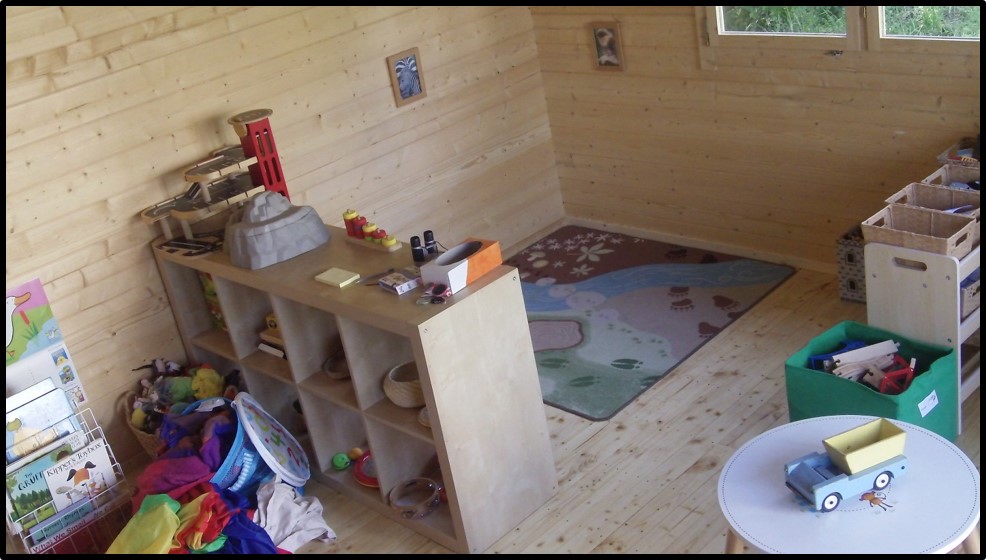
Playroom log cabin
There’s loads of room for furniture and it’s a lovely place to play or just to sit – especially in the Summer sun!
We’re looking forward to getting the stove going so that we can have a warm outdoor retreat in winter.
Review
Mr M was also kind enough to leave a review on the Derby 58mm log cabin, he wrote:
We bought a 58mm Derby Log Cabin (4m x 4m internally) a few weeks ago.
The quality of the cabin is excellent – the logs are cut very accurately and it’s very easy to put together (like Lego for grown-ups!). The whole thing is very solid. The instructions are minimal but it’s not difficult to work out what goes where if you take the time to sort ALL of the pieces in the pack first. The only problem I encountered was that the parts of the door frame weren’t on the plans and I ended up building the door frame and then having to re-assemble it when I realised I’d missed a bit! The shingles for the roof seem really sturdy and the finished cabin looks exactly like it does on the website. Excellent service too – thoroughly recommended.
Thank you Mr M
Thank you for taking the time to write this, it is very much appreciated and I hope you are pleased with the thank you present we sent you.
You may like to see what other customer experiences, build and ideas are here: Pictorial Tuin Reviews